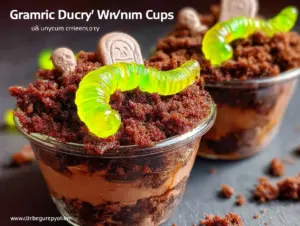
This was supposed to be a proper chocolate mousse. I had the good chocolate out, the fancy ramekins, the whole plan to impress my sister-in-law who was coming over for dinner. But somewhere between realizing I was out of heavy cream and my toddler deciding the living room floor needed a yogurt facial, the plan fell apart. I grabbed the wrong pudding mix—the instant kind instead of cook-and-serve—and I was already elbow-deep in a mess of crushed chocolate cookies I’d bought for a crust I no longer had time to make. What came out was nothing like the plan. And honestly? It was better.
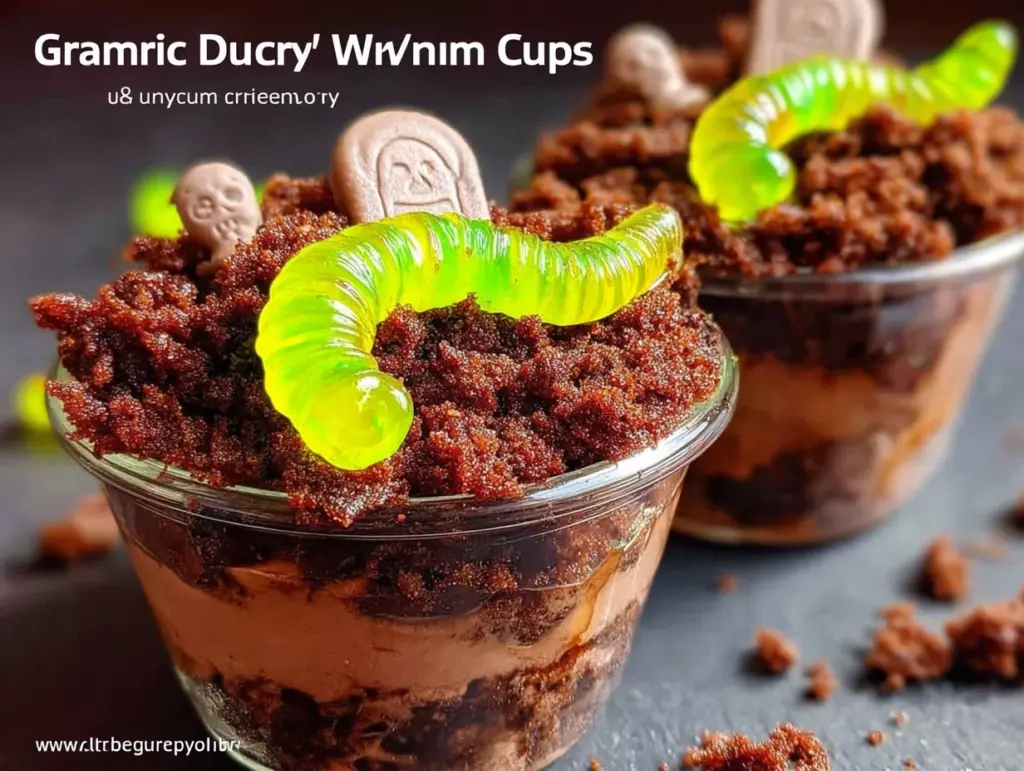
These Kid-Approved Graveyard Dirt Cups with Gummy Worms are the happy accident that turned into a family tradition. I mean, who knew that a distracted trip to the pantry and a four-year-old’s meltdown would lead to the most requested dessert at every birthday, school party, and random Tuesday? Let me tell you, there’s something about eating pudding out of a cup that looks like actual dirt—with gummy worms wriggling their way out—that makes kids lose their minds in the best possible way.
Maybe you’ve been there, staring at a half-finished project in the kitchen, wondering if you should just order pizza and call it a night. That was me, standing over a bowl of crushed cookies and too-thin pudding, thinking I’d ruined dinner entirely. But then I layered them together, stuck a few gummy worms on top, and handed one to my daughter. She looked at me like I’d just handed her a treasure chest. That moment—the pure, unbridled joy on her face—is why I keep making these. They’re not fancy, they’re not complicated, but they’re the kind of dessert that makes memories stick.
Why You’ll Love This Recipe
Let me tell you why these dirt cups have earned a permanent spot in our family rotation. First off, they are incredibly quick and easy. We’re talking about ten minutes of active work, and then the fridge does the rest. For busy weeknights when you promised dessert but forgot until after dinner, this is your saving grace. No baking, no complicated steps, no melting chocolate over a double boiler while your kids ask for the hundredth time if it’s ready yet.
- Simple Ingredients: You probably have most of these in your pantry right now. Chocolate pudding mix, milk, Oreo cookies, and gummy worms. That’s it. No fancy grocery trips, no specialty items that cost a fortune.
- Perfect for Halloween and Beyond: While these look spooky and fun for Halloween, they’re honestly perfect for any occasion. Birthday parties, school celebrations, movie nights, or just a regular Tuesday that needs a little extra fun.
- Crowd-Pleaser: I’ve yet to meet a kid who doesn’t go wild for these. And the adults? They sneak one when no one’s looking. The combination of creamy pudding, crunchy cookie crumbs, and chewy gummy worms hits that nostalgic sweet spot that everyone loves.
- Unbelievably Customizable: You can switch up the pudding flavor, use different cookies, or add extra decorations. Each batch can be completely different, so you never get bored.
What makes this recipe different from all the other dirt cup recipes out there? It’s the texture. I learned the hard way that not all pudding sets the same, and not all cookie crumbs stay crunchy. After a few sad, soggy attempts, I figured out the trick: letting the crushed cookies sit out for a bit before layering, and using whole milk instead of skim for a pudding that actually firms up properly. These little adjustments make the difference between a dessert that falls flat and one that has people asking for the recipe.
This isn’t just a dessert—it’s an experience. It’s the kind of thing that makes kids light up and adults feel like kids again. And honestly, in a world that feels complicated, sometimes you just need a cup of dirt with worms to make everything better.
What Ingredients You Will Need
This recipe uses simple, everyday ingredients to create something that feels special without breaking the bank. Most of these are probably already in your kitchen, which is exactly how I like to cook—especially when feeding a family on a budget.
- 2 boxes (3.9 ounces each) instant chocolate pudding mix — I prefer Jell-O brand for the smoothest texture, but store brands work fine too. Make sure you’re getting the instant kind, not cook-and-serve. Trust me on this one—I learned that difference the hard way.
- 3 cups whole milk — Whole milk gives the pudding a richer, creamier texture that sets up perfectly. You can use 2% in a pinch, but the pudding won’t be quite as thick. For a dairy-free version, oat milk works surprisingly well.
- 1 package (14.3 ounces) Oreo cookies — Regular Oreos are my go-to because they crush into that perfect dark “dirt” texture. You’ll use the whole cookie, filling and all. The filling helps the crumbs stick together just enough to look like moist soil. If you’re feeling fancy, the double-stuf ones work great too.
- 1 bag (5 ounces) gummy worms — This is where you can have fun! I like the sour worms for an extra tangy surprise, but regular gummy worms are classic. Look for the colorful ones that have different colors swirled together—they look the most “alive” poking out of the dirt.
- Optional decorations — You can add gummy spiders, candy bones, or even small plastic tombstone decorations if you’re making these for a Halloween party. A few crushed chocolate sandwich cookies sprinkled on top as “extra dirt” never hurts.
One thing I’ve learned after making these dozens of times: the quality of your pudding mix matters more than you’d think. The cheaper store brands sometimes leave little lumps that don’t dissolve completely, which ruins the smooth, creamy texture. Spend the extra dollar on the name brand—your kids will thank you.
For the milk, I always use whole milk because it makes the pudding thick and luxurious. If you’re trying to cut calories, you can use 2%, but don’t go lower than that. Skim milk makes a runny pudding that won’t hold up to the cookie crumbs, and nobody wants a soupy dirt cup.
And the gummy worms? Buy the good ones. The cheap bags often have a weird, hard texture that doesn’t soften up nicely in the fridge. The name brand worms stay chewy and soft, which is exactly what you want when you bite into one hiding in the “dirt.”
Equipment Needed
You don’t need a fancy kitchen to make these dirt cups. In fact, you probably already have everything you need sitting in your drawers and cabinets.
- Large mixing bowl — For whisking the pudding. A glass or stainless steel bowl works best because they don’t hold onto odors.
- Whisk — A good whisk helps you get the pudding smooth without lumps. I’ve used a fork in a pinch, and it works, but a whisk is much easier.
- Measuring cups — For the milk. A liquid measuring cup with a spout makes pouring easier.
- Plastic zip-top bag — For crushing the Oreos. You can also use a food processor, but the bag method is more fun for kids and requires less cleanup.
- Rolling pin or heavy-bottomed glass — To crush the cookies inside the bag. A wine bottle works in a pinch too.
- Small clear cups (7-ounce size) — Clear cups are essential for the visual effect. You want to see the layers of pudding and “dirt.” I use small plastic cups from the party supply store, but small glass jars or even disposable shot glasses work for mini versions.
- Spatula — For scraping every last bit of pudding into the cups. Waste not, want not.
- Refrigerator space — You’ll need room to chill the cups for at least 30 minutes, preferably an hour.
If you don’t have a rolling pin, don’t stress. I’ve used the bottom of a heavy skillet, a can of beans, and even my fist when I was in a hurry. The goal is just to get those cookies crushed into fine crumbs. And if you’re making these with little helpers, the bag-crushing method is half the fun—just make sure the bag is sealed tight before you start pounding!
Preparation Method
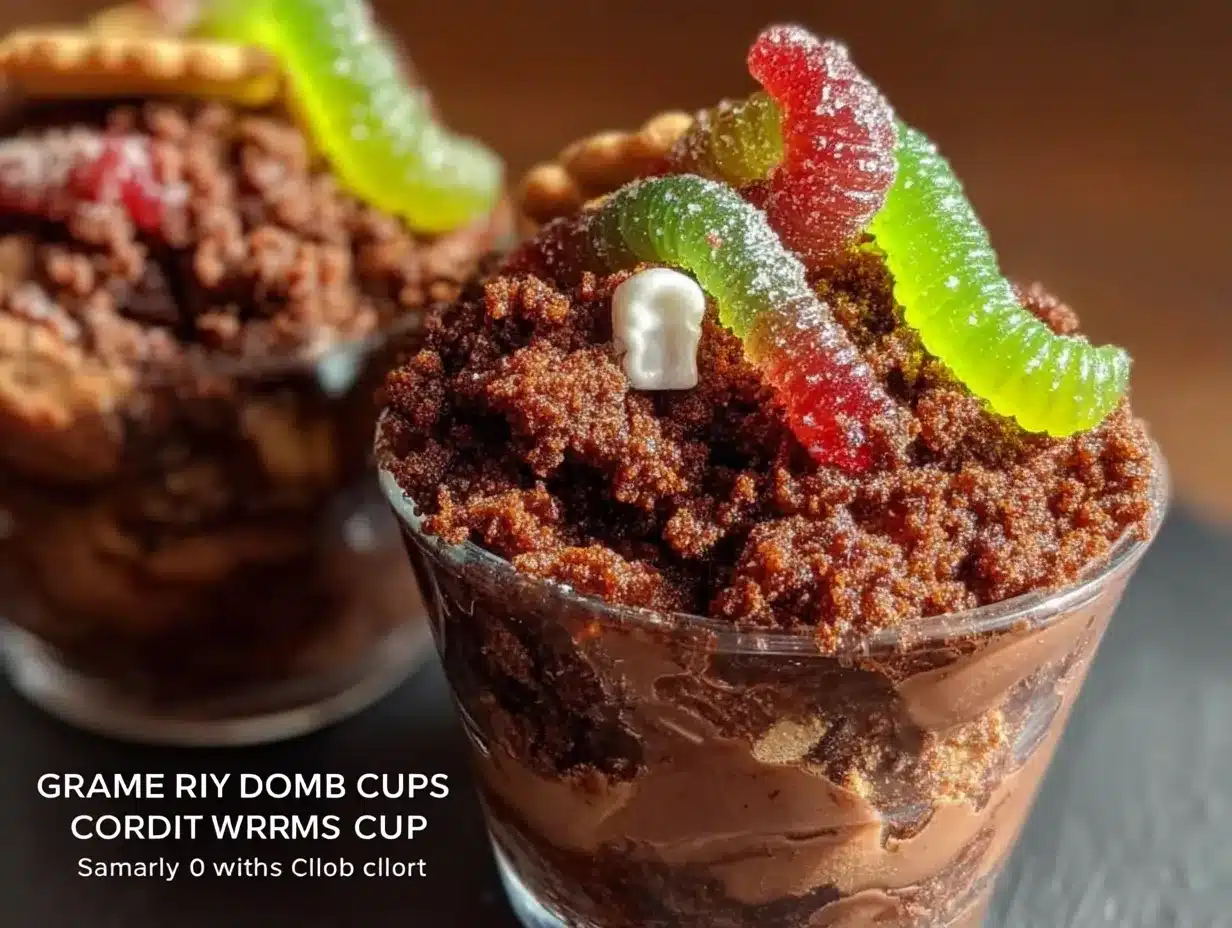
Making these dirt cups is almost embarrassingly easy, but there are a few tricks I’ve picked up along the way to make sure they turn out perfect every time. Follow these steps, and you’ll have a batch of creepy, delicious cups that will disappear faster than you can say “gummy worm.”
- Crush the Oreos: Place the entire package of Oreos (filling and all) into a large zip-top bag. Squeeze out as much air as possible, then seal it tight. Using a rolling pin or a heavy-bottomed glass, crush the cookies into fine crumbs. You want them to look like dark, rich soil—some small chunks are okay, but try to get most of them pretty fine. This usually takes about 2-3 minutes of steady crushing. If you’re using a food processor, pulse about 10-15 times until you get the right texture. Set the crumbs aside.
- Make the pudding: In a large mixing bowl, combine both boxes of instant chocolate pudding mix with 3 cups of cold whole milk. Whisk vigorously for about 2 minutes, until the pudding starts to thicken. You’ll feel it getting heavier as you whisk. Don’t over-whisk, or it can get a little grainy. Just until it’s smooth and starting to set.
- Let the pudding rest: Here’s a tip I learned after making these for my daughter’s preschool class—let the pudding sit for about 5 minutes before layering. It gives it time to set up just enough that it won’t run into the cookie crumbs. If you layer too soon, the crumbs get soggy and the layers blur together. Patience pays off here.
- Layer the cups: Spoon about 2 tablespoons of crushed Oreo crumbs into the bottom of each clear cup. Press them down gently with the back of a spoon to create a solid “dirt” base. Then, spoon the chocolate pudding on top, filling each cup about three-quarters full. Leave a little room at the top for the final layer of crumbs.
- Add the top “dirt” layer: Sprinkle a generous layer of crushed Oreo crumbs over the pudding. You want it to completely cover the chocolate, so the cup looks like it’s filled with actual dirt. Use about 2-3 tablespoons per cup, depending on how deep you want the top layer.
- Insert the gummy worms: This is the fun part! Take 2-3 gummy worms per cup and gently push them into the “dirt” so they look like they’re crawling out. Some can be half-buried, some can be completely on top. Get creative with it—make it look like they’re squirming their way out of the ground.
- Chill: Place the cups in the refrigerator for at least 30 minutes, but ideally 1-2 hours. This lets the pudding fully set and the cookie crumbs soften just slightly, which makes the texture perfect. If you’re making them for a party, you can make them a day ahead—they actually taste better the next day.
- Serve cold: Take them straight from the fridge to the table. The cold pudding against the crunchy cookie crumbs is pure magic. Add any extra decorations right before serving.
A quick note about timing: if you’re making these with kids, expect the process to take a little longer. Crushing the cookies is a big hit with little ones, but they also tend to get crumbs everywhere. Lay a towel down on the counter, and embrace the mess. It’s worth it.
Cooking Tips & Techniques
After making these dirt cups more times than I can count, I’ve collected a few tricks that make the difference between good dirt cups and unforgettable ones. Let me share what I’ve learned—sometimes the hard way.
Don’t skip the chilling time. I know it’s tempting to serve these right away, especially when you have eager little faces staring at you. But the pudding needs time to set properly. If you serve them too soon, the layers will mix together, and you’ll end up with a muddy mess instead of distinct layers of “dirt” and pudding. Trust the process—30 minutes is the minimum, but an hour is better.
Crush the cookies unevenly on purpose. You don’t want all your crumbs to be the same size. A mix of fine powder and small chunks gives the “dirt” a more realistic texture. Think about what real soil looks like—it’s not uniform. The bigger pieces also add a nice crunch that contrasts with the smooth pudding.
Use a piping bag for the pudding if you want clean layers. I learned this trick from a friend who makes these for her son’s class parties every year. If you spoon the pudding in, it can drip down the sides of the cup and mess up your layers. A piping bag (or even a zip-top bag with the corner snipped off) lets you pipe the pudding neatly into the center, keeping the sides clean.
Toast the cookie crumbs for extra flavor. This is optional but amazing. Spread the crushed Oreo crumbs on a baking sheet and toast them in a 350°F oven for about 5 minutes. It deepens the chocolate flavor and adds a subtle smokiness that makes the “dirt” taste even better. Just let them cool completely before layering.
One mistake I made early on: I used fat-free milk to save calories, and the pudding never set properly. It was soupy and sad, and the kids were not impressed. Whole milk is non-negotiable for the right texture. If you’re dairy-free, use a full-fat oat or coconut milk—the fat content is what helps the pudding thicken.
For the best presentation, add the gummy worms right before serving. If you add them too early, they can bleed color into the pudding and get a little slimy. I usually make the cups a day ahead, keep the worms separate, and let the kids add them themselves. It’s an activity in itself!
Variations & Adaptations
One of the best things about this recipe is how easy it is to change up. I’ve tried all kinds of variations over the years, and they’ve all been hits in their own way. Here are some of my favorites.
Peanut Butter Dirt Cups: Swap the chocolate pudding for chocolate peanut butter pudding. You can find it in most grocery stores, or you can make your own by adding 2 tablespoons of creamy peanut butter to the chocolate pudding mix before whisking. It adds a rich, nutty flavor that pairs beautifully with the Oreo crumbs. Just make sure no one has peanut allergies if you’re serving these at a party.
Vanilla Dirt Cups: For a less intense chocolate flavor, use vanilla pudding instead. The contrast between the white/cream-colored pudding and the dark Oreo “dirt” is actually really striking. Plus, vanilla pairs well with almost any candy, so you can mix in gummy bears, candy corn, or even sprinkles.
Vegan Dirt Cups: This is easier than you think. Use a vegan chocolate pudding mix (many brands are accidentally vegan), oat milk or coconut milk, and vegan chocolate sandwich cookies. Most Oreos are actually vegan, which is a pleasant surprise. Check the label to be sure, but the classic ones are dairy-free. Top with vegan gummy worms, which are available at most health food stores.
Gluten-Free Dirt Cups: You can find gluten-free chocolate sandwich cookies at most grocery stores now. They taste almost identical to the originals, so no one will notice the difference. Just make sure your pudding mix is also gluten-free—most are, but it’s worth double-checking.
Spooky Spider Cups: For Halloween, swap the gummy worms for gummy spiders and add a few candy eyeballs on top. You can also use black licorice strings to make spider legs sticking out of the “dirt.” It’s a fun twist that takes about two extra minutes.
My personal favorite variation? The Birthday Dirt Cup. I use vanilla pudding, add rainbow sprinkles to the Oreo crumbs, and top it with a mini candle. It’s my daughter’s go-to birthday dessert, and it always gets compliments. Plus, it’s way cheaper than a store-bought cake.
Serving & Storage Suggestions
These dirt cups are best served cold, straight from the fridge. The temperature contrast between the cool, creamy pudding and the crunchy cookie crumbs is what makes them so satisfying. I like to take them out about 5 minutes before serving, just to take the edge off the chill, but that’s a personal preference.
Presentation ideas: For a Halloween party, arrange the cups on a platter with fake spiderwebs draped around them. You can also label each cup with a spooky name like “Worm Graveyard” or “Creepy Crawly Cups.” For a birthday party, add a small plastic toy spider or skeleton on top of each cup. The kids go wild for these little details.
What to serve with them: These are rich enough to stand alone, but they pair beautifully with a glass of cold milk or a warm apple cider. If you’re serving them at a party, I’d recommend keeping the other desserts light—maybe some fruit skewers or a simple sugar cookie—so the dirt cups can be the star of the show.
Storage: These keep well in the refrigerator for up to 3 days. Just cover each cup with plastic wrap or a lid to keep them from absorbing fridge odors. I’ve found that the texture actually improves after a day—the cookie crumbs soften just enough to create a more cohesive “dirt” texture, and the pudding sets up perfectly.
Can you freeze them? I don’t recommend it. The pudding gets icy and the texture becomes grainy when thawed. Plus, the gummy worms turn rock-hard in the freezer. These are really best enjoyed fresh or within a few days.
Reheating? No need! These are served cold, so just pull them from the fridge and enjoy. If you’ve stored them for a couple of days, give them a quick stir before serving to redistribute the cookie crumbs, which might have settled a bit.
One thing I love about these is how the flavors meld together over time. The chocolate pudding absorbs a little of the cookie flavor, and the gummy worms soften slightly, releasing their fruity sweetness into the surrounding “dirt.” It’s a beautiful thing.
Nutritional Information & Benefits
Let’s be real—these are a treat, not a health food. But if you’re going to indulge, you might as well know what you’re getting into. Here’s the estimated nutritional breakdown for one dirt cup (based on 8 servings using the ingredients listed above):
- Calories: Approximately 380-420 per cup
- Fat: 14-16 grams
- Carbohydrates: 58-62 grams
- Protein: 6-8 grams
- Sugar: 44-48 grams
- Fiber: 2-3 grams
Keep in mind that these numbers will vary based on the specific brands you use and whether you add extra decorations. The gummy worms alone add about 5-7 grams of sugar per cup, so if you’re watching sugar intake, you can use fewer worms or opt for sugar-free versions.
Health considerations: This recipe contains dairy, gluten, and soy (from the Oreos). If you have allergies, check the labels carefully and use the substitutions I mentioned earlier. The vegan and gluten-free versions work beautifully and taste just as good.
Potential benefits: On the bright side, milk provides calcium and vitamin D, and the cocoa in the pudding mix contains antioxidants. The Oreo crumbs offer a small amount of iron from the enriched flour. And honestly? The biggest benefit is the joy these bring. Sometimes a little bit of whimsy and sugar is exactly what a family needs. I’m not saying these are health food—I’m saying that making memories with your kids is its own kind of nourishment.
If you’re looking to lighten them up, you can use sugar-free pudding mix and low-fat milk, but honestly, I’d rather have the real thing and just enjoy it in moderation. Life’s too short for sad desserts.
Conclusion
These Kid-Approved Graveyard Dirt Cups with Gummy Worms are proof that the best recipes often come from the biggest mistakes. What started as a failed attempt at fancy chocolate mousse turned into the most requested dessert in our house, and I wouldn’t have it any other way. They’re easy, they’re fun, and they bring a kind of joy that no store-bought dessert can match.
I love how customizable these are—you can make them for Halloween, birthdays, or just a random Tuesday that needs a little extra magic. The kids get to help crush the cookies and stick in the worms, and the adults get to enjoy a nostalgic treat that takes them back to their own childhoods. It’s a win-win.
So go ahead—embrace the mess, let the kids help, and don’t stress about perfection. These dirt cups are supposed to look like dirt, after all. The imperfections are part of the charm. If you make these, I’d love to hear about it. Drop a comment below and tell me how your family liked them, or share your own twist on the recipe. Did you use different candy? Try a new pudding flavor? I’m always looking for new ideas.
And if you’re looking for more kid-friendly desserts that won’t break the bank, check out my easy no-bake cookie dough bites or these frozen yogurt bark with berries. Both are perfect for busy families who want something homemade without the hassle. Happy cooking, and remember—sometimes the best things come from happy accidents.
Frequently Asked Questions
Can I make these dirt cups ahead of time?
Absolutely! In fact, they taste even better the next day. You can make them up to 3 days in advance. Just keep them covered in the refrigerator and add the gummy worms right before serving to keep them from bleeding color into the pudding.
What if I don’t have clear cups?
No problem at all. You can use small glass jars, ramekins, or even paper cups. The visual effect won’t be as dramatic, but the taste will be exactly the same. If you’re using opaque cups, just make sure to label them so everyone knows what’s inside.
Can I use homemade pudding instead of instant mix?
You can, but it will change the texture. Homemade pudding is usually thinner and won’t set as firmly as instant pudding. If you go that route, add an extra tablespoon of cornstarch to your recipe to help it thicken. I’ve done it before, and it works, but instant is definitely easier and more reliable.
How many cups does this recipe make?
This recipe makes about 8-10 dirt cups, depending on the size of your cups. If you’re using 7-ounce cups, you’ll get about 8 generous servings. For smaller cups (like shot glasses for a party), you can get up to 20 mini cups.
My pudding didn’t set properly. What went wrong?
This usually happens for one of three reasons: you used low-fat or skim milk, you didn’t whisk long enough, or you didn’t let it rest before layering. Make sure you’re using whole milk, whisk for a full 2 minutes, and let the pudding sit for 5 minutes before assembling. If all else fails, pop the cups in the fridge for an extra hour—sometimes they just need more time.
Pin This Recipe!
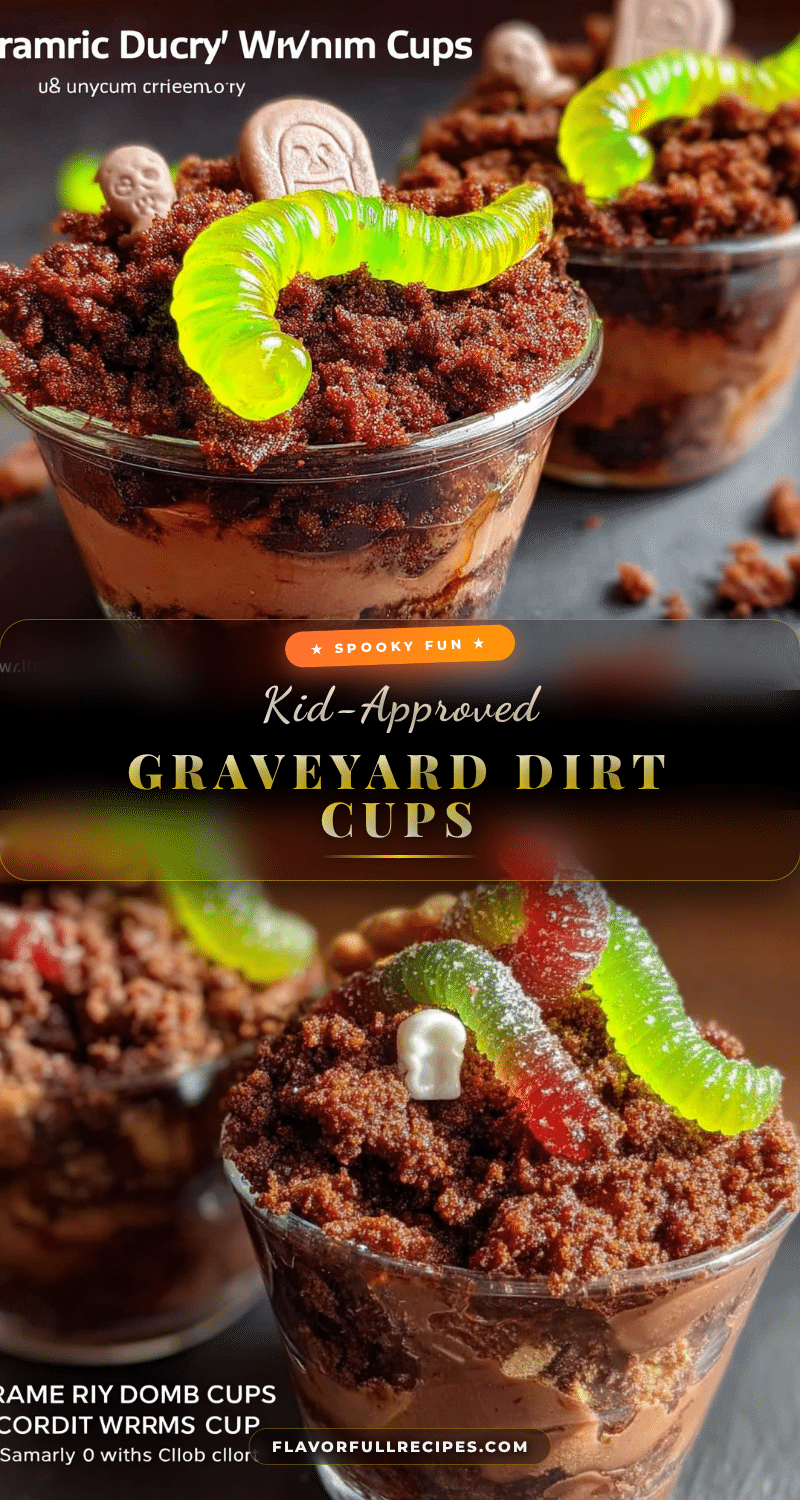
Easy Graveyard Dirt Cups with Gummy Worms: Kid-Approved
- Total Time: 40 minutes (including chilling time)
- Yield: 8 servings 1x
Description
These Kid-Approved Graveyard Dirt Cups with Gummy Worms are a happy accident turned family tradition. Layers of creamy chocolate pudding and crushed Oreo ‘dirt’ with gummy worms crawling out make for a fun, no-bake dessert that kids and adults love.
Ingredients
- 2 boxes (3.9 ounces each) instant chocolate pudding mix
- 3 cups whole milk
- 1 package (14.3 ounces) Oreo cookies
- 1 bag (5 ounces) gummy worms
- Optional: gummy spiders, candy bones, plastic tombstone decorations for garnish
Instructions
- Crush the Oreos: Place the entire package of Oreos (filling and all) into a large zip-top bag. Squeeze out as much air as possible, then seal it tight. Using a rolling pin or a heavy-bottomed glass, crush the cookies into fine crumbs. Set aside.
- Make the pudding: In a large mixing bowl, combine both boxes of instant chocolate pudding mix with 3 cups of cold whole milk. Whisk vigorously for about 2 minutes, until the pudding starts to thicken.
- Let the pudding rest: Let the pudding sit for about 5 minutes before layering to allow it to set up enough that it won’t run into the cookie crumbs.
- Layer the cups: Spoon about 2 tablespoons of crushed Oreo crumbs into the bottom of each clear cup. Press them down gently with the back of a spoon. Then, spoon the chocolate pudding on top, filling each cup about three-quarters full.
- Add the top ‘dirt’ layer: Sprinkle a generous layer of crushed Oreo crumbs over the pudding, using about 2-3 tablespoons per cup, to completely cover the chocolate.
- Insert the gummy worms: Take 2-3 gummy worms per cup and gently push them into the ‘dirt’ so they look like they’re crawling out. Get creative with the placement.
- Chill: Place the cups in the refrigerator for at least 30 minutes, but ideally 1-2 hours, to let the pudding fully set and the cookie crumbs soften slightly.
- Serve cold: Take them straight from the fridge to the table. Add any extra decorations right before serving.
Notes
For best results, use whole milk to ensure the pudding sets properly. Let the crushed Oreo crumbs sit out for a bit before layering to maintain crunch. Add gummy worms right before serving to prevent color bleeding. The texture improves after a day in the fridge.
- Prep Time: 10 minutes
- Cook Time: 0 minutes
- Category: Dessert
- Cuisine: American
Nutrition
- Serving Size: 1 dirt cup
- Calories: 400
- Sugar: 46
- Sodium: 480
- Fat: 15
- Saturated Fat: 6
- Carbohydrates: 60
- Fiber: 2.5
- Protein: 7
Keywords: dirt cups, graveyard dirt cups, gummy worms, Halloween dessert, no-bake dessert, kid-friendly dessert, chocolate pudding, Oreo dessert