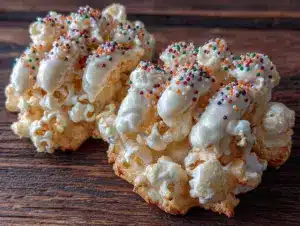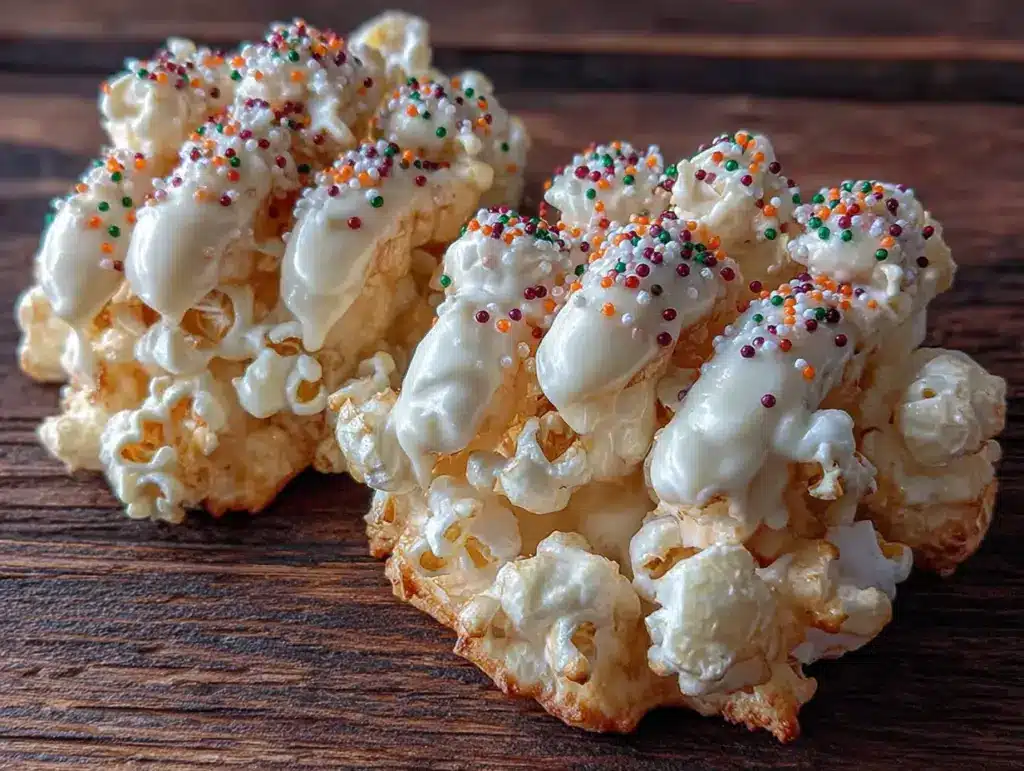
I was at the hardware store last October, picking up a new bag of mulch for the front garden, when the guy behind me in line—a retired plumber named Frank who I’d only ever exchanged nods with—started talking about Halloween treats. “You know what my grandkids go crazy for every year?” he said, setting down a box of trash bags. “Popcorn hands. I coat ’em in white chocolate and make ’em look all creepy.” I almost laughed. I mean, here was this gruff, no-nonsense guy in a flannel shirt, describing how he carefully shapes popcorn into claw-like fingers. But the way he talked about it—the excitement in his voice, the little details about getting the knuckles right—I knew I had to try it.
So there I was, standing in the checkout line with mulch and a sudden obsession with making Spooky White Chocolate Popcorn Hands. Honestly, I forgot about the mulch for a solid week. I went home, grabbed a bag of popcorn, a block of white chocolate, and some disposable gloves, and I got to work. And let me tell you, the first batch was a mess. The chocolate seized up, the popcorn crumbled, and I ended up with what looked like a sad, lumpy snowman hand. But Frank’s description stuck with me, and I kept tweaking until I got it right.
These Spooky White Chocolate Popcorn Hands are now my go-to Halloween party trick. They’re creepy, they’re crunchy, and they’re ridiculously fun to make. Maybe you’ve been there—standing in a party store, staring at overpriced plastic decorations, thinking, “I could make something cooler than this.” Well, you can. And it starts with a bag of popcorn and a little bit of patience. Let me show you how.
Why You’ll Love This Recipe
I’ve tested this recipe about seven times now, and I’ve learned a few things the hard way. So trust me when I say these Spooky White Chocolate Popcorn Hands are worth every bit of effort. Here’s why they’ve become my Halloween tradition:
- Quick & Easy: Once you get the hang of shaping, these come together in about 30 minutes. Perfect for last-minute party prep or a fun afternoon activity with kids.
- Simple Ingredients: You only need popcorn, white chocolate, and a few decorating extras. No weird specialty items—everything is at your regular grocery store.
- Perfect for Halloween Parties: These hands are the ultimate conversation starter. They look professional and spooky, but they’re secretly simple to make.
- Crowd-Pleaser: Kids and adults both go nuts for them. There’s something about eating a “hand” that makes everyone giggle.
- Unbelievably Delicious: The combo of salty popcorn and sweet white chocolate is next-level. Add a pinch of sea salt on top, and you’ve got a treat that’s hard to stop eating.
What makes this recipe different from all the other popcorn treats out there? It’s the texture. Most popcorn clusters are just blobs of chocolate with popcorn stuck in them. But these hands have structure—you can actually see the fingers, the knuckles, the whole shape. It’s not just another version of chocolate popcorn; it’s your best version, the one that makes people say, “Wait, you made these?”
This recipe isn’t just good—it’s the kind that makes you close your eyes after the first bite. It’s Halloween fun reimagined—creepier, crunchier, but with the same soul-soothing satisfaction of a classic snack. Perfect for impressing guests without stress, or turning a simple movie night into something memorable.
What Ingredients You Will Need
This recipe uses simple, wholesome ingredients to deliver big flavor and spooky looks without the fuss. Most of these are pantry staples or easy to find at any grocery store. Here’s what you’ll need:
For the Popcorn Base
- 10 cups popped popcorn (about 1/2 cup unpopped kernels, or one 3-ounce bag of microwave popcorn) — I prefer plain, lightly salted popcorn. Avoid heavily buttered varieties, as the extra oil can mess with the chocolate coating.
- 1 tablespoon unsalted butter, melted (optional, for extra richness) — I use this when I want a slightly more decadent base. It’s optional but recommended.
- 1/4 teaspoon salt (if using unsalted popcorn) — A little salt balances the sweetness of the white chocolate.
For the White Chocolate Coating
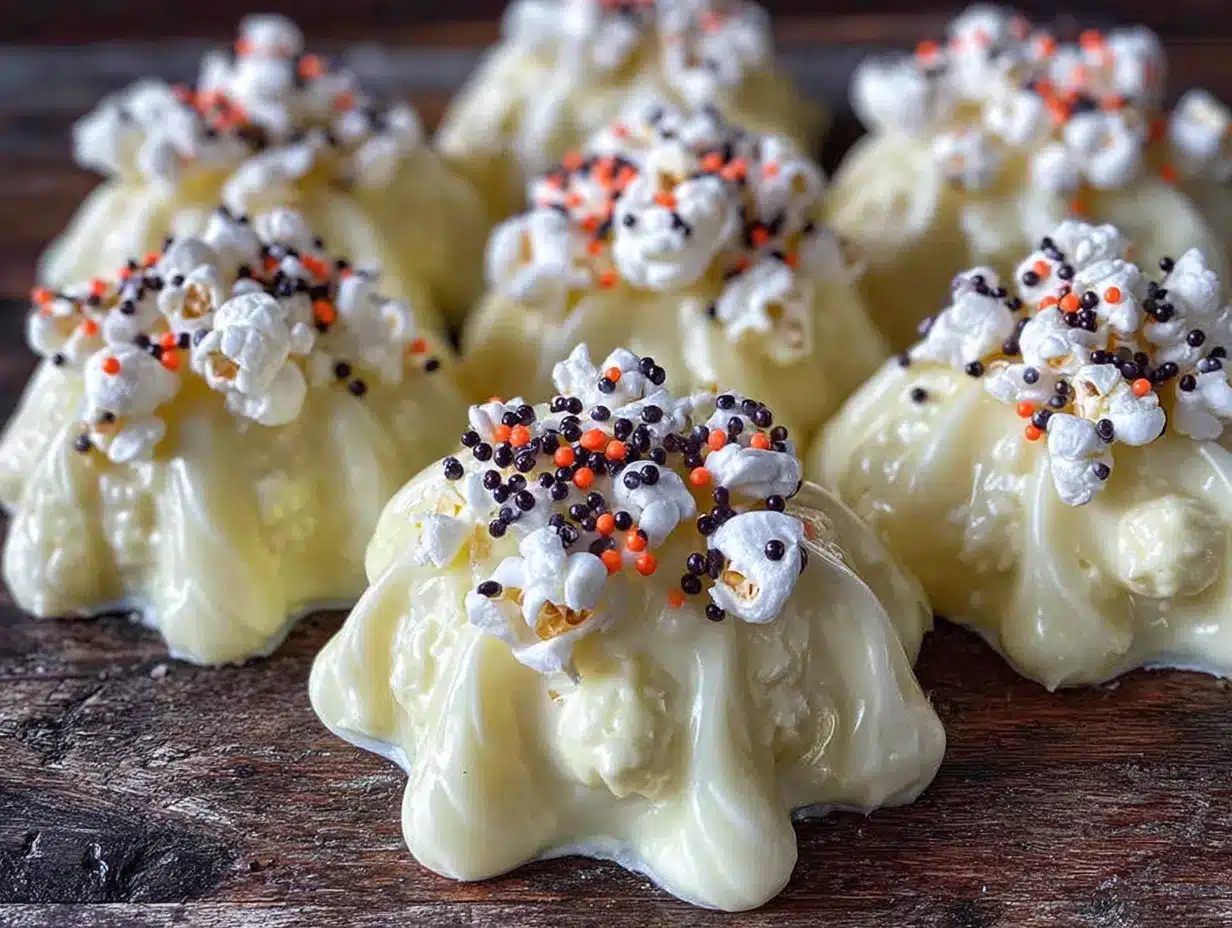
- 16 ounces white chocolate melting wafers or white chocolate chips — I recommend Ghirardelli white chocolate melting wafers for the smoothest coating. They melt evenly and harden with a nice snap. If you use regular chips, add 1 teaspoon of coconut oil to help them melt smoothly.
- 1 teaspoon coconut oil or vegetable shortening (optional, for thinning the chocolate) — This helps the chocolate coat the popcorn more evenly and prevents clumping.
For Decorating (Optional but Fun)
- Red gel food coloring — For making “blood” drips at the base of the hands. A little goes a long way.
- Sliced almonds — These make perfect “fingernails” when pressed into the chocolate before it sets. Trust me, it looks disturbingly realistic.
- Edible glitter or silver dragees — For a magical, witchy vibe. I sometimes add these for a more fantasy-themed Halloween look.
- Black sanding sugar — Sprinkled on top for a dirt-like effect. It adds texture and creepiness.
Ingredient Selection Tips: For the best texture, use popcorn that’s at least a day old. Freshly popped popcorn is too crispy and crumbles easily when you shape it. If you’re using microwave popcorn, let it sit out uncovered for a few hours to stale slightly. Sounds weird, I know, but it makes a huge difference. Also, look for white chocolate that contains cocoa butter—it melts more smoothly and tastes better than “white confectionery coating.”
Substitution Guidance: Use dairy-free white chocolate and vegan butter for a vegan version. For a nut-free option, skip the sliced almonds and use small candy corn pieces for fingernails instead. If you don’t have coconut oil, any neutral vegetable oil works fine.
Equipment Needed
You don’t need anything fancy for this recipe, but a few specific tools make the process much easier. Here’s what I use:
- Large mixing bowl — For tossing the popcorn with chocolate. A wide, shallow bowl works best for even coating.
- Disposable nitrile gloves — These are essential for shaping the hands without getting chocolate all over your fingers. I buy a box of 100 at the pharmacy for about $8.
- Baking sheet lined with parchment paper or a silicone mat — For setting the finished hands. The silicone mat is non-stick and reusable, which I prefer.
- Microwave-safe bowl or double boiler — For melting the white chocolate. I use a microwave because it’s faster, but a double boiler gives you more control.
- Spatula or wooden spoon — For stirring the chocolate and coating the popcorn.
- Small offset spatula or butter knife — For smoothing any rough edges on the hands after shaping.
- Piping bag or small zip-top bag — For drizzling red gel “blood” or extra chocolate details. A zip-top bag with the corner snipped off works perfectly.
If you don’t have disposable gloves, you can use plastic sandwich bags over your hands, but they’re less flexible and harder to shape with. Trust me, the gloves are worth the investment. I keep a box in my pantry now for all kinds of messy baking projects.
Preparation Method
Alright, let’s get into the nitty-gritty. This method has been tested and tweaked through several batches, so follow these steps closely and you’ll avoid my early mistakes.
- Pop and stale your popcorn (do this a day ahead if possible). Pop your kernels using your preferred method—air popper, stovetop, or microwave. Spread the popped popcorn on a baking sheet and let it sit uncovered at room temperature for at least 4 hours, or overnight. This step is crucial. Fresh popcorn is too crisp and will shatter when you try to shape it. You want it slightly chewy and pliable. I learned this the hard way after my first batch crumbled into a thousand pieces.
- Melt the white chocolate. Place the white chocolate wafers or chips in a microwave-safe bowl. Microwave in 30-second intervals at 50% power, stirring thoroughly after each interval. White chocolate burns easily, so don’t rush this. It should be smooth and glossy when done. If it looks thick or grainy, stir in 1 teaspoon of coconut oil. The oil helps thin it out and gives a smoother coating. Let the chocolate cool for 2-3 minutes—it should be warm but not hot to the touch.
- Coat the popcorn. Place the stale popcorn in a large mixing bowl. Pour the melted white chocolate over the top and gently fold with a spatula until every piece is coated. Work quickly here—the chocolate will start to set as it cools. If you see clumps forming, that’s okay; they’ll add texture to the hands. You want a generous coating, but not so much that the popcorn is swimming in chocolate.
- Put on your gloves and prepare your workstation. Lay out a sheet of parchment paper on your baking sheet. Have a small bowl of water nearby to rinse your gloves if they get too sticky. This is the messy part, but it’s also the most fun.
- Shape the hands. Grab a handful of the coated popcorn (about 1/2 cup) and gently squeeze it into a fist shape in your palm. This forms the base of the hand. Then, using your other hand, pull out five “fingers” by gently pinching and shaping the popcorn into elongated forms. The fingers should be about 2-3 inches long and slightly tapered at the tips. Don’t worry about perfection—creepy, uneven fingers look more realistic anyway. Press firmly but gently to make the shape hold. If the popcorn isn’t sticking together, your chocolate is too cool. Pop it back in the microwave for 10 seconds.
- Add the fingernails. While the chocolate is still wet, press a sliced almond onto the tip of each finger. Position it so the pointed end faces outward, like a natural nail. This detail takes the hands from “cute” to “disturbingly realistic.” If you don’t have almonds, use small candy corn pieces or even white chocolate chips turned sideways.
- Create the “blood” drips (optional but highly recommended). Dip a toothpick or small brush into red gel food coloring and draw thin lines from the base of the hand downward, as if blood is dripping. Don’t overdo it—a little goes a long way. You can also add a few drops around the “wrist” area for a severed-hand effect. I usually add this step after the hands have set for 5 minutes, so the red doesn’t bleed into the white chocolate.
- Let the hands set. Place the shaped hands on the parchment-lined baking sheet. Let them set at room temperature for about 20-30 minutes, or until the chocolate is firm to the touch. If you’re in a hurry, pop them in the refrigerator for 10 minutes. But don’t leave them in too long, or condensation can make the chocolate look dull.
- Add final decorations. Once the hands are set, you can sprinkle on black sanding sugar for a “dirt” effect, or add edible glitter for a magical twist. I like to dust a little cocoa powder on the fingertips for a grimy, undead look. Get creative with it—the spookier, the better.
- Serve and enjoy. Arrange the hands on a platter with some extra popcorn “bones” or gummy worms around them. They’re best eaten within 24 hours, while the popcorn still has a slight chew. Store any leftovers in an airtight container at room temperature.
Sensory Cues: When you squeeze the popcorn into a hand shape, you should feel it compress slightly but not crumble. The chocolate should feel tacky but not sticky on your gloves. When you press the almond fingernails in, you should feel a slight give before the chocolate firms up. The finished hands should look slightly lumpy and uneven—that’s what makes them look like real, creepy hands.
Cooking Tips & Techniques
I’ve made plenty of mistakes with this recipe so you don’t have to. Here are the most important things I’ve learned:
The popcorn must be stale. I cannot stress this enough. Fresh popcorn is too brittle and will shatter when you try to shape it. If you forget to stale it ahead of time, spread the freshly popped popcorn on a baking sheet and bake at 250°F (120°C) for 10-15 minutes to dry it out slightly. Let it cool completely before coating. It’s not as good as overnight staling, but it works in a pinch.
Don’t overheat the white chocolate. White chocolate is finicky. If it gets too hot, it will seize into a grainy, clumpy mess. Always melt at 50% power in the microwave and stir frequently. If it does seize, stir in a teaspoon of warm coconut oil or heavy cream to bring it back. I’ve saved many a batch this way.
Work in small batches. Don’t try to coat all the popcorn at once and then shape all the hands. The chocolate will start to set, and you’ll end up with crumbly, uncooperative popcorn. Instead, coat about 2 cups of popcorn at a time, shape 2-3 hands, then repeat. This keeps the chocolate warm and workable.
Keep your gloves clean. Rinse your gloves under warm water every few hands to remove excess chocolate. Sticky gloves will pull the coating off the popcorn and make a mess. I keep a bowl of warm water and a paper towel next to my workstation for quick cleanups.
Use a light touch when shaping. You want the hands to hold together, but you don’t want to crush the popcorn into a dense, hard lump. Think of it like a gentle hug—firm enough to hold shape, but soft enough to keep the popcorn texture intact.
Timing tip: Make these the day before your party. They actually taste better after sitting overnight—the flavors meld, and the texture becomes perfectly chewy-crunchy. Just store them in an airtight container at room temperature, layered with parchment paper.
Variations & Adaptations
Once you’ve mastered the basic Spooky White Chocolate Popcorn Hands, there are so many ways to customize them. Here are some of my favorite variations:
Dark Chocolate Zombie Hands
Swap the white chocolate for dark or milk chocolate. Use 16 ounces of dark chocolate chips (60-70% cacao works best). The dark chocolate gives a more “decayed” look, and it’s less sweet. For fingernails, use white chocolate chips or even whole almonds. Dust with cocoa powder for an extra-grimy effect. I made these for a zombie-themed party, and they were a hit.
Vegan Coconut Hands
Use dairy-free white chocolate (many brands like Enjoy Life make good options) and skip the butter. Add 1/2 cup shredded coconut to the popcorn before coating for a tropical twist. The coconut adds texture and a subtle sweetness. For fingernails, use small pieces of dried papaya or mango. These are perfect for vegan Halloween parties.
Spicy Skeleton Hands
Add 1/2 teaspoon cayenne pepper and 1/4 teaspoon smoked paprika to the melted white chocolate before coating. The heat sneaks up on you and contrasts beautifully with the sweet chocolate. Decorate with black sanding sugar for a “dirt” effect. These are great for adult parties where you want a little kick.
Gluten-Free Friendly
This recipe is naturally gluten-free as long as you use certified gluten-free popcorn and white chocolate. Double-check your white chocolate label—some brands add wheat-based ingredients. I use Ghirardelli, which is gluten-free. For added texture, mix in 1/2 cup gluten-free pretzel sticks broken into small pieces.
Color-Changing Witch Hands
Divide the white chocolate into three bowls and tint each with a different gel food coloring—green, purple, and orange. Coat the popcorn in batches and shape into hands. The multi-colored hands look magical and witchy. Use silver dragees for fingernails and edible glitter for sparkle. My niece requested these for her Halloween birthday party, and they were adorable.
Serving & Storage Suggestions
These Spooky White Chocolate Popcorn Hands are best served at room temperature, arranged on a large platter or tray. I like to scatter extra popcorn around them—plain or lightly salted—to look like “bone fragments.” Add a few gummy worms crawling between the hands for extra creepiness. If you’re serving them at a party, place the platter on a black tablecloth with some fake spider webs for a dramatic effect.
For beverages, these pair wonderfully with warm apple cider, hot chocolate, or a pumpkin spice latte. For an adult gathering, try them with a dark stout beer or a bourbon-spiked cider. The sweetness of the white chocolate balances the bitterness of the stout beautifully.
Storage: Store any leftover hands in an airtight container at room temperature for up to 3 days. Layer them with parchment paper to prevent sticking. Do not refrigerate—the condensation will make the popcorn soggy and the chocolate dull. If you need to make them ahead, prepare them up to 2 days in advance and store in an airtight container. They actually improve slightly after a day, as the flavors meld together.
Reheating: These are meant to be eaten at room temperature, so no reheating is needed. If the chocolate looks slightly dull after storage, you can spritz them lightly with water (just a few drops) and let them sit for 5 minutes—the moisture will revive the shine. This sounds weird, but it works.
Freezing: You can freeze the shaped, undecorated hands for up to 1 month. Place them on a baking sheet in the freezer until solid, then transfer to a freezer-safe bag. Thaw at room temperature for 30 minutes before adding decorations and serving. The texture will be slightly less chewy, but they’re still delicious.
Nutritional Information & Benefits
Let’s be honest—these Spooky White Chocolate Popcorn Hands are a treat, not a health food. But they’re made with real ingredients, and popcorn itself has some surprising benefits. Here’s the breakdown per hand (based on one hand made with 1/2 cup popcorn and about 2 ounces of white chocolate coating):
- Calories: Approximately 280-320 calories per hand
- Fat: 18-22 grams (mostly from the white chocolate and butter)
- Carbohydrates: 28-32 grams
- Sugar: 20-24 grams
- Protein: 3-4 grams
- Fiber: 1-2 grams (from the popcorn)
Health Benefits: Popcorn is a whole grain, so it provides fiber and antioxidants called polyphenols. White chocolate contains calcium and a small amount of protein from the milk solids. Of course, the sugar content is high, so these are best enjoyed in moderation as a special occasion treat.
Dietary Considerations: This recipe contains dairy (white chocolate, butter) and tree nuts (almonds). For a nut-free version, skip the almonds and use candy corn or white chocolate chips for fingernails. For a dairy-free version, use vegan white chocolate and coconut oil instead of butter. The recipe is naturally gluten-free if you use certified gluten-free ingredients.
Allergen Note: White chocolate is made with milk solids, so it’s not suitable for those with dairy allergies. Some brands also process white chocolate on equipment shared with tree nuts and soy. Always check labels if you’re serving guests with allergies.
My personal take? I don’t make these every week—they’re a seasonal indulgence. But when Halloween rolls around, I go all out. Life is about balance, and a little spooky sweetness once a year is good for the soul.
Conclusion
These Spooky White Chocolate Popcorn Hands have become my signature Halloween contribution, all thanks to a random conversation with Frank at the hardware store. They’re creepy, they’re fun, and honestly, they’re surprisingly easy once you get the hang of it. The best part? Watching people’s faces when they see the platter—first shock, then delight, then the inevitable, “Wait, you made these?”
I encourage you to make these your own. Change up the colors, try different decorations, add your own creepy touches. Maybe you’ll use green chocolate for witch hands, or add candy corn teeth for a monster look. The possibilities are endless, and that’s the fun of it.
I’d love to hear how yours turn out! Drop a comment below with your variations, share a photo on Pinterest, or tag me in your Halloween creations. There’s nothing better than seeing someone else get excited about this weird, wonderful recipe. Now go make some spooky hands—your Halloween party will thank you.
Frequently Asked Questions
Can I use microwave popcorn for this recipe?
Absolutely! Just make sure to let it sit out for a few hours to stale slightly before coating. Also, avoid heavily buttered varieties—the extra oil can make the chocolate coating slide off. Plain or lightly salted microwave popcorn works best.
Why did my white chocolate seize up?
White chocolate is sensitive to heat and moisture. If it gets too hot (above 110°F/43°C) or if even a drop of water gets in, it can seize into a grainy, clumpy mess. Always melt at 50% power in the microwave and stir frequently. If it does seize, stir in a teaspoon of warm coconut oil or heavy cream to smooth it out.
How far in advance can I make these?
You can make these up to 2 days in advance. Store them in an airtight container at room temperature, layered with parchment paper. They actually taste better after a day—the flavors meld together. Just don’t refrigerate them, or the popcorn will get soggy.
My popcorn hands keep falling apart. What am I doing wrong?
This usually happens for two reasons: the popcorn is too fresh (and therefore too brittle), or the chocolate is too cool. Make sure your popcorn is at least 4 hours old (overnight is best). Also, keep your chocolate warm and fluid while shaping. If it starts to thicken, pop it back in the microwave for 10 seconds.
Can I use colored chocolate instead of white?
Yes! You can use candy melts in any color—green, purple, orange, or even black. Just follow the melting instructions on the package. Colored candy melts often have a slightly different consistency than white chocolate, so you may need to add a bit of coconut oil to thin them out for coating.
Pin This Recipe!
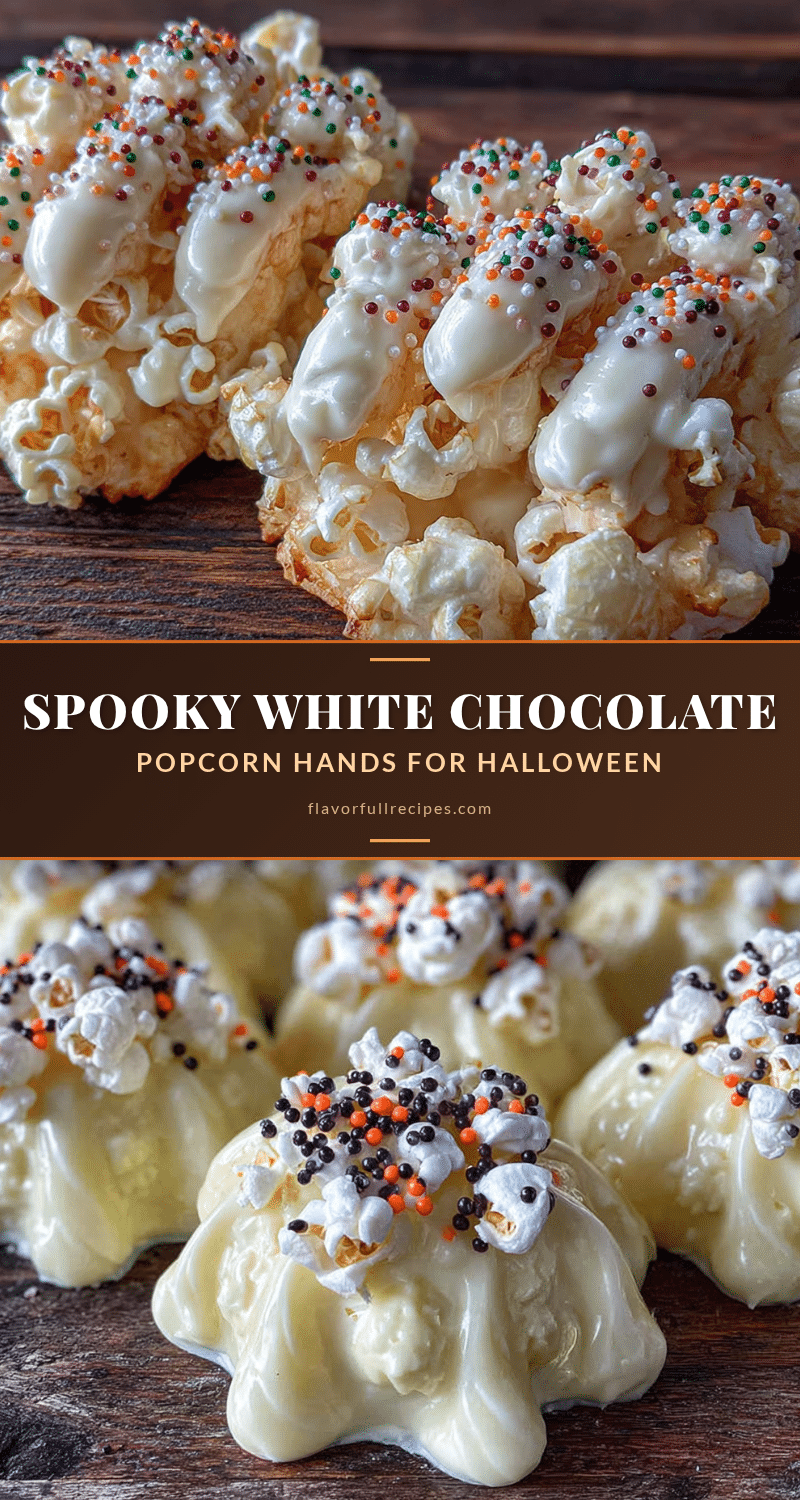

Spooky White Chocolate Popcorn Hands: Easy Halloween Treat
- Total Time: 30 minutes (plus 4 hours staling time)
- Yield: 8 servings 1x
Description
These Spooky White Chocolate Popcorn Hands are a creepy, crunchy, and ridiculously fun Halloween treat. Made with simple ingredients, they’re perfect for parties and guaranteed to be a conversation starter.
Ingredients
- 10 cups popped popcorn (about 1/2 cup unpopped kernels, or one 3-ounce bag of microwave popcorn)
- 1 tablespoon unsalted butter, melted (optional)
- 1/4 teaspoon salt (if using unsalted popcorn)
- 16 ounces white chocolate melting wafers or white chocolate chips
- 1 teaspoon coconut oil or vegetable shortening (optional)
- Red gel food coloring (for decorating)
- Sliced almonds (for fingernails)
- Edible glitter or silver dragees (optional)
- Black sanding sugar (optional)
Instructions
- Pop and stale your popcorn: Pop kernels using your preferred method. Spread on a baking sheet and let sit uncovered at room temperature for at least 4 hours or overnight.
- Melt the white chocolate: Place white chocolate in a microwave-safe bowl. Microwave in 30-second intervals at 50% power, stirring after each, until smooth and glossy. Let cool for 2-3 minutes.
- Coat the popcorn: Place stale popcorn in a large bowl. Pour melted white chocolate over and gently fold until every piece is coated.
- Put on disposable gloves and prepare a baking sheet lined with parchment paper.
- Shape the hands: Grab about 1/2 cup of coated popcorn and gently squeeze into a fist shape. Pull out five fingers by pinching and shaping into elongated forms about 2-3 inches long.
- Add fingernails: While chocolate is still wet, press a sliced almond onto the tip of each finger, pointed end outward.
- Create blood drips (optional): Dip a toothpick in red gel food coloring and draw thin lines from the base of the hand downward.
- Let the hands set on the baking sheet at room temperature for 20-30 minutes, or until firm.
- Add final decorations: Sprinkle with black sanding sugar, edible glitter, or dust with cocoa powder if desired.
- Serve and enjoy: Arrange on a platter. Best eaten within 24 hours. Store leftovers in an airtight container at room temperature.
Notes
Popcorn must be stale for best shaping. Avoid over-heating white chocolate. Work in small batches to keep chocolate warm. Hands can be made up to 2 days in advance and stored in an airtight container at room temperature.
- Prep Time: 15 minutes
- Cook Time: 10 minutes
- Category: Dessert
- Cuisine: American
Nutrition
- Serving Size: 1 hand
- Calories: 300
- Sugar: 22
- Sodium: 150
- Fat: 20
- Saturated Fat: 12
- Carbohydrates: 30
- Fiber: 1.5
- Protein: 3.5
Keywords: Halloween treats, popcorn hands, white chocolate popcorn, spooky snacks, easy Halloween recipe