
My nephew asked why I couldn’t just use a boxed brownie mix for the cookies. I started to explain why that wouldn’t work—then stopped. He was eight, standing on a step stool in my kitchen, holding a box of devil’s food cake mix like it was a winning lottery ticket. I had a whole speech ready about homemade versus store-bought, about the integrity of a butter-based cookie, about how real bakers don’t cut corners. But honestly? I was tired. It was a Tuesday night in late October, and I had promised him we’d make something for his class Halloween party the next morning. So I shrugged, grabbed the box, and said, “Fine. Let’s see what happens.”
What happened was a miracle, let me tell you. The cookies came out perfectly fudgy, soft in the middle with those crinkly tops that make homemade cookies look so impressive. We added a drop of peppermint extract and a handful of chocolate chips, and suddenly we had these intensely chocolatey, minty little rounds that tasted like they came from a bakery. My nephew looked at me with this smug grin, and I had to admit he was right. Sometimes the shortcut is the smart move. I mean, I’ve spent years perfecting my chocolate cookie recipe from scratch, and this box mix version was honestly just as good—maybe better for what we needed that night.
Maybe you’ve been there, standing in your kitchen at 8 PM, realizing you promised 24 cookies for tomorrow’s school party and you haven’t even started. That’s exactly the energy these Quick Chocolate Mint Halloween Sandwich Cookies were born from. They saved me that night, and they’ve saved me countless times since. The best part? Nobody at that party had any idea these started from a box. They just kept asking for the recipe, and I kept smiling, thinking about that eight-year-old who taught me that being a good cook isn’t about being right—it’s about being smart with your time.
Why You’ll Love This Recipe
Let me tell you why these cookies have become my secret weapon for every Halloween gathering, classroom party, and last-minute treat emergency. I’ve tested this recipe at least a dozen times now, tweaking the mint level, playing with bake times, and even trying different box mixes to find the perfect combination. What I landed on is foolproof, and I mean that sincerely.
- Quick & Easy: These come together in under 30 minutes from start to finish. No chilling dough, no creaming butter and sugar, no fuss. If you can stir, you can make these.
- Simple Ingredients: A box of chocolate cake mix, eggs, oil, a little peppermint extract, and some chocolate chips. That’s it. You probably have everything except the extract right now.
- Perfect for Halloween: The mint-chocolate combination is basically made for spooky season. Plus, you can dress them up with orange sprinkles or candy eyes for that festive look.
- Crowd-Pleaser: I’ve brought these to three different Halloween parties and watched them disappear every single time. Kids love them, adults love them, and nobody guesses they started from a mix.
- Unbelievably Delicious: The texture is this perfect middle ground between a brownie and a cookie—chewy edges, soft centers, with little pockets of melted chocolate throughout.
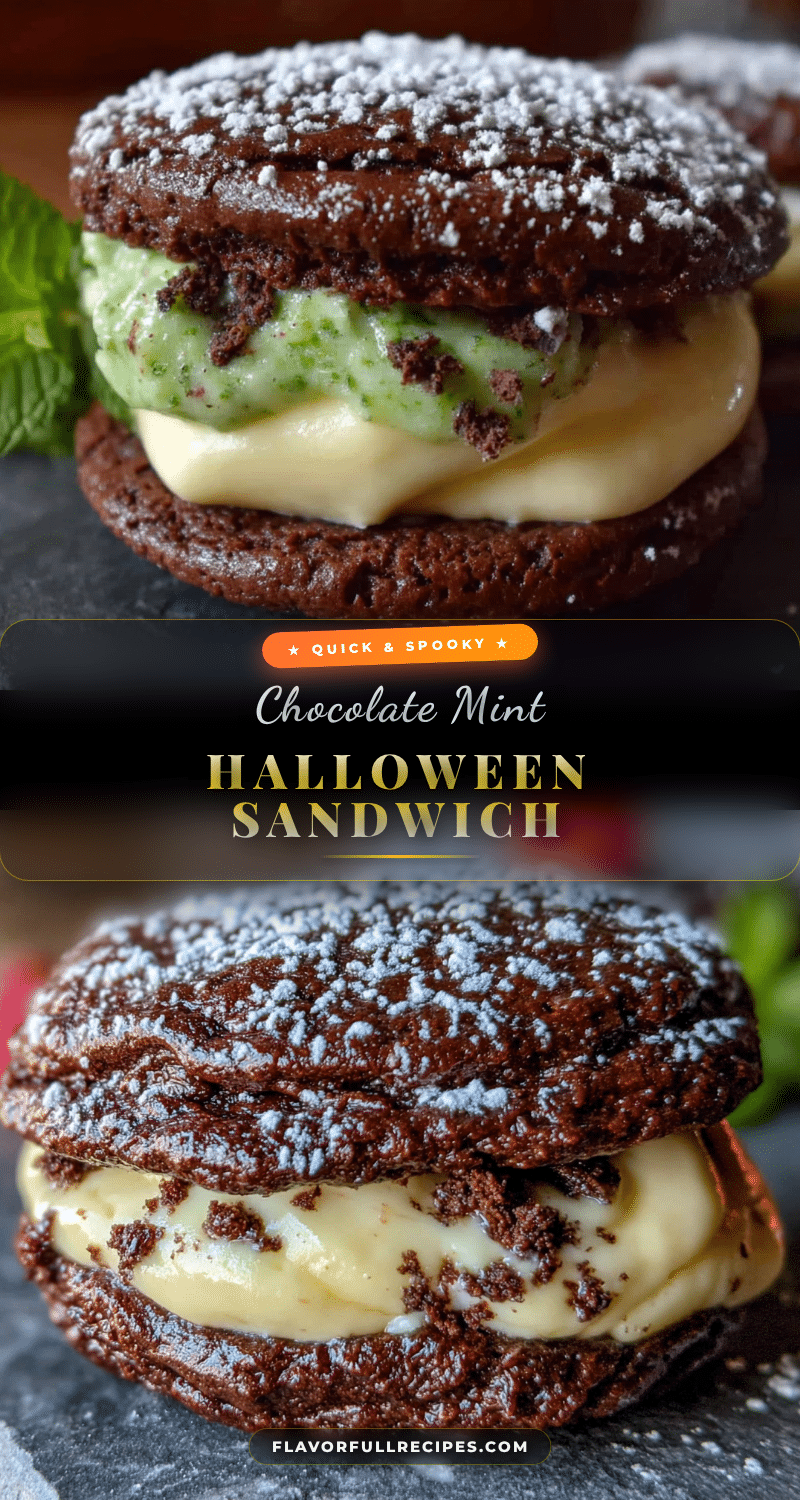
What makes this recipe different from other chocolate mint cookies I’ve tried is the sandwich approach. Instead of just a mint cookie, you get two soft chocolate cookies sandwiched around a creamy mint filling. It’s like eating a Thin Mint but better—softer, fresher, and way more satisfying. The filling is made with butter, powdered sugar, and peppermint extract, and it sets up just firm enough to hold the cookies together without being hard.
This recipe isn’t just good—it’s the kind that makes you close your eyes after the first bite. The mint hits first, cool and refreshing, and then the deep chocolate comes through and lingers. It’s comfort food reimagined for busy people who still want something special. Perfect for impressing other parents at the school party without spending hours in the kitchen, or turning a regular Tuesday into something a little more magical.
What Ingredients You Will Need
This recipe uses simple, mostly pantry-stable ingredients to deliver that classic mint-chocolate flavor without any complicated shopping trips. Here’s what you’ll need, broken down by component.
For the Cookies
- 1 box (15.25 oz) chocolate cake mix (I prefer Duncan Hines Devil’s Food or Betty Crocker Super Moist—both give great texture)
- 2 large eggs, room temperature (cold eggs can make the dough stiff and harder to mix)
- 1/3 cup vegetable oil (canola or melted coconut oil also work well)
- 1/2 teaspoon peppermint extract (not mint extract—peppermint has that clean, cool flavor we want for these cookies)
- 1 cup semi-sweet chocolate chips (I like Ghirardelli for the best melt, but any brand works)
- Optional: 2 tablespoons unsweetened cocoa powder (adds extra chocolate depth if you want a richer cookie)
For the Mint Cream Filling
- 1/2 cup unsalted butter, softened to room temperature (salted butter will make the filling too salty—trust me on this one)
- 2 cups powdered sugar, sifted (sifting prevents lumps, and nobody wants lumpy filling in a sandwich cookie)
- 1/2 teaspoon peppermint extract (adjust to taste—some people like it stronger, some milder)
- 2-3 tablespoons heavy cream (or whole milk if that’s what you have; heavy cream gives a richer texture)
- A few drops green food coloring (optional, but it makes the filling look so festive for Halloween)
Ingredient Selection Tips
When choosing your cake mix, look for one that lists “devil’s food” or “dark chocolate” on the box—these have a deeper cocoa flavor that stands up better to the mint. I’ve tried yellow cake mix with added cocoa powder, and it just doesn’t hit the same. The peppermint extract is worth seeking out at your grocery store; it’s usually near the vanilla extract or in the baking aisle. Don’t substitute mint extract if you can help it—mint extract often has a more medicinal, toothpaste-like flavor, while peppermint is clean and sweet.
For the chocolate chips, semi-sweet is my go-to because it balances the sweetness of the cake mix and the filling. If you only have milk chocolate chips on hand, reduce the powdered sugar in the filling by a couple tablespoons to keep things from getting too sweet. And if you’re dairy-free, use a vegan butter stick and coconut cream in place of the heavy cream—the cookies themselves are already dairy-friendly if you use oil instead of butter.
Equipment Needed
You don’t need a fancy kitchen to pull these off. Here’s what I use every time I make these Quick Chocolate Mint Halloween Sandwich Cookies.
- Large mixing bowl (any size works, but bigger is better for stirring without making a mess)
- Electric hand mixer or stand mixer (you can mix by hand, but the filling comes together much smoother with a mixer)
- Baking sheets (two if you have them, so you can bake all the cookies at once)
- Parchment paper or silicone baking mats (parchment is cheaper, silicone mats are reusable—both prevent sticking)
- Cookie scoop or tablespoon (a 1.5-tablespoon scoop gives the perfect size for sandwich cookies)
- Cooling rack (wire racks let the cookies cool evenly, which matters for the filling)
- Small offset spatula or butter knife (for spreading the filling)
- Air-tight container (for storing the finished cookies)
If you don’t have a cookie scoop, just use two spoons to portion the dough. The cookies don’t need to be perfectly round—honestly, slightly irregular edges make them look more homemade and charming. And if you don’t have a cooling rack, you can let the cookies cool right on the baking sheet, but they’ll take a bit longer and the bottoms might get a little softer.
Preparation Method
Alright, let’s make these cookies. I’ve broken this down step by step so you can follow along without any confusion. The whole process takes about 25-30 minutes from start to finish.
- Preheat your oven to 350°F (175°C). Line two baking sheets with parchment paper or silicone mats. This is important—without parchment, the cookies can stick and lose their shape when you try to move them.
- Make the cookie dough. In a large bowl, combine the chocolate cake mix, eggs, vegetable oil, and peppermint extract. Stir with a wooden spoon or spatula until everything comes together into a thick, fudgy dough. It will look darker than regular cookie dough and smell amazing already. Fold in the chocolate chips until they’re evenly distributed throughout the dough.
- Portion the dough. Using your cookie scoop or a tablespoon, drop rounded balls of dough onto the prepared baking sheets, spacing them about 2 inches apart. Each ball should be about 1.5 tablespoons in size—bigger than a golf ball but smaller than a tennis ball. You should get about 24-26 cookies total, which means 12-13 sandwich cookies when you’re done.
- Bake the cookies. Place the baking sheets in the preheated oven and bake for 8-10 minutes. The cookies will look puffed and slightly cracked on top when they’re done. The edges should be set but the centers will still look a little soft—that’s exactly what you want. Don’t overbake them or they’ll be dry and crumbly instead of soft and fudgy.
- Cool the cookies. Let the cookies rest on the baking sheets for 2-3 minutes. They’ll be very soft right out of the oven, so this resting time lets them firm up enough to transfer. After 3 minutes, use a spatula to move them to a wire cooling rack. Let them cool completely before adding the filling—warm cookies will melt the filling and make a mess.
- Make the mint cream filling. While the cookies are cooling, make the filling. In a medium bowl, beat the softened butter with an electric mixer until it’s smooth and creamy, about 1 minute. Gradually add the sifted powdered sugar, beating on low speed at first to avoid a sugar cloud, then increase to medium speed. Add the peppermint extract and 2 tablespoons of heavy cream. Beat until the filling is light and fluffy, about 2 minutes. If it’s too thick, add the remaining tablespoon of cream. If you’re using green food coloring, add a few drops and beat until the color is even.
- Assemble the sandwich cookies. Pair up the cooled cookies by size—find two that are roughly the same diameter. Using your offset spatula or butter knife, spread about 1-2 teaspoons of the mint filling on the flat bottom of one cookie. Gently press the second cookie on top, flat side down, to create a sandwich. Don’t press too hard or the filling will squish out the sides. Repeat with all the cookie pairs.
- Let the cookies set. Place the assembled sandwich cookies on a plate or baking sheet and refrigerate for 15-20 minutes. This allows the filling to firm up so the cookies hold together better. If you’re in a hurry, 10 minutes in the freezer works too.
A quick note: if your dough feels too sticky to handle, pop it in the fridge for 10 minutes. This happens sometimes if your eggs were large or your kitchen is warm. Chilled dough is much easier to scoop and shape.
Cooking Tips & Techniques
After making these cookies more times than I care to count, I’ve picked up a few tricks that make a real difference. Let me share them so you don’t have to learn the hard way.
Don’t overmix the dough. I learned this one the hard way during a particularly rushed batch. You want to stir just until the dry ingredients are incorporated and no streaks of cake mix remain. Overmixing develops too much gluten and makes the cookies tough instead of tender. A few lumps are totally fine—they’ll bake out.
Chill the dough if your kitchen is warm. On a hot day or if your oven heats up the kitchen, the dough can get greasy and spread too much in the oven. If you notice the dough looking shiny or feeling overly soft, pop it in the fridge for 15 minutes before baking. Your cookies will be thicker and more bakery-style.
Use a light hand with the peppermint extract. I cannot stress this enough. Peppermint extract is potent, and a little goes a long way. Start with the amount listed in the recipe, taste the filling before you add more, and remember that the flavor intensifies as the cookies sit. I once added an extra 1/4 teaspoon to a batch thinking it would be fine, and the cookies tasted like toothpaste. Learn from my mistake.
Bake one sheet at a time if your oven runs hot. Most home ovens have hot spots, and baking two sheets at once can lead to uneven baking. If you have the time, bake one sheet on the middle rack, then the second sheet after. If you’re in a rush (and let’s be honest, with this recipe you probably are), rotate the sheets halfway through baking—swap the top rack to the bottom and vice versa.
Let the cookies cool completely. I know it’s tempting to rush this step, especially when the kitchen smells amazing and you want to taste one. But warm cookies + filling = a melty disaster. The filling needs the cookies to be at room temperature or cooler to hold its shape. Trust me on this—I’ve ruined more than a few batches by getting impatient.
Make the filling while the cookies bake. This is my favorite multitasking trick. While the cookies are in the oven, make the filling. By the time the cookies are baked and cooled, the filling is ready to go. It saves you about 10 minutes and keeps the process moving smoothly.
Variations & Adaptations
One of the best things about this recipe is how easy it is to adapt. Here are some variations I’ve tried and loved.
Gluten-Free Option: Use a gluten-free chocolate cake mix. I’ve tested this with King Arthur’s gluten-free chocolate cake mix and it works beautifully. The texture is slightly more delicate, so be extra gentle when spreading the filling. Everything else stays the same.
Spooky Halloween Twist: Add orange food coloring to the filling instead of green, or use both colors and swirl them together for a marbled effect. You can also press candy eyes into the filling before it sets, or roll the edges of the sandwich cookies in orange and black sprinkles. My niece loves when I make these with purple food coloring—she calls them “witch cookies.”
Double Chocolate Mint: For the chocolate lovers in your life, melt 1/4 cup of dark chocolate chips and drizzle it over the assembled cookies. Let the chocolate set in the fridge for 10 minutes. The extra chocolate layer makes these feel even more decadent and special.
Thin Mint Style: If you prefer a crunchier cookie, bake the cookies for 11-12 minutes instead of 8-10. They’ll be crisper and more like the classic Thin Mint texture. The filling stays the same, but the overall experience is more snap-and-crunch than soft-and-chewy.
Dairy-Free Version: Use a dairy-free cake mix (most are naturally dairy-free, but check the label) and replace the butter in the filling with vegan butter sticks. Use coconut cream instead of heavy cream. The cookies turn out just as delicious, and nobody will know the difference.
Mint Chocolate Chip Cookies (No Sandwich): If you don’t want to bother with the filling, these cookies are fantastic on their own. Just skip the filling steps and enjoy them as regular drop cookies. They’re basically mint chocolate chip cookies in cookie form, and they’re perfect for snacking.
Serving & Storage Suggestions
These Quick Chocolate Mint Halloween Sandwich Cookies are best served slightly chilled or at room temperature. The filling is firmer when cold, which makes the cookies easier to eat without the filling squishing out the sides. If you’re serving them at a party, take them out of the fridge about 10 minutes before you put them out—that gives them just enough time to soften slightly without getting messy.
For Halloween parties, I like to arrange them on a platter with some orange and black napkins, maybe a few fake spider webs for decoration. They also look great on a tiered serving tray with other Halloween treats like popcorn balls or caramel apples. A glass of cold milk is the obvious pairing, but they’re also fantastic with hot chocolate or coffee.
Storage Instructions: Store the assembled cookies in an airtight container in the refrigerator for up to 5 days. Layer them between sheets of parchment paper so the fillings don’t stick together. If you’re storing them for longer, you can freeze them for up to 3 months. To freeze, place the cookies on a baking sheet in the freezer for 1 hour (this prevents them from sticking together), then transfer them to a freezer-safe bag or container.
Reheating Tips: These cookies are actually better cold or at room temperature, so I don’t recommend reheating them. If you want to soften them slightly, let them sit at room temperature for 15-20 minutes before serving. The flavors actually develop and deepen over the first day or two, so these are one of those rare treats that taste even better the next day.
Nutritional Information & Benefits
Let’s be real—these are a treat, not a health food. But here’s the nutritional breakdown so you know what you’re working with. Per sandwich cookie (based on 13 cookies total): approximately 280 calories, 14g fat, 38g carbohydrates, 3g protein, and 22g sugar. These numbers will vary depending on the specific cake mix and chocolate chips you use.
On the bright side, dark chocolate (if you use semi-sweet chips) contains antioxidants called flavonoids that can support heart health. Peppermint is known for its digestive benefits and can help soothe an upset stomach—though I’m not sure that applies when it’s surrounded by butter and sugar! The eggs provide a small amount of protein, and the oil adds healthy fats.
For those with dietary concerns, this recipe contains gluten, dairy, and eggs. The gluten-free version I mentioned earlier works great, and the dairy-free option is solid too. If you’re watching your sugar intake, you could try using a sugar-free chocolate cake mix and sugar-free chocolate chips, though I haven’t tested that version myself. These cookies are also nut-free as written, which makes them a safe choice for school parties where allergies are a concern.
Conclusion
These Quick Chocolate Mint Halloween Sandwich Cookies have become my go-to for every last-minute treat emergency, and I hope they become yours too. They’re proof that you don’t need to spend hours in the kitchen to make something that tastes special and looks impressive. The chocolate-mint combination is a classic for a reason, and when you sandwich that creamy filling between two soft, fudgy cookies, you get something truly memorable.
I’d love to hear how these turn out for you. Did you add any fun Halloween decorations? Did you try a different flavor of cake mix? Maybe you discovered a new favorite variation? Drop a comment below and let me know—I read every single one, and your ideas often inspire my next batch. And if you share these on social media, tag me so I can see your beautiful creations. There’s nothing that makes my day quite like seeing someone else enjoying a recipe that started in my kitchen.
Go ahead, give these a try. Your Halloween party guests will thank you, and honestly? You deserve a treat that comes together this easily. Happy baking, and Happy Halloween!
Frequently Asked Questions
Can I use a different cake mix flavor?
Absolutely! While chocolate is the classic choice for mint, you can experiment with other flavors. Red velvet cake mix gives a fun color contrast with green filling, and yellow cake mix with added cocoa powder works in a pinch. Just keep in mind that the mint flavor pairs best with chocolate or vanilla-based cakes.
How do I keep the cookies from spreading too much?
If your cookies are spreading into flat discs, your dough might be too warm. Chill it in the refrigerator for 15-20 minutes before baking. Also, make sure your baking sheets aren’t too warm—let them cool completely between batches if you’re reusing them.
Can I make these cookies ahead of time?
Yes! You can make the cookie dough up to 3 days ahead and keep it in the refrigerator. Let it sit at room temperature for 10 minutes before scooping and baking. You can also bake the cookies and freeze them without the filling for up to 3 months. Thaw and fill them when you’re ready to serve.
My filling is too runny. What went wrong?
This usually happens if your butter was too soft or if you added too much cream. Pop the filling in the refrigerator for 15-20 minutes to firm it up. If it’s still too soft after chilling, beat in an additional 1/4 cup of powdered sugar.
How many cookies does this recipe make?
This recipe makes about 24-26 individual cookies, which gives you 12-13 sandwich cookies. If you want more, you can easily double the recipe. Just make sure you have enough baking sheets and space in your oven.
Pin This Recipe!

Easy Mint Chocolate Halloween Sandwich Cookies
- Total Time: 25 minutes
- Yield: 12-13 sandwich cookies 1x
Description
Quick and easy mint chocolate sandwich cookies made from a boxed cake mix, perfect for Halloween parties and last-minute treat emergencies. These fudgy cookies are sandwiched with a creamy mint filling and come together in under 30 minutes.
Ingredients
- 1 box (15.25 oz) chocolate cake mix (preferably devil’s food or dark chocolate)
- 2 large eggs, room temperature
- 1/3 cup vegetable oil (canola or melted coconut oil work well)
- 1/2 teaspoon peppermint extract
- 1 cup semi-sweet chocolate chips
- Optional: 2 tablespoons unsweetened cocoa powder
- 1/2 cup unsalted butter, softened
- 2 cups powdered sugar, sifted
- 1/2 teaspoon peppermint extract (for filling)
- 2–3 tablespoons heavy cream (or whole milk)
- A few drops green food coloring (optional)
Instructions
- Preheat oven to 350°F (175°C). Line two baking sheets with parchment paper or silicone mats.
- In a large bowl, combine chocolate cake mix, eggs, vegetable oil, and 1/2 teaspoon peppermint extract. Stir until a thick, fudgy dough forms. Fold in chocolate chips.
- Drop rounded balls of dough (about 1.5 tablespoons each) onto prepared baking sheets, spacing 2 inches apart. You should get about 24-26 cookies.
- Bake for 8-10 minutes until puffed and slightly cracked on top. Edges should be set but centers still soft. Do not overbake.
- Let cookies rest on baking sheets for 2-3 minutes, then transfer to a wire cooling rack. Cool completely.
- While cookies cool, make filling: Beat softened butter with an electric mixer until smooth. Gradually add sifted powdered sugar, beating on low then medium speed. Add 1/2 teaspoon peppermint extract and 2 tablespoons heavy cream. Beat until light and fluffy (about 2 minutes). Add remaining cream if needed. Add green food coloring if desired.
- Pair cooled cookies by size. Spread 1-2 teaspoons of mint filling on the flat bottom of one cookie. Gently press a second cookie on top to create a sandwich.
- Refrigerate assembled cookies for 15-20 minutes to set the filling.
Notes
Don’t overmix the dough to keep cookies tender. Chill dough for 10 minutes if too sticky. Use a light hand with peppermint extract as it’s potent. Bake one sheet at a time if your oven runs hot. Let cookies cool completely before adding filling to prevent melting. Make filling while cookies bake to save time. Store in refrigerator for up to 5 days or freeze for up to 3 months.
- Prep Time: 15 minutes
- Cook Time: 10 minutes
- Category: Dessert
- Cuisine: American
Nutrition
- Serving Size: 1 sandwich cookie
- Calories: 280
- Sugar: 22
- Sodium: 200
- Fat: 14
- Saturated Fat: 6
- Carbohydrates: 38
- Fiber: 2
- Protein: 3
Keywords: Halloween cookies, mint chocolate cookies, sandwich cookies, easy cookies, cake mix cookies, chocolate mint, quick dessert, Halloween treats