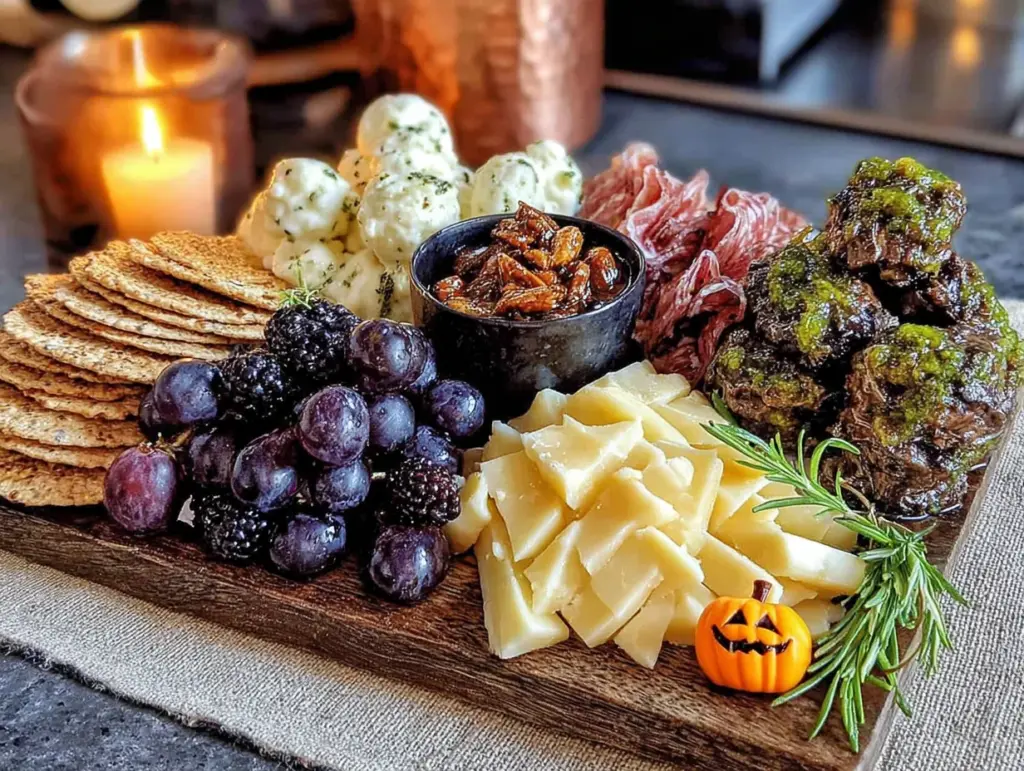
It was 11:47 PM on a random Tuesday in late September, and I had a very specific vision of a Halloween party board that looked like a creature crawling out of the swamp. I didn’t have a proper platter—my nice one was in the dishwasher from a dinner party two days ago—but I had a massive cutting board that my mom gave me, and the idea that hit me like a sugar rush: what if the board itself was the monster?
Honestly, I’d been scrolling through Pinterest for hours, and everything looked so… perfect. Too perfect. I wanted something that felt alive, you know? Something that would make people at my Halloween gathering stop mid-conversation and say, “Wait, is that edible?” I had some leftover cheese from the weekend, a bag of pretzel sticks that were about to go stale, and a sudden burst of late-night confidence. I mean, let’s face it, the best ideas come when you’re not trying so hard.
So there I was, standing in my kitchen in my pajamas, arranging black olives like eyeballs and slicing cheddar into jagged teeth. The dog watched me from the doorway like I’d finally lost it. But when I stepped back and saw this monstrous face staring up at me from the board—complete with a mozzarella brain and pepperoni warts—I actually laughed out loud. It was weird, it was wonderful, and it was exactly the kind of thing that makes a Halloween party unforgettable. Maybe you’ve been there too, looking for that one dish that steals the show without stealing your sanity.
Why You’ll Love This Recipe
Let me tell you, this Monster Mash Halloween Charcuterie Board has saved my hosting sanity more times than I can count. I’ve tested this at three different parties now, and every single time, people hover around it like it’s the main attraction. And the best part? It takes maybe 20 minutes to put together. Twenty minutes!
- Quick & Easy: Comes together in under 25 minutes, perfect for last-minute Halloween hosting or when you’re juggling a dozen other party prep tasks.
- Simple Ingredients: No fancy grocery trips needed. Most of these items are pantry staples or easy to find at any regular store.
- Perfect for Halloween Gatherings: Great for adult parties, family get-togethers, or even classroom celebrations. It’s a conversation starter and a snack bar all in one.
- Crowd-Pleaser: Always gets rave reviews from kids and adults alike. The spooky presentation hides how delicious everything actually is.
- Unbelievably Fun: The texture and flavor combo is next-level comfort food, and the visual wow factor is off the charts.
What makes this different from the other charcuterie boards you’ve seen? It’s not just a platter of meat and cheese arranged in a circle. This one has a personality. The monster face design means every component has a job—the eyes, the teeth, the hair, the warts. It’s interactive. It’s silly. And honestly, it’s the kind of thing that makes people take photos before they even grab a cracker.
This recipe isn’t just good—it is the kind that makes you close your eyes after the first bite. It’s comfort food reimagined for a spooky night, with the same soul-soothing satisfaction of a classic cheese board but with a Halloween twist that feels fresh and exciting. Perfect for impressing guests without stress, or turning a simple snack spread into something memorable.
What Ingredients You Will Need
This recipe uses simple, crowd-friendly ingredients to deliver bold flavor and a seriously spooky presentation. Most of these are things you might already have in your fridge or can grab in one quick trip to the store.
For the Monster Face & Base
- 1 large wooden cutting board or serving platter (at least 16 inches wide)
- 8 ounces cream cheese, softened (this acts as the “glue” for some elements and a dip base)
- 1 cup sour cream (adds creaminess and a tangy base for the “brain”)
- 1 packet ranch seasoning mix (I prefer Hidden Valley for that classic flavor)
- 1 cup shredded mozzarella cheese (for the monster’s “brain” texture)
- 8 ounces sharp cheddar cheese, cut into 1-inch cubes (for teeth and scattered pieces)
- 4 ounces pepperoni slices (for warts and texture on the monster’s skin)
- 1 cup black olives, pitted (for eyeballs—use whole for big eyes, sliced for smaller ones)
- 1 cup green olives with pimentos (adds a pop of color and a briny contrast)
For the Monster’s “Skin” & Surroundings
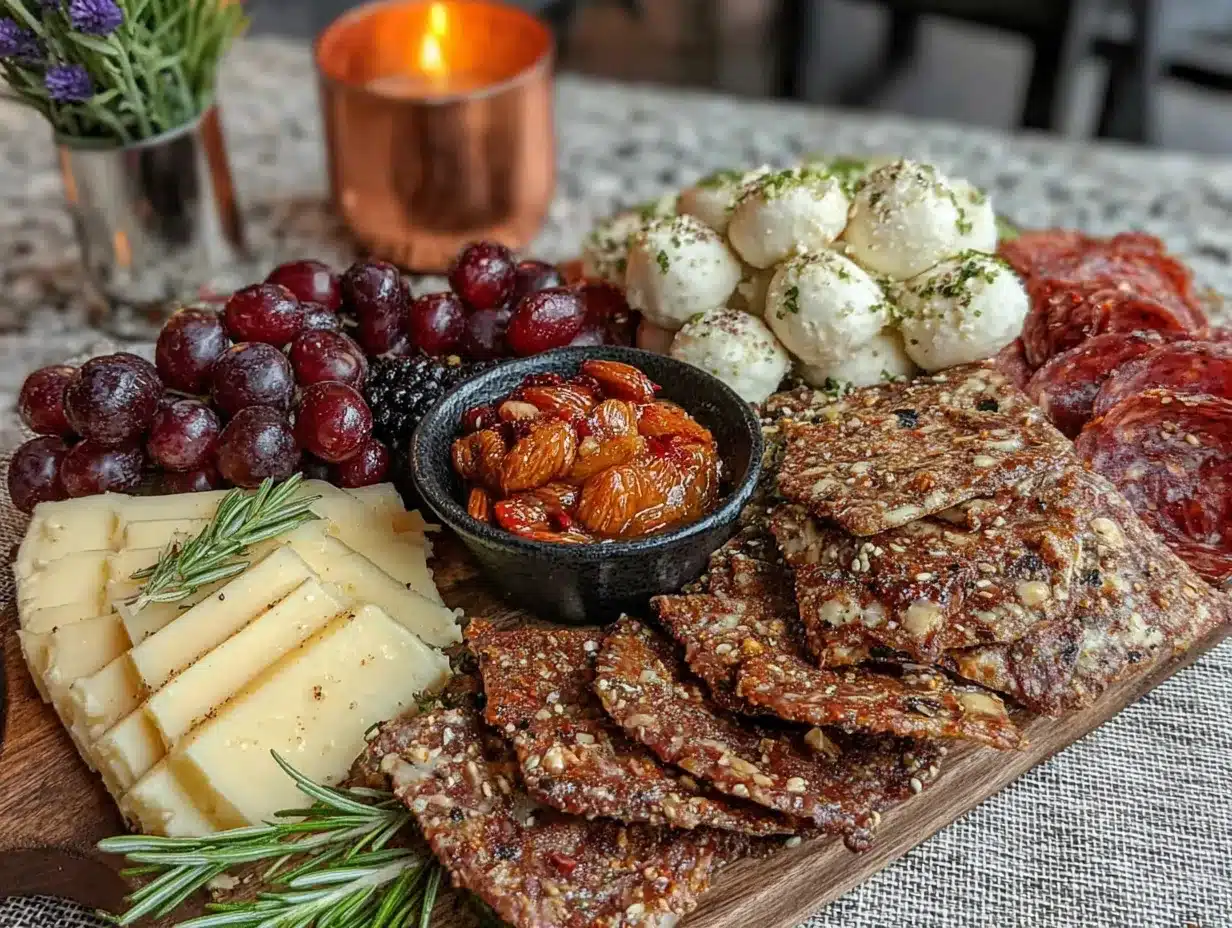
- 1 bag pretzel sticks (about 8 ounces)—these become the monster’s spiky hair or fur
- 1 cup cherry tomatoes (for warts or bloodshot eyes)
- 8 ounces salami, thinly sliced (fold into roses for decoration or use as monster skin patches)
- 1 cup baby carrots (for fingers or toes peeking out from the edges)
- 1 cup cucumber slices (for a fresh, crunchy element that balances the richness)
- 1 cup grapes, red or green (for sweetness and color contrast)
- Assorted crackers (about 2 cups)—use a mix of shapes and sizes for texture
For the Spooky Decorations
- 1 tablespoon black sesame seeds (for freckles or warts on the monster)
- 1 small jar of red pepper jelly or sweet chili sauce (for “blood” drips)
- Edible googly eyes (optional, but hilarious—find them at baking supply stores)
- Fresh rosemary sprigs (for swampy, creepy “hair” accents)
I recommend using Tillamook for the cheddar and cheddar—it melts beautifully if you decide to do a warm dip version, and it has that sharp, tangy bite that stands up to the salty meats. For the cream cheese, Philadelphia is my go-to because it spreads so smoothly. Look for firm, pitted olives for the best texture—you want them to hold their shape when you arrange them.
If you’re feeding a crowd with dietary restrictions, swap the cream cheese and sour cream for dairy-free versions. Use gluten-free crackers and pretzels for a celiac-friendly board. The beauty of this recipe is how forgiving it is—substitutions barely change the vibe.
Equipment Needed
You don’t need anything fancy here, which is part of why I love this recipe for hosting. Here’s what you’ll want to have on hand:
- Large wooden cutting board or serving platter (at least 16 inches wide)—I use a big rectangle board from IKEA that cost me $15. It’s my workhorse for parties.
- Small mixing bowls (2-3) for holding dips, olives, and smaller items
- Cheese knife or small offset spatula for spreading the cream cheese mixture
- Paring knife for slicing olives and shaping cheese if needed
- Small spoon for scooping and arranging
- Paper towels (trust me, you’ll need them for patting things dry)
If you don’t have a large board, use a baking sheet lined with parchment paper. It’s not as pretty, but it works perfectly. I’ve done this at a friend’s house using a clean pizza pan, and honestly, it looked even more rustic and fun. For budget-friendly options, thrift stores often have great wooden boards for under $10.
Preparation Method
Alright, let’s build this monster. I’ve broken it down so you can prep everything before your guests arrive, leaving you free to enjoy the party.
- Make the cream cheese base (5 minutes): In a small bowl, mix the softened cream cheese, sour cream, and ranch seasoning until smooth. This will be the “glue” that holds some of your monster features in place and also serves as a delicious dip. Spread it in a rough oval shape in the center of your board—this will be the monster’s face area. Don’t worry about making it perfect; the messier, the more monster-like.
- Build the monster’s “brain” (3 minutes): Sprinkle the shredded mozzarella over the cream cheese base in a wavy, brain-like pattern. Use your fingers to create ridges and folds. It should look like a lumpy, grayish-white brain. Honestly, the more uneven, the better. I once made it too smooth and it looked like a pancake—learn from my mistake.
- Create the eyes (4 minutes): Place two whole black olives in the upper portion of the face area for the main eyeballs. If you want them to look bloodshot, place a small dot of red pepper jelly or sweet chili sauce next to each one. For extra creepiness, use edible googly eyes on top of the olives—they wobble and it’s hilarious. I’ve also used halved cherry tomatoes with a dot of cream cheese in the center for a different look.
- Add the teeth and mouth (5 minutes): Arrange the cheddar cubes in a jagged, crooked smile below the eyes. Use the paring knife to cut some cubes into triangle shapes for fangs. Leave gaps between the teeth for that monster-ish look. I like to angle a few teeth downward like they’re dripping.
- Make the hair (4 minutes): Stick the pretzel sticks into the cream cheese mixture around the top and sides of the face, pointing outward like wild, spiky hair. Layer them in different directions for a truly unhinged look. For a swampy effect, tuck in a few rosemary sprigs among the pretzels.
- Add warts and texture (5 minutes): Scatter pepperoni slices over the face area like monster warts or skin patches. Place cherry tomatoes in clusters for bumpy texture. Sprinkle black sesame seeds randomly for freckles or tiny warts. This is where the monster really comes to life—don’t be shy.
- Fill in the surroundings (5 minutes): Arrange the salami roses, cucumber slices, baby carrots, grapes, and remaining olives around the monster face. Fill any gaps with crackers. The goal is to make the board look full and abundant, like the monster is emerging from a snack landscape.
- Add the creepy details (2 minutes): Drizzle a little red pepper jelly or sweet chili sauce around the mouth area for “blood” drips. Place a few extra googly eyes in random spots for a fun surprise. Step back and adjust anything that looks off-balance.
- Final touches (2 minutes): Taste test a cracker with some cheese to make sure the seasoning is right. Add more salt or pepper if needed. Let the board sit at room temperature for 15 minutes before serving so the cream cheese softens and the flavors meld.
Sensory cue: When you’re done, the board should look chaotic but intentional—like a monster that just crawled out of a delicious swamp. The cream cheese should be soft and spreadable, the olives glossy, and the pretzels crisp. It should smell like ranch, cheese, and a hint of pepperoni.
Cooking Tips & Techniques
Here’s where I share the stuff I learned the hard way. The first time I made this board, I used cold cream cheese straight from the fridge. Big mistake. It wouldn’t spread, and I ended up with lumpy monster skin that looked more like cottage cheese than a creature. Let your cream cheese sit out for at least 30 minutes before you start.
Another thing—don’t overthink the face. The beauty of a monster is that it’s supposed to be ugly. If one eye is higher than the other, that’s character. If the teeth are crooked, that’s charm. I once spent 10 minutes trying to make the eyes perfectly symmetrical, and then my friend walked in and said, “It looks like it’s judging me.” So I moved one olive down an inch, and suddenly it looked mischievous. Perfect.
Timing tip: Assemble the board about an hour before your guests arrive. Cover it loosely with plastic wrap and keep it in the fridge. Take it out 20 minutes before serving. This gives the cream cheese time to soften without getting warm enough to make the olives slide around.
If you’re hosting a big party, make two smaller boards instead of one giant one. People tend to congregate around food, and a single board can create a bottleneck. I learned this at my Halloween party last year when 12 people were standing three-deep around the kitchen island. Two boards in different rooms kept the flow moving.
One more thing—use a damp paper towel under the board to keep it from sliding on the counter. Nothing worse than a monster that shifts when someone reaches for a cracker.
Variations & Adaptations
This recipe is incredibly flexible. Here are some ways I’ve adapted it for different crowds and occasions.
Dairy-Free Monster Board
Use dairy-free cream cheese (Kite Hill is my favorite) and vegan shredded mozzarella. Replace the cheddar with marinated artichoke hearts or roasted red peppers for color and texture. The flavor profile changes a bit, but the spooky look stays intact.
Low-Carb / Keto Version
Skip the crackers and pretzels entirely. Use cucumber slices, bell pepper strips, and celery sticks as the base for scooping. Load up on the meats—pepperoni, salami, and prosciutto—and add extra olives and cheese. I’ve served this to my keto friends and they were thrilled.
Sweet & Spooky Board
For a kids’ party or a dessert table, swap the savory ingredients for sweet ones. Use cream cheese frosting as the base, marshmallows for the brain, chocolate chips for eyes, gummy worms for hair, and graham crackers for teeth. Add candy corn and pretzel sticks for decoration. It’s ridiculous and kids absolutely lose their minds over it.
Warm Dip Version
If you want a hot element, make a small batch of queso or warm spinach-artichoke dip and place it in a heat-safe bowl in the center of the board. Arrange the monster face around the bowl. The warmth adds a cozy factor that’s perfect for chilly October nights.
I once tried a version with blue cheese crumbles for the monster’s skin, thinking it would look moldy and creepy. It did look creepy, but the smell was a bit much for my guests. Stick with mozzarella unless you know your crowd loves strong cheese.
Serving & Storage Suggestions
Serve this board at room temperature. Cold cheese loses its flavor, and the cream cheese base needs to be soft enough to spread on crackers. I usually take it out of the fridge 20-30 minutes before guests arrive.
For presentation, place the board in the center of your table or kitchen island. Surround it with small plates and napkins. If you’re feeling extra, add some battery-operated tea lights around the board for a spooky glow. I also like to scatter a few fake spiders or plastic bones around the platter for added Halloween vibes.
As for what to serve alongside, this board is pretty self-sufficient, but it pairs beautifully with a warm apple cider or a pumpkin beer. If you’re doing a full spread, add a bowl of popcorn tossed with nutritional yeast for a cheesy, crunchy side, or a simple green salad with a tangy vinaigrette to cut through the richness.
Storage is simple: cover the board tightly with plastic wrap and refrigerate for up to 24 hours. The olives and tomatoes might release some moisture, so pat them dry before serving leftovers. I wouldn’t recommend freezing this—the cream cheese gets grainy and the vegetables turn mushy.
Reheating isn’t really needed, but if you’re serving the warm dip version, you can microwave the dip portion for 30-second intervals until hot. The flavors actually get better after a few hours in the fridge—the ranch seasoning melds with the cream cheese and everything becomes more cohesive.
One thing I love: if you have leftovers, scrape everything into a container and use it as a spread for sandwiches or wraps the next day. It’s like a monster mash sandwich, and honestly, it’s delicious.
Nutritional Information & Benefits
This board is indulgent, no doubt about it, but it’s not without its redeeming qualities. Here’s a rough estimate per serving (assuming 8-10 servings):
- Calories: Approximately 350-450 per serving
- Protein: 15-20 grams (from cheese, meats, and cream cheese)
- Fat: 25-30 grams (mostly from cheese and meats)
- Carbohydrates: 15-20 grams (from crackers, pretzels, and vegetables)
- Fiber: 2-3 grams (from vegetables and whole-grain crackers if used)
The olives provide healthy monounsaturated fats and are a good source of vitamin E and iron. The vegetables add some fiber and vitamins, and the cheese offers calcium and protein. If you use whole-grain crackers, you’ll get a bit more fiber and complex carbs.
For dietary considerations, this recipe is naturally vegetarian if you skip the meats. It’s not vegan or dairy-free in its standard form, but as I mentioned, those adaptations work well. The main allergens are dairy and gluten (from crackers and pretzels), so be mindful if you’re serving a mixed crowd.
My personal take? This is a treat, not an everyday meal. It’s for celebrations and gatherings. I don’t stress about the numbers when I’m hosting—I focus on the joy of sharing food with people I care about. And honestly, the laughter this board brings is worth every calorie.
Conclusion
This Monster Mash Halloween Charcuterie Board has become my go-to for every Halloween gathering, and I don’t see that changing anytime soon. It’s fun, it’s fast, and it genuinely makes people happy. There’s something about seeing a monster made of cheese and olives that brings out the kid in everyone.
I love that this recipe lets me be creative without being stressed. I can make it as silly or as spooky as I want, and it always turns out great. The best part is watching people’s faces when they first see it—that moment of surprise and delight is pure magic.
So go ahead, give it a try. Customize it however you like. Make it your own monster. And when you do, I’d love to hear about it. Drop a comment below, share a photo, or tell me what weird ingredient you added that made it even better. Happy Halloween, and happy snacking!
Frequently Asked Questions
Can I make this board ahead of time?
Yes! You can assemble the entire board up to 24 hours in advance. Just cover it tightly with plastic wrap and keep it in the fridge. Take it out 20-30 minutes before serving to let the cream cheese soften.
How many people does this board serve?
This board serves about 8-10 people as a snack or appetizer. If you’re serving it as a main course for a casual gathering, it might stretch to 6-8 people. For larger parties, make two boards or double the ingredients.
Can I use different cheeses?
Absolutely. Swap the cheddar for gouda, provolone, or even a smoked cheese for a deeper flavor. The mozzarella brain is iconic, but you could use shredded Monterey Jack or even crumbled feta for a different texture.
How do I keep the olives from rolling off the board?
Press them gently into the cream cheese base. The ranch mixture acts like glue and holds them in place. If you’re worried, use a small dab of cream cheese on the bottom of each olive before placing it.
What if I don’t have a large cutting board?
Use a baking sheet, a pizza pan, or even a clean serving tray. Line it with parchment paper for easy cleanup. I’ve even used a large piece of butcher paper on a table for a rustic, picnic-style presentation.
Pin This Recipe!
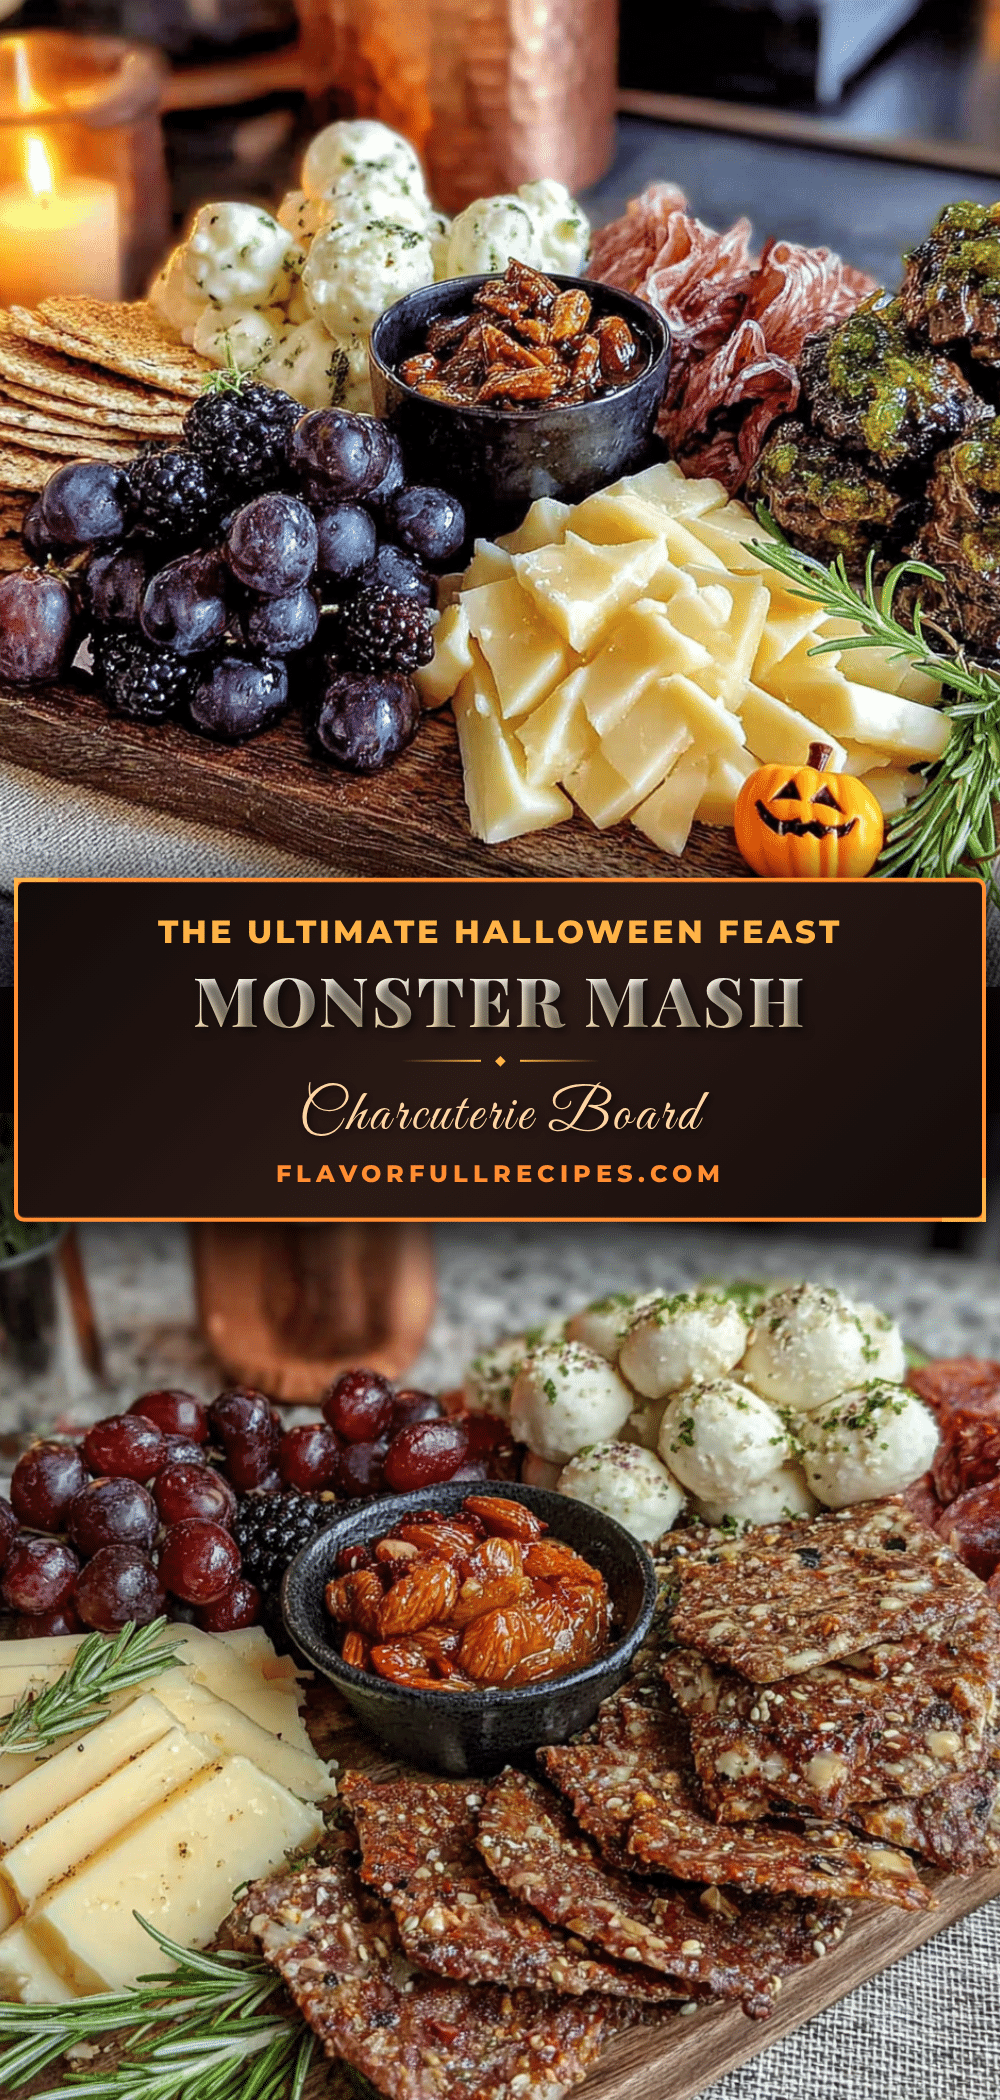
Easy Monster Mash Halloween Charcuterie Board
- Total Time: 20 minutes
- Yield: 8-10 servings 1x
Description
A fun and spooky Halloween charcuterie board shaped like a monster, featuring a creamy ranch base, mozzarella brain, olive eyes, and pretzel hair. Perfect for parties and gatherings, this quick and easy recipe comes together in under 25 minutes and is sure to be a conversation starter.
Ingredients
- 1 large wooden cutting board or serving platter (at least 16 inches wide)
- 8 ounces cream cheese, softened
- 1 cup sour cream
- 1 packet ranch seasoning mix
- 1 cup shredded mozzarella cheese
- 8 ounces sharp cheddar cheese, cut into 1-inch cubes
- 4 ounces pepperoni slices
- 1 cup black olives, pitted
- 1 cup green olives with pimentos
- 1 bag pretzel sticks (about 8 ounces)
- 1 cup cherry tomatoes
- 8 ounces salami, thinly sliced
- 1 cup baby carrots
- 1 cup cucumber slices
- 1 cup grapes, red or green
- Assorted crackers (about 2 cups)
- 1 tablespoon black sesame seeds
- 1 small jar of red pepper jelly or sweet chili sauce
- Edible googly eyes (optional)
- Fresh rosemary sprigs
Instructions
- Make the cream cheese base: In a small bowl, mix the softened cream cheese, sour cream, and ranch seasoning until smooth. Spread it in a rough oval shape in the center of your board—this will be the monster’s face area.
- Build the monster’s ‘brain’: Sprinkle the shredded mozzarella over the cream cheese base in a wavy, brain-like pattern. Use your fingers to create ridges and folds.
- Create the eyes: Place two whole black olives in the upper portion of the face area for the main eyeballs. If desired, place a small dot of red pepper jelly or sweet chili sauce next to each one for a bloodshot effect. Optionally, add edible googly eyes on top of the olives.
- Add the teeth and mouth: Arrange the cheddar cubes in a jagged, crooked smile below the eyes. Use a paring knife to cut some cubes into triangle shapes for fangs. Leave gaps between the teeth.
- Make the hair: Stick the pretzel sticks into the cream cheese mixture around the top and sides of the face, pointing outward like wild, spiky hair. Tuck in a few rosemary sprigs among the pretzels for a swampy effect.
- Add warts and texture: Scatter pepperoni slices over the face area like monster warts or skin patches. Place cherry tomatoes in clusters for bumpy texture. Sprinkle black sesame seeds randomly for freckles or tiny warts.
- Fill in the surroundings: Arrange the salami roses, cucumber slices, baby carrots, grapes, and remaining olives around the monster face. Fill any gaps with crackers.
- Add the creepy details: Drizzle a little red pepper jelly or sweet chili sauce around the mouth area for ‘blood’ drips. Place a few extra googly eyes in random spots for a fun surprise. Step back and adjust anything that looks off-balance.
- Final touches: Taste test a cracker with some cheese to make sure the seasoning is right. Add more salt or pepper if needed. Let the board sit at room temperature for 15 minutes before serving so the cream cheese softens and the flavors meld.
Notes
Let cream cheese sit out for at least 30 minutes before starting for easier spreading. Don’t overthink the face—imperfections add character. Assemble up to 24 hours in advance, cover with plastic wrap, and refrigerate. Take out 20-30 minutes before serving. For a dairy-free version, use dairy-free cream cheese and vegan mozzarella. For a low-carb version, skip crackers and pretzels and use cucumber slices and bell pepper strips.
- Prep Time: 20 minutes
- Cook Time: 0 minutes
- Category: Appetizer
- Cuisine: American
Nutrition
- Serving Size: 1 serving (based on
- Calories: 350450
- Sugar: 58
- Sodium: 8001000
- Fat: 2530
- Saturated Fat: 1215
- Carbohydrates: 1520
- Fiber: 23
- Protein: 1520
Keywords: Halloween charcuterie board, monster mash, spooky snack, party appetizer, easy Halloween recipe, cheese board, monster face