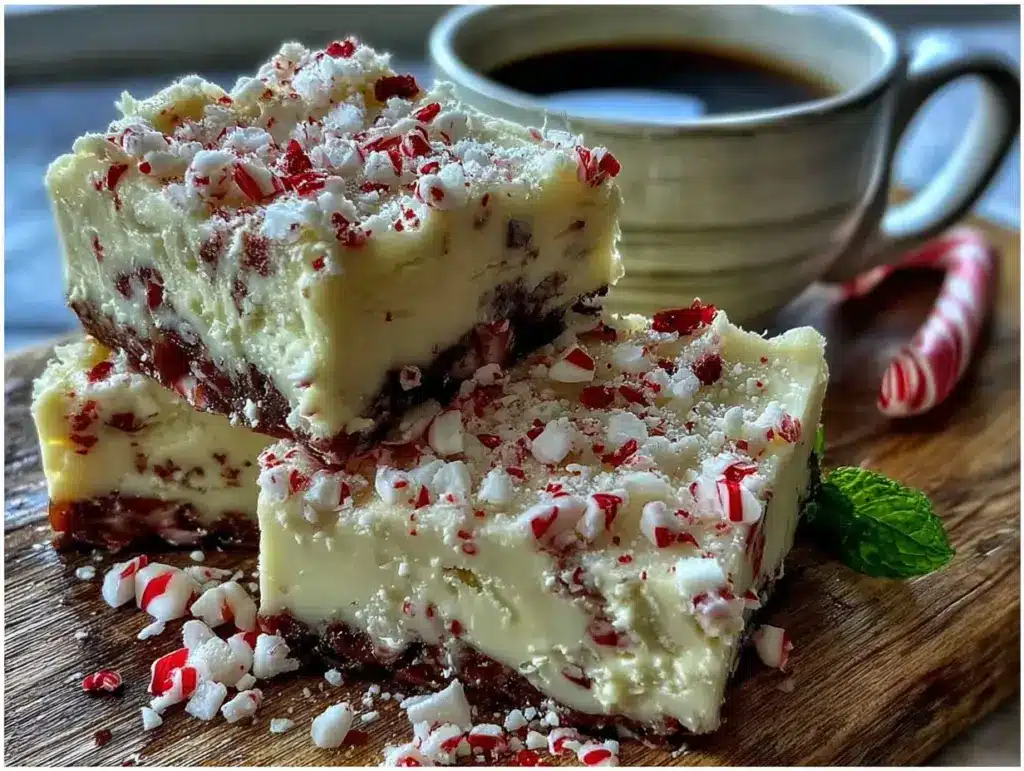
My sister-in-law, Rachel, did not trust white chocolate in fudge. She said it was too sweet, too finicky, and frankly, a waste of good butter. For years, she made the same dark chocolate fudge for every holiday cookie swap, and nobody dared complain. Last December, I showed up to her house with a tray of this Easy White Chocolate Peppermint Fudge tucked under my arm, mostly because I had a bag of candy canes I needed to use up. She took one polite bite, I think just to be nice, and then she just stood there in her kitchen, chewing slowly. She didn’t say anything for a solid ten seconds. Then she asked for the recipe. That was three years ago, and now this white chocolate peppermint fudge is the first thing she makes every single Christmas season. It is not fancy. It is not complicated. But it is the kind of thing that makes people stop mid-conversation and reach for another square. I think that is the real magic of a good recipe—it doesn’t need to be impressive. It just needs to be right.
Why You’ll Love This Recipe
Let’s be honest for a second. Most holiday fudge recipes are a bit of a production. You need a candy thermometer, you have to watch the sugar like a hawk, and one wrong move gives you grainy, crumbly disappointment. This Easy White Chocolate Peppermint Fudge is the exact opposite. It is the kind of recipe you make when you want something that looks like you spent hours in the kitchen, but you actually didn’t. It is forgiving. It is foolproof. And it tastes like the holidays in a way that feels genuinely nostalgic, not artificial.
- Only 3 Ingredients: White chocolate chips, sweetened condensed milk, and crushed peppermint. That is it. No heavy cream, no corn syrup, no weird specialty items.
- No Candy Thermometer Required: You melt everything together in a saucepan or the microwave. No precise temperatures, no sugar crystals to worry about.
- Sets Up Firm but Creamy: The texture is dense and smooth, not crumbly or greasy. It cuts cleanly into neat little squares.
- Perfect for Gifting: This fudge travels well, stacks beautifully in tins, and stays fresh for over a week. It is my go-to for Christmas neighbor gifts and teacher appreciation treats.
- Naturally Gluten-Free: As long as you check your white chocolate chips, this recipe is safe for gluten-free guests.
What makes this version different from the dozens of other white chocolate fudge recipes out there? It is the ratio. Most recipes use too much condensed milk, which makes the fudge soft and sticky. I tested this three times to find the sweet spot where the fudge is firm enough to hold its shape but still melts on your tongue. And the peppermint? You fold it in at the very end, so the pieces stay crunchy and don’t dissolve into the warm fudge. It is a small detail, but it makes a huge difference.
Ingredients Needed
This recipe uses just three simple ingredients to create a dessert that looks and tastes like it came from a fancy bakery. Each one plays a specific role, so choosing the right versions matters more than you might think.
- 3 cups (18 oz) white chocolate chips – Not white melting wafers or almond bark. You want real white chocolate chips that contain cocoa butter. I prefer Ghirardelli or Guittard for the creamiest texture. Store brands can work, but they sometimes contain more stabilizers, which can make the fudge grainy. (Look for at least 20% cocoa butter on the label.)
- 1 can (14 oz) sweetened condensed milk – This is not the same as evaporated milk. Sweetened condensed milk is thick, sticky, and already sweetened. It provides the creamy base and helps the fudge set without needing to boil sugar. I use Eagle Brand or Borden, but any brand works as long as it is full-fat. Do not use low-fat or dairy-free versions—they have different sugar and fat ratios and will not set properly.
- 1/2 cup crushed peppermint candy canes or starlight mints – You can buy pre-crushed peppermint in the baking aisle, but I like to crush my own. It gives you control over the texture. I use a rolling pin and a zip-top bag, and I leave some pieces a little larger for visual contrast. (Pro tip: crush them before you start anything else—it saves time and keeps your hands clean.)
- Optional: 1/2 teaspoon peppermint extract – If you want a stronger mint flavor, add this. The crushed candy provides mild flavor, but the extract kicks it up a notch. Use pure peppermint extract, not mint extract, which often has a spearmint taste.
That is the whole list. No butter, no cream, no vanilla. The sweetened condensed milk does all the heavy lifting, and the white chocolate chips provide the structure. It is almost too simple, but that is exactly why it works.
Equipment Needed
You do not need a lot of fancy tools for this recipe, which is one of the reasons I make it so often during the chaotic holiday season. Here is what you will need:
- 8×8-inch baking pan – This is the ideal size for a 1-inch thick fudge. If you only have a 9×9, the fudge will be slightly thinner and may set faster. Line it with parchment paper or aluminum foil, leaving overhang on two sides for easy lifting.
- Medium saucepan – For melting everything together on the stovetop. A heavy-bottomed saucepan works best to prevent scorching. Alternatively, you can use a large microwave-safe bowl if you prefer the microwave method.
- Silicone spatula – For stirring. A wooden spoon works too, but a silicone spatula scrapes the sides and bottom more thoroughly, which helps prevent scorching.
- Sharp knife – For cutting the fudge into clean squares. A chef’s knife or a long serrated knife both work. Wipe the blade clean between cuts for the neatest edges.
- Rolling pin or meat mallet – For crushing the candy canes if you are doing it yourself. A food processor works too, but pulse gently—you want pieces, not powder.
That is it. No double boiler, no candy thermometer, no mixer. This is the kind of recipe you can throw together between wrapping presents and watching a Christmas movie.
Preparation Method
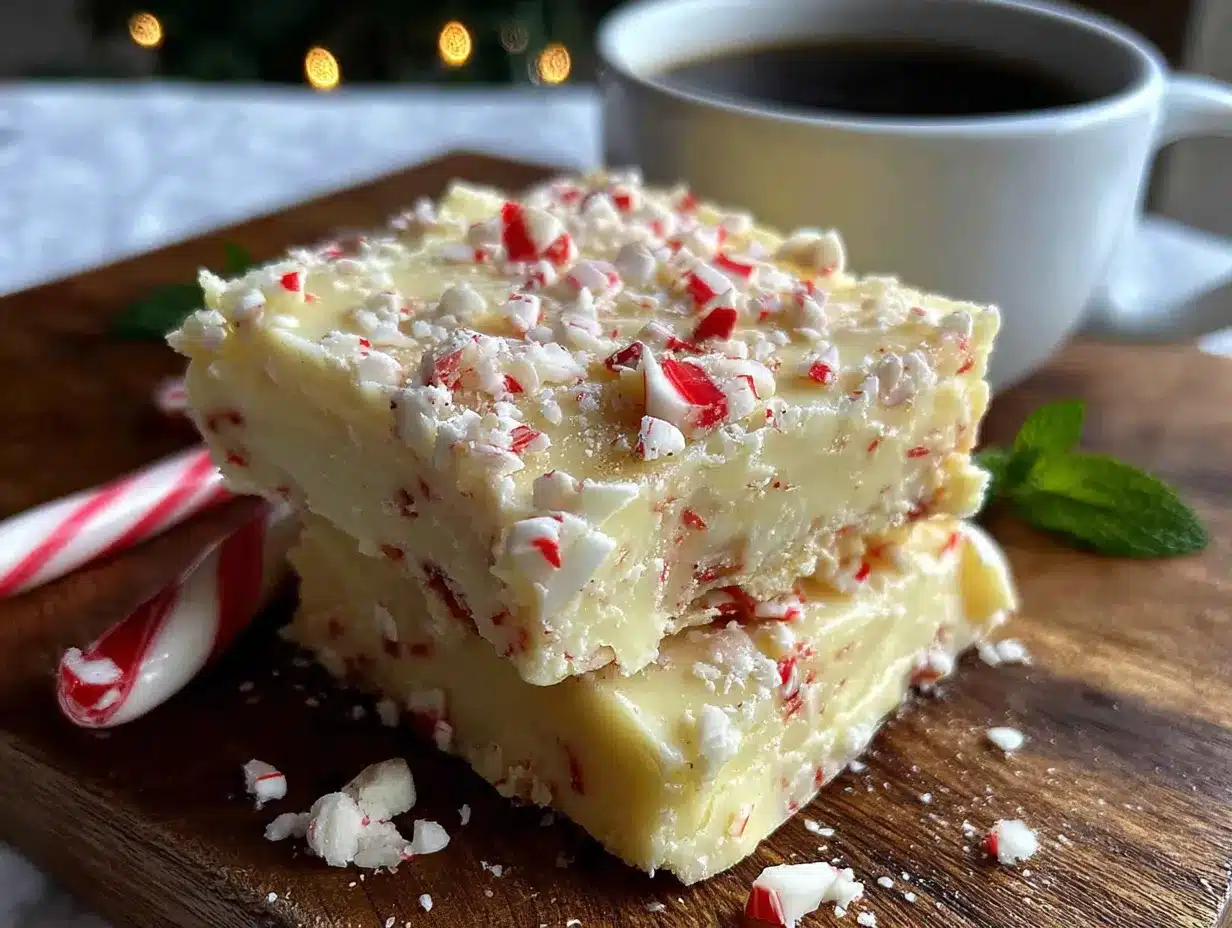
This Easy White Chocolate Peppermint Fudge comes together in about 15 minutes of active time, plus 2 to 3 hours of chilling. The process is straightforward, but a few small details make the difference between perfect fudge and a sticky mess.
- Prepare the pan. Line an 8×8-inch baking pan with parchment paper or aluminum foil. Leave about 2 inches of overhang on two opposite sides. This creates handles that let you lift the whole block of fudge out cleanly later. Lightly spray the paper or foil with nonstick cooking spray for extra insurance.
- Crush the peppermint. Place 1/2 cup of candy canes or starlight mints in a sturdy zip-top bag. Seal it, then wrap it in a kitchen towel (this muffles the noise and contains any sharp pieces). Use a rolling pin or the flat side of a meat mallet to crush the candy into small pieces. You want a mix of fine crumbs and tiny chunks—not powder. Set aside.
- Combine the base ingredients. In a medium saucepan over low heat, combine the 3 cups of white chocolate chips and the entire can of sweetened condensed milk. Stir constantly with a silicone spatula. Do not walk away. White chocolate scorches easily because of its high sugar and milk solids content. Low heat and continuous stirring are non-negotiable here.
- Melt until smooth. Keep stirring until the white chocolate chips are completely melted and the mixture is thick, smooth, and glossy. This usually takes 5 to 7 minutes. The mixture will look slightly grainy at first, but it will smooth out as the chocolate melts. If you see any white streaks or lumps, keep stirring—they will disappear. Remove the pan from the heat immediately once everything is combined.
- Add the peppermint (and extract if using). Stir in the crushed peppermint candy. If you are using the optional peppermint extract, add it now and stir until evenly distributed. The mixture will thicken slightly as the candy cools it down. Work quickly but gently—you do not want to melt the candy pieces completely.
- Transfer to the pan. Pour the fudge mixture into the prepared pan. Use the silicone spatula to spread it evenly into all corners. The mixture is thick, so you may need to press it gently. Try to make the surface as level as possible. Tap the pan lightly on the counter a few times to release any air bubbles.
- Sprinkle extra peppermint on top (optional). If you reserved a tablespoon of crushed peppermint, sprinkle it over the top now. Press it in very gently with your fingers or the back of a spoon so it sticks to the surface.
- Chill until firm. Place the pan in the refrigerator, uncovered, for at least 2 hours. For best results, chill for 3 hours. The fudge should be firm to the touch and pull away from the edges of the paper slightly. Do not rush this step—warm fudge will not cut cleanly.
- Lift and cut. Once the fudge is fully set, use the parchment overhang to lift the entire block out of the pan. Place it on a cutting board. Use a sharp knife to cut it into 1-inch squares. Wipe the blade clean between cuts for the neatest edges. If the fudge feels too hard straight from the fridge, let it sit at room temperature for 5 minutes before cutting.
- Serve or store. Arrange the squares on a platter or pack them into gift tins. The fudge is best served at room temperature, where the texture becomes perfectly creamy.
Cooking Tips & Techniques
I have made this Easy White Chocolate Peppermint Fudge more times than I can count, and I have definitely learned a few things the hard way. Here are the tips I wish someone had told me the first time.
Low heat is your friend. The number one mistake people make with white chocolate fudge is using medium or high heat to speed things up. White chocolate burns at a lower temperature than dark or milk chocolate because of its high milk solids content. If you see the mixture turning brown or smelling toasted, you have gone too far. Keep the burner on low and stir constantly. Patience here pays off.
Do not over-stir once the candy is added. Once you fold in the crushed peppermint, stir just enough to distribute it evenly. Over-stirring can cause the candy pieces to dissolve into the warm fudge, leaving you with a pink tinted fudge instead of distinct white and red speckles. You want those little red pops of color and crunch.
Watch for condensation. If you chill the fudge uncovered in the refrigerator, it can sometimes develop condensation on the surface. This is harmless, but it can make the top slightly sticky. To prevent this, let the fudge cool at room temperature for 10 minutes before refrigerating, and once it is fully set, cover the pan loosely with plastic wrap.
Cutting clean squares. The cleanest cuts come from a room-temperature knife. If your fudge is too cold, it can crack. If it is too warm, it will smear. Let the fudge sit out for 5 to 10 minutes after chilling, then use a sharp knife and wipe it clean between each cut. A bench scraper also works beautifully for this.
Humidity matters. Fudge is sensitive to humidity. If you live in a humid climate or it is a rainy day, the fudge may take longer to set and could be slightly softer. You can compensate by chilling it for an extra hour. Store it in an airtight container to prevent it from absorbing moisture from the air.
Variations & Adaptations
One of the best things about this Easy White Chocolate Peppermint Fudge is how easy it is to adapt. I have played around with it quite a bit, and here are some of my favorite variations.
Dark Chocolate Peppermint Fudge: Swap the white chocolate chips for semi-sweet or dark chocolate chips. The process is exactly the same, but the bitterness of the dark chocolate balances the sweetness of the condensed milk beautifully. Use about 3 cups of dark chocolate chips and follow the same melting instructions. This version feels a little more grown-up, if that makes sense.
Cookies and Cream Fudge: This is my nephew’s favorite. After melting the white chocolate and condensed milk, fold in 1 cup of crushed Oreo cookies (about 8 to 10 cookies) along with the peppermint. The cookie pieces add texture and a slight cocoa flavor that plays nicely with the white chocolate.
Peppermint Bark Fudge: For a layered look, pour half of the fudge mixture into the pan, sprinkle with crushed peppermint, then pour the remaining fudge on top. Swirl gently with a knife for a marbled effect. It looks impressive but takes almost no extra effort.
Vegan Version: Use dairy-free white chocolate chips and a can of sweetened condensed coconut milk. The texture will be slightly softer, so plan to keep the fudge refrigerated until serving. The flavor is still rich and creamy, with a subtle coconut undertone that actually pairs well with peppermint.
Extra Minty: If you are a peppermint purist like my husband, add 1/2 teaspoon of peppermint extract along with the crushed candy. You can also sprinkle a tiny bit of fine sea salt on top before chilling to cut through the sweetness and enhance the mint flavor.
Serving & Storage Suggestions
This Easy White Chocolate Peppermint Fudge is best served at room temperature. Straight from the fridge, it is firm and a little dense, but after 10 to 15 minutes on the counter, it softens to a perfectly creamy texture that melts on your tongue. Arrange the squares on a festive platter or layer them in a gift tin with parchment paper between each layer.
For a holiday dessert spread, I love pairing this fudge with a batch of peppermint bark chocolate chip cookies for a double dose of minty goodness. It also works beautifully on a Christmas tree charcuterie board, where the white and red speckles add a festive pop of color alongside cheeses, nuts, and dried fruits.
Storing: Store the fudge in an airtight container at room temperature for up to 5 days. If your kitchen runs warm (above 72°F), keep it in the refrigerator instead. Layer the squares between sheets of parchment paper to prevent them from sticking together. The fudge also freezes beautifully. Wrap the whole block or individual squares tightly in plastic wrap, then place them in a freezer-safe bag or container. Freeze for up to 3 months. Thaw in the refrigerator overnight, then let it come to room temperature before serving.
Flavor development: Here is something interesting—this fudge actually tastes better the next day. The flavors meld together overnight, and the texture becomes even creamier. If you can resist eating it right away, make it a day ahead for the best results.
Nutritional Information & Benefits
Let’s be real—this is a treat, not a health food. But knowing what is in it helps you enjoy it mindfully. Here is the estimated nutritional breakdown per 1-inch square (based on 36 squares per batch):
| Nutrient | Amount per Square |
|---|---|
| Calories | 145 |
| Total Fat | 7g |
| Saturated Fat | 4.5g |
| Cholesterol | 8mg |
| Sodium | 35mg |
| Total Carbohydrates | 20g |
| Sugars | 19g |
| Protein | 2g |
This fudge is naturally gluten-free, but always check the labels on your white chocolate chips and candy canes to be sure. Some brands of white chocolate contain barley malt or other gluten-containing ingredients. The recipe is also vegetarian, and as mentioned above, it can be adapted to be vegan with dairy-free substitutions.
On the plus side, white chocolate does contain a small amount of calcium and phosphorus from the milk solids. And peppermint has been used for centuries to aid digestion—so maybe eating a square after a big holiday meal is not such a bad idea. Everything in moderation, right?
Conclusion
This Easy White Chocolate Peppermint Fudge is the kind of recipe that earns a permanent spot in your holiday rotation. It is simple enough to make with kids on a snowy afternoon, but pretty enough to gift to your boss or your neighbor. It requires no special skills, no expensive equipment, and no stressful timing. Just three ingredients, a little patience while it chills, and you have a dessert that makes people smile every single time.
I love this recipe because it reminds me that the best holiday traditions are often the simplest ones. Rachel now makes this fudge every year, and she texts me a photo of her tray before she even cuts it. It is our little tradition, and it started with a batch of fudge I almost did not bother making.
If you try this recipe, I would love to hear how it turns out. Leave a comment below and let me know if you added any twists, or if you kept it classic. And if you are looking for more easy holiday treats, you might enjoy these soft-batch chocolate chip cookies or this white chocolate cranberry bark. Happy holidays, and happy fudge-making!
Frequently Asked Questions
Can I use white chocolate bars instead of chips?
Yes, absolutely. Chop the bars into small, even pieces so they melt uniformly. Use the same weight—18 ounces total. Chips are just more convenient because they are already uniformly sized, but bars work perfectly fine.
Why is my fudge grainy?
Grainy fudge usually happens when the white chocolate gets too hot too quickly, causing the cocoa butter to separate from the other ingredients. Always melt on low heat and stir constantly. If you see the mixture starting to look greasy or separated, remove it from the heat immediately and stir vigorously to bring it back together.
Can I make this fudge in the microwave?
Yes. Place the white chocolate chips and sweetened condensed milk in a large microwave-safe bowl. Microwave in 30-second intervals on 50% power, stirring thoroughly after each interval. It usually takes 2 to 3 minutes total. Be careful not to overheat—the mixture can burn quickly in the microwave.
How do I crush candy canes without making a mess?
Put the candy canes in a sturdy zip-top bag, then wrap the bag in a kitchen towel before crushing. The towel absorbs the sound and contains any sharp pieces that might poke through the bag. Use a rolling pin or the flat side of a meat mallet. A food processor works too, but pulse gently to avoid turning everything into powder.
Can I use sugar-free white chocolate?
You can, but the texture will be different. Sugar-free white chocolate often contains different types of sweeteners and stabilizers that do not melt the same way. If you try it, expect a slightly softer, less stable fudge that may need longer chilling time. I recommend sticking with regular white chocolate for the best results.
Pin This Recipe!


Easy White Chocolate Peppermint Fudge: Best 3-Ingredient Holiday Treat
- Total Time: 2 hours 20 minutes (including chilling)
- Yield: 36 servings 1x
Description
This Easy White Chocolate Peppermint Fudge is a simple, foolproof holiday treat made with just three ingredients. It sets up firm and creamy, perfect for gifting or enjoying at home.
Ingredients
- 3 cups (18 oz) white chocolate chips
- 1 can (14 oz) sweetened condensed milk
- 1/2 cup crushed peppermint candy canes or starlight mints
- Optional: 1/2 teaspoon peppermint extract
Instructions
- Prepare the pan. Line an 8×8-inch baking pan with parchment paper or aluminum foil, leaving about 2 inches of overhang on two opposite sides. Lightly spray with nonstick cooking spray.
- Crush the peppermint. Place 1/2 cup of candy canes or starlight mints in a sturdy zip-top bag. Seal, wrap in a kitchen towel, and crush with a rolling pin or meat mallet into small pieces (mix of crumbs and tiny chunks). Set aside.
- Combine the base ingredients. In a medium saucepan over low heat, combine 3 cups white chocolate chips and the entire can of sweetened condensed milk. Stir constantly with a silicone spatula.
- Melt until smooth. Continue stirring until the white chocolate chips are completely melted and the mixture is thick, smooth, and glossy (5-7 minutes). Remove from heat immediately.
- Add the peppermint. Stir in the crushed peppermint candy and optional peppermint extract until evenly distributed.
- Transfer to the pan. Pour the fudge mixture into the prepared pan and spread evenly. Tap the pan lightly on the counter to release air bubbles.
- Sprinkle extra peppermint on top (optional). If desired, reserve 1 tablespoon of crushed peppermint and sprinkle over the top, pressing gently.
- Chill until firm. Refrigerate uncovered for at least 2 hours, or 3 hours for best results.
- Lift and cut. Use the parchment overhang to lift the fudge out of the pan. Cut into 1-inch squares with a sharp knife, wiping the blade clean between cuts.
- Serve or store. Serve at room temperature or store in an airtight container.
Notes
Use real white chocolate chips (at least 20% cocoa butter) for best texture. Do not use low-fat or dairy-free sweetened condensed milk. For stronger mint flavor, add 1/2 teaspoon peppermint extract. Fudge can be stored at room temperature for up to 5 days or frozen for up to 3 months.
- Prep Time: 15 minutes
- Cook Time: 5-7 minutes
- Category: Dessert
- Cuisine: American
Nutrition
- Serving Size: 1 square
- Calories: 145
- Sugar: 19
- Sodium: 35
- Fat: 7
- Saturated Fat: 4.5
- Carbohydrates: 20
- Protein: 2
Keywords: white chocolate fudge, peppermint fudge, 3-ingredient fudge, holiday fudge, easy fudge recipe, Christmas fudge