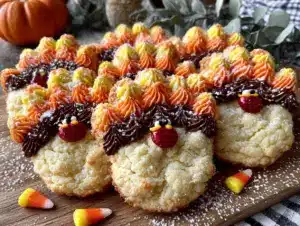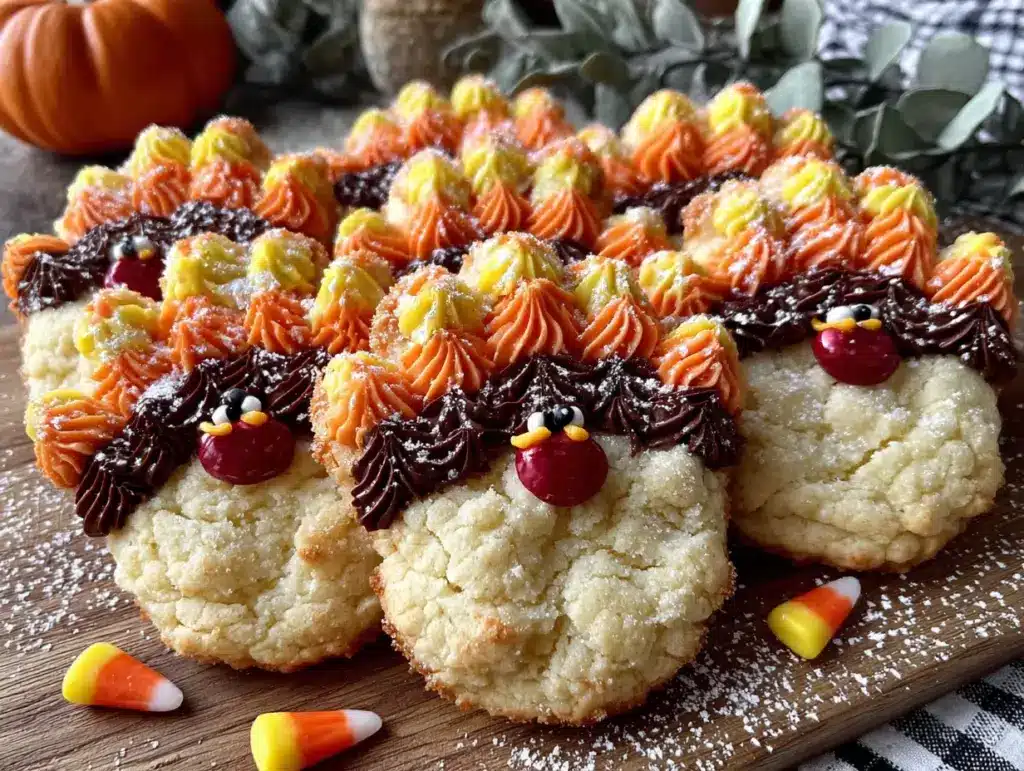
It was 11:47 PM on a random Wednesday in November, and I was supposed to be meal-prepping for Thanksgiving. That was the plan, anyway. But instead of chopping onions or brining a turkey, I found myself staring into the pantry, hit with a very specific, very weird craving. I didn’t have any fancy cookie cutters or sprinkles, but I had a bag of sugar cookie mix, a tub of frosting, and a sudden, almost desperate urge to make something fun. The idea just arrived, fully formed: what if I traced my hand?
Honestly, I wasn’t trying to be clever. I was just too tired to dig for the cookie cutters I knew were buried somewhere in the back of a cabinet. So I grabbed a piece of parchment paper, traced my own hand with a knife, and used it as a stencil. It was messy, a little ridiculous, and the dough was sticking to my fingers. But when those hand-shaped cookies came out of the oven, golden and slightly puffy, I knew I was onto something. I mean, they looked like little turkey tails, didn’t they?
That late-night experiment turned into what my kids now call “the hand turkey cookies.” Maybe you’ve been there, too—staring at a pile of sugar cookie dough, wanting to make something memorable but without the energy for a Pinterest-perfect project. This recipe is that. It’s the cookie that came from being too tired to do it the “right” way, and honestly? That’s what makes it so good. It’s the kind of kitchen magic that only happens when you stop overthinking and just let your hands do the work.
Why You’ll Love This Recipe
Let me tell you, after testing this recipe on three separate occasions (and one very enthusiastic preschool class), I can confidently say these Easy Turkey Hand Sugar Cookies are a game-changer. They’re not just cute—they’re genuinely foolproof, and here’s why you’ll fall for them too:
- Quick & Easy: From start to finish, you’re looking at about 45 minutes. That includes chilling time, which is practically nothing for cut-out cookies. Perfect for those “I need a classroom treat tomorrow” moments.
- Simple Ingredients: You probably have everything in your pantry right now. No special extracts, no hard-to-find sprinkles. Just butter, sugar, flour, and a little bit of creativity.
- Perfect for Thanksgiving: Whether it’s a classroom party, a family gathering, or just a rainy afternoon, these cookies scream “holiday fun” without the stress of elaborate decorating.
- Crowd-Pleaser: I’ve made these for picky toddlers, skeptical grandparents, and even my neighbor who “doesn’t do themed desserts.” They all disappeared within minutes. Kids love the hands-on tracing part, and adults love how nostalgic they feel.
- Unbelievably Delicious: This isn’t just a gimmick cookie. The sugar cookie base is soft in the middle, slightly crisp on the edges, and has that perfect buttery vanilla flavor that takes you right back to childhood.
What makes this recipe different from the dozens of other turkey cookies out there? It’s the personal touch. Every single cookie is unique because it’s literally traced from a real hand. Your hand, your kid’s hand, your neighbor’s hand—it doesn’t matter. Each cookie has its own personality, its own little imperfections. That’s the magic of it. It’s not about perfection; it’s about the memory of tracing around someone’s fingers and laughing at how silly it looks. And honestly? That’s way better than any cookie cutter could ever be.
This recipe is comfort food reimagined—simpler, faster, but with the same soul-soothing satisfaction. It’s the kind of cookie that makes you close your eyes after the first bite, not because it’s fancy, but because it tastes exactly like the best parts of the holiday season.
What Ingredients You Will Need
This recipe uses simple, wholesome ingredients to deliver that classic sugar cookie flavor and soft-yet-slightly-crisp texture. No fancy stuff here—just pantry staples that work together beautifully. Here’s what you’ll need:
For the Sugar Cookie Dough
- 2 ¾ cups all-purpose flour (spooned and leveled—don’t scoop directly from the bag, or you’ll end up with dry dough)
- 1 cup unsalted butter, softened to room temperature (I prefer Kerrygold for its rich flavor, but any good-quality butter works)
- 1 cup granulated sugar
- 1 large egg, at room temperature (cold eggs can make the dough seize up)
- 2 teaspoons vanilla extract (use pure vanilla extract, not imitation, if you can—it makes a real difference in flavor)
- ½ teaspoon baking powder
- ½ teaspoon salt (fine sea salt is best)
For the Royal Icing or Buttercream
- 2 cups powdered sugar (sifted to avoid lumps)
- 3 tablespoons milk (whole milk gives the best consistency, but any milk works)
- 1 teaspoon vanilla extract
- Food coloring (red, orange, yellow, and brown for the turkey feathers—I like gel colors for more vibrant shades)
- Candy eyes (optional, but they make the turkeys come alive)
- Orange and red M&M’s or candy corn (for the beak and wattle—candy corn is more traditional, but M&M’s hold up better in storage)
Ingredient Selection Tips
For the best texture, make sure your butter is truly softened—it should give slightly when you press it with your finger, but not be melty. I’ve made the mistake of using cold butter before, and the dough was impossible to roll out. Also, if you’re using a gluten-free flour blend, look for one that includes xanthan gum for structure. I’ve tested this with Bob’s Red Mill 1-to-1 Baking Flour, and it worked beautifully.
Substitution Guidance
Need a dairy-free option? Swap the butter with a high-quality vegan butter stick (not the spreadable kind in a tub) and use almond milk in the icing. For an egg-free version, use a flax egg (1 tablespoon ground flaxseed mixed with 3 tablespoons water, let sit for 5 minutes). The texture will be slightly less tender, but it still works great for decorating.
Equipment Needed
- Large mixing bowl and hand mixer or stand mixer (a wooden spoon works too, but your arm will get tired)
- Rolling pin (I use a French-style tapered pin, but any rolling pin works)
- Parchment paper (essential for tracing and for easy cleanup)
- Sharp knife or pizza cutter (for cutting around the hand tracing)
- Baking sheets (light-colored metal sheets give the most even browning)
- Cooling rack (wire racks are best for letting cookies cool completely before decorating)
- Piping bags or small zip-top bags (for the icing—snip a tiny corner off the bag for precise decorating)
- Small bowls (for dividing and coloring the icing)
- Toothpicks (for spreading icing into tight spots and for popping air bubbles)
Honestly, you don’t need anything fancy. I’ve made these cookies using a wine bottle as a rolling pin (true story—it was a desperate Thanksgiving Eve), and they turned out just fine. The most important tool is your hand, literally. Oh, and a good sense of humor when the dough sticks to your fingers. It happens to all of us.
Preparation Method
- Make the dough: In a large bowl, cream together the softened butter and granulated sugar until light and fluffy, about 3 minutes with a hand mixer. Scrape down the sides of the bowl, then add the egg and vanilla extract. Beat until well combined, about 1 minute. In a separate bowl, whisk together the flour, baking powder, and salt. Gradually add the dry ingredients to the wet mixture, mixing on low speed until a soft dough forms. Don’t overmix—stop as soon as the flour disappears.
- Chill the dough: Divide the dough into two equal portions, flatten each into a disc, and wrap tightly in plastic wrap. Refrigerate for at least 30 minutes (or up to 3 days). This step isn’t optional—chilled dough is much easier to roll out and holds its shape better in the oven. If you skip this, your hand cookies will spread into unrecognizable blobs. Trust me, I learned this the hard way.
- Trace your hand: While the dough chills, trace your hand (or your child’s hand) onto a piece of parchment paper. Cut out the tracing to create a stencil. The fingers will become the turkey’s feathers, and the palm will be the body. Make sure the fingers are spread slightly apart for that classic turkey tail look.
- Roll and cut: Preheat your oven to 350°F (175°C). On a lightly floured surface, roll out one disc of dough to about ¼-inch thickness. Place your parchment hand stencil on top of the dough and use a sharp knife or pizza cutter to carefully cut around it. Transfer the hand-shaped dough to a parchment-lined baking sheet, spacing them about 2 inches apart. Repeat with the remaining dough. You should get about 8-10 hand cookies, depending on the size of your hand.
- Bake: Bake for 8-10 minutes, or until the edges are just barely golden brown. The centers should look set but not browned. Let the cookies cool on the baking sheet for 5 minutes, then transfer to a wire rack to cool completely. Do not try to decorate warm cookies—the icing will melt into a sad, runny mess.
- Make the icing: In a medium bowl, whisk together the powdered sugar, milk, and vanilla extract until smooth. The consistency should be thick but flowy—think toothpaste, not water. If it’s too thick, add a drop more milk. If it’s too thin, add a bit more powdered sugar. Divide the icing into small bowls and color each one: orange for the palm (the turkey body), and red, yellow, and brown for the fingers (the feathers).
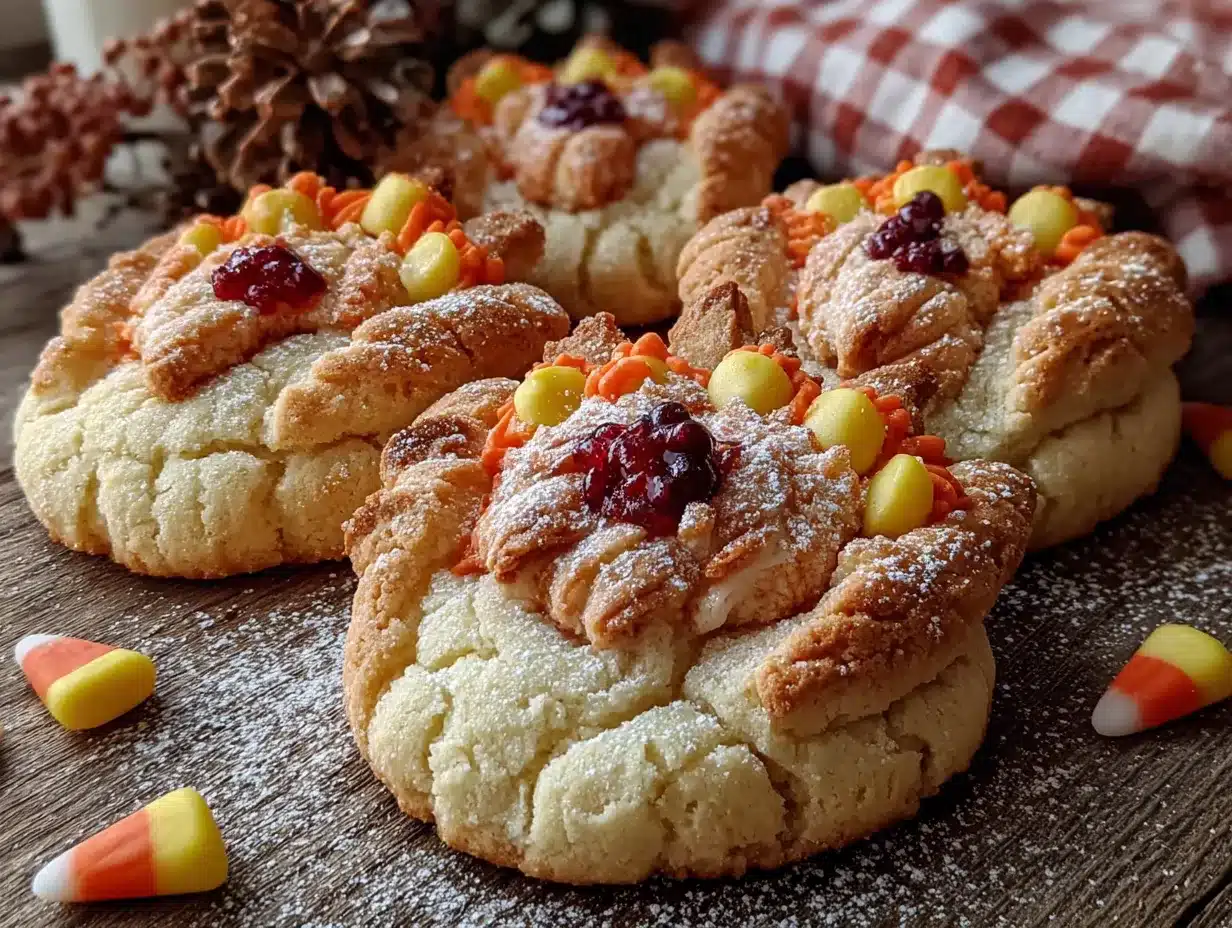
- Decorate the turkeys: Using a piping bag or a small zip-top bag with a tiny corner snipped off, pipe the orange icing onto the palm area of each cookie. Use a toothpick to spread it evenly if needed. Then, pipe different colors onto each finger to represent the feathers. Let the icing set for about 10 minutes before adding the face details. Place two candy eyes on the palm (near the top, where the thumb would be), and add an orange M&M or candy corn for the beak. A small red M&M or a dot of red icing works for the wattle (that dangly bit under the beak). Let the cookies sit for at least 1 hour to allow the icing to fully harden.
Sensory cue: When you pull these cookies out of the oven, you should smell warm butter and vanilla. The edges will be a pale, sun-kissed gold, and the centers will feel slightly soft to the touch. If they smell like toasted flour, they’ve been in too long.
Cooking Tips & Techniques
Here’s something I learned after my first disastrous batch: the thickness of your dough matters more than you think. Roll it too thin, and your hand cookies will be brittle and break apart when you try to decorate them. Roll it too thick, and they’ll puff up into little pillows, losing the hand shape entirely. Aim for exactly ¼ inch—that’s the sweet spot where they hold their shape but still have a tender bite.
Another thing: when you’re cutting around the hand stencil, don’t stress about being perfect. The beauty of these cookies is that they’re handmade. My first few attempts looked like deformed alien hands, but once they were decorated with icing and candy eyes, they transformed into the cutest little turkeys. The imperfections are what make them charming.
One mistake I made early on was trying to bake all the cookies at once. Don’t do that. Bake one sheet at a time on the middle rack of your oven. If you overcrowd the oven, the heat circulates unevenly, and some cookies will be overdone while others are still raw. Also, always let your baking sheets cool completely between batches. Placing dough on a hot sheet will cause the butter to melt immediately, leading to flat, spread-out cookies.
For the icing, here’s a pro tip: if you’re making these with kids, skip the piping bags and just use small paintbrushes. Seriously. Give each kid a clean, food-safe paintbrush and a little bowl of icing, and let them “paint” their turkey. It’s less messy than piping bags (which kids tend to squeeze too hard), and they love the artistic freedom. I learned this trick from my friend Jenna, who runs a kids’ baking class, and it’s been a game-changer for classroom parties.
Finally, if you’re short on time, you can use store-bought sugar cookie dough. I won’t judge. I’ve done it myself on those weeks when life feels like a hurricane. Just make sure it’s the refrigerated kind that comes in a roll, not the pre-cut slices. You need the dough to be pliable enough to roll out and cut into hand shapes.
Variations & Adaptations
This recipe is endlessly adaptable, and that’s part of what makes it so fun. Here are a few variations I’ve tried and loved:
- Gluten-Free Version: Swap the all-purpose flour with a 1-to-1 gluten-free baking blend. I’ve tested this with King Arthur’s Measure for Measure blend, and the cookies came out slightly more crumbly but still delicious. Add an extra tablespoon of butter to compensate for the lack of gluten.
- Vegan Option: Use vegan butter sticks and a flax egg (1 tablespoon ground flaxseed + 3 tablespoons water, let sit for 5 minutes). The dough will be a bit stickier, so chill it for an extra 15 minutes before rolling. For the icing, use almond milk and vegan powdered sugar (some brands use bone char in processing, so check labels).
- Chocolate Hand Turkeys: Replace ¼ cup of the flour with unsweetened cocoa powder for a chocolate version. The chocolate dough is a little trickier to work with (it’s more delicate), but the flavor is incredible. My kids actually prefer these over the original.
- Spiced Autumn Version: Add 1 teaspoon of cinnamon, ½ teaspoon of nutmeg, and ¼ teaspoon of cloves to the dry ingredients. This gives the cookies a warm, cozy flavor that’s perfect for Thanksgiving. The spices also make your whole kitchen smell like heaven.
- Mini Hand Cookies: Use a child’s hand for the tracing to make smaller cookies. These are perfect for classroom parties or as little gifts. Just reduce the baking time by 2-3 minutes since they’re smaller.
- No-Icing Option: If you’re really short on time or just not in the mood for decorating, you can sprinkle the cookies with colored sugar before baking. The hand shape is still recognizable, and they look festive without any extra work.
Serving & Storage Suggestions
These cookies are best served at room temperature, and they’re honestly at their peak within 24 hours of decorating. The icing stays firm but not rock-hard, and the cookie itself is perfectly tender. I love arranging them on a platter with the “feathers” fanning out, almost like a bouquet of turkeys. It makes for a stunning centerpiece at any Thanksgiving gathering.
For storage, place the decorated cookies in a single layer in an airtight container, with parchment paper between each layer. They’ll keep at room temperature for up to 5 days. Do not refrigerate them—the moisture in the fridge can make the icing weep and the cookies become soft and soggy. If you live in a humid climate, add a silica gel packet (the kind you find in shoe boxes) to the container to absorb excess moisture.
These cookies also freeze beautifully. Before decorating, place the baked, cooled cookies in a freezer-safe bag or container, separated by parchment paper. They’ll keep for up to 3 months. When you’re ready to serve, thaw them at room temperature for about 30 minutes, then decorate as usual. The icing won’t freeze well, so always add that after thawing.
One thing I love about these cookies is that the flavors actually mellow and meld together after a day or two. The vanilla becomes more pronounced, and the butteriness deepens. So if you can resist eating them all immediately (I never can), they’ll taste even better on day two.
Nutritional Information & Benefits
Let’s be real—these are sugar cookies, so they’re not exactly health food. But here’s the estimated nutritional breakdown per cookie (based on 10 cookies with icing):
- Calories: 285
- Total Fat: 12g
- Saturated Fat: 7g
- Carbohydrates: 42g
- Sugar: 26g
- Protein: 3g
- Sodium: 95mg
That said, there are a few redeeming qualities. The butter provides a small amount of vitamin A and healthy saturated fats (in moderation, of course). The egg adds a bit of protein and choline, which is great for brain health. And honestly? The biggest benefit here is the joy of making something with your hands. There’s a therapeutic quality to tracing, cutting, and decorating these cookies—especially if you’re doing it with kids. It’s a chance to slow down, be present, and create something together. That’s a kind of nutrition we all need more of.
For dietary considerations: these cookies contain gluten, dairy, and eggs. They are not suitable for vegans or those with celiac disease unless modified. The candy eyes and M&M’s may contain traces of nuts, so check labels if you’re serving these to children with allergies.
Conclusion
These Easy Turkey Hand Sugar Cookies are more than just a recipe—they’re a tradition waiting to happen. They’re the kind of thing you’ll make year after year, each time tracing a slightly bigger hand as your kids grow, or laughing at how your own hand looks compared to your partner’s. They’re messy, imperfect, and absolutely wonderful.
I hope you give these a try, and I hope you make them your own. Maybe you’ll use different colors, or add sprinkles, or turn them into reindeer for Christmas. The beauty of this recipe is that it’s a starting point, not a rulebook. So grab some butter, trace your hand, and get baking. And when you do, I’d love to hear about it. Drop a comment below and tell me how your turkeys turned out—especially if they looked as ridiculous as my first batch did. Because honestly? The ridiculous ones are always the best.
Frequently Asked Questions
Can I use a different type of cookie dough?
Absolutely! While this recipe uses a classic sugar cookie base, you can use any rolled cookie dough you like. Gingerbread works wonderfully for a spiced version, and even a shortbread dough can work (though it’s more delicate). Just make sure the dough is sturdy enough to hold the hand shape.
How do I prevent the dough from sticking to the knife when cutting?
Dust your knife or pizza cutter with a little bit of flour before cutting. If the dough starts sticking to the blade, wipe it clean and re-flour. You can also chill the cut-out shapes on the baking sheet for 10 minutes before baking to help them hold their shape.
Can I make these cookies ahead of time for a party?
Yes! You can bake the cookies up to a week in advance and store them in an airtight container at room temperature. Decorate them the day before your party for the freshest look. Or freeze the baked, undecorated cookies for up to 3 months.
My icing is too runny. What did I do wrong?
You likely added too much milk. Fix it by adding more powdered sugar, one tablespoon at a time, until the icing reaches a thick, spreadable consistency. Conversely, if your icing is too thick, add a drop of milk at a time until it loosens up.
Can I use this hand-tracing technique for other holidays?
Definitely! The hand shape is incredibly versatile. For Christmas, turn the hand into a reindeer by adding antlers on the thumb and pinky fingers. For Easter, make it a bunny by adding long ears on the top fingers. For Halloween, turn it into a spooky tree or a monster. The possibilities are endless!
Pin This Recipe!


Easy Turkey Hand Sugar Cookies Recipe for Kids
- Total Time: 45 minutes (including 30 minutes chilling)
- Yield: 8-10 cookies 1x
Description
These Easy Turkey Hand Sugar Cookies are a fun, foolproof Thanksgiving treat made by tracing your hand to create unique turkey-shaped cookies. Perfect for kids and family gatherings, they’re quick to make with simple ingredients and require no special cookie cutters.
Ingredients
- 2 ¾ cups all-purpose flour (spooned and leveled)
- 1 cup unsalted butter, softened to room temperature
- 1 cup granulated sugar
- 1 large egg, at room temperature
- 2 teaspoons vanilla extract (pure vanilla extract recommended)
- ½ teaspoon baking powder
- ½ teaspoon salt (fine sea salt)
- 2 cups powdered sugar (sifted)
- 3 tablespoons milk (whole milk recommended)
- 1 teaspoon vanilla extract
- Food coloring (red, orange, yellow, brown; gel colors recommended)
- Candy eyes (optional)
- Orange and red M&M’s or candy corn (for beak and wattle)
Instructions
- Make the dough: In a large bowl, cream together the softened butter and granulated sugar until light and fluffy, about 3 minutes with a hand mixer. Scrape down the sides, then add the egg and vanilla extract. Beat until well combined, about 1 minute. In a separate bowl, whisk together the flour, baking powder, and salt. Gradually add the dry ingredients to the wet mixture, mixing on low speed until a soft dough forms. Do not overmix.
- Chill the dough: Divide the dough into two equal portions, flatten each into a disc, and wrap tightly in plastic wrap. Refrigerate for at least 30 minutes (or up to 3 days).
- Trace your hand: While the dough chills, trace your hand (or your child’s hand) onto a piece of parchment paper. Cut out the tracing to create a stencil. Ensure fingers are spread slightly apart.
- Roll and cut: Preheat oven to 350°F (175°C). On a lightly floured surface, roll out one disc of dough to about ¼-inch thickness. Place the parchment hand stencil on top and use a sharp knife or pizza cutter to carefully cut around it. Transfer the hand-shaped dough to a parchment-lined baking sheet, spacing them about 2 inches apart. Repeat with remaining dough. You should get about 8-10 hand cookies.
- Bake: Bake for 8-10 minutes, or until edges are just barely golden brown. Centers should look set but not browned. Let cookies cool on the baking sheet for 5 minutes, then transfer to a wire rack to cool completely.
- Make the icing: In a medium bowl, whisk together the powdered sugar, milk, and vanilla extract until smooth. The consistency should be thick but flowy (like toothpaste). Divide the icing into small bowls and color each one: orange for the palm, and red, yellow, and brown for the fingers.
- Decorate the turkeys: Using a piping bag or small zip-top bag with a tiny corner snipped off, pipe orange icing onto the palm area of each cookie. Use a toothpick to spread evenly if needed. Pipe different colors onto each finger for feathers. Let icing set for about 10 minutes. Place two candy eyes on the palm (near the top), and add an orange M&M or candy corn for the beak. Add a small red M&M or dot of red icing for the wattle. Let cookies sit for at least 1 hour to allow icing to fully harde…
Notes
For best results, ensure butter is truly softened but not melty. Chill dough for at least 30 minutes to prevent spreading. Roll dough to exactly ¼-inch thickness for ideal shape and texture. Bake one sheet at a time on the middle rack. Let cookies cool completely before decorating. For kids, use small food-safe paintbrushes instead of piping bags for less mess. Store decorated cookies in an airtight container at room temperature for up to 5 days; do not refrigerate. Freeze undecorated cookies for up to 3 months.
- Prep Time: 15 minutes
- Cook Time: 10 minutes
- Category: Dessert
- Cuisine: American
Nutrition
- Serving Size: 1 cookie
- Calories: 285
- Sugar: 26
- Sodium: 95
- Fat: 12
- Saturated Fat: 7
- Carbohydrates: 42
- Protein: 3
Keywords: turkey cookies, hand sugar cookies, Thanksgiving cookies, kids baking, easy sugar cookies, hand turkey, holiday cookies