My neighbor Carla watched me fumbling with two different boxes of cornbread mix in the grocery aisle, a toddler on my hip and a preschooler trying to climb out of the cart. She didn’t say anything at first. Then she just reached over, grabbed a box of Jiffy, and dropped it in my cart. “Forget the fancy stuff,” she said. “You need the one that works when you’re tired.”
That chance encounter turned into a full-blown recipe exchange on her porch the next week, and honestly? It changed the way I approach weeknight dinners. Carla grew up in New Mexico, and she had this thing about adding green chiles to everything. I was skeptical at first—I mean, green chiles in a corn casserole? But the way she talked about it, with this casual confidence, made me want to try it. She didn’t give me a formal lesson or a printed card. She just told me what she does, and I scribbled it on the back of a receipt.
This Jiffy corn casserole with cheddar and green chiles is the result of that conversation. It’s not fancy, and it’s not supposed to be. It’s the kind of dish you throw together on a Tuesday when you’ve got thirty minutes and a hungry family staring at you. The original version was simpler—just corn, Jiffy mix, and butter. But Carla’s addition of sharp cheddar and mild green chiles turned it into something people actually fight over at the table. I’ve tweaked it over the years, added a few shortcuts of my own, but the heart of it is still hers. Maybe you’ve been there—standing in the kitchen, wondering how to get dinner on the table without losing your mind. This is the answer.
Why You’ll Love This Recipe
Let me tell you why this Jiffy corn casserole with cheddar and green chiles has become my go-to for busy weeknights. I’ve tested this recipe at least a dozen times, tweaking the ratios and the baking times, and I can say with confidence—it works every single time.
- Quick & Easy: You can have this in the oven in under 10 minutes. No kidding. It’s one bowl, a whisk, and a spatula. That’s it.
- Simple Ingredients: You probably already have most of this in your pantry. Jiffy mix, canned corn, butter, eggs. The green chiles and cheddar are the only “extras,” and they’re easy to find.
- Perfect for Weeknights: This is the definition of a weeknight hero. It goes with almost anything—chicken, burgers, chili, or even just a simple salad.
- Crowd-Pleaser: I’ve brought this to potlucks, family dinners, and even a neighborhood block party. It disappears fast. Kids love it, adults love it, and people always ask for the recipe.
- Unbelievably Delicious: The texture is what gets me every time. It’s soft and tender on the inside, with a slightly crisp golden edge. The cheese adds this savory richness, and the green chiles give it a gentle warmth that’s not spicy at all.
What makes this version different from the other corn casseroles out there? It’s the balance. Some recipes are too sweet, some are too dry, and some are just plain boring. This one hits that sweet-savory spot perfectly. The Jiffy mix gives it a hint of sweetness, the cheddar adds sharpness, and the green chiles bring a subtle earthiness. Plus, it’s forgiving. You can swap ingredients, add more cheese, or even throw in some leftover bacon—it still works. This isn’t just another recipe. It’s the one you’ll make again and again.
What Ingredients You Will Need
This recipe uses simple, honest ingredients that come together to create something truly satisfying. Most of these are pantry staples, which is exactly what you want on a busy weeknight.
- 1 box (8.5 oz) Jiffy Corn Muffin Mix – This is the base of the whole dish. I know some people like to make cornbread from scratch, but on a weeknight, Jiffy is your friend. It’s consistent, it’s affordable, and it gives that slightly sweet flavor that works so well here.
- 1 can (15 oz) whole kernel corn, drained – Don’t skip draining this. The liquid will throw off the texture and make the casserole too wet. I prefer whole kernel corn for the pops of texture, but you can use cream-style corn if you want a softer, more pudding-like result.
- 1 can (15 oz) cream-style corn – This is the secret to the moist, tender crumb. It adds richness and helps bind everything together without needing extra eggs or oil.
- 1/2 cup unsalted butter, melted – Butter adds flavor and moisture. I use unsalted so I can control the salt level, but salted butter works too—just reduce the added salt by a pinch. Let it cool slightly before mixing so it doesn’t cook the eggs.
- 2 large eggs, lightly beaten – Eggs give structure and help the casserole rise. Make sure they’re at room temperature if you can—cold eggs can seize the melted butter.
- 1 cup sharp cheddar cheese, shredded – Sharp cheddar is non-negotiable for me. It cuts through the sweetness of the corn and adds that savory punch. I recommend shredding it yourself from a block—pre-shredded cheese has anti-caking agents that prevent it from melting smoothly. Cabot or Tillamook are my go-to brands.
- 1 can (4 oz) diced green chiles, drained – These are mild, so don’t worry about heat. They add a subtle smoky flavor and a little texture. I like Hatch green chiles when I can find them, but any brand works. If you want more heat, use hot green chiles or add a minced jalapeño.
- 1/4 cup sour cream (optional, for extra creaminess) – This is my little addition. It makes the casserole even more tender and adds a slight tang that balances the sweetness. Greek yogurt works as a substitute.
- Salt and black pepper to taste – Go easy on the salt since the Jiffy mix and cheese both have salt. A pinch of black pepper is enough.
For substitutions: If you don’t have Jiffy mix, you can use another corn muffin mix, but the sweetness level might vary. For a gluten-free option, use a gluten-free corn muffin mix. You can swap the cheddar with Monterey Jack, pepper jack, or even a Mexican blend. And if you’re out of green chiles, a small can of chopped mild jalapeños works in a pinch.
Equipment Needed
You don’t need a lot of fancy equipment for this one, which is part of the beauty of it. Here’s what you’ll need:
- 8×8-inch baking dish – This is the perfect size for this recipe. It gives you a nice thick casserole that’s not too shallow. A 9×9-inch dish works too, but the baking time will be slightly shorter. You can also use a 9-inch cast iron skillet for a rustic look.
- Large mixing bowl – Any bowl will do, but a wide one makes it easier to mix without splashing.
- Whisk – For beating the eggs and combining the wet ingredients smoothly.
- Spatula or wooden spoon – For folding everything together gently.
- Measuring cups and spoons – Even though this is a simple recipe, it’s worth measuring accurately.
- Oven mitts – The dish gets hot, and you don’t want to drop it.
- Cooling rack – Not essential, but it helps the casserole cool evenly and prevents the bottom from getting soggy.
If you don’t have an 8×8 dish, you can use a 9-inch pie plate or even a loaf pan—just adjust the baking time. I’ve also made this in a muffin tin for individual servings, and it works great. Just reduce the baking time to about 15-18 minutes.
Preparation Method
Let’s get cooking. This is straightforward, so don’t overthink it. I’ll walk you through each step with tips I’ve learned the hard way.
- Preheat your oven to 350°F (175°C). This is important—don’t skip the preheat. While it’s heating up, spray your 8×8-inch baking dish with nonstick cooking spray or grease it with a little butter. I’ve forgotten to do this before, and let me tell you, scrubbing baked-on corn casserole is not fun.
- Melt the butter. You can do this in the microwave in a small bowl, about 30-45 seconds. Let it cool for a minute while you prepare the other ingredients. If it’s too hot, it will cook the eggs when you mix them in, and nobody wants scrambled eggs in their corn casserole.
- In your large mixing bowl, whisk the eggs until they’re light and frothy. This takes about 30 seconds. Then add the melted butter, sour cream (if using), and both cans of corn—the drained whole kernel corn and the cream-style corn. Whisk until everything is well combined. The mixture should look a little lumpy from the corn, and that’s fine.
- Add the Jiffy mix. Pour it into the bowl and stir gently with your spatula or wooden spoon. Don’t overmix—just stir until the dry ingredients are moistened. A few lumps are okay. Overmixing will make the casserole tough, and we want it tender.
- Fold in the shredded cheddar cheese and drained green chiles. Reserve about 1/4 cup of the cheese for topping later. Fold gently until everything is evenly distributed. The batter will be thick but pourable.
- Pour the batter into your prepared baking dish. Use the spatula to spread it evenly. Sprinkle the reserved cheddar cheese on top. This will create a lovely golden crust as it bakes.
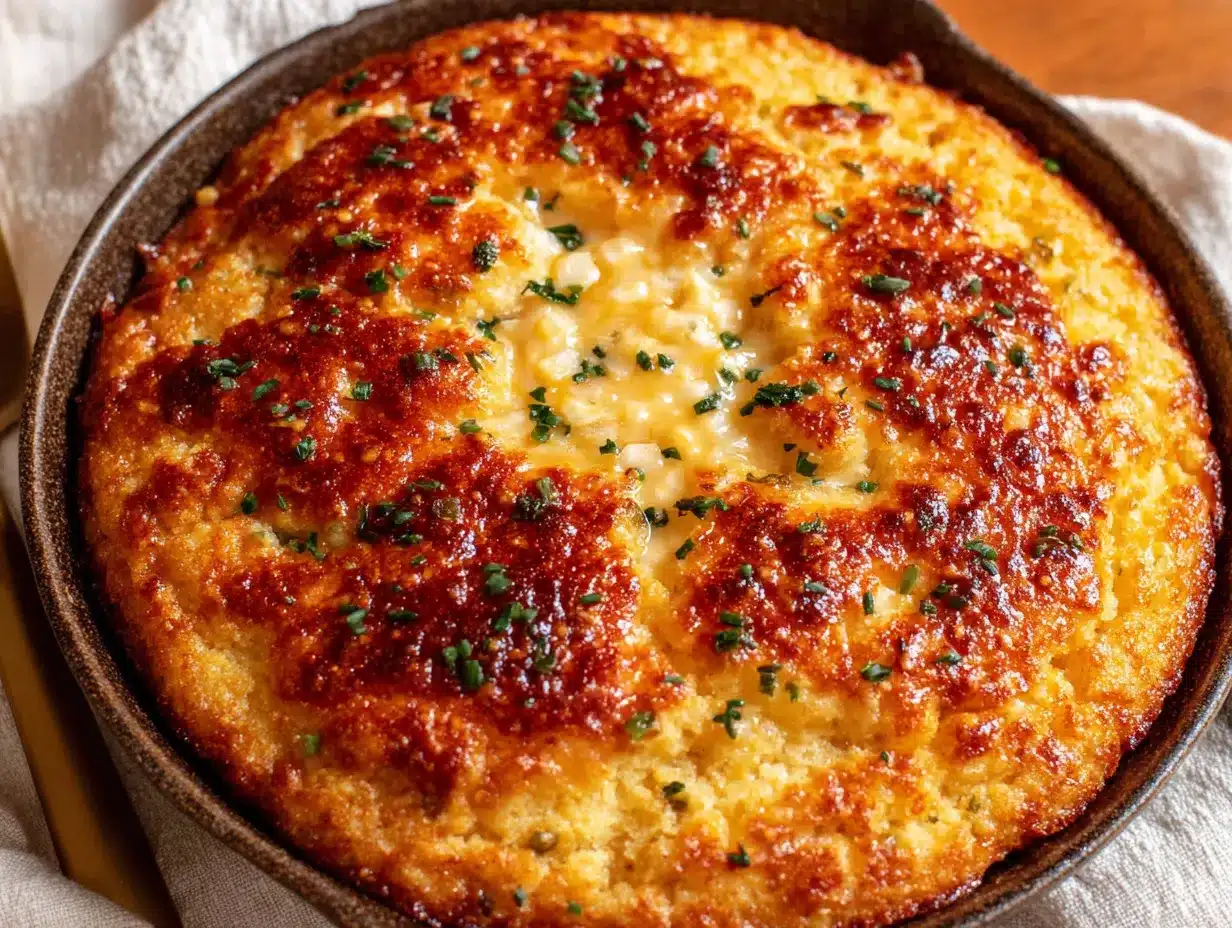
- Bake for 35-40 minutes. The casserole is done when the top is golden brown and a toothpick inserted into the center comes out clean or with just a few moist crumbs. The edges should be pulling away from the sides of the dish slightly. Every oven is different, so start checking at 30 minutes. My oven runs a little hot, so I usually check at 32 minutes.
- Let it rest for 5-10 minutes before serving. This is the hardest part, I know. But letting it rest allows the casserole to set properly. If you cut into it too soon, it will be too soft and might fall apart. Trust me, I’ve done it, and it’s still delicious, but it’s much prettier if you wait.
A few sensory cues to watch for: The kitchen will smell like butter and cornbread, with a hint of cheese. The top should be a deep golden brown, and you might see a few bubbles around the edges. When you tap the dish, the center should feel firm, not jiggly.
Cooking Tips & Techniques
I’ve made this Jiffy corn casserole more times than I can count, and I’ve learned a few things along the way. Let me share some of the lessons that have saved me.
Don’t overmix the batter. This is probably the most common mistake. When you overmix, you develop the gluten in the corn muffin mix, and the casserole turns out dense and rubbery. Stir just until the dry ingredients disappear. A few lumps are your friend.
Room temperature ingredients matter. If your eggs and sour cream are cold, they can cause the melted butter to solidify into little clumps. It won’t ruin the dish, but it can create uneven texture. Take them out of the fridge 15-20 minutes before you start. I usually set them on the counter while I preheat the oven.
Shred your own cheese. I know it’s tempting to buy the pre-shredded bags, but they’re coated with potato starch or cellulose to prevent clumping, and that affects how the cheese melts. Freshly shredded cheddar melts into the casserole beautifully, creating those gooey pockets of flavor.
Drain your corn and chiles well. Extra liquid is the enemy of a good casserole texture. I drain the whole kernel corn in a fine-mesh sieve and even give it a gentle shake. For the green chiles, I press them lightly with a paper towel to remove excess moisture.
Watch your baking time. Every oven is different, and even the type of baking dish can affect how long it takes. Glass dishes retain heat longer, so you might need to reduce the baking time by a few minutes. Metal pans heat up faster, so check a little earlier.
One time, I was rushing and forgot to add the eggs. I realized it halfway through baking. The casserole still came out okay—just a little flatter and denser. So even if you mess up, it’s usually still edible. That’s the beauty of this recipe.
Variations & Adaptations
This recipe is incredibly forgiving, and I’ve tried quite a few variations over the years. Here are some of my favorites.
Spicy Southwest Version: Add 1/2 cup of diced jalapeños (fresh or pickled) and swap the sharp cheddar for pepper jack cheese. You can also stir in a drained can of black beans for extra protein and fiber. This version is great with grilled chicken or fish.
Bacon and Chive Twist: Cook 4-5 slices of bacon until crispy, then crumble them. Stir half into the batter and sprinkle the rest on top along with the cheese. Add 2 tablespoons of chopped fresh chives. The smoky, salty bacon pairs perfectly with the sweet corn. I’ve made this for brunch, and it was a hit.
Gluten-Free Adaptation: Use a gluten-free corn muffin mix instead of Jiffy. Most brands work well, but you might need to add an extra tablespoon of milk or sour cream to adjust the moisture. Check the package directions for any adjustments. Everything else in the recipe is naturally gluten-free.
Dairy-Free Option: Substitute the butter with a plant-based butter alternative (like Earth Balance), use a dairy-free cheddar shred, and replace the sour cream with coconut yogurt or a dairy-free sour cream. The texture will be slightly different, but it’s still delicious.
Add More Veggies: Stir in 1/2 cup of diced bell peppers (any color), a small can of drained diced tomatoes, or even some chopped spinach (thawed and squeezed dry). This is a great way to sneak in extra vegetables for picky eaters.
My personal favorite variation? I add a handful of chopped pickled jalapeños and a sprinkle of smoked paprika on top before baking. The smokiness adds another layer of flavor that’s just incredible.
Serving & Storage Suggestions
This Jiffy corn casserole is best served warm, straight from the oven. Let it rest for those 5-10 minutes, then cut it into squares. It holds its shape well, so you can serve it neatly on a plate or in a bowl. I like to garnish it with a sprinkle of fresh cilantro or a dollop of sour cream, but it’s perfect on its own.
It pairs beautifully with so many things. For a weeknight dinner, serve it alongside grilled chicken, pork chops, or a simple roasted chicken. It’s also fantastic with chili, soup, or barbecue. I’ve even served it as a side for Thanksgiving, and it was a welcome change from the usual stuffing and mashed potatoes.
For storage, let the casserole cool completely, then cover it tightly with plastic wrap or aluminum foil. It will keep in the refrigerator for up to 4 days. The flavors actually meld together and get even better after a day or two.
To reheat, you can microwave individual portions for about 30-45 seconds, but for the best texture, reheat it in the oven at 300°F for about 10-15 minutes. This helps restore the crispy edges. You can also reheat it in a skillet over medium heat with a little butter—it gets a nice crust that way.
This casserole freezes surprisingly well. Cut it into individual portions, wrap each one tightly in plastic wrap and then foil, and store them in a freezer bag for up to 3 months. To thaw, just move a portion to the refrigerator overnight, then reheat as usual.
One thing I’ve noticed—the casserole is even better the next day. The corn and cheese have time to meld, and the texture becomes even more tender. So don’t be afraid to make it ahead.
Nutritional Information & Benefits
Here’s an approximate breakdown per serving (based on 9 servings):
- Calories: 280-320
- Protein: 9g
- Carbohydrates: 32g
- Fat: 15g
- Saturated Fat: 8g
- Fiber: 2g
- Sugar: 8g
- Sodium: 480mg
This casserole offers some surprising nutritional benefits. Corn is a good source of fiber, which aids digestion, and it contains antioxidants like lutein and zeaxanthin that support eye health. The eggs provide high-quality protein and essential vitamins like B12 and D. Cheddar cheese adds calcium for strong bones and teeth, plus a little extra protein. The green chiles are rich in vitamin C and capsaicin, which can boost metabolism and reduce inflammation.
For those watching their intake, this recipe can fit into a balanced diet. It’s not low-calorie, but it’s made with real, whole ingredients. If you’re looking to reduce the calories, you can use low-fat sour cream, reduce the butter to 1/3 cup, or use a reduced-fat cheese. The flavor will be slightly different, but still good.
Potential allergens to note: This recipe contains dairy (butter, cheese, sour cream), eggs, and gluten (from the Jiffy mix). It’s not suitable for vegans or those with celiac disease without modifications.
Personally, I love that this casserole feels indulgent but is made with ingredients I feel good about. It’s comfort food that doesn’t come from a box—well, mostly.
Conclusion
This Jiffy corn casserole with cheddar and green chiles has become a staple in my kitchen for a reason. It’s quick, it’s forgiving, and it delivers every single time. Whether you’re feeding a hungry family on a Tuesday night or bringing a dish to a potluck, this recipe will not let you down. It’s the kind of food that makes people close their eyes and say “mmm” after the first bite.
I love that this recipe has a story behind it—a conversation with a neighbor, a scribbled note, and years of tweaking. It reminds me that the best recipes don’t come from fancy cookbooks or celebrity chefs. They come from real people sharing what they know. And now, I’m sharing it with you.
I’d love to hear how it turns out for you. Did you add your own twist? Did your kids ask for seconds? Drop a comment below and let me know. And if you loved this recipe, share it with a friend who needs a weeknight win. Happy cooking!
Frequently Asked Questions
Can I make this Jiffy corn casserole ahead of time?
Absolutely! You can assemble the casserole up to a day in advance. Just cover it and store it in the refrigerator. When you’re ready to bake, let it sit at room temperature for 20 minutes while the oven preheats, then bake as directed. You might need to add 5-10 minutes to the baking time since it starts cold.
Can I use frozen corn instead of canned?
Yes, you can. Use about 1 1/2 cups of frozen corn, thawed and drained well. Frozen corn has a slightly firmer texture, which some people prefer. Just make sure to pat it dry with a paper towel to remove excess moisture.
Why is my corn casserole too wet or runny?
This usually happens for one of two reasons: either the corn wasn’t drained well enough, or the casserole wasn’t baked long enough. Make sure to drain the whole kernel corn thoroughly. If you’re using cream-style corn, that’s supposed to be wet, so it’s fine. Also, check your oven temperature with an oven thermometer—it might be running cooler than you think.
Can I double this recipe?
Yes, this recipe doubles beautifully. Use a 9×13-inch baking dish and increase the baking time to about 45-50 minutes. The casserole will be thicker, so check for doneness with a toothpick in the center.
What can I serve with this corn casserole?
This is a versatile side dish that goes with almost anything. It’s perfect with grilled or roasted chicken, pork chops, steak, or fish. It also pairs wonderfully with chili, soup, or barbecue. For a complete meal, serve it alongside a simple green salad or some roasted vegetables.
Pin This Recipe!
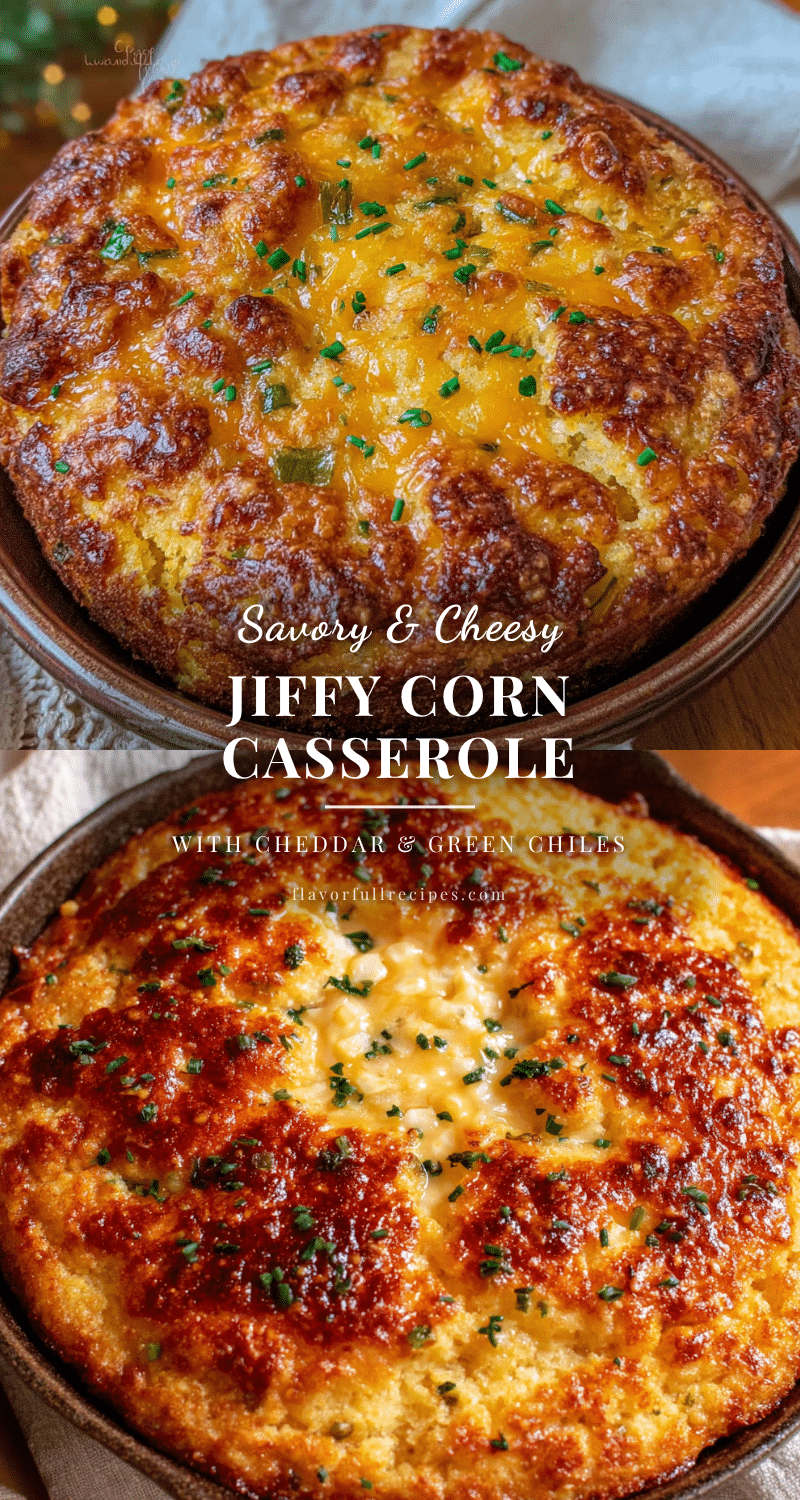

Easy Jiffy Corn Casserole with Cheddar & Green Chiles
- Total Time: 45-50 minutes
- Yield: 9 servings 1x
Description
A quick and easy corn casserole made with Jiffy mix, sharp cheddar, and mild green chiles. Perfect for busy weeknights, this dish is tender, savory, and a crowd-pleaser.
Ingredients
- 1 box (8.5 oz) Jiffy Corn Muffin Mix
- 1 can (15 oz) whole kernel corn, drained
- 1 can (15 oz) cream-style corn
- 1/2 cup unsalted butter, melted
- 2 large eggs, lightly beaten
- 1 cup sharp cheddar cheese, shredded
- 1 can (4 oz) diced green chiles, drained
- 1/4 cup sour cream (optional)
- Salt and black pepper to taste
Instructions
- Preheat oven to 350°F (175°C). Grease an 8×8-inch baking dish with nonstick spray or butter.
- Melt the butter in the microwave (30-45 seconds) and let cool slightly.
- In a large bowl, whisk eggs until light and frothy. Add melted butter, sour cream (if using), drained whole kernel corn, and cream-style corn. Whisk until combined.
- Add Jiffy mix and stir gently with a spatula until just moistened. Do not overmix.
- Fold in shredded cheddar cheese (reserve 1/4 cup for topping) and drained green chiles until evenly distributed.
- Pour batter into prepared dish and spread evenly. Sprinkle reserved cheese on top.
- Bake for 35-40 minutes, until golden brown and a toothpick inserted in center comes out clean or with a few moist crumbs.
- Let rest for 5-10 minutes before serving.
Notes
For best results, use freshly shredded cheddar and drain corn and chiles well. Let ingredients come to room temperature before mixing. The casserole can be assembled a day ahead and refrigerated; add 5-10 minutes to baking time if starting cold.
- Prep Time: 10 minutes
- Cook Time: 35-40 minutes
- Category: Side Dish
- Cuisine: American
Nutrition
- Serving Size: 1 square (1/9 of cas
- Calories: 300
- Sugar: 8
- Sodium: 480
- Fat: 15
- Saturated Fat: 8
- Carbohydrates: 32
- Fiber: 2
- Protein: 9
Keywords: Jiffy corn casserole, corn casserole with cheddar, green chiles, easy side dish, weeknight dinner, potluck