My neighbor, Clara, watched me wrestling with a wobbly, cracked pumpkin cheesecake at our building’s fall potluck sign-up. She didn’t say anything at first. Then, the next morning, a foil-wrapped pan appeared on my doormat with a sticky note that just said, “Try these.”
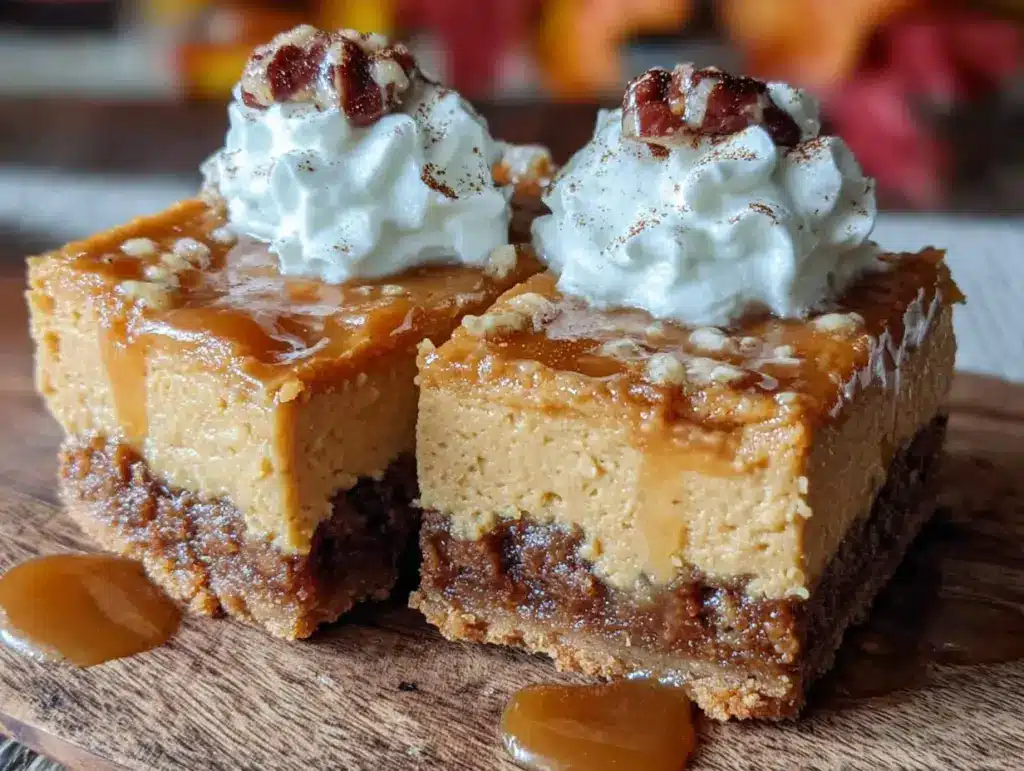
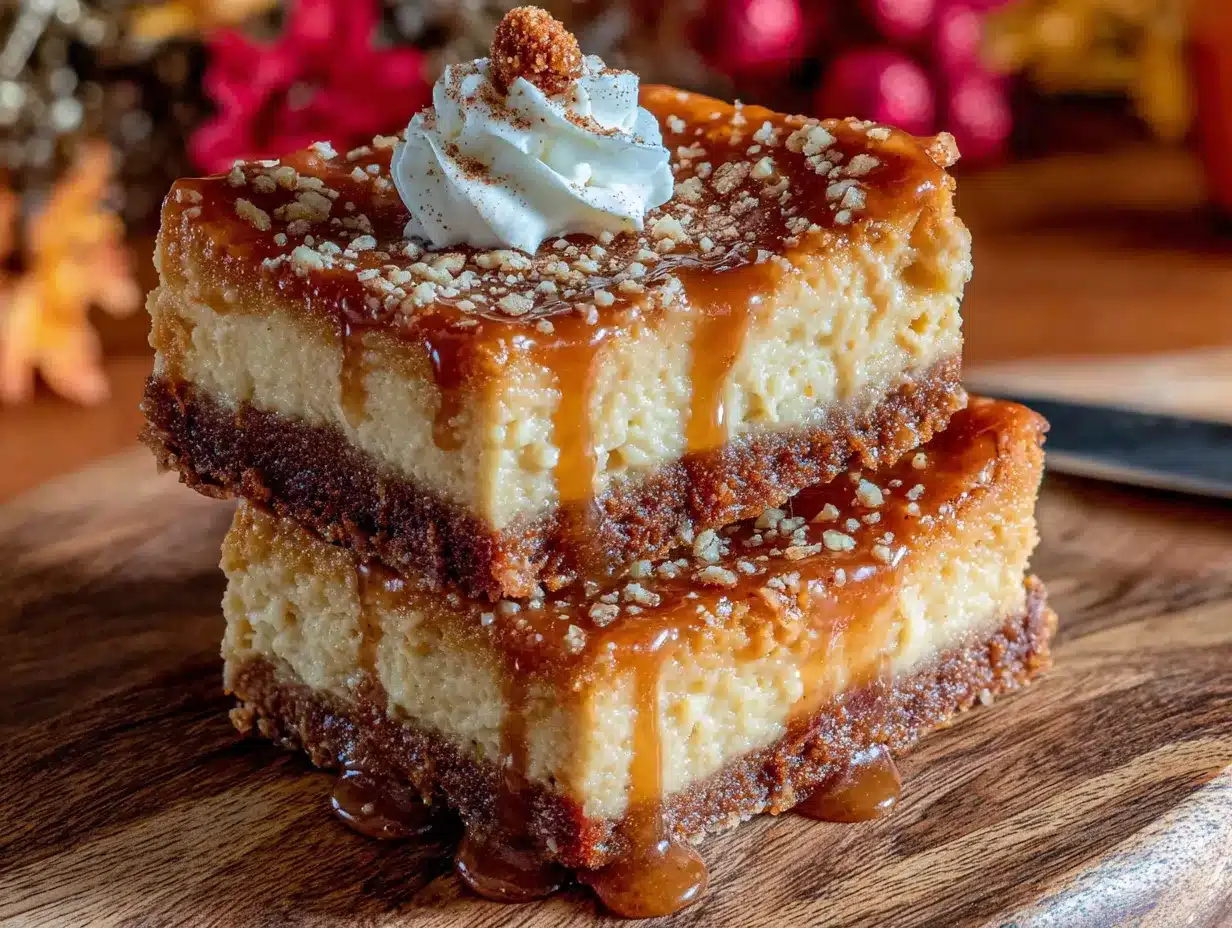
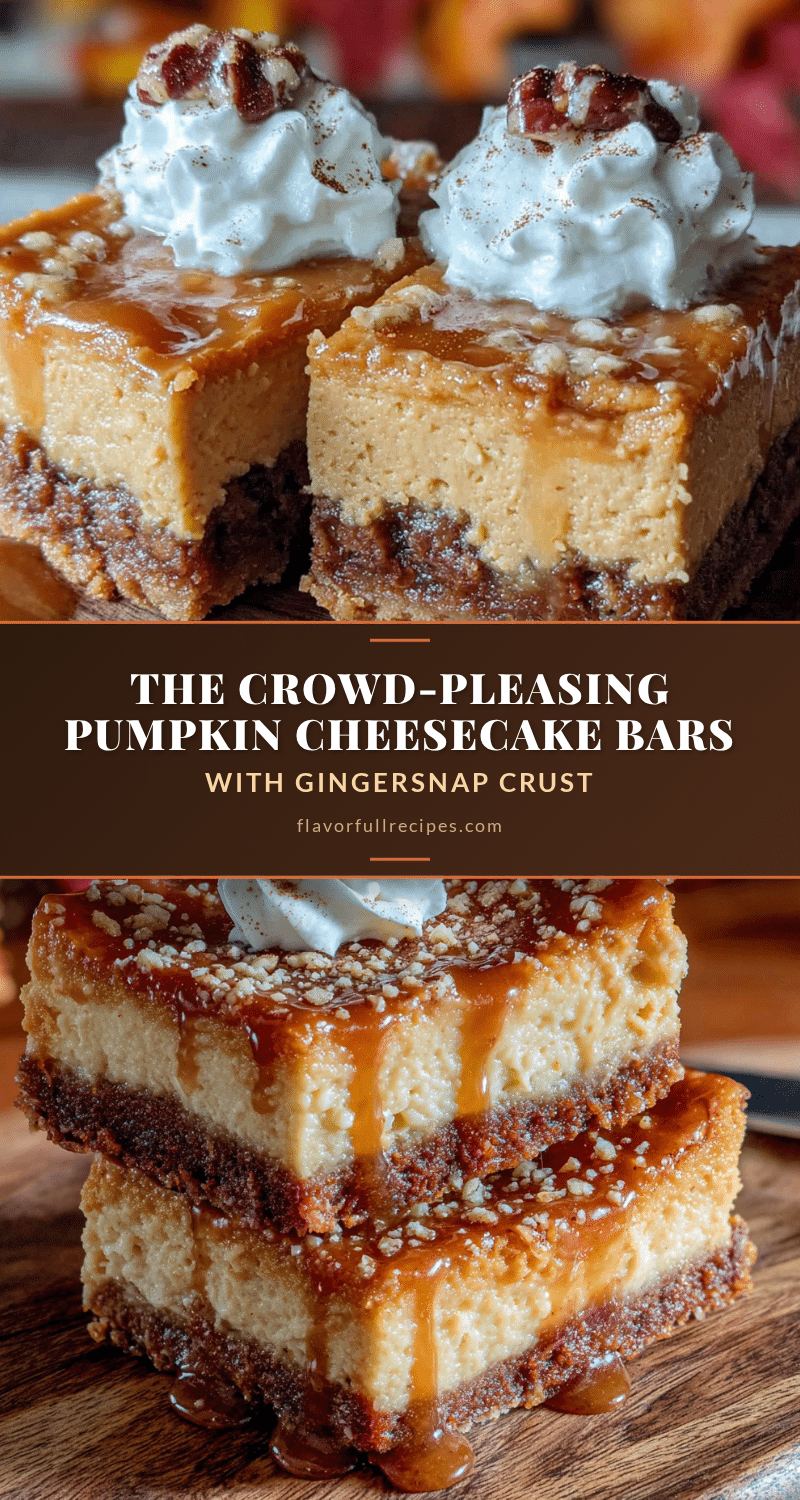
I opened the foil expecting the same old fussy dessert. Instead, I found these perfectly layered pumpkin cheesecake bars with a gingersnap crust that was somehow both sturdy and tender. No water bath needed. No worrying about cracking. I mean, honestly, I ate two before I even poured my coffee. Clara and I had only ever traded hellos in the elevator before that. But that pan of bars started a conversation that’s still going three years later. She told me her grandmother used to make them for church suppers in Ohio, and she’d tweaked the recipe over decades until it became this—the kind of dessert that makes people close their eyes when they take a bite.
Let me tell you, I’ve made these bars more times than I can count now, and they’ve never let me down. Maybe you’ve been there—staring down a complicated dessert recipe and wondering if it’s really worth the stress. These pumpkin cheesecake bars are the answer. They give you all the creamy, spiced, tangy goodness of a full cheesecake without the drama. And that gingersnap crust? It’s the kind of thing that makes you wonder why you ever bothered with graham crackers.
I’ve adapted Clara’s version just a little over the years—added a touch more cinnamon, swapped in full-fat cream cheese for extra richness—but the heart of it is still hers. And honestly, that’s what makes it special. It’s a recipe that came through a relationship, not a transaction. And it’s the one I reach for every single time I need to show up at a gathering with something that’ll make people ask for the recipe before they’ve even finished their first piece.
Why You’ll Love This Recipe
I’ve tested this recipe at least a dozen times—for Thanksgiving, for casual Sunday dinners, for a friend’s engagement party where I forgot the vanilla extract and had to improvise with a splash of bourbon (honestly, it was still incredible). So when I say these are the best pumpkin cheesecake bars, I mean it. Here’s why they work:
- No Water Bath Required: Forget the hassle of wrapping springform pans in foil and hoping for the best. These bars bake up perfectly smooth and crack-free every single time.
- Simple Ingredients: You probably have most of this in your pantry right now. No weird specialty items, no trips to three different stores.
- Perfect for a Crowd: This recipe makes a generous 9×13 pan—enough for a potluck, a dinner party, or a holiday dessert table where you want to make sure there’s enough for seconds.
- Crowd-Pleaser Guaranteed: I’ve served these to kids, to picky in-laws, to a friend who “doesn’t really like pumpkin.” Every single person has asked for the recipe.
- Make-Ahead Friendly: You can prep these the day before your gathering, and they actually taste better after a night in the fridge. Less stress on the day of—that’s a win.
What makes these bars different from the rest is the crust. Most recipes use a basic graham cracker base, but the gingersnap crust adds this warm, peppery snap that cuts right through the creamy pumpkin layer. It’s not just a supporting player—it’s the co-star. And the filling? It’s perfectly balanced: tangy cream cheese, sweet pumpkin, and a warm blend of spices that smells like autumn in a bowl.
What Ingredients You Will Need
This recipe uses simple, wholesome ingredients to deliver big flavor without any fuss. Most of these are pantry staples, especially if you do a lot of fall baking. I’ve tested a few different brands over the years, and I’ll share my favorites where it really matters.
For the Gingersnap Crust
- 2 cups (240g) gingersnap cookie crumbs – I prefer Nabisco brand for the best balance of spice and sweetness. You can crush them in a food processor or just seal them in a bag and go at them with a rolling pin (honestly, the rolling pin method is oddly satisfying).
- 6 tablespoons (85g) unsalted butter, melted – Use real butter here, not margarine. It makes a difference in both flavor and how well the crust holds together.
- 2 tablespoons (25g) granulated sugar – Just a little extra sweetness to balance the spice of the gingersnaps.
- Pinch of salt – Don’t skip this. It keeps the crust from tasting flat.
For the Pumpkin Cheesecake Filling
- 16 ounces (452g) full-fat cream cheese, softened – This is non-negotiable. Low-fat cream cheese has too much water and can make your filling runny. Let it sit out for about an hour before you start.
- 1 cup (200g) granulated sugar – Just enough sweetness to balance the tang of the cream cheese and the earthiness of the pumpkin.
- 1 cup (245g) canned pumpkin puree – Make sure it’s 100% pumpkin, not pumpkin pie filling. The pie filling has added sugar and spices that will throw off the balance.
- 3 large eggs, room temperature – Cold eggs can make the filling seize up. If you forgot to take them out ahead of time, just place them in a bowl of warm water for 5 minutes.
- 1 teaspoon vanilla extract – Pure vanilla, not imitation. It really does make a difference in the depth of flavor.
- 1 ½ teaspoons ground cinnamon – I like McCormick for its consistent quality, but any brand works.
- ½ teaspoon ground ginger – This adds a little warmth that plays beautifully with the gingersnap crust.
- ¼ teaspoon ground nutmeg – Freshly grated is amazing if you have it, but pre-ground is perfectly fine.
- ¼ teaspoon ground cloves – Just a touch. Cloves are strong, so don’t go overboard.
- Pinch of salt – To bring all the flavors together.
For the Topping (Optional but Recommended)
- 1 cup (240ml) heavy cream – For whipping into a light, fluffy topping that balances the richness of the bars.
- 2 tablespoons (15g) powdered sugar – Just enough to sweeten the cream without making it heavy.
- ½ teaspoon vanilla extract – For flavor.
- Caramel sauce for drizzling – Store-bought is fine, but if you have a favorite homemade version, go for it.
Equipment Needed
You don’t need a professional kitchen to make these bars. Here’s what you’ll need:
- 9×13-inch baking pan – A metal pan works best for even baking. Glass pans can work too, but you might need to add a few minutes to the baking time.
- Parchment paper – This is a lifesaver for easy removal. Leave some overhang on the long sides so you can lift the bars out cleanly.
- Food processor or resealable plastic bag – For crushing the gingersnaps. I’ve used both methods, and honestly, the bag and rolling pin method is more fun.
- Electric hand mixer or stand mixer – You need this to get the cream cheese smooth. A whisk will work in a pinch, but your arm will thank you for using a mixer.
- Large mixing bowls – At least two: one for the crust, one for the filling.
- Measuring cups and spoons – For accuracy.
- Spatula – For scraping every last bit of filling into the pan.
- Offset spatula – Not required, but it makes spreading the filling even much easier.
Preparation Method
Let’s get baking. I’ve broken this down into clear steps, and I’ve included all the little notes I wish someone had told me the first time I made these.
Step 1: Prep Your Pan and Preheat
Preheat your oven to 350°F (175°C). Line your 9×13-inch baking pan with parchment paper, leaving about 2 inches of overhang on the two long sides. This creates little handles that let you lift the entire block of bars out once they’re chilled. Lightly spray the parchment with non-stick cooking spray, just to be safe.
Step 2: Make the Gingersnap Crust
Place the gingersnap cookies in your food processor and pulse until you have fine crumbs. If you’re using the bag method, seal the cookies in a sturdy zip-top bag and crush them with a rolling pin until no large pieces remain. You should have about 2 cups of crumbs.
Pour the crumbs into a medium bowl. Add the melted butter, sugar, and salt. Stir with a fork until every crumb is coated and the mixture looks like wet sand. It should clump together when you press it in your fist.
Pour the mixture into your prepared pan. Press it down firmly and evenly into the bottom. I use the bottom of a measuring cup to really pack it in—this prevents the crust from crumbling when you cut the bars later. Bake for 10 minutes, then set aside to cool while you make the filling.
Step 3: Make the Pumpkin Cheesecake Filling
In a large mixing bowl, beat the softened cream cheese with an electric mixer on medium speed until it’s completely smooth and fluffy—about 2 minutes. Scrape down the sides and bottom of the bowl with a spatula. You don’t want any lumps.
Add the sugar and beat for another minute until well combined. Then add the pumpkin puree, eggs (one at a time, beating well after each), and vanilla extract. Mix until everything is smooth and uniform.
In a small bowl, whisk together the cinnamon, ginger, nutmeg, cloves, and salt. Add these dry spices to the wet mixture and beat on low speed just until combined. Don’t overmix at this stage—you don’t want to incorporate too much air, which can cause cracks.
Step 4: Assemble and Bake
Pour the pumpkin cheesecake filling over the pre-baked crust. Use your spatula or offset spatula to spread it evenly to the edges. Give the pan a gentle tap on the counter to release any air bubbles.
Bake at 350°F (175°C) for 35-40 minutes. The edges should look set and slightly puffed, but the center should still have a slight jiggle when you gently shake the pan—like Jell-O, not like soup. That slight jiggle is your signal that the center will finish setting as it cools, giving you that perfectly creamy texture.
Let the bars cool completely on a wire rack—this takes about an hour. Then transfer the pan to the refrigerator and chill for at least 4 hours, but overnight is even better. This is the hardest part, I know, but it’s essential for clean slices.
Step 5: Slice and Serve
Once the bars are fully chilled, use the parchment overhang to lift the entire block out of the pan. Place it on a cutting board. Use a sharp chef’s knife to slice into squares—I usually go for 12 generous bars or 16 smaller ones. Wipe the knife clean between cuts for the neatest edges.
If you’re making the whipped cream topping, beat the heavy cream, powdered sugar, and vanilla together in a chilled bowl until soft peaks form. Dollop or pipe onto each bar, and drizzle with caramel sauce if you’re feeling fancy.
Cooking Tips & Techniques
I’ve made my share of mistakes with this recipe—some more memorable than others. Here’s what I’ve learned so you don’t have to learn the hard way:
Room Temperature Ingredients Matter. I know it’s tempting to use cold cream cheese straight from the fridge, but I promise you, it’s worth the 30-minute wait. Cold cream cheese creates lumps that are nearly impossible to get rid of, and those lumps will show up in your finished bars. Same goes for the eggs. Set everything out on the counter before you even start crushing the cookies.
Don’t Overbake. This is the single most common mistake. The center should still have a gentle wobble when you pull the pan out. If you wait until the center is completely firm, you’ll end up with dry, cracked bars. Trust the jiggle—it will set perfectly as the bars cool.
Chill Thoroughly Before Slicing. I once got impatient and tried to cut these after only two hours in the fridge. The result was a delicious but very messy pile of pumpkin cheesecake rubble. Four hours minimum, but overnight is truly best. The bars slice cleanly and the flavors have time to meld together.
Use a Sharp Knife. A dull knife will drag through the creamy filling and ruin the clean edges. Run your knife under hot water, wipe it dry, then make your cut. Wipe the blade clean between each slice. It takes an extra minute but makes the bars look bakery-quality.
Make Ahead Strategy for Hosting. If you’re making these for a dinner party, bake them two days ahead. Keep them covered in the fridge, and add the whipped cream and caramel drizzle just before serving. The bars actually taste better on day two—the spices have time to deepen and the texture becomes even creamier.
Variations & Adaptations
One of the best things about this recipe is how easy it is to adapt. Here are a few variations I’ve tried and loved:
Gluten-Free Version: Use gluten-free gingersnap cookies for the crust. Most major brands offer a gluten-free option, and the texture is virtually identical. The filling is naturally gluten-free, so this is an easy swap that doesn’t compromise on flavor.
Dairy-Free Adaptation: Substitute the cream cheese with a high-quality dairy-free cream cheese alternative. I’ve had good luck with Kite Hill brand. Use coconut oil or a plant-based butter alternative in the crust. The texture will be slightly less dense, but the flavor is still fantastic.
Spice It Up: If you like a bolder spice profile, add ¼ teaspoon of cardamom or allspice to the filling. I tried this once for a holiday party and got so many compliments that I’ve kept it as my “secret ingredient” ever since.
Chocolate Lover’s Twist: Melt ½ cup of semi-sweet chocolate chips and swirl it into the pumpkin cheesecake filling before baking. Use a knife to create gentle swirls—don’t overmix or you’ll lose the marbled effect. The chocolate and pumpkin combination is honestly underrated.
Individual Servings: Instead of a 9×13 pan, use a muffin tin lined with paper liners. Press about 1 ½ tablespoons of crust mixture into each liner, then fill with the cheesecake mixture. Bake for about 18-20 minutes. These are perfect for parties where people want to grab and go.
Serving & Storage Suggestions
These pumpkin cheesecake bars are best served cold, straight from the fridge. The chilled texture is what makes them so satisfying—firm enough to hold their shape but creamy and luscious on the tongue.
For presentation, I like to arrange the bars on a large wooden board or a white platter. A dollop of freshly whipped cream on each bar adds a beautiful contrast against the deep orange filling. Drizzle with caramel sauce and sprinkle a tiny pinch of flaky sea salt on top—trust me, that salt takes it to another level.
What to Serve Alongside: These bars pair beautifully with a cup of hot coffee or spiced chai. If you’re building a dessert table, they’re great alongside a classic apple crisp or some simple sugar cookies. The richness of the cheesecake means you don’t need much else.
Storage: Store any leftovers in an airtight container in the refrigerator for up to 5 days. Honestly, they’re even better on day two or three as the flavors continue to meld. I’ve never had them last longer than that in my house, but they should keep well for up to a week.
Freezing: These bars freeze exceptionally well. Wrap the entire block (or individual bars) tightly in plastic wrap, then in a layer of aluminum foil. Freeze for up to 3 months. To thaw, transfer to the refrigerator overnight. Add the whipped cream and caramel after thawing, not before.
Reheating: I don’t recommend reheating these bars—they’re meant to be served cold. But if you want a warm dessert experience, you can microwave an individual bar for about 10-15 seconds. It will soften the texture slightly, almost like a warm pumpkin pie.
Nutritional Information & Benefits
Let’s be real—this is a dessert, not a health food. But that doesn’t mean it can’t have some redeeming qualities. Here’s a rough estimate for one bar (based on 12 servings):
- Calories: Approximately 380-420
- Fat: 24g
- Carbohydrates: 38g
- Protein: 7g
- Fiber: 2g
- Sugar: 28g
Pumpkin is actually a nutritional powerhouse—it’s packed with vitamin A, fiber, and antioxidants. The cream cheese provides calcium and protein, and the ginger in the crust has anti-inflammatory properties. Of course, there’s plenty of butter and sugar here too, but everything in moderation, right?
Dietary Considerations: This recipe contains dairy, gluten, and eggs. For gluten-free and dairy-free adaptations, see the variations section above. It’s also relatively low in sodium compared to many store-bought desserts.
Conclusion
These pumpkin cheesecake bars with gingersnap crust are more than just a dessert—they’re the kind of recipe that becomes a tradition. Every time I make them, I think of Clara and that foil-wrapped pan on my doorstep. I think of the way she laughed when I told her I’d eaten two before breakfast. And I think of all the gatherings where these bars have shown up and stolen the show.
Whether you’re hosting a Thanksgiving dinner, bringing a dish to a potluck, or just want to treat yourself to something special, this recipe delivers. It’s forgiving enough for beginners, impressive enough for experienced bakers, and delicious enough to make everyone ask for the recipe.
I’d love to hear how yours turn out. Did you add your own twist? Did you serve them with something unexpected? Drop a comment below and let me know. And if you try the chocolate swirl version, you absolutely have to tell me about it. Happy baking, friends!
Frequently Asked Questions
Can I use fresh pumpkin instead of canned?
You can, but I don’t recommend it for this recipe. Canned pumpkin has a consistent moisture content that’s crucial for the texture of these bars. Fresh pumpkin can be watery and may cause the filling to be too soft. If you really want to use fresh, roast it, puree it, then strain it through cheesecloth overnight to remove excess moisture.
Why did my cheesecake bars crack on top?
Cracks usually happen from overbaking or from a sudden temperature change. Make sure you pull the bars out when the center still has a slight jiggle. Also, let them cool gradually—don’t put a hot pan directly into the fridge. Let them cool on the counter first, then transfer to the fridge once they’re at room temperature.
Can I make these bars in a different size pan?
Absolutely. For an 8×8 pan, halve the recipe and bake for about 30-35 minutes. For a springform pan, use the full recipe and bake for 45-50 minutes. Just keep an eye on the center jiggle test regardless of what pan you use.
How far in advance can I make these for a party?
You can make these up to 3 days ahead. Keep them tightly covered in the refrigerator. I actually prefer making them 1-2 days ahead because the flavors have time to develop and the texture becomes even creamier. Just add the whipped cream and any toppings right before serving.
Can I skip the whipped cream topping?
Of course! The bars are absolutely delicious on their own. The whipped cream adds a nice lightness that balances the richness, but it’s completely optional. If you’re serving a crowd, you can offer it on the side so people can add as much or as little as they like.
Pin This Recipe!
The Best Pumpkin Cheesecake Bars with Gingersnap Crust
- Total Time: 5 hours (includes chilling)
- Yield: 12 servings 1x
Description
These pumpkin cheesecake bars feature a gingersnap crust and a creamy, spiced pumpkin cheesecake filling. No water bath required, they are perfect for potlucks, holidays, or any fall gathering.
Ingredients
- 2 cups (240g) gingersnap cookie crumbs
- 6 tablespoons (85g) unsalted butter, melted
- 2 tablespoons (25g) granulated sugar
- Pinch of salt
- 16 ounces (452g) full-fat cream cheese, softened
- 1 cup (200g) granulated sugar
- 1 cup (245g) canned pumpkin puree
- 3 large eggs, room temperature
- 1 teaspoon vanilla extract
- 1 ½ teaspoons ground cinnamon
- ½ teaspoon ground ginger
- ¼ teaspoon ground nutmeg
- ¼ teaspoon ground cloves
- Pinch of salt
- 1 cup (240ml) heavy cream
- 2 tablespoons (15g) powdered sugar
- ½ teaspoon vanilla extract
- Caramel sauce for drizzling
Instructions
- Preheat oven to 350°F (175°C). Line a 9×13-inch baking pan with parchment paper, leaving overhang on the long sides. Lightly spray with non-stick cooking spray.
- Make the crust: Pulse gingersnap cookies in a food processor until fine crumbs form (or crush in a bag with a rolling pin). In a medium bowl, combine crumbs, melted butter, sugar, and salt. Stir until mixture resembles wet sand. Press firmly into the bottom of the prepared pan. Bake for 10 minutes, then set aside to cool.
- Make the filling: In a large bowl, beat softened cream cheese with an electric mixer on medium speed until smooth and fluffy, about 2 minutes. Add sugar and beat for 1 minute. Add pumpkin puree, eggs (one at a time, beating well after each), and vanilla extract. Mix until smooth.
- In a small bowl, whisk together cinnamon, ginger, nutmeg, cloves, and salt. Add to the wet mixture and beat on low speed just until combined. Do not overmix.
- Pour filling over the pre-baked crust. Spread evenly. Tap the pan gently on the counter to release air bubbles.
- Bake for 35-40 minutes. The edges should be set and slightly puffed, but the center should still have a slight jiggle. Cool completely on a wire rack (about 1 hour), then refrigerate for at least 4 hours or overnight.
- Once chilled, use parchment overhang to lift the bars out of the pan. Slice into squares with a sharp knife, wiping the blade clean between cuts.
- For the topping: Beat heavy cream, powdered sugar, and vanilla in a chilled bowl until soft peaks form. Dollop or pipe onto each bar. Drizzle with caramel sauce if desired.
Notes
Room temperature ingredients are crucial for a smooth filling. Do not overbake; the center should jiggle slightly. Chill thoroughly before slicing for clean cuts. Bars can be made up to 3 days ahead and stored in the refrigerator. Freeze for up to 3 months.
- Prep Time: 20 minutes
- Cook Time: 40 minutes
- Category: Dessert
- Cuisine: American
Nutrition
- Serving Size: 1 bar
- Calories: 400
- Sugar: 28
- Sodium: 280
- Fat: 24
- Saturated Fat: 14
- Carbohydrates: 38
- Fiber: 2
- Protein: 7
Keywords: pumpkin cheesecake bars, gingersnap crust, fall dessert, Thanksgiving dessert, no water bath cheesecake