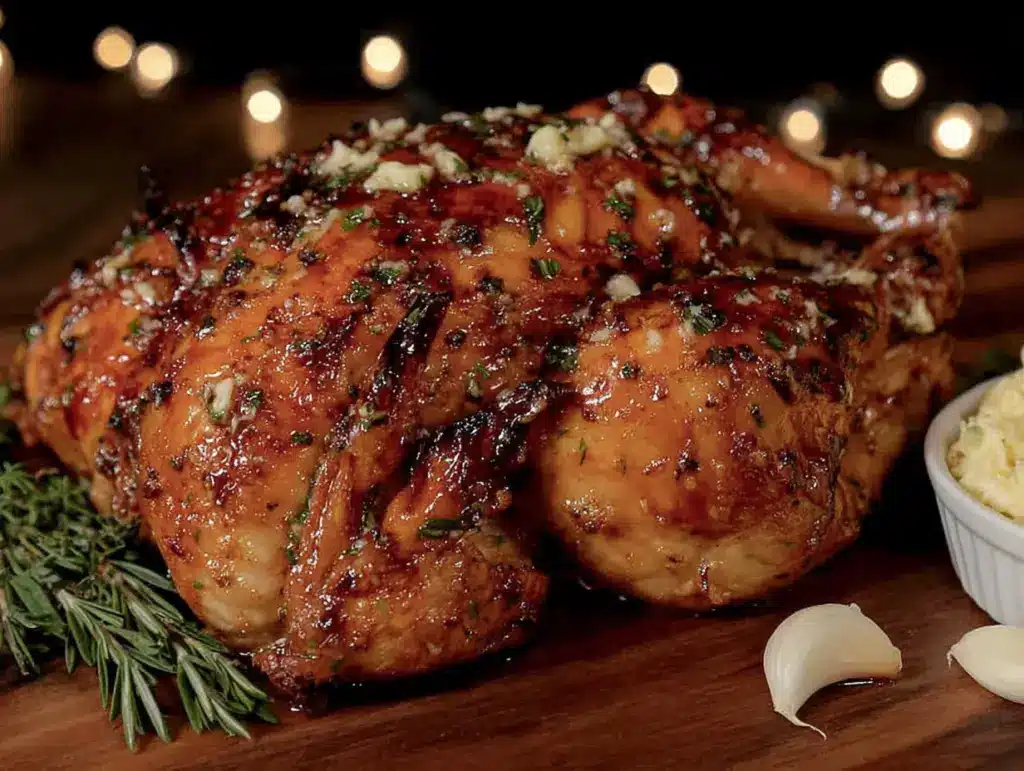
My husband had claimed for years that he “didn’t see the point” of turkey. Every Thanksgiving, he’d load his plate with ham, mashed potatoes, and maybe a single thin slice of white meat just to be polite. “It’s dry,” he’d mutter. “It’s bland. Why do we even bother?” For a decade, I nodded along, secretly agreeing with him. Then last November, on a random Tuesday that was absolutely not a holiday, I decided to make a small turkey breast just for myself. I wanted leftovers for sandwiches, nothing more. I seasoned it lightly, slipped it into the oven, and went about my afternoon. An hour later, I walked back into the kitchen to find him standing at the counter, fork in hand, pulling golden shreds straight off the bone. He didn’t even hear me come in. “This is actually good,” he said, not looking up. “Like, really good.” And that, my friends, is how this Lighter Garlic Herb Butter Roasted Turkey (Small Batch) became our new favorite thing.
Honestly, I get the turkey skepticism. A big bird is intimidating, expensive, and it takes forever. The pressure to get it right on a holiday is real, and the payoff can be, well, disappointing. But a small batch? That changes everything. This recipe is for those of us who want that classic roasted turkey experience—the crispy, golden skin, the tender, juicy meat, the incredible aroma filling the house—without roasting a twelve-pound bird. It’s for a cozy Sunday dinner, a practice run before the big day, or just because you have a serious craving for a turkey and Swiss sandwich. I mean, maybe you’ve been there, standing in the grocery store aisle, looking at a whole turkey and thinking, “That’s way too much trouble for a Tuesday.” I know I have.
This particular version is “lighter” because we use just enough butter to get that gorgeous, crispy skin, and we rely on a generous amount of fresh herbs and garlic to build deep flavor without a ton of fat. The result is a turkey that’s rich and satisfying, but not heavy. It’s the kind of meal that makes you feel good after you eat it—nourished, not stuffed. And the best part? It’s so simple. You don’t need a brining bucket, a roasting rack, or a culinary degree. You just need a small turkey breast, some butter, garlic, and herbs, and about an hour and a half. I keep making this recipe because it proves that you don’t need a special occasion to have something special. It turns a random Tuesday into a tiny celebration. And honestly, watching someone who swore they hated turkey go back for seconds (and thirds) never gets old.
Why You’ll Love This Recipe
This Lighter Garlic Herb Butter Roasted Turkey (Small Batch) isn’t just a smaller version of a big holiday bird. It’s a completely different, better experience. Here’s why it works so well:
- Perfectly Sized: This recipe uses a 2-3 pound bone-in, skin-on turkey breast. It’s ideal for two to four people, meaning no mountains of leftovers you’ll be eating for a month. It’s also quick enough for a weeknight meal!
- Incredibly Juicy: The magic is in the compound butter. By rubbing herb-infused butter under the skin, you’re basting the meat from the inside out. This guarantees moist, flavorful meat every single time.
- Simple, Everyday Ingredients: You don’t need any fancy, hard-to-find items. Garlic, fresh herbs (like rosemary, thyme, and sage), butter, salt, and pepper are all you need. You probably have most of them already.
- Foolproof Technique: This method is incredibly forgiving. The small size means it cooks evenly and quickly, drastically reducing the risk of that dreaded dry, overcooked turkey. It’s a confidence-building recipe for any home cook.
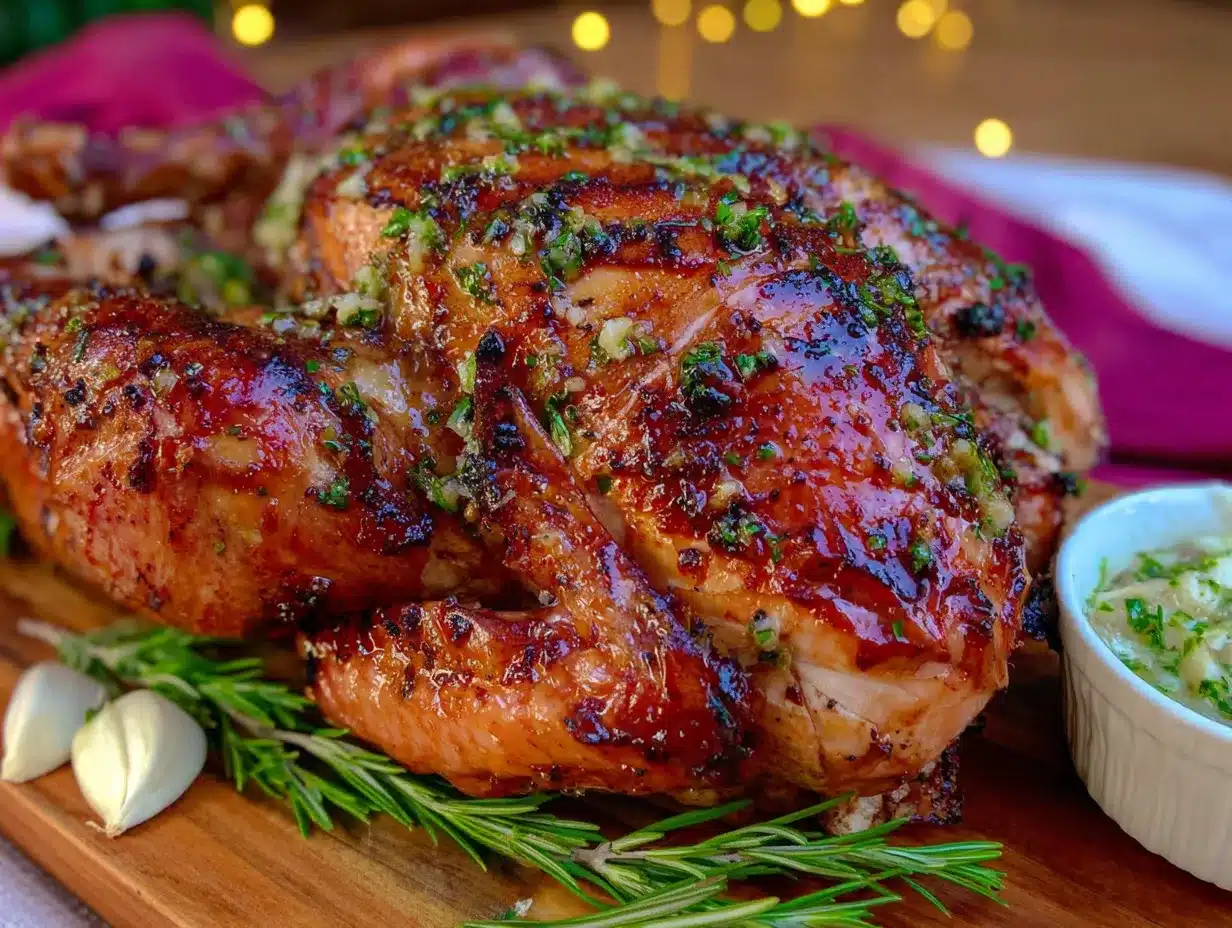
- Unbelievably Delicious: The combination of crispy, golden-brown skin and tender, herb-infused meat is pure comfort food. It’s that “close your eyes after the first bite” kind of good. The garlic mellows and sweetens as it roasts, creating a flavor that’s both sophisticated and deeply satisfying.
What makes this recipe different from every other turkey breast recipe out there? It’s the perfect balance of indulgence and practicality. You get the soul-soothing satisfaction of a classic roast turkey dinner, but it’s healthier, faster, and scaled for real life. It’s comfort food reimagined—perfect for impressing a small group without any stress, or for turning a simple Tuesday meal into something memorable.
What Ingredients You Will Need
This recipe relies on a handful of simple, high-quality ingredients to create something truly special. Each one plays a crucial role in building flavor and texture. Here’s what you’ll need to gather:
- Bone-in, Skin-on Turkey Breast (2-3 lbs): This is the star of the show. I recommend getting a fresh, natural turkey breast from a trusted butcher or the meat counter at your grocery store. The bone helps keep the meat moist during roasting, and the skin crisps up beautifully. If you can only find a frozen one, just make sure it’s fully thawed in the refrigerator before you start.
- Unsalted Butter (4 tablespoons, softened): We use just enough butter to create that rich, flavorful crust and to carry the herbs and garlic under the skin. Using unsalted butter lets you control the salt level. Let it soften to room temperature so it’s easy to mix.
- Fresh Garlic (4-5 cloves, minced): Fresh garlic is non-negotiable here. It adds a pungent, aromatic punch that mellows into a sweet, nutty flavor as it roasts. Avoid the pre-minced stuff in a jar—it won’t give you the same depth of flavor.
- Fresh Herbs (2 tablespoons each, finely chopped): A combination of fresh rosemary, thyme, and sage is my go-to. The rosemary is piney and aromatic, the thyme is earthy and floral, and the sage adds a slightly peppery, savory note. You can use just one or two if that’s what you have, but the trio is magical. I personally love the smell of fresh thyme the most.
- Kosher Salt (1-2 teaspoons): Salt is essential for bringing out the flavor of the turkey and seasoning the skin. I use Diamond Crystal kosher salt because it’s less salty by volume than Morton’s, but any fine sea salt will work. Start with one teaspoon and add more to taste.
- Freshly Ground Black Pepper (1/2 teaspoon): Freshly ground pepper adds a subtle heat and complexity that pre-ground pepper just can’t match. It’s a small step that makes a big difference.
- Olive Oil (1 tablespoon): A little drizzle of olive oil on the outside of the skin helps it get extra crispy and golden brown. It also helps the salt and pepper stick.
- Chicken or Turkey Broth (1/2 cup): This is poured into the bottom of the roasting pan. It creates steam, which helps keep the turkey moist, and it forms the base for a simple, delicious pan sauce or gravy.
Substitution Tips: If you’re out of fresh herbs, you can use dried herbs, but use about one-third of the amount. For a dairy-free option, you can use a high-quality vegan butter or ghee. If you don’t have chicken broth, water with a splash of white wine or a bouillon cube dissolved in water will work in a pinch.
Equipment Needed
You don’t need a professional kitchen to make this recipe a success. A few basic tools are all it takes. Here’s what you’ll need:
- Small Roasting Pan or Baking Dish: A 9×13-inch baking dish or a small roasting pan is perfect. It should be just big enough to hold the turkey breast with a little room around it. If it’s too big, the juices will spread out and burn.
- Instant-Read Meat Thermometer: This is the most important tool for success. Don’t guess when the turkey is done—a thermometer is your guarantee for perfectly cooked, juicy meat every time. I’ve learned this the hard way!
- Chef’s Knife and Cutting Board: For mincing the garlic and chopping the fresh herbs.
- Small Bowl: For mixing the compound butter.
- Kitchen Twine (optional): Trussing the turkey breast (tying the legs together) helps it cook more evenly. It’s not strictly necessary, but it does help the breast hold a nice shape. A couple of toothpicks can work in a pinch.
- Basting Brush or Spoon: For drizzling the pan juices over the turkey as it roasts.
- Aluminum Foil: To tent the turkey if the skin is browning too quickly.
If you don’t have a roasting rack, you can simply place the turkey breast directly in the baking dish. The vegetables (if you’re adding any) will act as a natural rack, lifting the bird up from the bottom of the pan.
Preparation Method
Let’s get cooking! This method is straightforward, but I’ve included all the little details that make it foolproof. Follow these steps, and you’ll have a beautiful, delicious turkey every time.
- Preheat and Prep (15 minutes before roasting): Preheat your oven to 425°F (220°C). While the oven heats, pat the turkey breast completely dry with paper towels. This is a crucial step for getting crispy skin. Let the turkey sit on the counter for about 15-20 minutes to take the chill off. This helps it cook more evenly.
- Make the Compound Butter (5 minutes): In a small bowl, combine the softened butter, minced garlic, and chopped fresh herbs (rosemary, thyme, and sage). Add about 1/2 teaspoon of kosher salt and 1/4 teaspoon of black pepper. Mix everything together with a fork until it’s well combined. The smell at this point is incredible—take a moment to enjoy it!
- Loosen the Skin (5 minutes): Using your fingers, gently work your way under the skin of the turkey breast. Be careful not to tear the skin. You want to create a pocket between the skin and the meat. This is where the magic happens. Slide about two-thirds of the herb butter under the skin, spreading it evenly over the entire breast. Massage the skin from the outside to distribute the butter.
- Season the Outside (2 minutes): Rub the remaining herb butter all over the outside of the turkey skin. Then, drizzle the olive oil over the skin and rub it in. Season generously with the remaining kosher salt and black pepper. Don’t be shy with the salt—it’s what makes the skin crispy and delicious.
- Prepare for Roasting (2 minutes): Place the seasoned turkey breast in your small roasting pan or baking dish, skin-side up. If you have any extra herbs, you can tuck a few sprigs around the turkey. Pour the chicken or turkey broth into the bottom of the pan, being careful not to wash the seasoning off the skin.
- Roast the Turkey (45-60 minutes): Place the pan in the preheated oven and roast for 45 minutes. After 30 minutes, check on it. If the skin is browning too quickly, loosely tent the pan with a piece of aluminum foil. About halfway through, use a spoon or basting brush to drizzle some of the pan juices over the turkey. This helps keep it moist and adds flavor.
- Check for Doneness (2 minutes): The most reliable way to know your turkey is done is with an instant-read thermometer. Insert it into the thickest part of the breast, being careful not to touch the bone. The turkey is ready when it reaches an internal temperature of 160°F (71°C). Remember, the temperature will continue to rise by about 5-10 degrees as it rests, so pulling it out at 160°F ensures it will be perfectly cooked and juicy, not dry.
- Rest the Turkey (15-20 minutes): This is the hardest part! Once the turkey is out of the oven, transfer it to a cutting board and tent it loosely with foil. Let it rest for at least 15-20 minutes. This allows the juices to redistribute throughout the meat. If you cut into it too soon, all those delicious juices will run out onto the cutting board, leaving you with dry meat. Trust me on this one.
- Make the Pan Sauce (optional, 5 minutes): While the turkey rests, you can make a quick pan sauce. Place the roasting pan on the stovetop over medium heat. Add a splash of white wine or a little more broth and scrape up all the browned bits from the bottom of the pan. Let it simmer for a minute or two to reduce slightly. You can whisk in a teaspoon of cornstarch mixed with a tablespoon of cold water to thicken it, if you like. Strain the sauce into a small bowl and serve alongside the turkey.
- Carve and Serve (5 minutes): After resting, carve the turkey breast against the grain into thick, beautiful slices. The meat should be tender and juicy, and the skin should be perfectly crispy. Serve immediately with your favorite sides.
My Personal Tip for Efficiency: While the turkey is roasting, you have a good 45-60 minutes to prepare your side dishes. Roasted vegetables, mashed potatoes, or a simple green salad all pair perfectly. This way, everything is ready at the same time!
Cooking Tips & Techniques
Over the years, I’ve made this recipe more times than I can count, and I’ve made just about every mistake in the book. Here are the lessons I’ve learned so you don’t have to:
Don’t Skip Drying the Skin. This is the number one tip for crispy skin. Moisture is the enemy of crispiness. Patting the turkey breast bone-dry with paper towels is non-negotiable. I once forgot this step in a rush, and the skin came out rubbery and pale. It was a sad, sad dinner.
Trust Your Thermometer, Not the Timer. Ovens vary wildly. A 3-pound breast might be done in 50 minutes in one oven and take 65 in another. The only way to know for sure is by using an instant-read thermometer. It’s a small investment that pays for itself in perfect results every time. I’ve ruined too many turkeys by relying on “cooking time per pound” charts.
Let It Rest! I cannot stress this enough. Resting is not optional. The carryover cooking is your friend. If you cut into the turkey the second it comes out of the oven, you’ll be met with a flood of juices and dry, stringy meat. Giving it that 15-20 minute rest is the secret to a restaurant-quality result at home.
Baste Carefully. While basting adds flavor, opening the oven door too often lets out heat and extends the cooking time. Also, if you baste too early, you can make the skin soggy. I recommend basting just once, about halfway through the cooking time.
Use a Small Pan. A pan that’s too large will cause the juices to evaporate and burn, creating a smoky mess. A snug-fitting pan keeps the juices concentrated and creates steam, which helps keep the turkey moist. It’s a small detail that makes a big difference.
Variations & Adaptations
One of the best things about this recipe is how easily it adapts to different tastes and dietary needs. Here are a few of my favorite ways to change it up:
- Citrus Herb Turkey: Add the zest of one lemon and one orange to the compound butter. The citrus brightens up the flavor beautifully and pairs wonderfully with the herbs. Squeeze the juice from the zested lemon and orange into the pan with the broth for an even more aromatic result.
- Spicy Chipotle Turkey: For a smoky, spicy kick, add 1-2 teaspoons of finely chopped chipotle peppers in adobo sauce to the compound butter. This is fantastic if you’re serving the turkey with southwestern-style sides like black beans and rice or a corn salad.
- Dairy-Free Version: Substitute the butter with a high-quality plant-based butter or ghee. Ghee is clarified butter, so it has the milk solids removed, making it lactose-free and perfect for a dairy-sensitive diet. The flavor will be slightly different, but still rich and delicious.
- Herb Swap: Don’t have rosemary, thyme, and sage? No problem! Try using fresh tarragon and parsley for a more delicate, anise-like flavor, or use fresh oregano and marjoram for a Mediterranean twist. The base technique is the same; just use whatever fresh herbs you have on hand.
- Air Fryer Adaptation: Believe it or not, you can make this in an air fryer! Season the turkey breast as directed, then place it in the air fryer basket. Cook at 375°F (190°C) for about 30-40 minutes, or until the internal temperature reaches 160°F (71°C). The skin gets incredibly crispy! You’ll need to check it more frequently as air fryers cook faster.
Serving & Storage Suggestions
This turkey is so versatile, it’s perfect for more than just a dinner plate. Here’s how to serve, store, and enjoy it all week long.
Serving Suggestions: Serve the turkey hot, right after its rest. It pairs beautifully with classic sides like creamy mashed potatoes, roasted Brussels sprouts, green bean casserole, or a simple cranberry sauce. For a lighter meal, serve it over a bed of arugula with a lemon vinaigrette and shaved Parmesan. The leftovers are legendary—thinly sliced on a crusty roll with Swiss cheese, cranberry sauce, and a little arugula makes the best sandwich you’ll have all year.
Storage Instructions: Let any leftover turkey cool completely to room temperature. Store it in an airtight container in the refrigerator for up to 4 days. For longer storage, you can freeze the cooked, sliced turkey. Wrap it tightly in plastic wrap, then place it in a freezer-safe bag or container. It will keep for up to 3 months.
Reheating Tips: The key to reheating turkey without drying it out is gentle heat. The best method is to reheat it in a low oven (300°F or 150°C) with a splash of broth or water in the pan, covered with foil. Heat for about 10-15 minutes, or until warmed through. You can also reheat individual slices in a skillet over medium-low heat with a little butter or broth. Avoid the microwave if you can—it tends to make the meat tough and rubbery.
Flavor Development: The flavors of this turkey actually deepen and meld together overnight. Cold leftovers are amazing. I love slicing it thin and adding it to a salad or a wrap the next day. The herb and garlic flavors become even more pronounced.
Nutritional Information & Benefits
This Lighter Garlic Herb Butter Roasted Turkey (Small Batch) is a fantastic choice for a healthy, satisfying meal. Here’s a quick look at the nutritional profile (per 4-ounce serving, without skin):
- Calories: Approximately 180-200
- Protein: 25-30 grams (excellent source of lean protein)
- Fat: 8-10 grams (from the butter and olive oil)
- Carbohydrates: 2-3 grams (mostly from the herbs and garlic)
Health Benefits: Turkey is a fantastic source of high-quality, lean protein, which is essential for muscle building and repair. It’s also rich in B vitamins (especially B6 and B12), which support energy metabolism and brain function. The fresh garlic is packed with antioxidants and has anti-inflammatory properties. The herbs (rosemary, thyme, sage) are also rich in antioxidants and add a ton of flavor without any extra salt or fat. This recipe is naturally gluten-free, low-carb, and keto-friendly.
Dietary Considerations: This recipe is naturally gluten-free and nut-free. To make it dairy-free, simply substitute the butter with a plant-based alternative or ghee. It’s a wonderful, wholesome meal that fits into a balanced, health-conscious lifestyle without feeling like a sacrifice.
Conclusion
This Lighter Garlic Herb Butter Roasted Turkey (Small Batch) has become a staple in my kitchen, and I think it will in yours, too. It takes everything we love about a holiday turkey—the crispy skin, the juicy meat, the incredible aroma—and makes it approachable for any day of the week. It’s proof that you don’t need a huge bird or a special occasion to enjoy a truly spectacular meal. It’s simple, it’s forgiving, and the results are consistently, wonderfully delicious.
I love this recipe because it feels like a secret weapon. It’s impressive enough for company, but easy enough for a random Tuesday. It turns a simple turkey breast into something you actually crave. I encourage you to make it your own—swap the herbs, add some citrus, or try it in the air fryer. The base is perfect, but there’s so much room for your personal touch.
So go ahead, give it a try! I’d love to hear how it turns out for you. Did you make any fun variations? Did you finally convert a turkey skeptic in your own life? Drop a comment below and let me know. And if you loved it, please share this recipe with a friend who needs a little turkey magic in their life. Happy cooking!
Frequently Asked Questions
Can I use a frozen turkey breast for this recipe?
Yes, you can! Just make sure it is completely thawed in the refrigerator before you start. A frozen turkey breast will not cook evenly and could be unsafe. Plan for 24 hours of thawing time for every 4-5 pounds of meat.
What if I don’t have fresh herbs? Can I use dried?
Absolutely. Dried herbs are more concentrated in flavor, so you’ll need to use less. As a general rule, use 1 teaspoon of dried herbs for every 1 tablespoon of fresh. So for this recipe, you’d use about 2 teaspoons of dried herbs total.
My turkey skin is browning too fast. What should I do?
This is a common issue! If the skin is getting too dark before the meat is cooked through, simply tent the pan loosely with a piece of aluminum foil. This will slow down the browning while the turkey continues to cook.
Can I make this recipe in a slow cooker or Instant Pot?
This recipe is specifically designed for roasting to achieve that crispy skin. You can cook a turkey breast in a slow cooker or Instant Pot, but you will not get the same browned, crispy skin. For the best results with this particular recipe, stick to the oven or air fryer method.
How do I know when the turkey is done without a thermometer?
While a thermometer is the most reliable method, you can also check by piercing the thickest part of the breast with a knife. The juices should run clear, not pink. However, this method is less precise and can lead to overcooking. I highly recommend investing in an instant-read thermometer for perfect results every time.
Pin This Recipe!
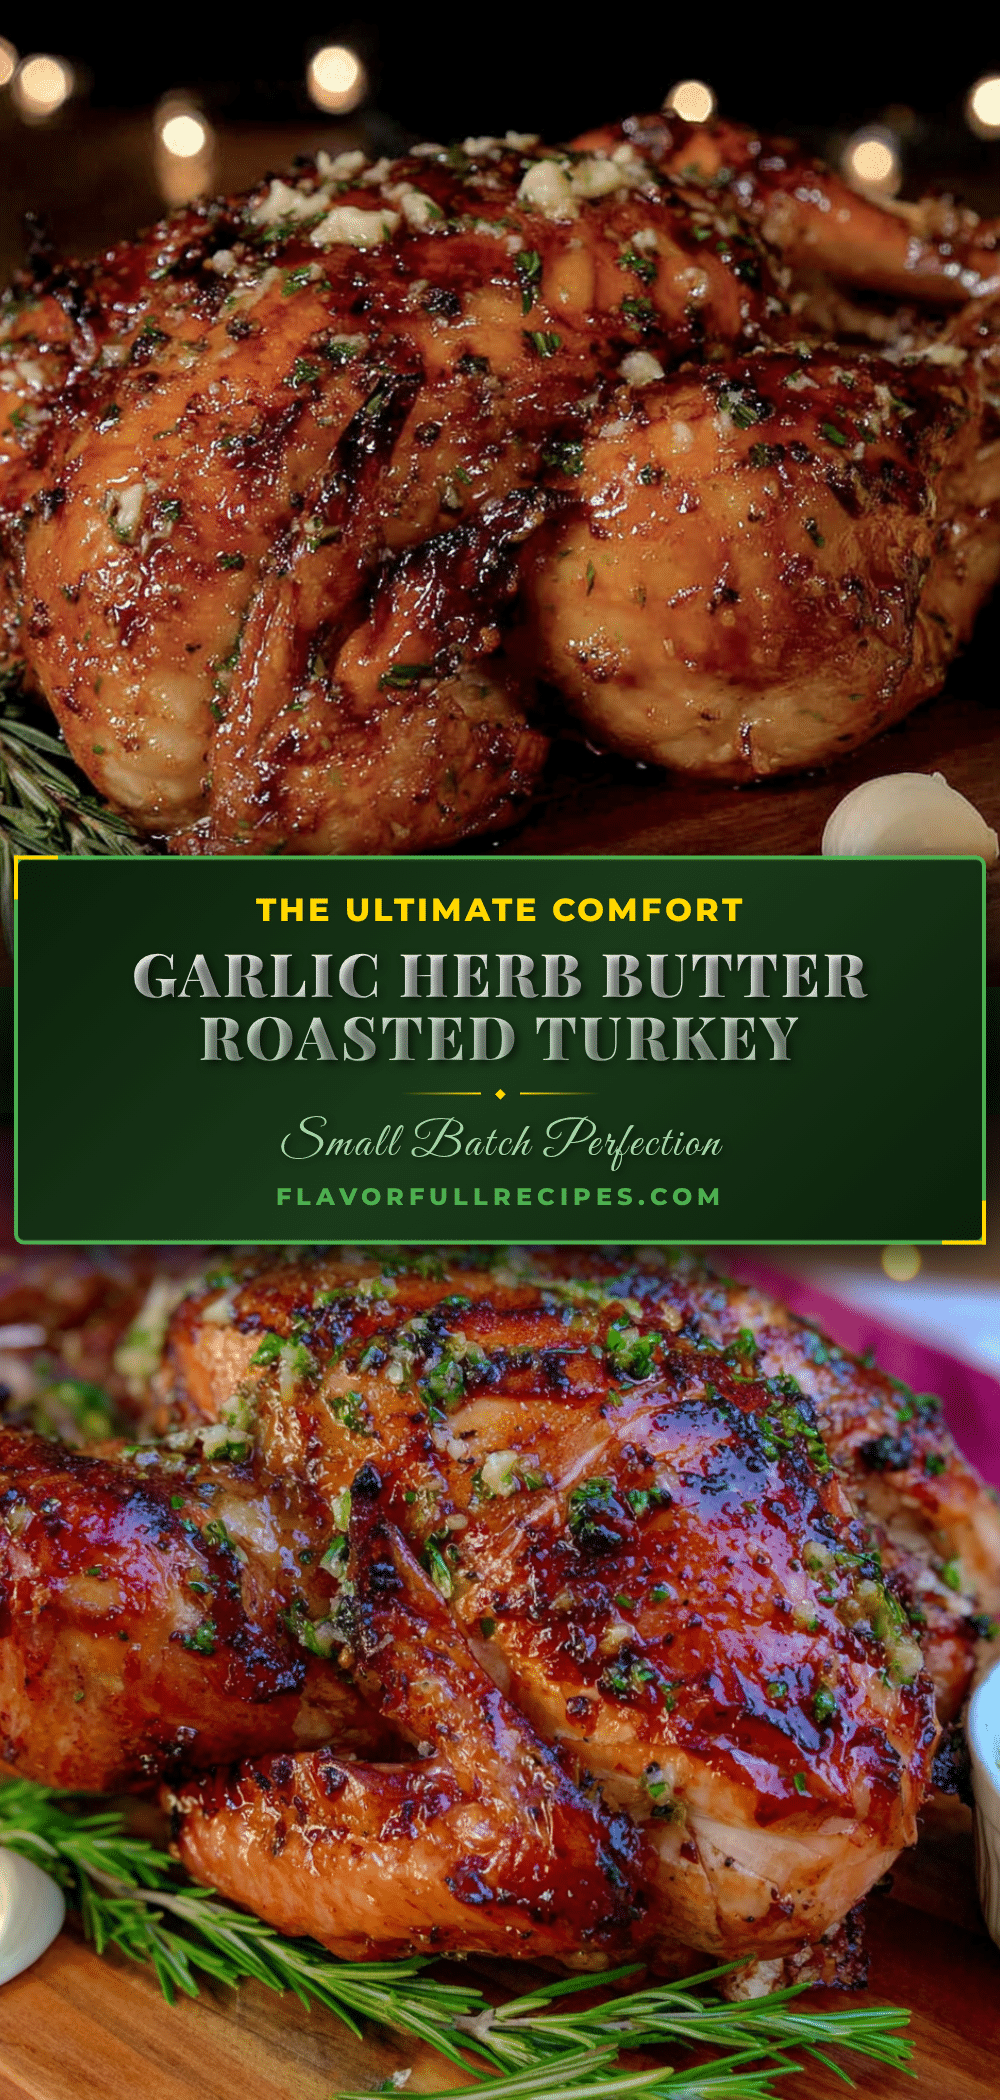

Lighter Garlic Herb Butter Roasted Turkey (Small Batch)
- Total Time: 1 hour 25 minutes
- Yield: 4 servings 1x
Description
A perfectly sized, juicy, and flavorful roasted turkey breast for two to four people. This lighter version uses herb-infused butter for incredible taste without the heaviness of a full holiday bird.
Ingredients
- 1 (2-3 lb) bone-in, skin-on turkey breast
- 4 tablespoons unsalted butter, softened
- 4–5 cloves fresh garlic, minced
- 2 tablespoons fresh rosemary, finely chopped
- 2 tablespoons fresh thyme, finely chopped
- 2 tablespoons fresh sage, finely chopped
- 1–2 teaspoons kosher salt
- 1/2 teaspoon freshly ground black pepper
- 1 tablespoon olive oil
- 1/2 cup chicken or turkey broth
Instructions
- Preheat oven to 425°F (220°C). Pat the turkey breast completely dry with paper towels. Let it sit at room temperature for 15-20 minutes.
- In a small bowl, combine softened butter, minced garlic, chopped herbs, 1/2 teaspoon salt, and 1/4 teaspoon pepper. Mix well.
- Gently loosen the skin of the turkey breast with your fingers, creating a pocket. Spread about two-thirds of the herb butter under the skin. Rub the remaining butter all over the outside of the turkey.
- Drizzle olive oil over the skin and rub it in. Season generously with remaining salt and pepper.
- Place the turkey breast skin-side up in a small roasting pan or 9×13-inch baking dish. Pour broth into the bottom of the pan.
- Roast for 45-60 minutes, or until the internal temperature reaches 160°F (71°C) in the thickest part of the breast. If browning too quickly, tent loosely with foil after 30 minutes. Baste once halfway through.
- Remove from oven and transfer to a cutting board. Tent loosely with foil and let rest for 15-20 minutes.
- For pan sauce (optional): Place roasting pan on stovetop over medium heat. Add a splash of white wine or broth, scraping up browned bits. Simmer for 1-2 minutes. Whisk in cornstarch slurry (1 teaspoon cornstarch + 1 tablespoon cold water) to thicken if desired. Strain and serve.
- Carve the turkey against the grain into thick slices. Serve immediately.
Notes
Patting the turkey dry is crucial for crispy skin. Use an instant-read thermometer for perfect doneness; pull at 160°F as temperature will rise to 165°F during rest. Let the turkey rest for at least 15-20 minutes before carving to retain juices. For a dairy-free version, substitute butter with plant-based butter or ghee.
- Prep Time: 15 minutes
- Cook Time: 50 minutes
- Category: Main Course
- Cuisine: American
Nutrition
- Serving Size: 4 ounces (without sk
- Calories: 190
- Sodium: 450
- Fat: 9
- Saturated Fat: 4
- Carbohydrates: 2
- Protein: 27
Keywords: roasted turkey, small batch turkey, garlic herb butter turkey, turkey breast, lighter turkey, easy turkey recipe, weeknight turkey