My neighbor, Carla, asked why I couldn’t just skip the rolling pin and press the whole thing into a pan instead. I had just spent twenty minutes explaining my grandmother’s apple pie technique—the chilled butter, the careful lattice, the way the dough has to rest just so. She was listening, nodding, but her eyes kept drifting to my tired flour-dusted counter.
I started to explain why that wouldn’t work—then stopped. Honestly, I had no good reason. I was just being stubborn. So I shrugged, grabbed my 9×13 baking dish, and said, “Fine. Let’s try it your way.”
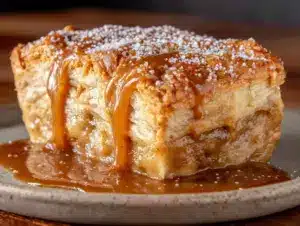
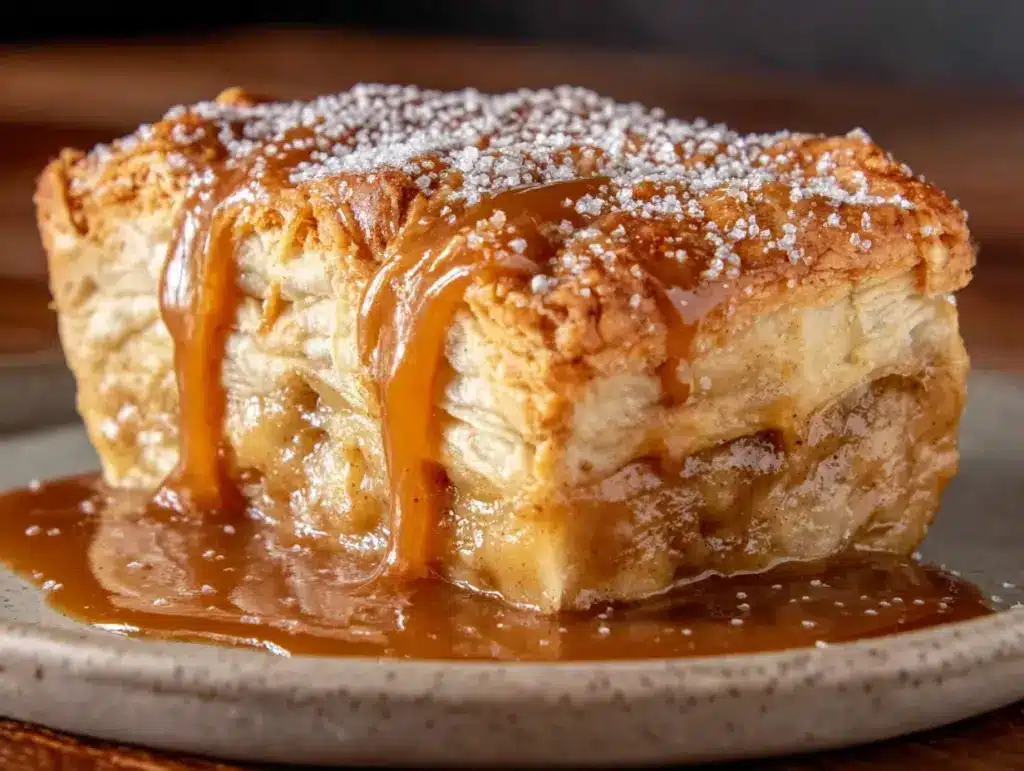
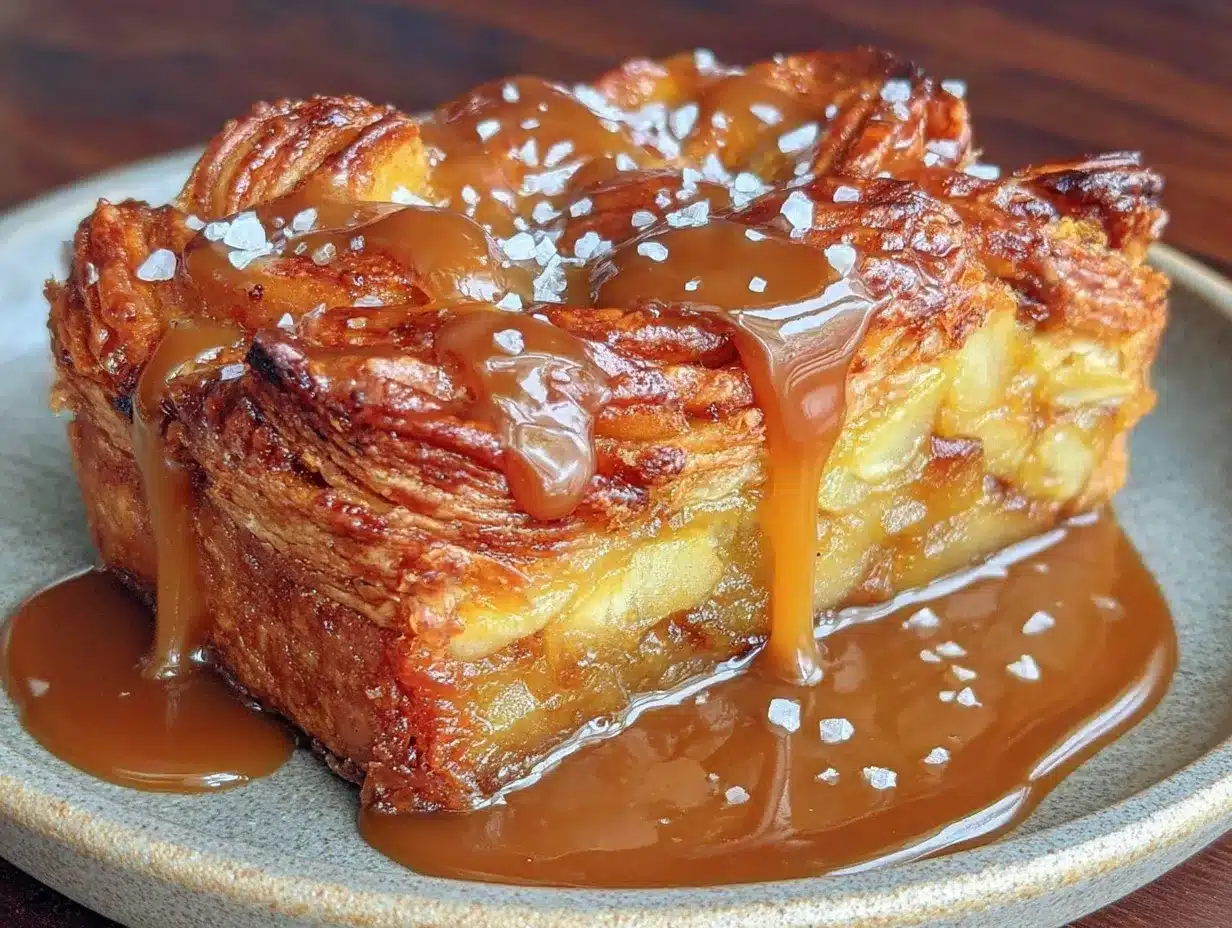
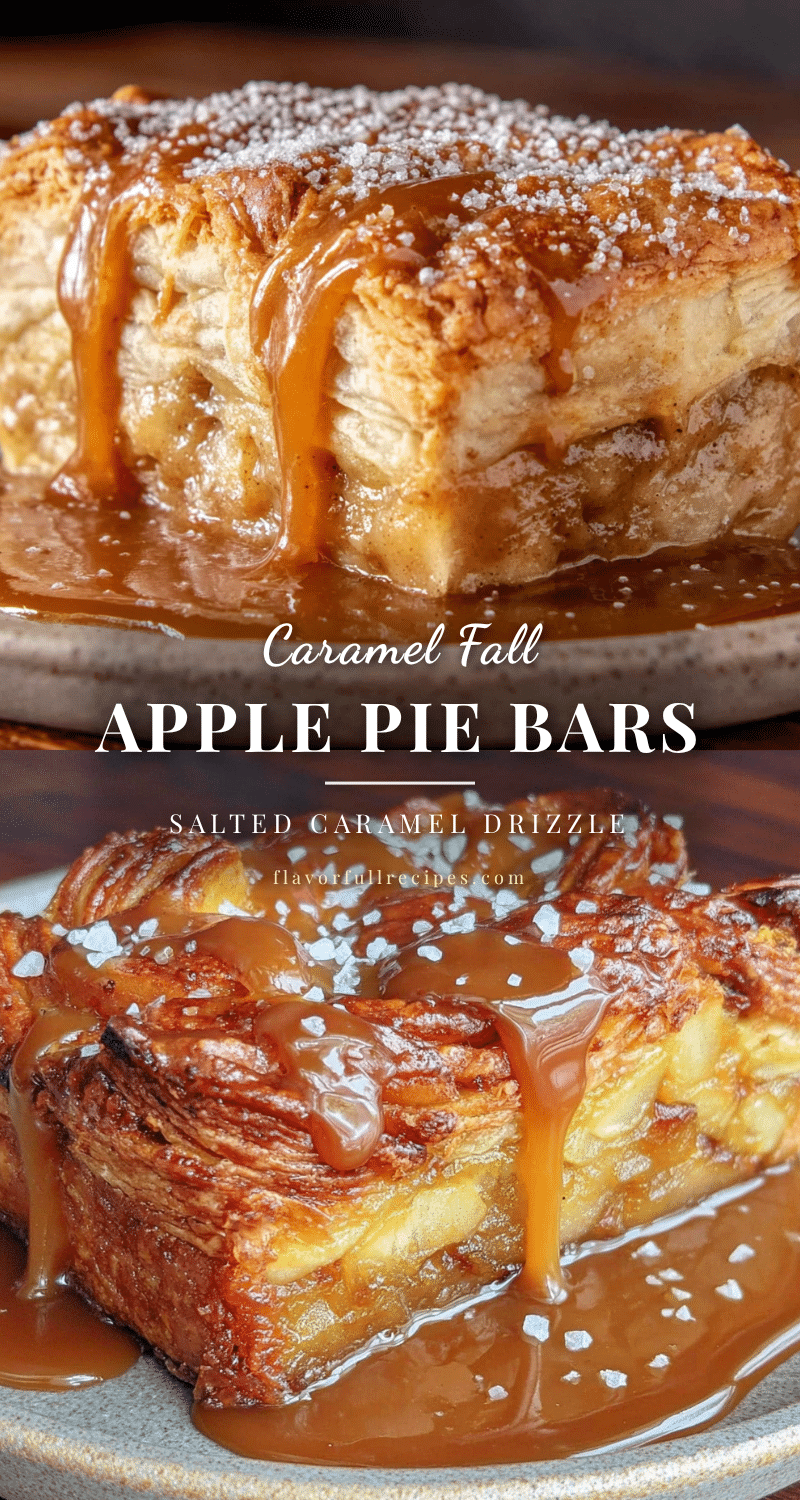
What happened next completely humbled me. The apples softened into this perfect, jammy layer. The crust—baked as a buttery shortbread base and crumbly top—stayed tender instead of getting tough from over-handling. And the salted caramel? It pooled into every little crevice like it had been planning to live there all along.
I mean, I actually laughed out loud when I pulled them from the oven. There they were—all the cozy, spiced, apple-pie feelings I loved—packed into neat little bars that didn’t require a single pie plate or a speck of lattice-work stress. Maybe you’ve been there, standing over a pie crust that just won’t cooperate, wondering why you bother. I get it. That was me, on a random Tuesday in October, being saved by a neighbor who just wanted to help.
These fall apple pie bars with salted caramel drizzle have become my go-to for every autumn gathering since. They taste like a hug and take half the effort. And honestly? That’s the kind of recipe worth keeping.
Why You’ll Love This Recipe
Let me tell you why these bars have completely replaced traditional pie in my kitchen. First off, they’re genuinely easy. You don’t need to chill dough, roll anything out, or worry about a soggy bottom crust. Everything gets pressed into one pan, and that’s it. I’ve tested this recipe four times now—once with a friend who claims she “can’t bake”—and it worked perfectly every single time.
- Quick & Easy: From start to table in about an hour, with only 15 minutes of active prep. Perfect for those busy fall weeknights when you still want something homemade.
- Simple Ingredients: You probably have most of this in your pantry right now. Butter, flour, sugar, apples, and a few warm spices. No fancy extracts or hard-to-find items.
- Perfect for Fall Gatherings: These bars travel beautifully, slice cleanly, and feed a crowd without any fuss. Thanksgiving potluck? Football party? Cozy Friendsgiving? They fit everywhere.
- Crowd-Pleaser: I’ve brought these to three different events this season, and every single time, someone asks for the recipe. Kids love the caramel; adults love the sophisticated salted finish.
- Unbelievably Delicious: The texture is what gets me every time. A buttery, almost shortbread-like crust, a soft apple filling that’s not too sweet, and that salted caramel that seeps into every bite. It’s next-level comfort food, I promise.
What makes these different from other apple bars you’ve tried? It’s the method. By pre-cooking the apples just slightly before baking, you avoid that watery, separated filling that plagues so many fruit bars. The apples stay tender but never mushy, and the caramel stays glossy instead of turning grainy. It’s a small tweak that makes a huge difference.
This recipe isn’t just good—it’s the kind that makes you close your eyes after the first bite. The warm cinnamon hits first, then the buttery crust, then that little pop of salt that makes the caramel sing. It’s comfort food reimagined: easier, faster, but with the same soul-soothing satisfaction. Perfect for impressing guests without stress, or turning a simple Tuesday into something memorable.
What Ingredients You Will Need
This recipe uses simple, wholesome ingredients to deliver bold flavor and satisfying texture without the fuss. Most of these are pantry staples, especially if you keep a well-stocked baking drawer. Here’s what you’ll need and why each one matters.
For the Crust & Topping
- 2 ½ cups all-purpose flour (spooned and leveled—don’t scoop straight from the bag or your crust will be dry)
- ½ cup granulated sugar (adds just enough sweetness to balance the tart apples)
- ¼ cup packed light brown sugar (for that subtle molasses warmth that pairs so well with cinnamon)
- 1 cup unsalted butter, cold and cubed (I use Kerrygold here—the higher butterfat content makes the crust incredibly tender)
- 1 teaspoon vanilla extract (pure, not imitation, if you can swing it)
- ½ teaspoon salt (fine sea salt works best; it dissolves evenly into the dough)
For the Apple Filling
- 5 cups peeled and sliced apples (about 5-6 medium apples—I recommend Honeycrisp or Granny Smith for the best balance of sweet and tart)
- ¼ cup granulated sugar
- 2 tablespoons all-purpose flour (this thickens the juices so your bars aren’t soggy)
- 1 tablespoon fresh lemon juice (keeps the apples from browning and brightens the flavor)
- 1 ½ teaspoons ground cinnamon
- ½ teaspoon ground nutmeg (freshly grated if you have it—it makes a difference)
- ¼ teaspoon ground allspice (optional, but I love the warmth it adds)
For the Salted Caramel Drizzle
- ½ cup unsalted butter
- 1 cup packed light brown sugar
- ½ cup heavy cream (room temperature—cold cream can cause the caramel to seize)
- 1 teaspoon flaky sea salt (like Maldon—it’s less intense than table salt and gives you those lovely crunchy bursts)
- 1 teaspoon vanilla extract
A few quick notes on ingredients. For the apples, I’ve found that a mix of Honeycrisp and Granny Smith gives the best texture. Honeycrisp holds its shape beautifully, while Granny Smith breaks down just enough to create that jammy filling. If you’re in a pinch, Fuji or Braeburn work too—just avoid Red Delicious, which turn into mush. For the butter, I really do recommend a European-style brand. It has less water content, which means your crust stays flaky instead of tough. And for the salt in the caramel, please don’t skip the flaky sea salt. Regular table salt will make it taste one-dimensional and harsh. The flaky stuff gives you those little pops of salt that make the caramel truly shine.
Equipment Needed
You don’t need a fancy kitchen to make these bars. Here’s what I use every time:
- 9×13-inch baking pan (metal or glass both work—just note that glass may need an extra 5 minutes of baking time)
- Parchment paper (non-negotiable for easy removal—let some hang over the edges as handles)
- Large mixing bowls (one for the crust, one for the apples)
- Pastry cutter or two forks (for cutting butter into the flour—your hands work too, but work quickly so the butter stays cold)
- Chef’s knife and cutting board
- Vegetable peeler
- Measuring cups and spoons
- Saucepan (for the caramel—a heavy-bottomed one prevents scorching)
- Whisk
- Cooling rack
If you don’t have a pastry cutter, honestly, your fingers are fine. Just rub the butter into the flour until it looks like coarse sand with some pea-sized bits remaining. Those little butter chunks are what create flaky pockets in the crust. And if you don’t have a 9×13 pan, an 8×8 will work—just double the baking time and expect thicker bars. I’ve done it before when my big pan was in use, and they turned out great, just a little taller.
Preparation Method
Let’s get baking. I’ll walk you through this step by step, with all the little cues I’ve learned from making these bars more times than I can count.
- Preheat your oven to 375°F (190°C). Line your 9×13 pan with parchment paper, leaving about 2 inches overhanging on the long sides. These will be your handles later. Lightly grease the parchment with butter or non-stick spray.
- Make the crust mixture. In a large bowl, whisk together the flour, granulated sugar, brown sugar, and salt. Add the cold, cubed butter and vanilla. Use your pastry cutter or fingers to work the butter into the flour until the mixture looks like coarse meal with some pea-sized butter pieces still visible. This should take about 2-3 minutes. Don’t overwork it—those butter bits are what make the crust tender.
- Press the crust. Reserve about 1 ½ cups of the crumb mixture for the topping. Press the remaining mixture evenly into the bottom of your prepared pan. Use the bottom of a measuring cup to really pack it down firmly. This is important—a loosely pressed crust will crumble when you try to cut the bars later. Bake for 12-14 minutes, until the edges are just starting to turn golden. Set aside to cool slightly while you prepare the filling.
- Prepare the apples. In a large bowl, toss the sliced apples with lemon juice, sugar, flour, cinnamon, nutmeg, and allspice. Make sure every slice is coated. Let this sit for 5 minutes—the sugar will start drawing out the apple juices, which is exactly what we want. The flour will absorb that liquid during baking, creating a thick, jammy filling instead of a watery one.
- Layer the filling. Spread the apple mixture evenly over the pre-baked crust. Don’t worry if it looks piled high—the apples will soften and settle as they bake. Sprinkle the reserved crumb mixture evenly over the top, covering all the apples.
- Bake the bars. Place the pan in the oven and bake for 35-40 minutes, until the topping is golden brown and the apple filling is bubbly around the edges. If the top is browning too quickly (around the 25-minute mark), tent loosely with foil. Your kitchen is going to smell absolutely incredible at this point—like a cozy apple orchard in November.
- Cool completely. This is the hardest step, I know. Let the bars cool in the pan on a wire rack for at least 2 hours before adding the caramel. If you try to cut them warm, the filling will slide right out. Trust me, I learned this the hard way. Patience pays off here.
- Make the salted caramel. While the bars cool, make your caramel. In a medium saucepan over medium heat, melt the butter. Add the brown sugar and heavy cream, whisking constantly until smooth. Bring to a gentle boil, then reduce heat to low and let it simmer for 3-4 minutes, whisking occasionally. It should thicken slightly and turn a deep amber color. Remove from heat, stir in the vanilla and flaky sea salt. Let it cool for 10-15 minutes—it will continue to thicken as it cools.
- Drizzle and serve. Once the bars are completely cool, drizzle the salted caramel generously over the top. Use a spatula to spread it if needed. Let the caramel set for about 10 minutes before slicing. Use the parchment handles to lift the entire block out of the pan, then cut into squares with a sharp knife. Wipe the knife clean between cuts for neat edges.
Cooking Tips & Techniques
After making these bars more times than I care to admit, I’ve collected a few tricks that make a real difference. Let me share them so you don’t have to learn the hard way like I did.
Keep your butter cold. This is the number one rule for a flaky crust. If your kitchen is warm, pop the cubed butter in the freezer for 10 minutes before you start. I once made these on a hot October afternoon (thanks, climate change), and my crust came out greasy instead of tender. Cold butter creates steam pockets as it bakes, which gives you that light, flaky texture.
Don’t skip the pre-bake. I know it’s tempting to just dump everything in and bake it all at once. But that pre-bake step for the crust is crucial. It prevents the bottom from turning soggy when the apple juices release. Think of it as insurance for a crisp, sturdy base.
Slice your apples evenly. Aim for slices about ¼-inch thick. Too thin, and they’ll turn to mush. Too thick, and they won’t soften enough in the baking time. I use a mandoline for consistency, but a sharp knife and a steady hand work just fine.
Watch the caramel carefully. Caramel can go from perfect to burnt in about 30 seconds. Keep your heat at medium-low and whisk constantly. If you see any dark specks forming, pull it off the heat immediately. And please, please don’t taste it straight from the pan—that stuff is lava-hot and will burn your tongue for days. Ask me how I know.
Let the bars set overnight. If you can wait, these bars are actually better the next day. The flavors meld together, the caramel soaks into the crust just slightly, and the texture becomes perfectly cohesive. I often make them the night before a gathering and just add the caramel in the morning.
Variations & Adaptations
One of the best things about this recipe is how flexible it is. Here are some ways I’ve adapted it over the years:
Gluten-Free Version: Swap the all-purpose flour with a 1:1 gluten-free baking blend. I’ve used Bob’s Red Mill with great results. The crust will be slightly more crumbly, but still delicious. Add an extra tablespoon of butter to help it hold together.
Dairy-Free Adaptation: Use vegan butter sticks (not margarine) and full-fat coconut cream instead of heavy cream in the caramel. Miyoko’s European-style cultured vegan butter works beautifully here. The crust will be a little less tender, but the flavor is still spot-on.
Flavor Twists: Try adding ½ cup of chopped pecans or walnuts to the crumb topping for extra crunch. Or swap the cinnamon for apple pie spice if you have it on hand. I once added a teaspoon of bourbon to the caramel, and let me tell you—that was a happy accident. The smoky warmth pairs perfectly with the apples.
Seasonal Variations: In the spring, try using sliced pears instead of apples with a pinch of cardamom. In summer, stone fruits like peaches or nectarines work beautifully—just reduce the sugar slightly since they’re sweeter. In winter, add a tablespoon of brandy to the filling for a boozy twist that’s perfect for holiday parties.
Method Swap: If you’re short on time, you can use store-bought caramel sauce and just stir in some flaky sea salt. It won’t be quite as rich, but it’ll still be delicious. No judgment here—we all have those days.
Serving & Storage Suggestions
These bars are incredibly versatile when it comes to serving. Here’s how I like to enjoy them:
Serving Temperature: I prefer them at room temperature, but they’re also wonderful warm. If you want to serve them warm, reheat individual bars in the microwave for about 15 seconds, or pop the whole pan in a 300°F oven for 10 minutes. Add a fresh drizzle of caramel after reheating.
Presentation Ideas: For a pretty presentation, dust the tops with a little powdered sugar before serving. A scoop of vanilla bean ice cream on the side takes these over the top—the cold creaminess against the warm, spiced bars is pure magic. For a fall-themed dessert board, arrange the bars on a wooden platter with cinnamon sticks, star anise, and fresh apple slices around them.
What to Serve With: These bars pair beautifully with a hot cup of spiced chai, a dark roast coffee, or even a glass of cold milk. For an adult gathering, try them with a bourbon old fashioned or a warm mulled cider. The caramel and spice notes complement both drinks perfectly.
Storage Instructions: Store leftover bars in an airtight container at room temperature for up to 3 days. If your kitchen is warm, refrigerate them—the caramel can get sticky otherwise. To freeze, place the bars (without caramel) in a single layer in a freezer-safe container, separating layers with parchment paper. They’ll keep for up to 3 months. Thaw overnight in the refrigerator, then add the caramel and bring to room temperature before serving.
Flavor Development: Here’s a little secret—these bars actually taste better on day two. The apples continue to soften, the spices meld together, and the crust absorbs just a hint of moisture from the filling, making everything incredibly cohesive. So don’t stress about making them fresh the day of your event. Make them ahead, and thank me later.
Nutritional Information & Benefits
Let’s be real—these are a treat, not a health food. But that doesn’t mean they can’t have some redeeming qualities. Here’s the nutritional breakdown for one bar (based on 16 servings):
| Nutrient | Amount per Bar |
|---|---|
| Calories | 320 |
| Total Fat | 16g |
| Saturated Fat | 10g |
| Carbohydrates | 44g |
| Fiber | 2g |
| Sugar | 30g |
| Protein | 3g |
| Sodium | 180mg |
On the bright side, apples are a great source of fiber and vitamin C, especially if you leave the peels on (though I peel mine for texture). Cinnamon has anti-inflammatory properties, and nutmeg is known for its calming effects. The butter and cream provide vitamin A and healthy fats that help your body absorb the fat-soluble vitamins from the apples.
If you’re watching your sugar intake, you can reduce the sugar in the filling by half—the apples are naturally sweet enough to carry the flavor. Just don’t reduce the sugar in the caramel, as it’s essential for the texture. For a lower-calorie option, serve smaller bars with a big scoop of Greek yogurt instead of ice cream.
Frequently Asked Questions
Can I use pre-made pie filling instead of fresh apples?
You can, but I wouldn’t recommend it. Canned pie filling is much sweeter and has a softer, almost mushy texture. Fresh apples give you that lovely tender-but-not-soggy bite that makes these bars special. If you’re in a pinch, look for a high-quality refrigerated apple filling in the produce section—it’s a step up from canned.
Why did my caramel turn out grainy?
Grainy caramel usually happens when sugar crystals form during cooking. This can happen if you stir too vigorously once the sugar has dissolved, or if your cream was too cold when you added it. To fix it, try reheating the caramel gently with a splash of water, whisking until smooth. Next time, make sure your cream is at room temperature and use a clean whisk—any residual crystals on your tools can cause graininess.
Can I make these bars ahead of time?
Absolutely! In fact, I prefer them made a day ahead. Prepare the bars completely, but hold off on the caramel drizzle. Store them covered at room temperature overnight. The next day, make the caramel fresh, drizzle it over, and let it set before slicing. This gives the flavors time to meld beautifully.
How do I get clean, neat slices?
The key is patience. Let the bars cool completely—at least 2 hours, but overnight is even better. Use a sharp chef’s knife and wipe it clean with a damp paper towel between each cut. For the cleanest edges, chill the bars in the refrigerator for 30 minutes before slicing. Run the knife under hot water, dry it, and slice. The heat helps the knife glide through the caramel without dragging.
Can I freeze these bars with the caramel already on?
I don’t recommend it. The caramel can become watery and separate during thawing, leaving you with a soggy mess. Instead, freeze the bars without caramel, then make a fresh batch when you’re ready to serve. The caramel only takes about 10 minutes to make, and the fresh drizzle makes a huge difference in both texture and appearance.
Conclusion
These fall apple pie bars with salted caramel drizzle have become a staple in my kitchen for good reason. They capture everything I love about autumn baking—the warm spices, the tender apples, the buttery crust—without the stress of a traditional pie. They’re the kind of recipe that makes you look like a hero with minimal effort, and honestly, isn’t that what we all want?
I hope you’ll give them a try, Carla’s way. Press that dough into the pan, pile on the apples, and drizzle that caramel with abandon. Make them your own—add extra cinnamon, throw in some pecans, or double the caramel (I won’t tell). That’s the beauty of a forgiving recipe like this one.
When you make these, I’d love to hear how they turn out. Drop a comment below and let me know if your family loved them as much as mine does. Did you try a variation? Did the caramel turn out perfectly? Share your wins—I read every single comment, and nothing makes me happier than knowing these bars brought a little warmth to your kitchen.
Here’s to cozy autumn days, messy counters, and recipes that remind us that sometimes the best things happen when we let go of perfection. Happy baking, friends!
Pin This Recipe!
Best Easy Apple Pie Bars with Salted Caramel Drizzle
- Total Time: 1 hour 5 minutes
- Yield: 16 servings 1x
Description
These fall apple pie bars with salted caramel drizzle capture all the cozy, spiced, apple-pie feelings without the stress of a traditional pie. A buttery shortbread crust, jammy apple filling, and glossy salted caramel come together in one pan for an easy, crowd-pleasing dessert.
Ingredients
- 2 ½ cups all-purpose flour
- ½ cup granulated sugar
- ¼ cup packed light brown sugar
- 1 cup unsalted butter, cold and cubed
- 1 teaspoon vanilla extract
- ½ teaspoon salt
- 5 cups peeled and sliced apples (about 5–6 medium apples, Honeycrisp or Granny Smith recommended)
- ¼ cup granulated sugar
- 2 tablespoons all-purpose flour
- 1 tablespoon fresh lemon juice
- 1 ½ teaspoons ground cinnamon
- ½ teaspoon ground nutmeg
- ¼ teaspoon ground allspice (optional)
- ½ cup unsalted butter
- 1 cup packed light brown sugar
- ½ cup heavy cream, room temperature
- 1 teaspoon flaky sea salt
- 1 teaspoon vanilla extract
Instructions
- Preheat your oven to 375°F (190°C). Line a 9×13-inch baking pan with parchment paper, leaving about 2 inches overhanging on the long sides. Lightly grease the parchment with butter or non-stick spray.
- Make the crust mixture: In a large bowl, whisk together 2 ½ cups flour, ½ cup granulated sugar, ¼ cup brown sugar, and ½ teaspoon salt. Add 1 cup cold cubed butter and 1 teaspoon vanilla. Use a pastry cutter or fingers to work the butter into the flour until the mixture looks like coarse meal with some pea-sized butter pieces still visible (about 2-3 minutes).
- Press the crust: Reserve about 1 ½ cups of the crumb mixture for the topping. Press the remaining mixture evenly into the bottom of the prepared pan, packing it down firmly with the bottom of a measuring cup. Bake for 12-14 minutes, until the edges are just starting to turn golden. Set aside to cool slightly.
- Prepare the apples: In a large bowl, toss the sliced apples with 1 tablespoon lemon juice, ¼ cup granulated sugar, 2 tablespoons flour, 1 ½ teaspoons cinnamon, ½ teaspoon nutmeg, and ¼ teaspoon allspice (if using). Let sit for 5 minutes.
- Layer the filling: Spread the apple mixture evenly over the pre-baked crust. Sprinkle the reserved crumb mixture evenly over the top.
- Bake the bars: Bake for 35-40 minutes, until the topping is golden brown and the apple filling is bubbly around the edges. If the top browns too quickly, tent loosely with foil. Let cool in the pan on a wire rack for at least 2 hours.
- Make the salted caramel: In a medium saucepan over medium heat, melt ½ cup butter. Add 1 cup brown sugar and ½ cup heavy cream, whisking constantly until smooth. Bring to a gentle boil, then reduce heat to low and simmer for 3-4 minutes, whisking occasionally, until thickened and deep amber. Remove from heat, stir in 1 teaspoon vanilla and 1 teaspoon flaky sea salt. Let cool for 10-15 minutes.
- Drizzle and serve: Once the bars are completely cool, drizzle the salted caramel generously over the top. Let set for about 10 minutes. Use the parchment handles to lift the block out of the pan, then cut into squares with a sharp knife, wiping the knife clean between cuts.
Notes
Keep butter cold for a flaky crust. Pre-baking the crust prevents sogginess. Slice apples evenly (about ¼-inch thick). Watch caramel carefully to avoid burning. Bars are even better the next day—flavors meld overnight. For clean slices, cool completely and chill before cutting.
- Prep Time: 15 minutes
- Cook Time: 50 minutes
- Category: Dessert
- Cuisine: American
Nutrition
- Serving Size: 1 bar
- Calories: 320
- Sugar: 30
- Sodium: 180
- Fat: 16
- Saturated Fat: 10
- Carbohydrates: 44
- Fiber: 2
- Protein: 3
Keywords: apple pie bars, salted caramel, fall dessert, easy apple bars, apple dessert, shortbread crust, autumn baking