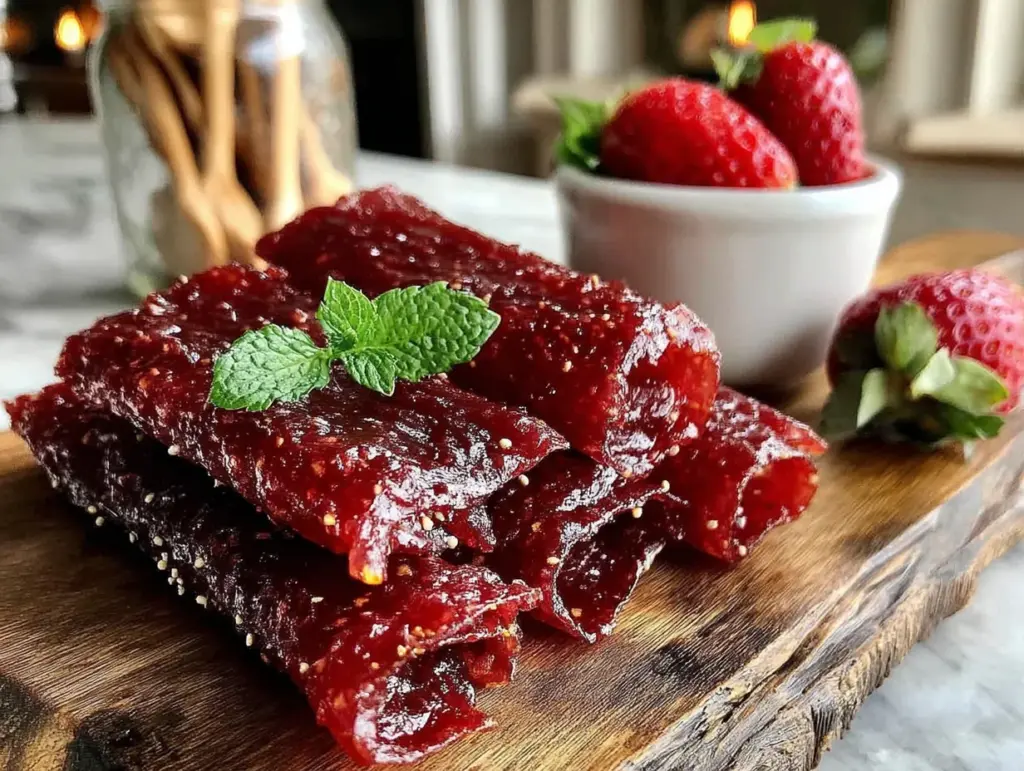
The bag of store-bought fruit snacks was sitting on the counter, and my three-year-old had just asked for the third time if she could have some. I picked it up, flipped it over, and read the ingredients. Sugar. Corn syrup. More sugar. Artificial flavor. Food coloring. I put it back down and said, “Let’s make our own instead.” That was a bold move for a Tuesday afternoon with a hungry toddler and a fridge full of fruit that was starting to look a little sad. I had a bunch of overripe strawberries, a couple of mangos that were begging to be used, and a bag of frozen peaches from last week’s smoothie phase. I figured—what’s the worst that could happen?
So I pulled out the blender, tossed in the fruit, and started experimenting. I wasn’t trying to be fancy. I just wanted something chewy, fruity, and sweet—without the junk. The first batch came out a little too thin. The second batch stuck to the parchment paper like glue. But the third batch? That one worked. It peeled right off, had that perfect bendy texture, and tasted like summer in a strip. My daughter ate three pieces before I could even get them all rolled up.
That’s how these healthy homemade fruit roll-ups with no added sugar were born. Not from a fancy recipe book or a wellness blog. Just from a mom who didn’t want to say “no” to a snack, but also didn’t want to say “yes” to a mouthful of high fructose corn syrup. And honestly? They turned out better than anything I’ve ever bought at the store. The flavor is brighter, the texture is softer, and you actually know what’s in them. It’s one of those kitchen wins that makes you feel like you’ve cracked some secret code.
If you’ve ever wanted a lunch box snack that feels like a treat but is secretly just fruit—this is it. Stick with me, and I’ll show you exactly how to make them without any special equipment or sugar substitutes. Just real fruit, a little patience, and a hot oven.
Why You’ll Love This Recipe
Let’s be real for a second. Most fruit roll-ups you buy at the store are basically candy in disguise. They’re sticky, sweet, and loaded with stuff you can’t pronounce. But these healthy homemade fruit roll-ups with no added sugar are the real deal. Here’s why they’ve become a staple in my kitchen:
- Only Real Fruit – No concentrates, no syrups, no hidden sugars. Just fruit, blended and dried. That’s it.
- Perfect for Lunch Boxes – They hold up surprisingly well, don’t get soggy, and kids absolutely love them. I’ve packed them alongside easy make-ahead school lunch wraps for a full meal that feels fun.
- Naturally Sweet – When you use ripe fruit, you don’t need sugar. The sweetness comes from the fruit itself, and it’s honestly more satisfying.
- Budget-Friendly – A box of organic fruit snacks costs a small fortune. This recipe uses fruit that’s often on sale or about to go bad. Total win.
- No Special Equipment – You don’t need a dehydrator. A regular baking sheet and an oven on low heat does the trick perfectly.
- Endless Flavor Combos – Strawberry, mango, peach, mixed berry—you can use whatever you have. I’ve even made a batch with leftover watermelon that was incredible.
What makes this recipe different from all the other fruit roll-up tutorials out there? It’s the texture. A lot of homemade versions come out either too brittle or too sticky. I’ve tested this one about seven times to get that perfect chewy, pliable consistency that doesn’t stick to your teeth. It’s not rubbery, it’s not hard—it’s just right. Plus, I’ll show you a trick for getting it off the parchment paper without losing your mind.
This is the kind of snack that makes you feel good about what you’re feeding your family. It’s simple, wholesome, and honestly kind of fun to make. My daughter calls them “fruit blankets” and asks for them every single day. I’m not mad about it.
What Ingredients You Will Need
This recipe is beautifully simple. You only need a few things, and chances are you already have most of them in your kitchen. The key is using fruit that’s ripe and flavorful—that’s where all the sweetness comes from.
- Fresh or Frozen Fruit (2 cups) – This is your base. Strawberries, mangos, peaches, raspberries, or a mix all work great. If using frozen, thaw them first and drain any excess liquid. I personally love a strawberry-mango combo—the sweetness of the mango balances the tartness of the strawberry perfectly.
- Lemon Juice (1 tablespoon) – This isn’t just for flavor. The acidity helps preserve the color and keeps the fruit from oxidizing. It also brightens the overall taste. Don’t skip it, even if you’re using sweet fruit.
- Water (2-3 tablespoons, as needed) – You only need this if your fruit is thick and not blending easily. Frozen fruit often needs a little extra liquid. Add it one tablespoon at a time until the puree is smooth.
- Optional: Honey or Maple Syrup (1 tablespoon, for slightly sweeter version) – I’m calling this optional because the recipe works without it. But if you’re using tart fruit like green apples or underripe berries, a tiny bit of natural sweetener helps. For the “no added sugar” version, leave it out entirely.
- Optional: Chia Seeds or Flax Seeds (1 teaspoon, for extra nutrition) – This is completely optional, but I’ve added finely ground chia seeds to a few batches and it gives the roll-ups a tiny nutritional boost. Just make sure they’re ground fine so the texture stays smooth.
Ingredient Selection Tips: The riper the fruit, the sweeter the roll-up. If your strawberries are pale and hard, the final product will be tart. Let them sit on the counter for a day or two until they’re deep red and fragrant. Same goes for mangos—they should yield slightly when you press them. For peaches, look for that sweet, floral smell at the stem end. Trust your nose on this one.
Substitution Guidance: You can swap out any fruit in this recipe. I’ve made batches with blueberries, raspberries, and even plums. Just keep in mind that very watery fruits like watermelon or citrus will need a longer drying time. Also, if you’re using berries with small seeds (like raspberries), you might want to strain the puree through a fine mesh sieve for a smoother texture. I don’t always bother, but it makes a difference if you’re serving them to picky kids.
Brand Preferences: I don’t have strong brand loyalty on fruit—whatever is on sale works. But for parchment paper, don’t go cheap. Thin parchment paper can stick or tear when you’re peeling off the dried fruit. I use Reynolds Kitchens parchment paper and it’s never let me down.
Equipment Needed
You don’t need a dehydrator or any fancy gadgets for this recipe. Here’s what you’ll actually use:
- Blender or Food Processor – A regular blender works fine. If you have a high-speed blender like a Vitamix, it’ll give you an ultra-smooth puree. But honestly, a $20 blender does the job too.
- Baking Sheet – A standard half-sheet pan (about 13×18 inches) is ideal. You want one with a rim so the puree doesn’t spill over.
- Parchment Paper – This is non-negotiable. Wax paper will melt, and aluminum foil will stick. Use good quality parchment paper.
- Spatula or Offset Spatula – For spreading the puree into an even layer. An offset spatula makes it easier to get smooth, even thickness.
- Oven – Set to the lowest temperature possible (usually 170-200°F or 75-95°C). If your oven doesn’t go that low, you can prop the door open slightly with a wooden spoon.
- Cooling Rack – Optional, but helpful for cooling the roll-ups evenly before cutting.
- Kitchen Scissors or Pizza Cutter – For cutting the dried fruit into strips. A pizza cutter gives you clean, straight edges.
Personal Note: I tried using a silicone baking mat once instead of parchment paper. It was a disaster. The fruit stuck in spots and the texture was uneven. Stick with parchment paper—it’s tried, tested, and way easier to peel off.
Preparation Method
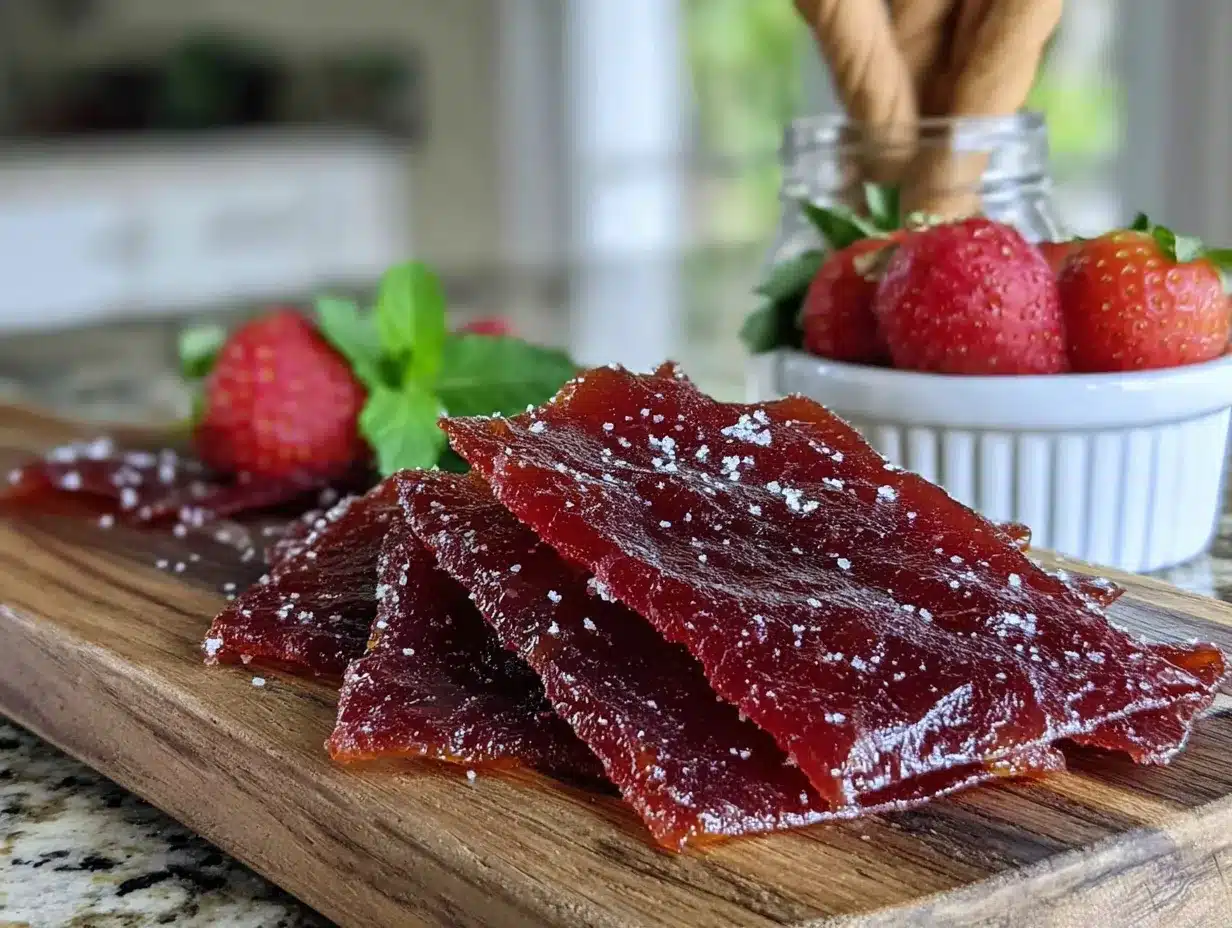
Making healthy homemade fruit roll-ups with no added sugar is easier than you think. Follow these steps carefully, and you’ll get perfect results every time.
- Preheat your oven to the lowest setting (170-200°F or 75-95°C). If your oven runs hot, go with 170°F. Low and slow is the name of the game here. Line a baking sheet with parchment paper, making sure the paper extends slightly over the edges for easy removal later.
- Wash and prep your fruit. If using strawberries, remove the green tops. For mangos, peel and cut the flesh away from the pit. Peaches should be pitted and sliced. You want about 2 cups of prepared fruit total. If using frozen fruit, thaw it completely and drain off any liquid that collects. Excess water will make the drying time way longer.
- Blend the fruit until smooth. Add the fruit to your blender along with 1 tablespoon of lemon juice. Blend on high until completely smooth, about 30-60 seconds. If the mixture is too thick to blend, add water 1 tablespoon at a time until it moves freely. You’re looking for a consistency similar to a thick smoothie—not watery, but not paste-like either.
- Taste and adjust. Give the puree a quick taste. If your fruit was tart, you can add a tiny bit of honey or maple syrup at this point. But if the fruit is ripe and sweet, you won’t need anything. Remember, the flavor concentrates as it dries, so what tastes mildly sweet now will taste much sweeter later.
- Pour the puree onto the prepared baking sheet. Pour it in the center, then use your spatula to spread it into an even, thin layer. Aim for about 1/8 inch thick. If it’s too thick, the roll-ups will take forever to dry and might end up gummy. Too thin, and they’ll be brittle. An even layer is crucial—check the corners and edges to make sure they’re not thicker than the middle.
- Bake low and slow. Place the baking sheet in the oven and let it dry for 3-4 hours. The exact time depends on your oven temperature and the water content of your fruit. Check it after 3 hours. The fruit leather is done when the surface is no longer sticky to the touch, and the edges start to peel away from the parchment paper slightly. It should feel firm but pliable, like a soft fruit snack.
- Cool completely. Remove the baking sheet from the oven and let it cool on a wire rack for about 15-20 minutes. Don’t try to peel it off while it’s warm—it will stick and tear. Patience here pays off.
- Cut and roll. Once completely cool, use kitchen scissors or a pizza cutter to cut the fruit leather into strips. I usually make them about 1.5 inches wide and 4-5 inches long. Then roll each strip up with a piece of parchment paper between the layers to prevent sticking. You can also cut them into fun shapes with cookie cutters for a special treat.
Troubleshooting Tip: If your fruit leather is still sticky after 4 hours, it needs more time. If the edges are crispy but the center is tacky, your layer was uneven. Next time, pay extra attention to spreading it evenly. If it’s brittle and cracking, it dried too long. Adjust your time next batch.
Cooking Tips & Techniques
I’ve made this recipe more times than I can count, and I’ve learned a few things the hard way. Here are my best tips for getting perfect fruit roll-ups every single time.
Don’t rush the drying time. I know it’s tempting to crank up the heat to speed things up, but don’t do it. High heat will cook the fruit instead of drying it, and you’ll end up with a jammy, sticky mess. Low and slow is the only way to get that chewy, bendy texture. If you’re in a hurry, a dehydrator set to 135°F (57°C) works in about 4-6 hours.
Use a fan or convection setting if you have it. Air circulation helps the fruit dry more evenly. If your oven has a convection setting, use it. If not, you can prop the oven door open slightly with a wooden spoon handle (just make sure no kids or pets can bump into it).
Watch for over-drying. The first time I made these, I left them in the oven for 5 hours and they came out like fruit crackers. Not terrible, but not what I was going for. Start checking at the 3-hour mark. The fruit leather is done when it’s dry to the touch but still flexible. If you bend it and it cracks, it’s overdone.
Peel while it’s cool but not cold. I made the mistake of refrigerating the whole sheet before peeling once. The cold made the fruit leather stiff and harder to work with. Room temperature is ideal. If it does get too cold, just let it sit out for 10 minutes before peeling.
Layer with parchment for storage. When you roll up the strips, place a small piece of parchment paper between each layer. This prevents them from sticking together in the storage container. Trust me on this—I learned the hard way when I pulled out a giant fruit blob instead of individual roll-ups.
Double batch tip: You can easily double this recipe and use two baking sheets at once. Just rotate the pans halfway through drying for even results. I often make a big batch on Sunday and we have fruit roll-ups for the entire week.
Variations & Adaptations
One of the best things about this recipe is how flexible it is. Once you master the basic technique, you can experiment with all kinds of flavors and add-ins.
Berry Blast: Use a mix of strawberries, blueberries, and raspberries. The color comes out a deep, gorgeous purple-red. If you don’t like seeds, strain the puree through a fine mesh sieve after blending. It takes an extra minute but gives you a perfectly smooth texture.
Tropical Twist: Mango and pineapple are a match made in heaven. The pineapple adds a little tang that cuts through the sweetness. Just make sure to drain the pineapple well if using canned—you want the puree to be thick, not watery.
Green Machine: This one sounds weird but trust me. Blend spinach or kale with apple and pear. The fruit masks the veggie taste completely, and you get a sneaky dose of greens in a snack your kids will actually eat. My daughter has no idea she’s eating spinach when I make these.
Spiced Apple: Use applesauce or cooked apples as your base, then add a pinch of cinnamon and a tiny dash of nutmeg. It tastes like autumn in a roll-up. This version is especially good for lunch boxes during the cooler months.
Dietary Adaptations: This recipe is naturally vegan, gluten-free, dairy-free, and nut-free. If you’re avoiding all added sugars, just make sure your fruit is very ripe and skip the honey or maple syrup. For a lower-sugar option, use berries and tart fruits like green apples or rhubarb (just add a little extra lemon juice to balance the flavor).
Personal Favorite: I made a batch last summer with fresh peaches from the farmer’s market and added a tiny splash of vanilla extract. It was hands-down the best version I’ve ever made. The vanilla brought out the natural sweetness of the peaches in a way that felt almost decadent. I’ll be making that one again as soon as peach season rolls around.
Serving & Storage Suggestions
These fruit roll-ups are incredibly versatile. Here’s how to serve and store them for the best experience.
Serving Temperature: Room temperature is ideal. The texture is soft and chewy, not stiff or cold. If you’ve stored them in the fridge, let them sit out for 5-10 minutes before eating.
Presentation Ideas: Cut them into fun shapes with cookie cutters for birthday parties or special treats. Stars, hearts, and animals are always a hit with kids. You can also cut them into long, thin strips and tie them into loose knots for a playful presentation. For lunch boxes, I roll them up with a strip of parchment paper and tuck them in next to a turkey ranch pinwheel sandwich for a complete meal that feels exciting.
Storage Instructions: Store the rolled-up fruit leather in an airtight container at room temperature for up to 2 weeks. They’ll stay soft and chewy as long as they’re sealed well. For longer storage, keep them in the refrigerator for up to a month, or freeze for up to 3 months. To freeze, layer the roll-ups between sheets of parchment paper in a freezer-safe bag. Thaw at room temperature for about 15 minutes before eating.
Reheating: You don’t really need to reheat these, but if they’ve gotten a little too firm in the fridge, you can microwave them for 5-10 seconds to soften them up. Don’t overdo it, or they’ll get sticky.
Flavor Development: Interestingly, the flavor of these fruit roll-ups actually deepens after a day or two. The natural sugars continue to meld, and the texture becomes more uniform. They’re good fresh, but they’re even better on day three. If you can resist eating them all right away, you’ll be rewarded.
Packing for Lunch: These hold up really well in lunch boxes. They don’t get soggy, they don’t melt, and they don’t need any special packaging. Just toss one in a reusable snack bag and you’re good to go. I’ve also packed them alongside wholesome no-microwave cold lunch ideas for a snack that feels like a treat.
Nutritional Information & Benefits
Let’s talk numbers. Since this recipe uses only fruit, the nutritional profile is about as clean as it gets.
Estimated Nutrition (per 1 roll-up, based on strawberry-mango):
- Calories: 35-45
- Carbohydrates: 9-11g
- Fiber: 1-2g
- Sugar: 7-9g (all natural, from fruit)
- Vitamin C: 20-30% of daily value
- Vitamin A: 5-10% of daily value
Health Benefits: These fruit roll-ups are packed with vitamins, antioxidants, and fiber. The vitamin C in strawberries and mangos supports immune health, while the fiber aids digestion and keeps kids full between meals. Unlike store-bought versions, there’s no added sugar, no artificial colors, and no preservatives. Just pure, whole food.
Dietary Considerations: This recipe is suitable for most dietary needs. It’s naturally gluten-free, dairy-free, egg-free, nut-free, and vegan. If you’re on a low-sugar diet, use berries and tart fruits. If you’re watching carbs, keep portion sizes in mind—fruit does contain natural sugars, even if they’re healthier than refined sugar.
Allergen Note: This recipe is free from the top 8 allergens. However, if you’re using a shared blender or kitchen tools, be mindful of cross-contamination if allergies are a concern.
Personal Perspective: I love that I can give these to my daughter without any guilt. She thinks she’s getting a treat, and I know she’s getting real fruit. It’s one of those rare parenting wins where everybody’s happy.
Conclusion
If you’ve been on the fence about making your own fruit snacks, let this be your sign to just go for it. These healthy homemade fruit roll-ups with no added sugar are genuinely one of the easiest, most rewarding recipes I’ve ever made. They’re forgiving, flexible, and way more delicious than anything you’ll find in a pouch or a box. Plus, you get to control exactly what goes into them—which feels pretty good when you’re packing lunch boxes or looking for a quick snack that won’t send the kids bouncing off the walls.
I love that this recipe works with whatever fruit you have on hand. It saves money, reduces food waste, and turns something as simple as a slightly overripe mango into a snack that feels special. And honestly? The first time you peel a perfect sheet of fruit leather off the parchment paper, you’re going to feel like a kitchen magician.
So grab your blender, pick your favorite fruit, and give these a try. Play around with the flavors, get the kids involved in spreading the puree, and don’t stress if the first batch isn’t perfect. Cooking is supposed to be fun, and this recipe is all about keeping things simple and real. I’d love to hear how yours turn out—drop a comment below and let me know what flavor combo you tried. And if you’re looking for more healthy lunch box ideas, you might enjoy these easy DIY bento lunch boxes for picky kindergartners for even more inspiration. Happy snacking!
Frequently Asked Questions
Can I make these fruit roll-ups without an oven?
Yes! A dehydrator works perfectly. Set it to 135°F (57°C) and dry for 4-6 hours. You can also use an air fryer on the dehydrate setting if yours has one. Just spread the puree on a parchment-lined tray that fits your air fryer basket.
Why are my fruit roll-ups sticking to the parchment paper?
This usually happens if the fruit leather isn’t fully dry, or if you’re trying to peel it while it’s still warm. Let it cool completely to room temperature before peeling. If it’s still sticking, pop it in the freezer for 10 minutes—that often helps release it.
How thin should I spread the fruit puree?
Aim for about 1/8 inch thick. If it’s too thick, it will take forever to dry and might end up gummy in the center. Too thin, and it will be brittle and crack when you try to roll it. An even layer is the key to success.
Can I use canned fruit for this recipe?
You can, but make sure to drain it really well and look for fruit packed in its own juice, not syrup. Canned fruit in syrup adds unnecessary sugar, which defeats the purpose of “no added sugar.” Fresh or frozen fruit gives you the best flavor and texture.
How long do homemade fruit roll-ups last?
Stored in an airtight container at room temperature, they’ll stay fresh for up to 2 weeks. In the fridge, they last about a month. In the freezer, they’re good for up to 3 months. Just make sure they’re sealed well to prevent them from drying out or absorbing moisture.
Pin This Recipe!
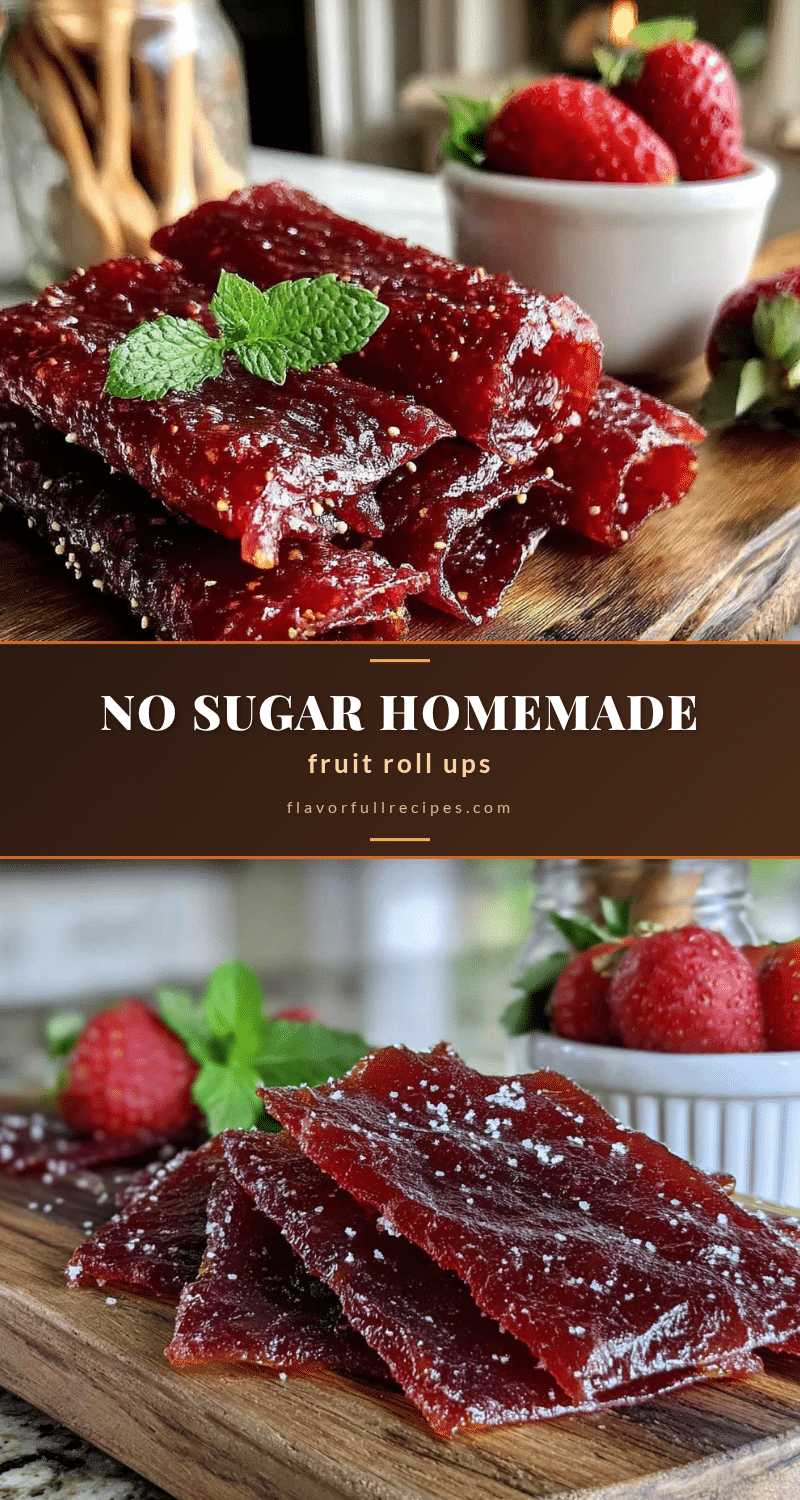
Healthy Homemade Fruit Roll-Ups with No Sugar
- Total Time: 3 hours 15 minutes to 4 hours 15 minutes
- Yield: 8 servings 1x
Description
These healthy homemade fruit roll-ups are made with only real fruit and no added sugar. They are chewy, fruity, and perfect for lunch boxes or a guilt-free snack.
Ingredients
- 2 cups fresh or frozen fruit (strawberries, mangos, peaches, or a mix)
- 1 tablespoon lemon juice
- 2–3 tablespoons water (as needed)
- 1 tablespoon honey or maple syrup (optional, for slightly sweeter version)
- 1 teaspoon chia seeds or flax seeds (optional, for extra nutrition)
Instructions
- Preheat your oven to the lowest setting (170-200°F or 75-95°C). Line a baking sheet with parchment paper, extending slightly over the edges.
- Wash and prep your fruit. Remove stems, pits, and peels as needed. If using frozen fruit, thaw completely and drain excess liquid.
- Blend the fruit with lemon juice until smooth, about 30-60 seconds. Add water 1 tablespoon at a time if needed to achieve a thick smoothie consistency.
- Taste the puree and adjust sweetness if desired. Remember, flavor concentrates as it dries.
- Pour the puree onto the prepared baking sheet and spread into an even 1/8-inch thick layer using a spatula.
- Bake for 3-4 hours, until the surface is no longer sticky and edges start to peel away from the parchment. The leather should be firm but pliable.
- Remove from oven and cool completely on a wire rack for 15-20 minutes.
- Cut into strips (about 1.5 inches wide and 4-5 inches long) using kitchen scissors or a pizza cutter. Roll each strip with parchment paper between layers to prevent sticking.
Notes
Use very ripe fruit for natural sweetness. If fruit leather is sticky after 4 hours, it needs more time. If brittle, it dried too long. For even drying, use convection setting or prop oven door open slightly. Store in an airtight container at room temperature for up to 2 weeks, refrigerate for up to 1 month, or freeze for up to 3 months.
- Prep Time: 15 minutes
- Cook Time: 3-4 hours
- Category: Snack
- Cuisine: American
Nutrition
- Serving Size: 1 roll-up
- Calories: 3545
- Sugar: 79
- Carbohydrates: 911
- Fiber: 12
Keywords: fruit roll-ups, homemade fruit snacks, no sugar, healthy snacks, fruit leather, vegan, gluten-free