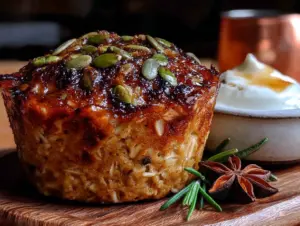
I burned my first batch of pumpkin oatmeal cups so badly the smoke alarm went off and my neighbor actually knocked on the door to check if everything was okay. Not my finest cooking moment, honestly. The recipe looked so simple on paper—mix oats, pumpkin, eggs, bake, done. But I learned the hard way that moisture content in pumpkin puree is no joke, and my baking time was completely off. I stood there fanning the kitchen window, eating a sad bowl of cold cereal for breakfast, wondering how something so straightforward could go so wrong.
But here’s the thing about failure in the kitchen—it teaches you stuff you’d never learn from a perfect first try. I went back to the drawing board, tested batch after batch, and figured out exactly what makes these Easy Pumpkin Baked Oatmeal Cups work every single time. They’re not too wet, not too dry, and they actually hold together when you grab one on your way out the door. I’ve made about thirty versions since that smoky disaster, and this is the one I keep coming back to.
These little cups have become my fall breakfast hero. They taste like pumpkin pie filling wrapped in a warm oatmeal hug, but they’re actually good for you. No refined sugar overload, no weird ingredients, just real food that happens to be delicious. That first burned batch was frustrating, but honestly? I’m kind of grateful for it. It forced me to really understand what makes these work, and now I get to share that knowledge with you.
So let me show you how to make pumpkin oatmeal cups that won’t set off any alarms.
Why You’ll Love This Recipe
These Easy Pumpkin Baked Oatmeal Cups solve the breakfast problem in the best possible way. You make them once, and you’ve got grab-and-go breakfasts for the whole week. No morning assembly required, no standing over a stove while you’re half asleep.
- Quick & Easy: From mixing bowl to oven in under 10 minutes. They bake for about 20 minutes, and you’re done. Perfect for Sunday meal prep or even a weekday morning if you’re organized like that.
- Simple Ingredients: You probably have most of this stuff in your pantry right now. Oats, pumpkin puree, eggs, maple syrup, spices. No hunting down specialty items at three different stores.
- Perfect for Fall Mornings: The smell of pumpkin and cinnamon baking in your kitchen is basically autumn in a jar. It makes getting out of bed feel worth it, even on chilly mornings.
- Crowd-Pleaser: I’ve served these at brunch, at playdates, and even at a casual work meeting. Kids love them, adults love them, and nobody guesses they’re actually pretty healthy.
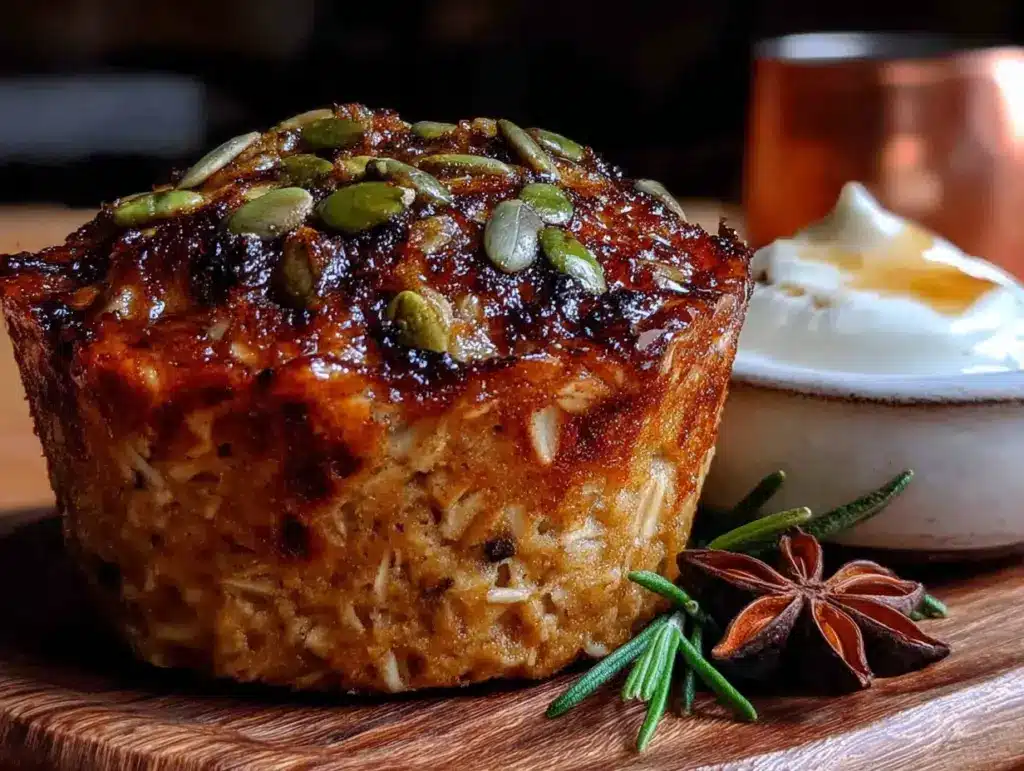
- Unbelievably Delicious: The texture is where these shine. Soft and tender in the middle, slightly golden on the edges, with that warm pumpkin spice flavor that just hits different in October.
What makes this version different from all those other recipes out there? It’s the ratio, honestly. I tested about eight different oat-to-pumpkin ratios before landing on this one. Too much pumpkin and they turn into soggy messes. Too little and they’re dry and crumbly. This is the sweet spot where they’re moist but not wet, tender but not falling apart. Plus, I add a little trick with the egg whites that gives them just enough structure to hold their shape without getting tough.
This is the kind of breakfast that makes you feel good about starting your day. It’s nourishing, satisfying, and tastes like you’re eating dessert for breakfast—except you’re actually getting fiber, protein, and real pumpkin. If you’re into easy make-ahead breakfasts that actually taste amazing, you’ll love these.
What Ingredients You Will Need
This recipe uses simple, wholesome ingredients to deliver bold pumpkin flavor and satisfying texture without any fuss. Most of these are pantry staples, especially if you do any fall baking.
- Rolled Oats, 2 cups (use certified gluten-free if needed). Not quick oats—they get mushy. Rolled oats give the best texture and hold up to the moisture from the pumpkin.
- Pumpkin Puree, 1 cup (not pumpkin pie filling). I prefer Libby’s brand for consistent texture and moisture content. Make sure it’s 100% pure pumpkin.
- Eggs, 2 large, at room temperature. They help bind everything together and add protein.
- Egg Whites, 2 large (or about 1/4 cup liquid egg whites). This is my secret for structure without adding extra fat or making them rubbery.
- Maple Syrup, 1/3 cup (pure maple syrup, not pancake syrup). It adds natural sweetness and helps with browning.
- Milk, 1/2 cup (any kind works—dairy, almond, oat). I use whole milk for richness, but unsweetened almond milk works great too.
- Coconut Oil, 2 tablespoons, melted (or melted butter). Keeps them moist and adds a subtle richness.
- Vanilla Extract, 1 teaspoon. Enhances all the warm flavors.
- Pumpkin Pie Spice, 2 teaspoons (store-bought or homemade). If you’re making your own, mix cinnamon, nutmeg, ginger, and cloves.
- Cinnamon, 1 teaspoon. Extra warmth and that classic fall flavor.
- Baking Powder, 1 teaspoon. Gives them a little lift so they’re not dense hockey pucks.
- Salt, 1/4 teaspoon. Balances the sweetness and brings out the pumpkin flavor.
- Optional Mix-Ins: 1/3 cup chocolate chips, dried cranberries, or chopped pecans. I usually add chocolate chips because, well, chocolate.
Substitution Guidance: For a gluten-free version, use certified gluten-free rolled oats. For a dairy-free version, use almond milk and coconut oil instead of butter. If you want to reduce sugar, use only 1/4 cup maple syrup and add a mashed very ripe banana for extra sweetness. I’ve tried all these variations and they work beautifully.
For the pumpkin puree, avoid anything labeled “pumpkin pie filling”—that has added sugar and spices and will throw off the whole recipe. You want just straight-up pumpkin. If you’re feeling ambitious, you can roast and puree your own sugar pumpkin, but honestly, canned is perfectly fine and way more convenient.
Equipment Needed
You don’t need fancy equipment for these Easy Pumpkin Baked Oatmeal Cups, which is part of why I love them. Here’s what you’ll need:
- Muffin Tin, standard 12-cup. I use a nonstick one, but any will work with liners or greasing.
- Mixing Bowls, one medium and one large. Nothing fancy—whatever you’ve got.
- Whisk and Spatula for mixing the batter.
- Measuring Cups and Spoons for accurate ingredients.
- Muffin Liners (optional but recommended). I like parchment paper liners for easy release. If you don’t have liners, grease the tin well with butter or cooking spray.
- Cookie Scoop (optional). A 1/4-cup scoop makes filling the cups neat and even. Not essential, but it speeds things up.
If you don’t have a muffin tin, you can bake this as a single dish in an 8×8 baking pan. Just increase the baking time by 5-10 minutes and cut it into squares. I’ve done this when my muffin tin was in the dishwasher, and it works fine—just not as portable.
I’ve tried making these in silicone muffin cups, and they work okay but don’t get as golden on the edges. Metal tins give better browning, in my experience. And if you’re using paper liners, give them a quick spray with cooking spray so nothing sticks. Learned that one the hard way.
Preparation Method
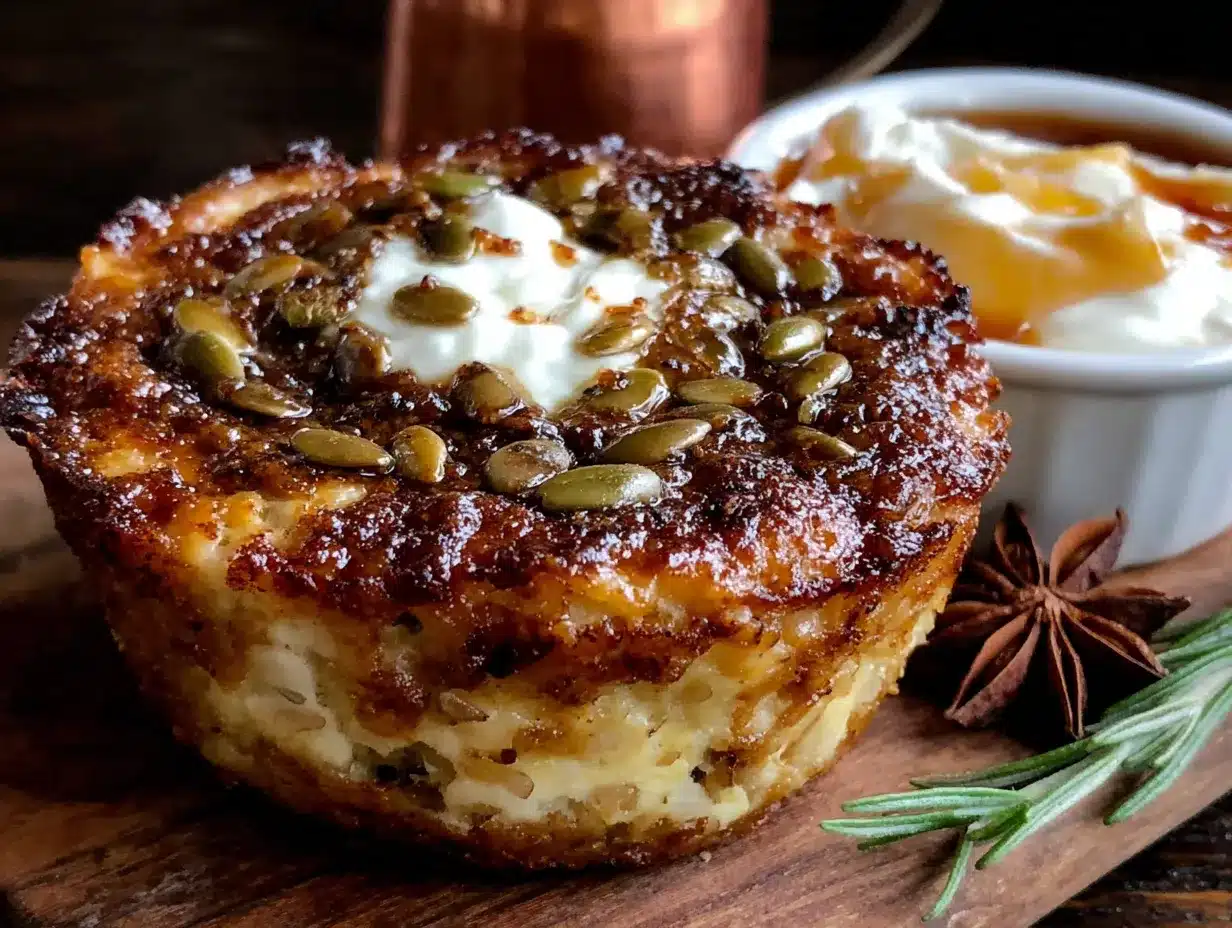
Let’s walk through this step by step. I promise it’s straightforward, and I’ll point out where things can go wrong so you avoid my early mistakes.
- Preheat your oven to 350°F (175°C). Get this going first so it’s ready when you are. Line your muffin tin with paper liners or grease it well with butter or cooking spray.
- In a large bowl, whisk together the dry ingredients. Combine the rolled oats, pumpkin pie spice, cinnamon, baking powder, and salt. Give it a good stir so the spices are evenly distributed. This is important—nobody wants a bite with a clump of baking powder.
- In a medium bowl, whisk together the wet ingredients. Add the pumpkin puree, eggs, egg whites, maple syrup, milk, melted coconut oil, and vanilla extract. Whisk until smooth and fully combined. The mixture should be a beautiful orange color and smell amazing already.
- Pour the wet ingredients into the dry ingredients. Use a spatula to fold everything together until just combined. Don’t overmix—that’s the number one mistake people make with oatmeal bakes. Overmixing makes them dense and tough. You want to see a few small streaks of dry oats still in there. They’ll hydrate as the batter sits.
- Fold in your mix-ins. If you’re using chocolate chips, dried cranberries, or nuts, gently fold them in now. I usually add about 1/3 cup of dark chocolate chips because the bitterness balances the sweet pumpkin perfectly.
- Let the batter rest for 5 minutes. This is a step most recipes skip, but it makes a difference. Giving the oats time to absorb some of the liquid means your oatmeal cups will be tender instead of having crunchy, under-hydrated oats. Use this time to clean up a few dishes or just enjoy the pumpkin-spice smell.
- Scoop the batter into the prepared muffin tin. Use a 1/4-cup scoop or a spoon to fill each cup almost to the top—these don’t rise much, so filling them full is fine. I like to sprinkle a few extra oats or a pinch of cinnamon sugar on top for a prettier finish.
- Bake for 18-22 minutes. The exact time depends on your oven and how full you filled the cups. They’re done when the edges are golden brown, the tops are set, and a toothpick inserted in the center comes out mostly clean with a few moist crumbs. If the toothpick is wet with batter, give them another 2-3 minutes.
- Cool in the pan for 5 minutes. This lets them set up properly. If you try to remove them immediately, they might fall apart. After 5 minutes, transfer them to a wire rack to cool completely. The bottoms will steam if you leave them in the pan, making them soggy.
- Enjoy warm or let them cool completely. Warm with a pat of butter is my favorite way to eat them. But they’re also delicious at room temperature, which makes them perfect for packed lunches or on-the-go breakfasts.
Visual Cue: When you mix the batter, it should look like a thick, scoopable oatmeal—not runny like pancake batter and not stiff like cookie dough. If it seems too thick, add a tablespoon more milk. If it seems too thin, add a tablespoon more oats. Trust your eyes on this one.
Cooking Tips & Techniques
I’ve made these Easy Pumpkin Baked Oatmeal Cups more times than I can count, and I’ve definitely learned some things the hard way. Here are my best tips for perfect results every time.
Don’t skip the egg whites. I tried a version with just whole eggs, and they were denser and didn’t hold their shape as well. The extra egg whites give structure without making them taste eggy. If you’re in a pinch, you can use 3 whole eggs instead of 2 eggs plus 2 whites, but the texture won’t be quite as good.
Watch your pumpkin moisture. Different brands of pumpkin puree have slightly different water content. If your batter looks too wet after resting, add a tablespoon of oats at a time until it thickens up. If it’s too dry, add a splash of milk. This is where cooking experience comes in—you’ll learn to feel the right texture.
Use room temperature ingredients. Cold eggs and cold milk will make the coconut oil seize up into little hard bits. Take everything out of the fridge 15-20 minutes before you start. If you forget, you can warm the milk slightly in the microwave (about 15 seconds) and run the eggs under warm water for a minute.
Line your muffin tin properly. I prefer parchment paper liners because they never stick. If you use paper liners, give them a quick spray with cooking spray. I learned this after peeling paper off a dozen beautiful oatmeal cups and leaving half the crust behind. Heartbreaking.
Bake time varies by oven. My oven runs hot, so I start checking at 16 minutes. Yours might need the full 22. Get familiar with how your oven behaves and adjust accordingly. The toothpick test is your friend here.
Let them cool completely before storing. If you put warm oatmeal cups in an airtight container, the steam will make them soggy on the outside. Let them sit on a wire rack until they’re completely cool, then store them. Patience pays off.
Variations & Adaptations
One of the best things about this recipe is how flexible it is. Here are some variations I’ve tried and loved:
- Chocolate Chip Pumpkin: Fold in 1/3 cup dark chocolate chips. The bitter chocolate against the sweet pumpkin is a match made in heaven. This is my go-to version.
- Apple Pumpkin: Reduce pumpkin to 3/4 cup and add 1/2 cup finely diced apple (I like Honeycrisp or Fuji). The apple adds little bursts of sweetness and texture. This is great for using up that last apple in the bowl.
- Nutty Crunch: Add 1/4 cup chopped pecans or walnuts to the batter and sprinkle a few more on top before baking. Toast the nuts first for extra flavor—just 5 minutes in a dry pan or the oven.
- Dairy-Free Version: Use almond milk or oat milk instead of dairy milk, and use coconut oil instead of butter. They turn out slightly less rich but still delicious. I’ve made this for dairy-free friends and they loved it.
- Lower Sugar Version: Reduce maple syrup to 1/4 cup and add one very ripe mashed banana. The banana adds sweetness and moisture without extra sugar. Just be aware the banana flavor will come through a bit.
- Protein Boost: Add 2 scoops (about 1/2 cup) of vanilla or unflavored protein powder. You’ll need to increase the milk by 2-3 tablespoons to compensate for the extra dry ingredients. This makes them more filling for post-workout breakfasts.
I’ve also tried making these as mini muffins for snack-sized portions—just reduce the baking time to 10-12 minutes. Perfect for little hands or portion control. And if you’re feeling fancy, you can top them with a drizzle of Greek yogurt mixed with a little maple syrup for a cream cheese frosting vibe.
Serving & Storage Suggestions
These Easy Pumpkin Baked Oatmeal Cups are incredibly versatile when it comes to serving. Here’s how I like to enjoy them:
Serving Temperature: They’re delicious warm, at room temperature, or even slightly chilled. Warm them in the microwave for 15-20 seconds if you want that fresh-from-the-oven experience. A pat of butter melting on top is pure comfort.
Presentation Ideas: For brunch, arrange them on a wooden board with fresh apple slices, a bowl of yogurt, and a drizzle of honey. For a quick breakfast, grab two and go—they’re sturdy enough to eat in the car (not that I’m recommending distracted eating, but we’ve all been there).
Complementary Dishes: These pair beautifully with a hot cup of coffee or chai tea. For a more substantial breakfast, serve alongside scrambled eggs or a simple Greek chickpea salad jar for a savory-sweet balance. They also work great as a side for cozy chicken and wild rice soup on a chilly evening.
Storage Instructions: Store cooled oatmeal cups in an airtight container in the refrigerator for up to 5 days. Place a paper towel at the bottom of the container to absorb excess moisture, and another on top. Replace the paper towels if they get soggy. This keeps them from getting mushy.
Freezer Instructions: These freeze beautifully! Place cooled cups in a single layer on a baking sheet and freeze for 1 hour, then transfer to a freezer-safe bag or container. They’ll keep for up to 3 months. To thaw, leave them in the fridge overnight or microwave for 30-45 seconds from frozen.
Reheating Tips: For best results, reheat in the microwave for 20-30 seconds, or in a 350°F oven for 5-7 minutes. If you’re reheating from frozen, add an extra 15-20 seconds in the microwave. The texture comes back beautifully—almost like fresh-baked.
Flavor Development: Honestly, these taste even better on day two. The flavors meld together overnight, and the spices become more pronounced. So if you can resist eating them all on day one, you’re in for a treat on day two.
Nutritional Information & Benefits
These Easy Pumpkin Baked Oatmeal Cups aren’t just delicious—they’re actually good for you. Here’s the estimated nutritional breakdown per cup (based on 12 servings, without mix-ins):
- Calories: Approximately 145-160
- Protein: 6-7 grams
- Carbohydrates: 22-25 grams
- Fiber: 3-4 grams
- Sugar: 8-10 grams (naturally occurring plus maple syrup)
- Fat: 4-5 grams
- Iron: 10% of daily value
- Vitamin A: 70% of daily value (from pumpkin)
Health Benefits: Pumpkin is packed with vitamin A, which supports eye health and immune function. Oats provide soluble fiber that helps lower cholesterol and keeps you full. Eggs add high-quality protein for sustained energy. The spices—cinnamon, nutmeg, ginger—have anti-inflammatory properties and help regulate blood sugar.
Dietary Considerations: This recipe can easily be made gluten-free (use certified gluten-free oats) and dairy-free (use plant-based milk and coconut oil). It’s naturally nut-free if you skip the optional nuts. It’s also lower in sugar than most baked goods, making it a better choice for balanced eating.
Potential Allergens: Contains eggs and gluten (from oats). If you’re using dairy milk, that’s another potential allergen. Always check labels if you’re cooking for someone with allergies.
I love that I can feel good about eating these for breakfast. They’re not a health food pretending to be dessert—they’re actually nourishing food that happens to taste amazing. That’s my favorite kind of recipe.
Conclusion
These Easy Pumpkin Baked Oatmeal Cups have become my fall breakfast tradition, and I think they’re about to become yours too. They’re simple enough for a busy weekday, special enough for a weekend brunch, and forgiving enough for beginner bakers. The pumpkin flavor is warm and cozy, the texture is just right, and the convenience factor is through the roof.
I love that I can make a batch on Sunday and have breakfast sorted for the whole week. No morning stress, no decision fatigue, just grab and go. And honestly? They make my kitchen smell incredible while they’re baking. That alone is worth the 10 minutes of prep time.
If you make these, I’d love to hear how they turn out. Did you add chocolate chips or go with nuts? Did your kids love them as much as mine do? Drop a comment below and let me know. And if you’re looking for more easy make-ahead breakfast ideas, check out my protein berry pancake bites or these turkey taco meal prep bowls for savory mornings.
Happy baking, and may your kitchen smell like pumpkin spice all season long!
Frequently Asked Questions
Can I use quick oats instead of rolled oats?
You can, but the texture will be different. Quick oats absorb liquid faster and create a softer, almost mushy texture. Rolled oats give you more structure and a pleasant chew. If you only have quick oats, reduce the resting time to 2 minutes and check for doneness a few minutes earlier.
Can I make these vegan?
Yes! Substitute the eggs with flax eggs (2 tablespoons ground flaxseed mixed with 6 tablespoons water, let sit for 5 minutes). Use plant-based milk instead of dairy, and maple syrup instead of honey. The texture will be slightly less fluffy, but they’ll still be delicious. I’ve tested this and they hold together well.
Why did my oatmeal cups turn out mushy?
This usually happens for one of three reasons: too much pumpkin puree, not enough oats, or underbaking. Make sure you’re measuring the pumpkin accurately—scoop it into the measuring cup and level it off, don’t just eyeball it. Also, make sure they’re fully baked before you pull them out. The centers should be set, not jiggly.
Can I use pumpkin pie filling instead of pumpkin puree?
I wouldn’t recommend it. Pumpkin pie filling has added sugar, spices, and often thickeners that will throw off the recipe completely. Your oatmeal cups would be overly sweet and the texture would be different. Stick with 100% pure pumpkin puree for best results.
How long do these keep in the freezer?
Up to 3 months if stored properly in an airtight freezer bag or container. I like to freeze them in a single layer on a baking sheet first, then transfer to a bag so they don’t stick together. To thaw, leave them in the fridge overnight or microwave for 30-45 seconds from frozen. They taste almost as good as fresh!
Pin This Recipe!
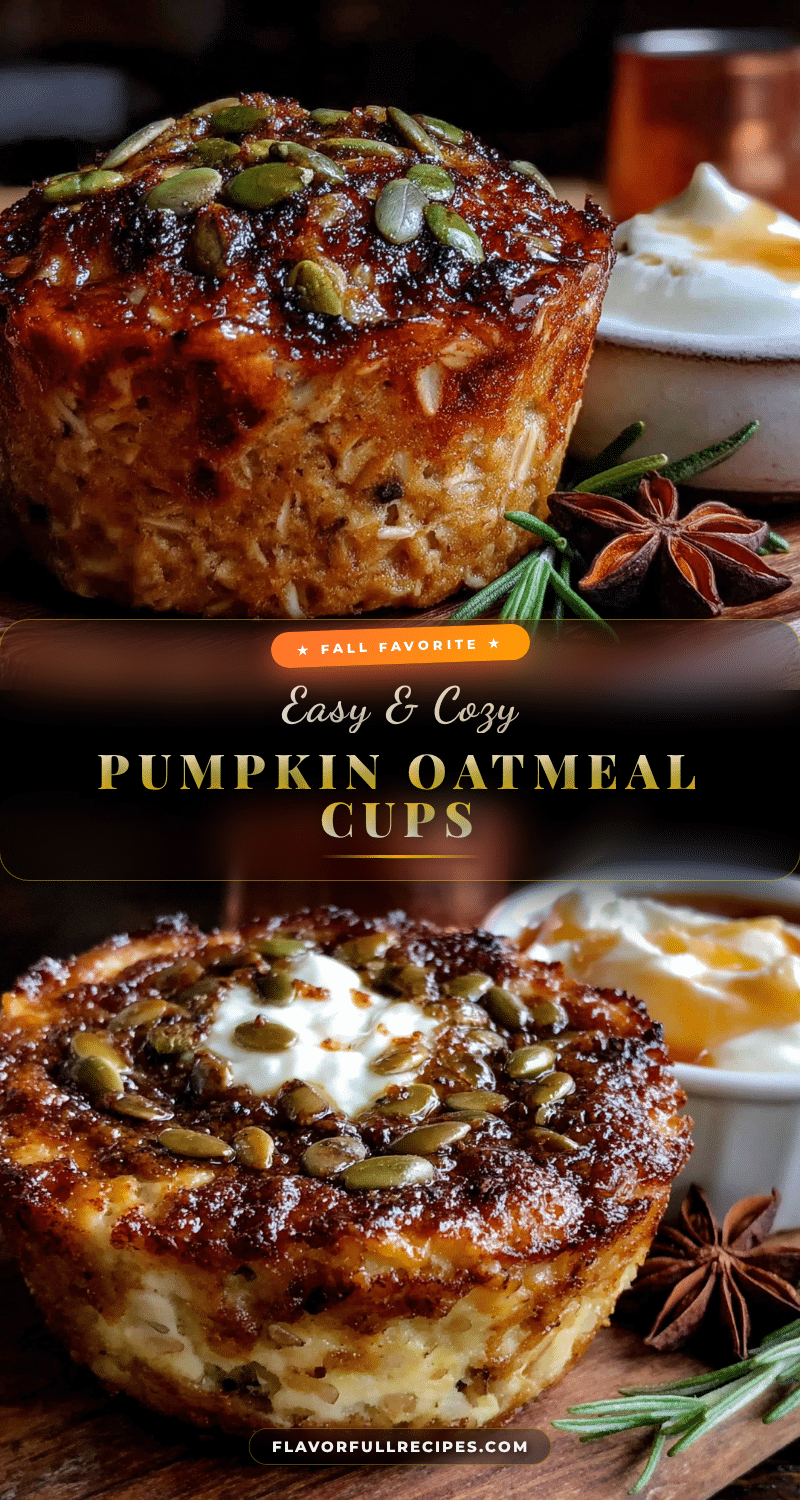

Easy Pumpkin Baked Oatmeal Cups: Best Fall Breakfast
- Total Time: 30 minutes
- Yield: 12 servings 1x
Description
These Easy Pumpkin Baked Oatmeal Cups are the perfect fall breakfast—tender, moist, and packed with warm pumpkin spice flavor. Made with simple ingredients, they’re great for meal prep and grab-and-go mornings.
Ingredients
- 2 cups rolled oats (use certified gluten-free if needed)
- 1 cup pumpkin puree (not pumpkin pie filling)
- 2 large eggs, at room temperature
- 2 large egg whites (or about 1/4 cup liquid egg whites)
- 1/3 cup pure maple syrup
- 1/2 cup milk (any kind works—dairy, almond, oat)
- 2 tablespoons coconut oil, melted (or melted butter)
- 1 teaspoon vanilla extract
- 2 teaspoons pumpkin pie spice
- 1 teaspoon cinnamon
- 1 teaspoon baking powder
- 1/4 teaspoon salt
- Optional mix-ins: 1/3 cup chocolate chips, dried cranberries, or chopped pecans
Instructions
- Preheat your oven to 350°F (175°C). Line your muffin tin with paper liners or grease it well with butter or cooking spray.
- In a large bowl, whisk together the dry ingredients: rolled oats, pumpkin pie spice, cinnamon, baking powder, and salt.
- In a medium bowl, whisk together the wet ingredients: pumpkin puree, eggs, egg whites, maple syrup, milk, melted coconut oil, and vanilla extract until smooth.
- Pour the wet ingredients into the dry ingredients and fold together with a spatula until just combined. Do not overmix.
- Fold in your optional mix-ins (chocolate chips, dried cranberries, or nuts) if using.
- Let the batter rest for 5 minutes to allow the oats to absorb some liquid.
- Scoop the batter into the prepared muffin tin using a 1/4-cup scoop, filling each cup almost to the top.
- Bake for 18-22 minutes, until the edges are golden brown, the tops are set, and a toothpick inserted in the center comes out mostly clean with a few moist crumbs.
- Cool in the pan for 5 minutes, then transfer to a wire rack to cool completely.
- Enjoy warm or at room temperature.
Notes
Don’t skip the egg whites—they give structure without making the cups eggy. Let the batter rest for 5 minutes to hydrate the oats. Use room temperature ingredients to prevent coconut oil from seizing. For best storage, place a paper towel in the container to absorb moisture. These taste even better on day two as flavors meld.
- Prep Time: 10 minutes
- Cook Time: 20 minutes
- Category: Breakfast
- Cuisine: American
Nutrition
- Serving Size: 1 oatmeal cup
- Calories: 150
- Sugar: 9
- Sodium: 120
- Fat: 5
- Saturated Fat: 3
- Carbohydrates: 24
- Fiber: 4
- Protein: 7
Keywords: pumpkin baked oatmeal cups, fall breakfast, healthy oatmeal cups, meal prep breakfast, pumpkin spice