
I packed my lunch for three days straight. That might not sound like a big deal, but for someone who usually scrapes together whatever is in the fridge five minutes before walking out the door, it felt like a major win. The jars were still sitting in my fridge on Thursday morning, and I actually looked forward to opening one. That never happens. Usually, by Wednesday, my meal prep is a sad, soggy memory. But these little Greek chickpea salad jars? They had me doing a happy dance in my kitchen.
It all started because I was tired of spending ten bucks on sad, wilted salads from the deli down the street. You know the ones. A few pale tomato wedges, some watery cucumber, and maybe three olives if you are lucky. I wanted something that actually tasted good, held up for a few days, and didn’t leave me hungry an hour later. So I threw some chickpeas, feta, and a really good lemon vinaigrette into a mason jar, and honestly? I haven’t looked back.
These Easy Greek Chickpea Salad Jars are my go-to for busy weeks when I know I will be tempted to grab takeout. They are sturdy, satisfying, and somehow get better as they sit in the fridge. The secret is layering the dressing at the bottom so everything stays crisp until you are ready to eat. It is one of those little tricks that makes a huge difference. I have made them for friends who swore they hated meal prep, and now they text me asking for the recipe. That quiet moment when someone takes a bite and their eyes go wide? That is the reason I keep making these jars.
Why You Will Love This Recipe
I have tested this recipe more times than I care to admit. I wanted a salad that would not turn into a mushy mess by day three, and I finally cracked the code. Here is why these jars work so well:
- Quick & Easy: You can throw these together in about 15 minutes. No cooking required, just chopping and layering. Perfect for those Sunday evenings when you are dreading the week ahead.
- Simple Ingredients: Everything on the list is something you can find at any grocery store. No weird specialty items or expensive gourmet ingredients. I bet you already have most of the pantry staples.
- Perfect for Meal Prep: These jars actually taste better on day two or three. The flavors meld together while the veggies stay crunchy thanks to the layering technique. It is like magic, but with vegetables.
- Crowd-Pleaser: I have brought these to picnics, work potlucks, and even on road trips. Everyone from picky kids to serious foodies loves them. There is something about eating out of a jar that feels fun and satisfying.
- Unbelievably Delicious: The combination of creamy feta, briny olives, crisp cucumber, and that tangy lemon dressing is honestly addictive. I have eaten these for lunch three days in a row and was sad when the last jar was gone.
What makes this different from every other Greek salad recipe out there? It is the layering. Most people just toss everything together, and by the next day, you have a sad, soggy mess. By putting the dressing on the bottom and the heartier ingredients on top, everything stays fresh and crunchy until you are ready to eat. It is a small change that makes a huge difference, and I learned it through trial and error after way too many disappointing lunches.
These jars are not just good for meal prep. They are the kind of lunch that makes you feel like you have your life together. When you pull one out of the fridge and your coworkers ask where you got it, you get to say, “Oh, I made it myself.” That feeling never gets old.
What Ingredients You Will Need
This recipe uses simple, wholesome ingredients that come together to create something truly satisfying. Nothing fancy, just good, real food that works.
- Chickpeas (1 can, drained and rinsed) — The protein-packed base of this salad. I prefer Goya or Bush’s Best for consistent texture. Make sure you rinse them well to remove that canned taste and excess sodium.
- English cucumber (1 large, diced) — I use English cucumbers because they have fewer seeds and a thinner skin. No need to peel them. If you only have regular cucumbers, just scoop out the seeds before dicing.
- Cherry tomatoes (1 cup, halved) — Grape tomatoes work just as well. In the summer, I use whatever is freshest from the farmers market. They add that burst of juicy sweetness.
- Red onion (1/2 medium, thinly sliced) — Soak the slices in cold water for five minutes if you want to mellow out the bite. I usually skip this step because I like the kick, but it is an easy fix if you are sensitive to raw onion.
- Kalamata olives (1/2 cup, halved) — These add that briny, salty punch that makes Greek salad so good. You can use green olives if that is what you have, but the flavor will be different.
- Feta cheese (1/2 cup, crumbled) — Buy a block of good feta and crumble it yourself. The pre-crumbled stuff has anti-caking agents that mess with the texture. I love the sheep’s milk feta from Mt. Vikos for its creamy, tangy flavor.
- Fresh parsley (1/4 cup, chopped) — Flat-leaf parsley has more flavor than the curly kind, but either works. It adds a fresh, herbaceous note that brightens everything up.
- Extra virgin olive oil (1/4 cup) — Use a good quality one here since it is the base of your dressing. California Olive Ranch is my go-to for everyday use.
- Red wine vinegar (2 tablespoons) — This gives the dressing that classic tang. White wine vinegar or lemon juice work in a pinch.
- Lemon juice (2 tablespoons, fresh squeezed) — Bottled lemon juice just does not taste the same. Trust me on this one. A fresh lemon makes all the difference.
- Dried oregano (1 teaspoon) — This is the signature Greek flavor. Rub it between your palms before adding to release the oils and wake up the flavor.
- Garlic (1 clove, minced) — Fresh garlic adds a punch that powdered garlic cannot replicate. If you are prepping for the week, go easy on the garlic unless you really love it.
- Salt and black pepper (to taste) — Go easy on the salt since the feta and olives are already salty. A good crack of fresh black pepper is non-negotiable though.
For the dressing, you can also add a teaspoon of Dijon mustard if you want a little extra tang and emulsification. I sometimes throw in a pinch of dried mint for a more authentic Greek flavor profile. It is optional but lovely.
Equipment Needed
You do not need anything fancy to make these jars. Here is what you will need:
- 4 wide-mouth pint-sized mason jars (16 oz each) — Wide mouths make layering and eating so much easier. I have tried narrow jars and regretted it every time. Ball or Kerr brands work great and are super affordable.
- Cutting board and sharp knife — A good chef’s knife makes dicing vegetables a pleasure instead of a chore. Nothing fancy needed, just something sharp.
- Small bowl or jar for the dressing — I actually use a small mason jar with a lid so I can shake the dressing to emulsify it. Less mess, fewer dishes.
- Measuring cups and spoons — Eyeballing works if you have experience, but measuring ensures consistency, especially for the dressing.
- Colander — For rinsing the chickpeas. A fine-mesh strainer works even better to catch all those little chickpeas.
- Large spoon or spatula — For layering and packing everything down. A long-handled spoon helps reach the bottom of the jars.
If you do not have mason jars, any airtight container will work. I have used glass meal prep containers with snap lids, and they work fine. The jars just look prettier and make portion control easy. You can find a set of 12 wide-mouth jars for around fifteen bucks, and they last for years.
Preparation Method
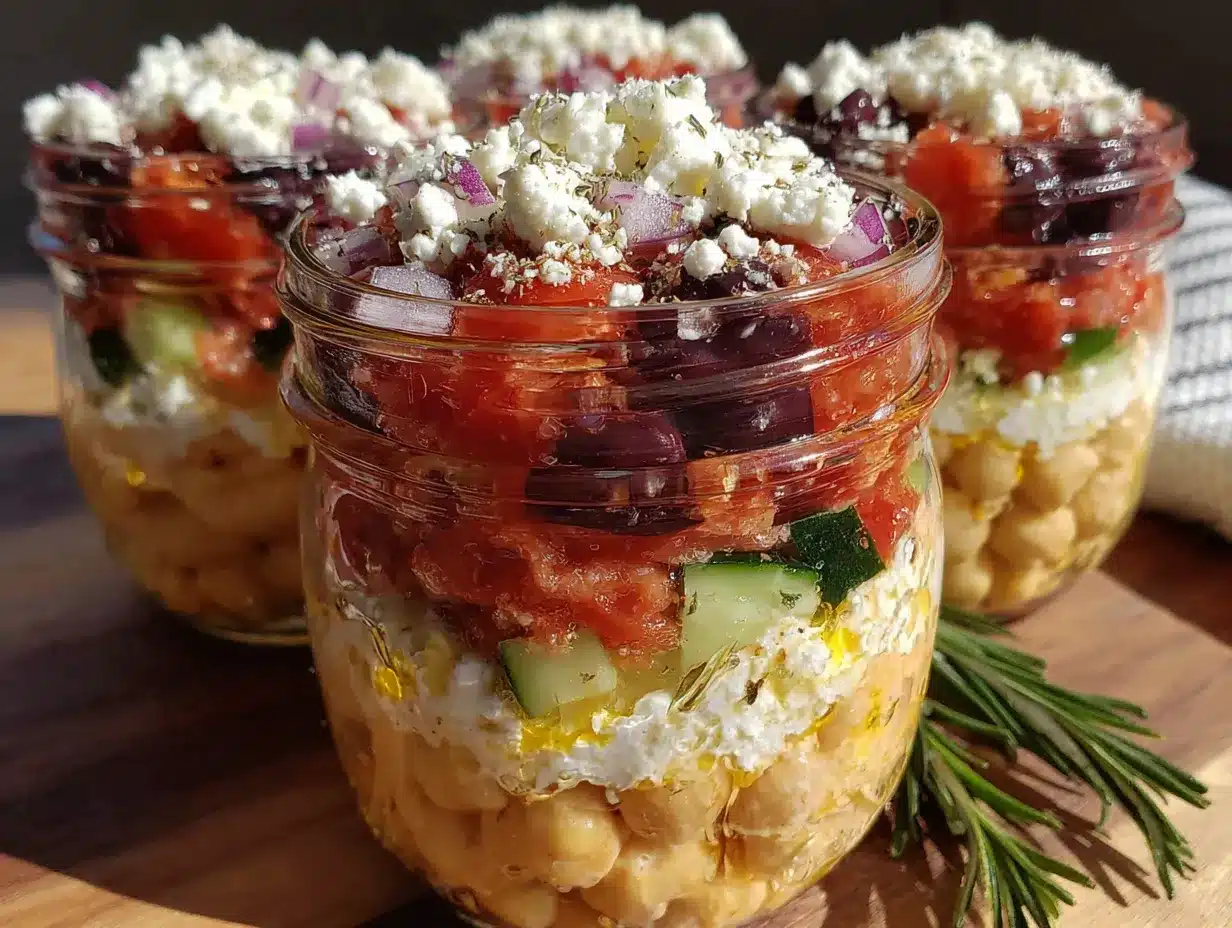
Making these jars is almost too easy. Here is how I do it:
- Make the dressing first. In a small bowl or jar, whisk together the olive oil, red wine vinegar, lemon juice, dried oregano, minced garlic, and a pinch of salt and pepper. If you are using a jar, just screw the lid on tight and shake it like crazy. Taste it and adjust the seasoning. It should be bright, tangy, and a little punchy. Set it aside while you prep everything else.
- Prep your vegetables. Dice the cucumber into bite-sized pieces, about half an inch. Halve the cherry tomatoes. Thinly slice the red onion. Halve the Kalamata olives. Chop the parsley. I like to do all my chopping first so I can just assembly-line the jars. It takes about ten minutes and feels very satisfying.
- Rinse and drain the chickpeas. Open the can, dump them into a colander, and rinse them under cold water for about thirty seconds. Shake off the excess water and let them drain while you work. Pat them dry with a paper towel if you are feeling fancy.
- Layer the jars. This is the most important part. Start by dividing the dressing evenly among the four jars. About 2-3 tablespoons per jar. Then add the chickpeas on top of the dressing. They will sit in the dressing and soak up all that flavor without getting mushy. Next, add the cucumber, then the tomatoes, then the red onion, then the olives. The idea is to keep the dressing away from the more delicate ingredients until you are ready to eat.
- Top with feta and parsley. Sprinkle the crumbled feta and chopped parsley on top of each jar. Do not stir or shake. Just let everything sit in its layers. Screw the lids on tight and pop them in the fridge.
- When you are ready to eat. Grab a jar, unscrew the lid, and dump everything into a bowl. Or, if you are eating on the go, just shake the jar really well to distribute the dressing. The flavors will have melded together, and the veggies will still be crisp. It is honestly the best part of the whole process.
A few notes from my many trials: Do not skip the layering step. I tried tossing everything together once, and by day two, the cucumbers were sad and the tomatoes were leaking juice everywhere. The dressing-on-the-bottom method keeps everything happy. Also, if you are making these more than three days in advance, leave the feta off until you are ready to eat. It stays fresher that way.
For the best texture, eat these within four days. They will still be good on day five, but the cucumbers start to lose their crunch. Not that they have ever lasted that long in my house.
Cooking Tips & Techniques
I have made a lot of mistakes so you do not have to. Here is what I have learned:
Don’t overdress the jar. I know it is tempting to dump all the dressing in, but you want just enough to coat everything. Too much dressing makes the veggies soggy and the whole thing feels heavy. Start with less and add more if needed.
Salt your cucumbers. If you have time, toss the diced cucumber with a pinch of salt and let it sit for ten minutes. Pat it dry before adding to the jar. This draws out excess water and keeps your salad from getting watery. I skip this step when I am in a hurry, but it makes a noticeable difference.
Toast your chickpeas for extra crunch. This is optional but amazing. Drain and rinse the chickpeas, pat them dry, toss them with a little olive oil and salt, and roast them at 400°F for 20 minutes. Let them cool completely before adding to the jars. They stay crunchy for days and add a whole new texture.
Make extra dressing. The dressing keeps in the fridge for up to a week. I always make a double batch so I have it on hand for other salads or to drizzle over roasted vegetables. It is also great as a marinade for chicken or fish.
Warm the jars before eating. If you are eating these straight from the fridge, let them sit on the counter for ten minutes first. The flavors open up when they are not ice cold. It is a small thing that makes a big difference.
I learned the hard way that red onion can overpower everything if you use too much. Start with a little and add more to taste. You can always add, but you cannot take away. Also, if you are sensitive to raw onion, soak the slices in cold water for five minutes before adding. It takes the edge off without losing the flavor.
Variations & Adaptations
One of the best things about these jars is how easy they are to customize. Here are some of my favorite variations:
Mediterranean Quinoa Jars: Add a half cup of cooked quinoa to each jar for extra protein and fiber. It makes the salad more filling and adds a nice nutty flavor. I do this when I know I will be having a long day and need something that sticks with me.
Greek Pasta Salad Jars: Toss in some cooked orzo or small shell pasta. It turns the salad into a heartier meal that feels more like a classic pasta salad. Great for picnics or potlucks where you need something that travels well.
Vegan Version: Skip the feta and add extra olives, some marinated artichoke hearts, or a sprinkle of nutritional yeast for a cheesy flavor. The dressing is already vegan, so you are halfway there. I have made this for vegan friends and they raved about it.
Grilled Chicken Addition: Add some shredded rotisserie chicken or grilled chicken breast for extra protein. It turns the salad into a complete meal that will keep you full for hours. Perfect for post-workout lunches.
Spicy Greek Jars: Add a pinch of red pepper flakes or a drizzle of harissa to the dressing for some heat. The spicy kick pairs beautifully with the cool cucumber and creamy feta. I love this version when I need a little pick-me-up in the middle of the day.
If you are looking for more meal prep inspiration, I have some other favorites that work well alongside these jars. My healthy high-protein chicken and rice meal prep bowls are great for when you need something heartier. And if you are packing lunches for the kids, these easy school lunch meal prep ideas have saved me more times than I can count.
Serving & Storage Suggestions
These jars are designed to be eaten cold, straight from the fridge. But they also work well at room temperature if you let them sit out for a bit. I love eating them with warm pita bread or crusty sourdough for dipping into the dressing at the bottom.
For a complete meal, serve these jars alongside some grilled chicken, lamb kebabs, or a simple piece of fish. They also pair beautifully with a bowl of creamy tomato basil soup with easy grilled cheese croutons for a cozy lunch that feels like comfort food.
Storage is simple. Keep the jars in the refrigerator for up to four days. Do not freeze them, the vegetables will turn into mush. If you are making these for a picnic or road trip, pack them in a cooler with an ice pack. They will stay fresh for hours.
For reheating, I do not recommend microwaving the whole jar. If you want a warm salad, dump the contents into a bowl and microwave for 30 seconds. But honestly, these are best cold. The flavors are brighter and the textures are more satisfying.
One thing I love about these jars is how the flavors develop over time. Day one is good. Day two is better. Day three is when the magic happens. The chickpeas have soaked up the dressing, the feta has softened, and everything just works together. It is one of those rare meal prep recipes that actually gets better as the week goes on.
Nutritional Information & Benefits
Here is the approximate nutritional breakdown for one jar (without any additions like quinoa or chicken):
- Calories: 320-350
- Protein: 12-14 grams
- Fat: 18-20 grams (mostly healthy fats from olive oil and olives)
- Carbohydrates: 30-35 grams
- Fiber: 8-10 grams
- Sugar: 6-8 grams (naturally occurring)
- Sodium: 600-700 mg (varies based on feta and olives)
Chickpeas are a powerhouse of plant-based protein and fiber, which helps keep you full and satisfied. They are also rich in iron, folate, and manganese. The olive oil provides heart-healthy monounsaturated fats, while the vegetables deliver a solid dose of vitamins A, C, and K. Feta adds calcium and protein, though it is higher in sodium, so go easy if you are watching your salt intake.
This recipe is naturally vegetarian, gluten-free, and can easily be made vegan by omitting the feta. It is also nut-free and egg-free, making it a safe option for school lunches or gatherings with dietary restrictions. If you are looking for more easy allergy-friendly snack box ideas, I have a whole collection of recipes that work for various dietary needs.
Conclusion
These Easy Greek Chickpea Salad Jars have honestly changed the way I think about meal prep. They are simple, satisfying, and make me feel like I have my life together even when everything else is chaos. The best part? They actually taste good. Not just “good for meal prep” good, but genuinely delicious, I-would-order-this-at-a-restaurant good.
I love that you can customize them based on what you have in your fridge or what you are craving. Add some grilled chicken, swap in quinoa, or throw in whatever vegetables are about to go bad. They are forgiving and flexible, which is exactly what a busy week needs.
I would love to hear how these turn out for you. Did you add anything fun? Did you make them for a picnic or a work lunch? Drop a comment below and let me know. And if you loved this recipe, share it with a friend who needs a little meal prep inspiration. Happy eating!
Frequently Asked Questions
Can I use canned chickpeas or do I need to cook dried ones?
Canned chickpeas work perfectly for this recipe. Just drain and rinse them well. If you want to cook dried chickpeas, you absolutely can, but it adds extra time. Canned is my go-to for convenience, and the texture is just right.
How long do these jars last in the fridge?
They stay fresh for up to four days. The key is keeping the dressing at the bottom and the delicate ingredients on top. By day five, the cucumbers start to lose their crunch, so try to eat them within four days for the best texture.
Can I freeze these salad jars?
I do not recommend freezing them. The vegetables will turn into a watery, mushy mess when thawed. These are strictly a refrigerator meal. If you need something freezer-friendly, check out my easy turkey taco meal prep bowls instead.
What if I do not have mason jars?
Any airtight container will work. Glass meal prep containers with snap lids are great. Even plastic containers work, though glass keeps the flavors fresher. Just make sure the container is wide enough to layer everything easily.
Can I add protein like chicken or shrimp?
Absolutely. Grilled chicken, shrimp, or even canned tuna work beautifully. Just add the protein on top of the chickpeas when layering. It keeps everything organized and ensures the protein stays separate from the dressing until you are ready to eat.
Pin This Recipe!
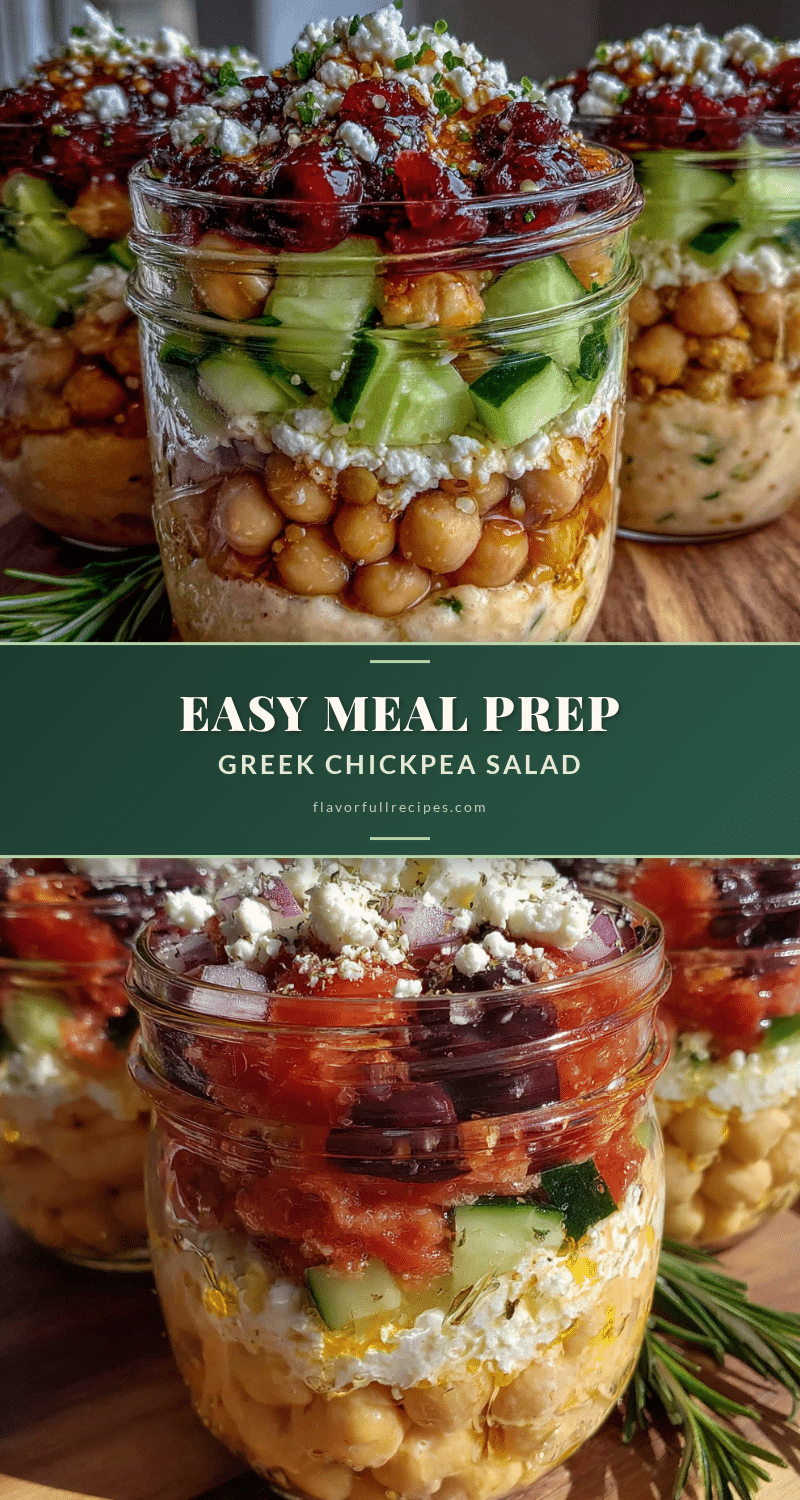
Easy Greek Chickpea Salad Jars for Perfect Meal Prep
- Total Time: 15 minutes
- Yield: 4 servings 1x
Description
These Easy Greek Chickpea Salad Jars are perfect for meal prep, featuring layers of chickpeas, fresh vegetables, feta cheese, and a tangy lemon vinaigrette that stay crisp and delicious for days. A simple, satisfying lunch that actually gets better as the week goes on.
Ingredients
- 1 can chickpeas, drained and rinsed
- 1 large English cucumber, diced
- 1 cup cherry tomatoes, halved
- 1/2 medium red onion, thinly sliced
- 1/2 cup Kalamata olives, halved
- 1/2 cup feta cheese, crumbled
- 1/4 cup fresh parsley, chopped
- 1/4 cup extra virgin olive oil
- 2 tablespoons red wine vinegar
- 2 tablespoons fresh lemon juice
- 1 teaspoon dried oregano
- 1 clove garlic, minced
- Salt and black pepper to taste
Instructions
- Make the dressing first. In a small bowl or jar, whisk together the olive oil, red wine vinegar, lemon juice, dried oregano, minced garlic, and a pinch of salt and pepper. Set aside.
- Prep your vegetables. Dice the cucumber into bite-sized pieces, halve the cherry tomatoes, thinly slice the red onion, halve the Kalamata olives, and chop the parsley.
- Rinse and drain the chickpeas. Open the can, dump them into a colander, and rinse under cold water for about thirty seconds. Let them drain.
- Layer the jars. Divide the dressing evenly among four wide-mouth pint-sized mason jars (about 2-3 tablespoons per jar). Add the chickpeas on top of the dressing. Then layer the cucumber, tomatoes, red onion, and olives.
- Top with feta and parsley. Sprinkle the crumbled feta and chopped parsley on top of each jar. Do not stir or shake. Screw the lids on tight and refrigerate.
- When ready to eat, dump the contents into a bowl or shake the jar well to distribute the dressing. Serve cold or at room temperature.
Notes
Do not skip the layering step to keep veggies crisp. For best texture, eat within 4 days. If making more than 3 days in advance, leave feta off until ready to eat. For extra crunch, toast chickpeas at 400°F for 20 minutes before adding.
- Prep Time: 15 minutes
- Cook Time: 0 minutes
- Category: Salad
- Cuisine: Greek
Nutrition
- Serving Size: 1 jar
- Calories: 335
- Sugar: 7
- Sodium: 650
- Fat: 19
- Saturated Fat: 4
- Carbohydrates: 33
- Fiber: 9
- Protein: 13
Keywords: Greek salad, chickpea salad, meal prep, mason jar salad, vegetarian, gluten-free, healthy lunch


