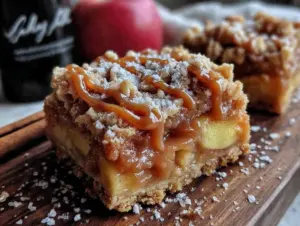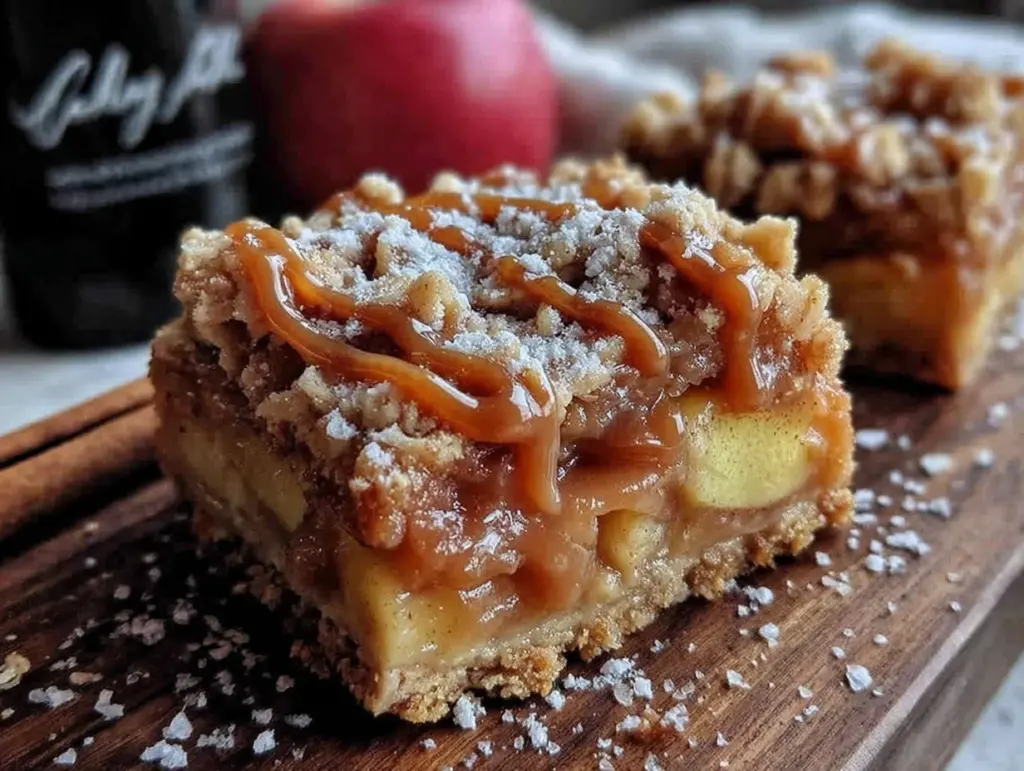
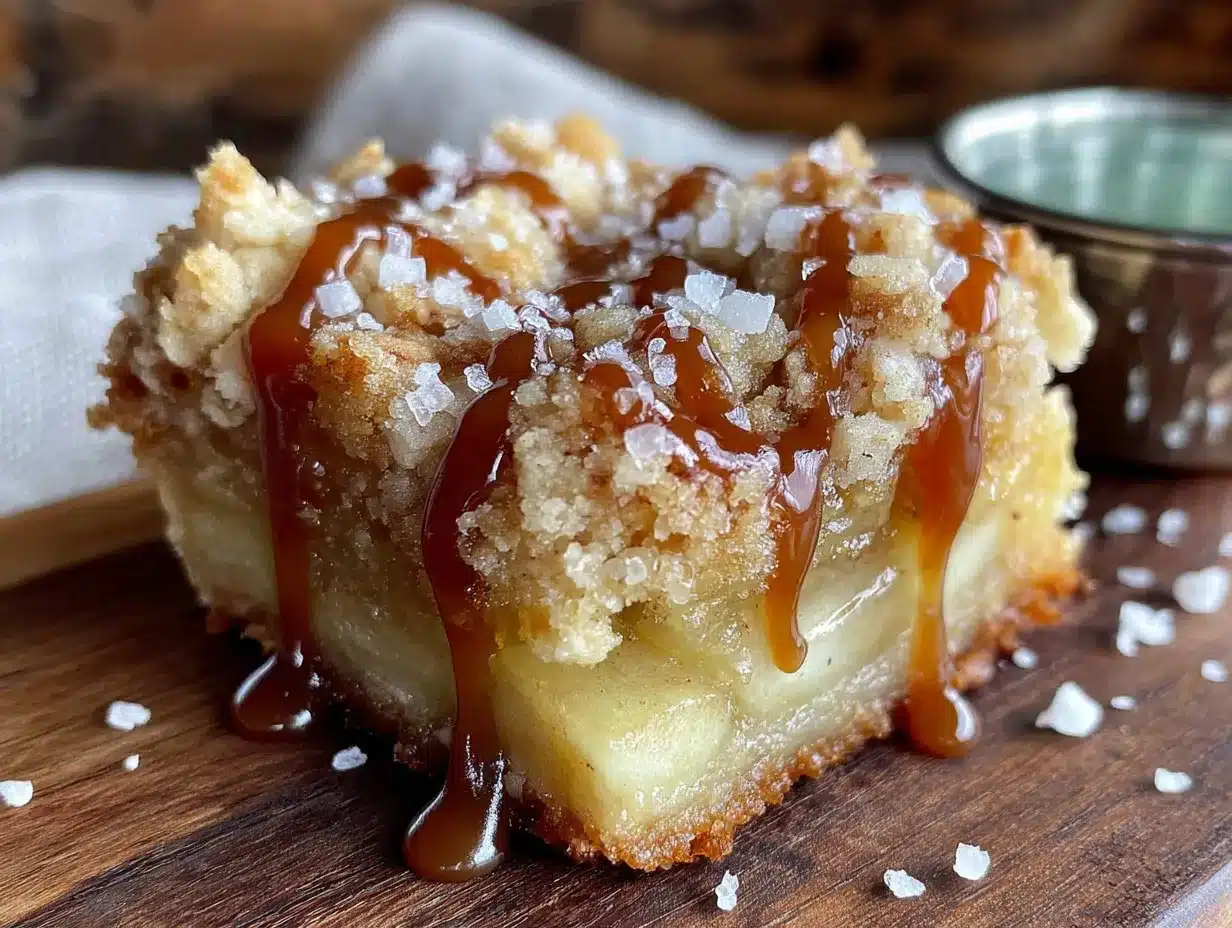
The crackle of the top layer as you bite down. That’s the whole reason I make these. It’s not the gooey caramel that drips down the sides, though that’s a close second. It’s not even the soft, spiced apple filling that practically melts into the buttery shortbread crust. No, it’s that first audible crunch that tells you everything is right in the world. I spent three whole weekends trying to get that texture right, and honestly, I burnt a few batches of oats before I figured out the trick.
These Best Caramel Apple Crisp Bars came from a very specific craving. I wanted the soul of a classic apple crisp, but I needed it to be portable. Something you could wrap in a napkin and take to a bonfire, or pack in a lunchbox without it turning into a pile of sad crumbs. The first version I made was a disaster—the crust was soggy, the apples slid right out, and the caramel turned into a rock-hard sheet. But I’m stubborn when it comes to dessert, so I kept tweaking.
I finally landed on a method that uses a par-baked shortbread base, a thick layer of cinnamon-spiced apples, and a crunchy oat topping that actually stays crunchy. The caramel gets drizzled on at the end, so it stays soft and sticky instead of melting into the crust. It’s the kind of bar that makes people close their eyes after the first bite. And once you make them, you’ll understand why I couldn’t stop until I got it right.
Why You’ll Love This Recipe
I’ve tested this recipe more times than I care to admit, and every single batch disappeared faster than I expected. Here’s what makes these bars stand out from every other apple dessert you’ve tried:
- Texture Heaven: You get three distinct textures in every bite—a buttery, firm shortbread base, a soft and tender apple filling, and a crunchy, golden oat topping. It’s a symphony of crunch and softness.
- No Soggy Bottoms: By par-baking the crust before adding the filling, you guarantee a sturdy base that won’t turn mushy. This is the one trick that changes everything.
- Perfectly Portable: Unlike a traditional crisp that falls apart on the plate, these bars hold their shape beautifully. They’re ideal for bake sales, potlucks, or just grabbing one on your way out the door.
- Simple Pantry Ingredients: You likely have everything in your kitchen right now. Butter, flour, oats, apples, sugar, and a few warm spices. No fancy extracts or hard-to-find items.
- Make-Ahead Friendly: These bars taste even better the next day. The flavors meld together overnight, and the texture somehow improves. They’re perfect for prepping ahead of a busy week.
- Crowd-Pleaser Guaranteed: I’ve brought these to family dinners, office parties, and casual get-togethers. They get devoured every single time, and people always ask for the recipe.
This isn’t just another apple crisp recipe. It’s the version that solves every problem I ever had with fall desserts. It’s sturdy enough to travel, simple enough for a weeknight, and impressive enough for a holiday table.
What Ingredients You Will Need
This recipe relies on a short list of simple, wholesome ingredients. Each one plays a specific role in building flavor and texture, so I’ll walk you through what to look for and why it matters.
For the Shortbread Crust
- Unsalted butter (1 cup / 226g), softened: Butter is the backbone of this crust. I always use unsalted so I can control the salt level. Make sure it’s truly softened to room temperature—if it’s too cold, the dough won’t come together properly. I recommend a good quality European-style butter for extra richness.
- Granulated sugar (½ cup / 100g): Just enough sweetness to balance the butter. Don’t substitute brown sugar here; it changes the texture of the shortbread.
- All-purpose flour (2 cups / 240g): Standard AP flour works perfectly. Spoon and level your flour for accuracy—scooping directly from the bag can pack in too much and make the crust dry.
- Salt (½ teaspoon): A must for balancing sweetness and enhancing the buttery flavor. Fine sea salt is my go-to.
For the Apple Filling
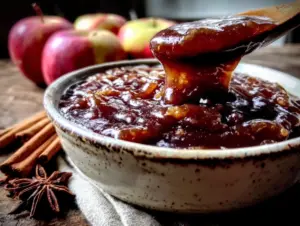
- Apples (4 medium, about 600g), peeled and diced: This is the most important ingredient choice. I prefer a mix of Granny Smith for tartness and Honeycrisp for sweetness. Granny Smith holds its shape beautifully during baking, while Honeycrisp breaks down just enough to create a soft, jammy texture. Avoid Red Delicious—they turn into mush.
- Light brown sugar (⅓ cup / 67g), packed: Brown sugar adds a deep, molasses-like sweetness that pairs perfectly with apples. Don’t skip it.
- All-purpose flour (2 tablespoons / 15g): This thickens the apple juices as they cook, preventing a watery filling that could make the crust soggy.
- Ground cinnamon (1½ teaspoons): The star spice of fall. I use Vietnamese cinnamon for its warm, intense flavor.
- Ground nutmeg (¼ teaspoon): A tiny amount adds warmth without overpowering the cinnamon. Freshly grated is best if you have it.
- Lemon juice (1 tablespoon): A squeeze of fresh lemon juice brightens the apples and prevents them from browning too quickly.
For the Crisp Topping
- Rolled oats (1 cup / 90g): Use old-fashioned rolled oats, not quick oats. Quick oats absorb too much moisture and turn mushy. Rolled oats give you that iconic crunchy texture.
- All-purpose flour (½ cup / 60g): Helps bind the topping and creates those lovely clumps.
- Light brown sugar (½ cup / 100g), packed: More brown sugar for that deep caramelized flavor.
- Unsalted butter (½ cup / 113g), cold and cubed: Cold butter is crucial here. It creates pockets of steam as it melts, resulting in a crumbly, crispy topping. If the butter softens, pop it back in the fridge for 10 minutes.
- Salt (¼ teaspoon): Balances the sweetness and makes the oat topping pop.
For the Caramel Drizzle
- Store-bought or homemade caramel sauce (about ½ cup): I’m a fan of using a high-quality store-bought caramel sauce for convenience. Look for one that lists cream and butter as ingredients, not just corn syrup and artificial flavors. If you’re feeling ambitious, a simple homemade caramel works beautifully too.
- Flaky sea salt (optional, for garnish): A tiny sprinkle of flaky salt over the caramel takes these bars from delicious to unforgettable. It cuts the sweetness and adds a professional touch.
Equipment Needed
You don’t need a fancy kitchen to make these bars, but a few specific tools make the process much smoother.
- 9×13-inch baking pan: This is the ideal size for these bars. A metal pan works best because it conducts heat evenly and helps the crust brown nicely. If you only have glass, reduce the oven temperature by 25°F and expect slightly longer baking times.
- Parchment paper: Line your pan with parchment paper, leaving some overhang on the long sides. This creates “handles” that let you lift the entire block of bars out of the pan for easy cutting. Trust me, you don’t want to try cutting these directly in the pan.
- Electric mixer or pastry cutter: For the crust, a hand mixer or stand mixer makes creaming the butter and sugar effortless. For the topping, I actually prefer using a pastry cutter or even my fingers—it gives you more control over the texture.
- Sharp chef’s knife and cutting board: Peeling and dicing four apples goes much faster with a sharp knife. A dull knife makes the job frustrating and dangerous.
- Mixing bowls: You’ll need at least three—one for the crust, one for the apples, and one for the topping. I like having a set of nesting bowls for easy cleanup.
- Measuring cups and spoons: For accuracy, especially with the flour. A kitchen scale is even better if you have one.
Preparation Method
Follow these steps carefully, and you’ll have a pan of perfect caramel apple crisp bars. I’ve included timing cues and visual checks so you know exactly what to look for at each stage.
- Preheat your oven to 350°F (175°C). Line your 9×13-inch baking pan with parchment paper, leaving a 2-inch overhang on the two long sides. This will make lifting the bars out later a breeze.
- Make the shortbread crust. In a large mixing bowl, beat 1 cup of softened unsalted butter and ½ cup of granulated sugar together until light and fluffy, about 2-3 minutes. Scrape down the sides of the bowl. Add 2 cups of all-purpose flour and ½ teaspoon of salt. Mix on low speed until the dough just comes together. It will look crumbly at first, but it should hold together when you squeeze a handful. If it feels too dry, add one tablespoon of cold water.
- Press the crust into the pan. Transfer the dough to your prepared pan. Press it down evenly into a flat, compact layer. I find using the bottom of a measuring cup or a flat glass works best for getting an even surface. Make sure there are no gaps or thin spots.
- Parbake the crust. Place the pan in the preheated oven and bake for 15 minutes. The crust should look set and just barely golden around the edges. It won’t be fully cooked through, and that’s exactly what we want. Remove from the oven and let it cool slightly on a wire rack while you prepare the filling.
- Prepare the apple filling. While the crust bakes, peel and dice your apples into ½-inch cubes. In a medium bowl, toss the diced apples with ⅓ cup packed light brown sugar, 2 tablespoons all-purpose flour, 1½ teaspoons ground cinnamon, ¼ teaspoon ground nutmeg, and 1 tablespoon lemon juice. Mix until every apple piece is evenly coated. The flour will look a little dusty at first, but it will absorb the apple juices during baking.
- Spread the apples over the crust. Once the parbaked crust has cooled for about 5 minutes, spread the apple mixture evenly over the surface. Don’t worry if it looks like a lot—the apples will soften and settle as they bake.
- Make the crisp topping. In a separate bowl, combine 1 cup rolled oats, ½ cup all-purpose flour, ½ cup packed light brown sugar, and ¼ teaspoon salt. Add ½ cup of cold, cubed unsalted butter. Use a pastry cutter or your fingertips to work the butter into the dry ingredients until the mixture resembles coarse crumbs with some larger clumps. You want those clumps—they create the crunchy bits everyone fights over.
- Add the topping. Sprinkle the oat mixture evenly over the apples. Don’t press it down; let it sit loosely on top. This allows the heat to circulate and creates that signature crisp texture.
- Bake the bars. Return the pan to the oven and bake for 40-45 minutes. At the 30-minute mark, check the topping. If it’s browning too quickly, tent the pan loosely with aluminum foil. The bars are done when the apples are tender (test with a fork) and the topping is deep golden brown and feels firm to the touch. The filling should be bubbling around the edges.
- Cool completely. This is the hardest part. Place the pan on a wire rack and let the bars cool completely at room temperature. This takes about 2 hours. Do not rush this step—cutting them while they’re warm will result in a crumbly mess. The filling needs time to set so the bars hold their shape.
- Drizzle with caramel. Once the bars are completely cool, drizzle the caramel sauce generously over the top. I like to use a spoon to create a zigzag pattern. If you’re using flaky sea salt, sprinkle it over the caramel while it’s still wet so it sticks.
- Cut and serve. Using the parchment paper handles, lift the entire block of bars out of the pan and transfer to a cutting board. Use a sharp chef’s knife to cut into squares. For clean cuts, wipe the knife clean between each slice. I usually get 12 large bars or 24 smaller ones, depending on the occasion.
Cooking Tips & Techniques
I learned most of these lessons the hard way, so you don’t have to. Here are the tips that make the biggest difference with this recipe.
- Don’t skip the parbake. I know it adds an extra step, but it’s non-negotiable. A raw crust will absorb moisture from the apples and turn into a soggy, doughy mess. Parbaking creates a barrier that keeps the crust firm and flaky.
- Use cold butter for the topping. Warm butter gets absorbed into the oats and flour, creating a dense, greasy layer. Cold butter creates steam pockets as it melts, resulting in those beautiful, crunchy clumps. If your kitchen is warm, chill the cubed butter for 10 minutes before mixing.
- Check your apples for doneness. Baking times can vary based on the type of apple you use and how small you diced them. After 40 minutes, poke a fork through the topping into the apples. They should be tender but not mushy. If they’re still firm, bake for another 5 minutes and check again.
- Let them cool completely. I once cut into these bars after 30 minutes because I couldn’t wait. The entire pan fell apart. The filling needs time to set and firm up. Patience pays off here.
- Toast your oats for extra flavor. If you have an extra 5 minutes, spread the rolled oats on a baking sheet and toast them in the 350°F oven for 5 minutes before mixing the topping. It adds a nutty depth that takes these bars to another level.
- Use a sharp knife for cutting. A dull knife will drag through the caramel and topping, making a mess. A sharp chef’s knife gives you clean, professional-looking squares.
Variations & Adaptations
One of the best things about this recipe is how flexible it is. Here are some variations I’ve tried and loved.
- Gluten-Free Version: Substitute the all-purpose flour in the crust and topping with a good 1-to-1 gluten-free baking blend. Make sure your oats are certified gluten-free as well. The texture will be slightly more delicate, but the flavor is just as good.
- Dairy-Free Version: Use a high-quality vegan butter stick (not margarine) in both the crust and the topping. Make sure your caramel sauce is dairy-free too. I’ve had great results with Miyoko’s European Style Cultured Vegan Butter.
- Nutty Twist: Add ½ cup of chopped pecans or walnuts to the crisp topping. Toast them first for maximum flavor. The crunch of nuts pairs beautifully with the soft apples and caramel.
- Spice It Up: Add ¼ teaspoon of ground cardamom or ginger to the apple filling for a more complex spice profile. Cardamom and apple are a surprisingly wonderful combination.
- Pear Apple Combo: Swap one of the apples for a firm pear, like Bosc or Anjou. The pear adds a subtle sweetness and a slightly different texture that works beautifully.
- No Caramel Option: If you’re not a caramel fan (are you okay?), you can skip it entirely. The bars are still delicious on their own. Or try a drizzle of maple glaze instead—mix ½ cup powdered sugar with 2 tablespoons maple syrup.
I once made a batch with a mix of Granny Smith apples and fresh cranberries for a Thanksgiving potluck. The tartness of the cranberries cut through the sweetness perfectly. It was a hit, and I’ve been making that version every November since.
Serving & Storage Suggestions
These bars are incredibly versatile when it comes to serving. Here’s how I like to enjoy them, plus how to keep them fresh for days.
Serving: These bars are fantastic at room temperature, but I actually prefer them slightly warm. Pop an individual bar in the microwave for 10-15 seconds to soften the apples and warm the caramel. Serve it with a scoop of vanilla ice cream or a dollop of freshly whipped cream for the ultimate fall dessert. They’re also perfect on their own as a grab-and-go snack with a cup of hot coffee or a mug of spiced cider.
Storage: Store leftover bars in an airtight container at room temperature for up to 3 days. If your kitchen is warm, I recommend refrigerating them after day two, as the caramel can get a bit sticky. To keep the topping crunchy, place a paper towel in the bottom of the container to absorb excess moisture. Change the paper towel every day if you’re storing them for longer.
Freezing: These bars freeze beautifully. Once they’re completely cooled and cut, place them on a baking sheet in a single layer and freeze for 1 hour. Then transfer the frozen bars to a freezer-safe bag or container, layering parchment paper between them. They’ll keep for up to 3 months. To thaw, leave them at room temperature for about 30 minutes, or warm them in the microwave for 20 seconds.
Reheating: For a single bar, microwave for 15-20 seconds. For a whole pan, reheat in a 300°F oven for 10 minutes, covered loosely with foil. The flavors actually deepen and meld together after a day or two in the fridge, making leftovers even better than the fresh batch.
Nutritional Information & Benefits
Let’s be honest—these are a treat, not a health food. But knowing what’s in them helps you enjoy them mindfully. Here’s the estimated nutritional breakdown for one large bar (based on 12 servings):
- Calories: ~380
- Fat: 18g
- Carbohydrates: 52g
- Fiber: 3g
- Sugar: 32g
- Protein: 4g
Apples are a great source of dietary fiber and vitamin C, especially if you leave the peel on (though I peel mine for texture). Oats provide soluble fiber, which is good for heart health. The butter and sugar are purely for pleasure, and there’s nothing wrong with that in moderation.
If you’re watching your sugar intake, you can reduce the brown sugar in the filling by a couple of tablespoons, especially if you use naturally sweet apples like Fuji or Gala. For a lower-calorie option, cut the bars into 24 smaller squares instead of 12. One small bar satisfies that sweet craving without overdoing it.
Conclusion
These Best Caramel Apple Crisp Bars are everything I want in a fall dessert. They’re crunchy, soft, buttery, sweet, and just a little bit salty. They travel well, they store beautifully, and they make your whole kitchen smell like autumn heaven. I’ve made them for apple picking parties, Thanksgiving dinners, and lazy Sunday afternoons, and they’ve never let me down.
I really hope you give them a try. Play around with the spices, swap in your favorite apples, or add a handful of nuts. Make them your own. And when you do, I’d love to hear about it. Drop a comment below and let me know how they turned out, or share a photo of your bars on Pinterest. Tag me so I can see your creation!
Happy baking, friends. Here’s to crunchy oat toppings, sticky caramel, and the simple joy of a really good bar.
Frequently Asked Questions
Can I use quick oats instead of rolled oats?
I wouldn’t recommend it. Quick oats are much finer and absorb more moisture, which makes the topping turn dense and mushy instead of light and crunchy. Rolled oats are worth the extra texture they provide.
Do I have to peel the apples?
Not necessarily, but I prefer to. The peel can become tough and chewy after baking, which contrasts with the soft filling. If you don’t mind the texture, feel free to leave the peel on for extra fiber.
Can I make these bars ahead of time?
Absolutely. In fact, they taste even better the next day. Bake them, cool them completely, and store them in an airtight container at room temperature. Drizzle the caramel on just before serving to keep it from making the topping soggy.
Why did my crust turn out soggy?
This usually happens if you skip the parbaking step or if you didn’t bake the crust long enough. The parbake creates a barrier that prevents the apple juices from soaking into the dough. Make sure you bake it for the full 15 minutes until it looks set and slightly golden.
How do I get clean cuts without the bars falling apart?
Patience is key. Let the bars cool completely at room temperature—about 2 hours. Use a sharp chef’s knife and wipe it clean between each cut. If the caramel is sticking, lightly grease the knife with a little butter or nonstick spray.
Pin This Recipe!


Best Caramel Apple Crisp Bars – Easy Fall Dessert
- Total Time: 2 hours 15 minutes (includes cooling)
- Yield: 12 large bars 1x
Description
These Best Caramel Apple Crisp Bars feature a buttery shortbread crust, a soft and spiced apple filling, and a crunchy oat topping, all finished with a drizzle of caramel. They are portable, make-ahead friendly, and perfect for fall gatherings.
Ingredients
- 1 cup (226g) unsalted butter, softened
- ½ cup (100g) granulated sugar
- 2 cups (240g) all-purpose flour
- ½ teaspoon salt
- 4 medium apples (about 600g), peeled and diced (mix of Granny Smith and Honeycrisp)
- ⅓ cup (67g) light brown sugar, packed
- 2 tablespoons (15g) all-purpose flour
- 1½ teaspoons ground cinnamon
- ¼ teaspoon ground nutmeg
- 1 tablespoon lemon juice
- 1 cup (90g) rolled oats
- ½ cup (60g) all-purpose flour
- ½ cup (100g) light brown sugar, packed
- ½ cup (113g) unsalted butter, cold and cubed
- ¼ teaspoon salt
- ½ cup store-bought or homemade caramel sauce
- Flaky sea salt (optional, for garnish)
Instructions
- Preheat your oven to 350°F (175°C). Line a 9×13-inch baking pan with parchment paper, leaving a 2-inch overhang on the two long sides.
- Make the shortbread crust: In a large mixing bowl, beat 1 cup softened unsalted butter and ½ cup granulated sugar together until light and fluffy, about 2-3 minutes. Add 2 cups all-purpose flour and ½ teaspoon salt. Mix on low speed until the dough just comes together. If too dry, add 1 tablespoon cold water.
- Press the crust into the prepared pan evenly using the bottom of a measuring cup or flat glass.
- Parbake the crust: Bake for 15 minutes until set and just barely golden around the edges. Remove and let cool slightly on a wire rack.
- Prepare the apple filling: In a medium bowl, toss the diced apples with ⅓ cup packed light brown sugar, 2 tablespoons all-purpose flour, 1½ teaspoons cinnamon, ¼ teaspoon nutmeg, and 1 tablespoon lemon juice until evenly coated.
- Spread the apple mixture evenly over the parbaked crust.
- Make the crisp topping: In a separate bowl, combine 1 cup rolled oats, ½ cup all-purpose flour, ½ cup packed light brown sugar, and ¼ teaspoon salt. Add ½ cup cold cubed unsalted butter. Use a pastry cutter or fingertips to work the butter into the dry ingredients until the mixture resembles coarse crumbs with some larger clumps.
- Sprinkle the oat mixture evenly over the apples. Do not press down.
- Bake for 40-45 minutes. At the 30-minute mark, check the topping; if browning too quickly, tent loosely with aluminum foil. Bars are done when apples are tender and topping is deep golden brown and firm.
- Cool completely at room temperature, about 2 hours.
- Once cool, drizzle caramel sauce generously over the top. Sprinkle with flaky sea salt if desired.
- Using the parchment paper handles, lift the bars out of the pan and transfer to a cutting board. Cut into squares with a sharp chef’s knife, wiping the knife clean between cuts.
Notes
Parbaking the crust is essential to prevent sogginess. Use cold butter for the topping to ensure a crunchy texture. Let bars cool completely before cutting to avoid crumbling. For extra flavor, toast the oats for 5 minutes before mixing the topping.
- Prep Time: 20 minutes
- Cook Time: 55 minutes
- Category: Dessert
- Cuisine: American
Nutrition
- Serving Size: 1 large bar
- Calories: 380
- Sugar: 32
- Sodium: 180
- Fat: 18
- Saturated Fat: 11
- Carbohydrates: 52
- Fiber: 3
- Protein: 4
Keywords: caramel apple crisp bars, apple crisp bars, fall dessert, apple dessert, caramel apple bars, easy apple bars