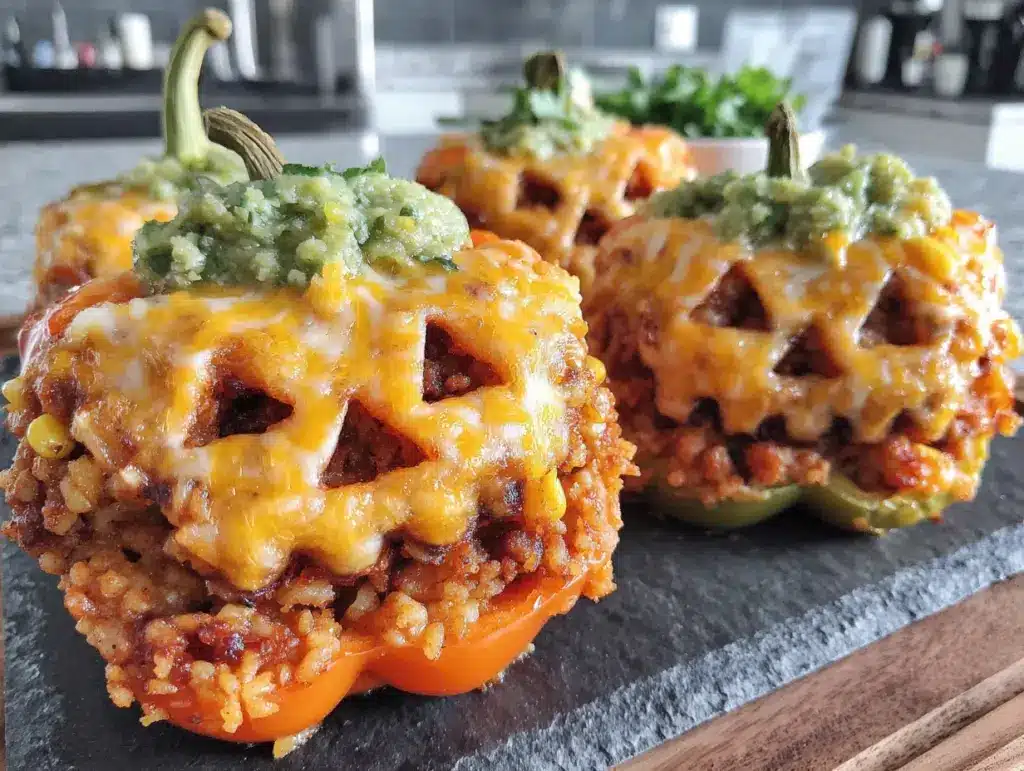
My neighbor’s kid had sworn off bell peppers for what felt like forever. Two years, maybe more. I’d watch him push them to the side of his plate at every barbecue, making a face like I’d asked him to eat a shoe. Then last October, I brought over a tray of these little jack-o-lantern stuffed peppers just for the adults, you know, something fun for a porch get-together. I turned my back for one second, and there he was, sitting on the step, halfway through his second pepper, orange juice running down his chin. He didn’t even look guilty. He just looked up and said, “These aren’t peppers.”
Honestly, I didn’t set out to trick anyone. I was just tired of the same old stuffed pepper recipe—the one that always turns into a sad, soggy mess in the bottom of the pan. I wanted something that felt like fall, something that made you smile when you saw it. I had a bag of orange bell peppers sitting on the counter, a leftover pack of ground turkey from taco night, and a sudden, stubborn idea. What if the pepper wasn’t just a vessel, but part of the fun?
The first batch came out looking a little wonky, I’ll admit. One of the faces I carved looked more like a surprised potato than a pumpkin. But the flavor? That was spot on. The sweetness of the roasted orange pepper mixed with the savory, smoky filling—it was the kind of cozy dinner that makes you forget the day you had. I started making them every week that October, just for myself, and maybe you’ve been there. You find a recipe that feels like a secret, and you almost don’t want to share it. Then your neighbor catches you red-handed, and suddenly, it’s not a secret anymore. It’s a tradition.
Why You’ll Love This Recipe
Let me tell you why these cozy jack-o-lantern stuffed bell peppers have become my go-to fall dinner. I’ve tested this recipe about a dozen times to get the texture just right—no mushy peppers, no dry filling. Just a perfect, hearty meal that feels special without a ton of work.
- Quick & Easy: From start to table in under 45 minutes. Perfect for those busy weeknights when you still want something that feels homemade.
- Simple Ingredients: You probably have most of this in your pantry right now. No hunting for obscure spices or expensive cuts of meat.
- Perfect for Fall: This is the ultimate cozy dinner for a chilly evening, a Halloween party, or just a Tuesday that needs a little fun.
- Crowd-Pleaser: Even the pickiest eaters (yes, even the ones who “hate” peppers) come back for seconds. I’ve seen it happen.
- Unbelievably Delicious: The way the pepper caramelizes in the oven, the savory filling with a hint of smoky heat—it’s comfort food that actually delivers.
What makes this different from every other stuffed pepper recipe out there is the face. Carving a little jack-o-lantern into the pepper isn’t just cute—it actually helps the pepper cook more evenly and lets a little bit of that delicious filling peek through. It’s a small tweak, but it changes the whole experience. You get a dinner that’s fun to make, fun to eat, and somehow tastes better because you smiled while you were cooking it. This isn’t just another version of stuffed peppers. It’s the one that makes you close your eyes after the first bite, even if you’re just sitting at your own kitchen counter on a random Wednesday night.
What Ingredients You Will Need
This recipe uses simple, wholesome ingredients to deliver bold flavor and satisfying texture without the fuss. Most of these are pantry staples, which makes this an easy last-minute dinner idea when you need something cozy fast.
For the Filling
- 1 lb ground turkey or beef (I prefer ground turkey for a lighter feel, but beef adds a richer flavor)
- 1 cup cooked rice (white or brown, leftover rice works perfectly here)
- 1 small onion, diced (yellow or sweet onion works best)
- 2 cloves garlic, minced (fresh is always better, but jarred minced garlic works in a pinch)
- 1 can (15 oz) diced tomatoes, drained (I like fire-roasted for extra smoky flavor)
- 1 teaspoon smoked paprika (this is the secret to that cozy, fall-like warmth)
- 1/2 teaspoon cumin
- 1/2 teaspoon chili powder (adjust to your heat preference)
- Salt and black pepper to taste
- 1 cup shredded cheese (cheddar or Monterey Jack, divided)
- 2 tablespoons olive oil
For the Peppers
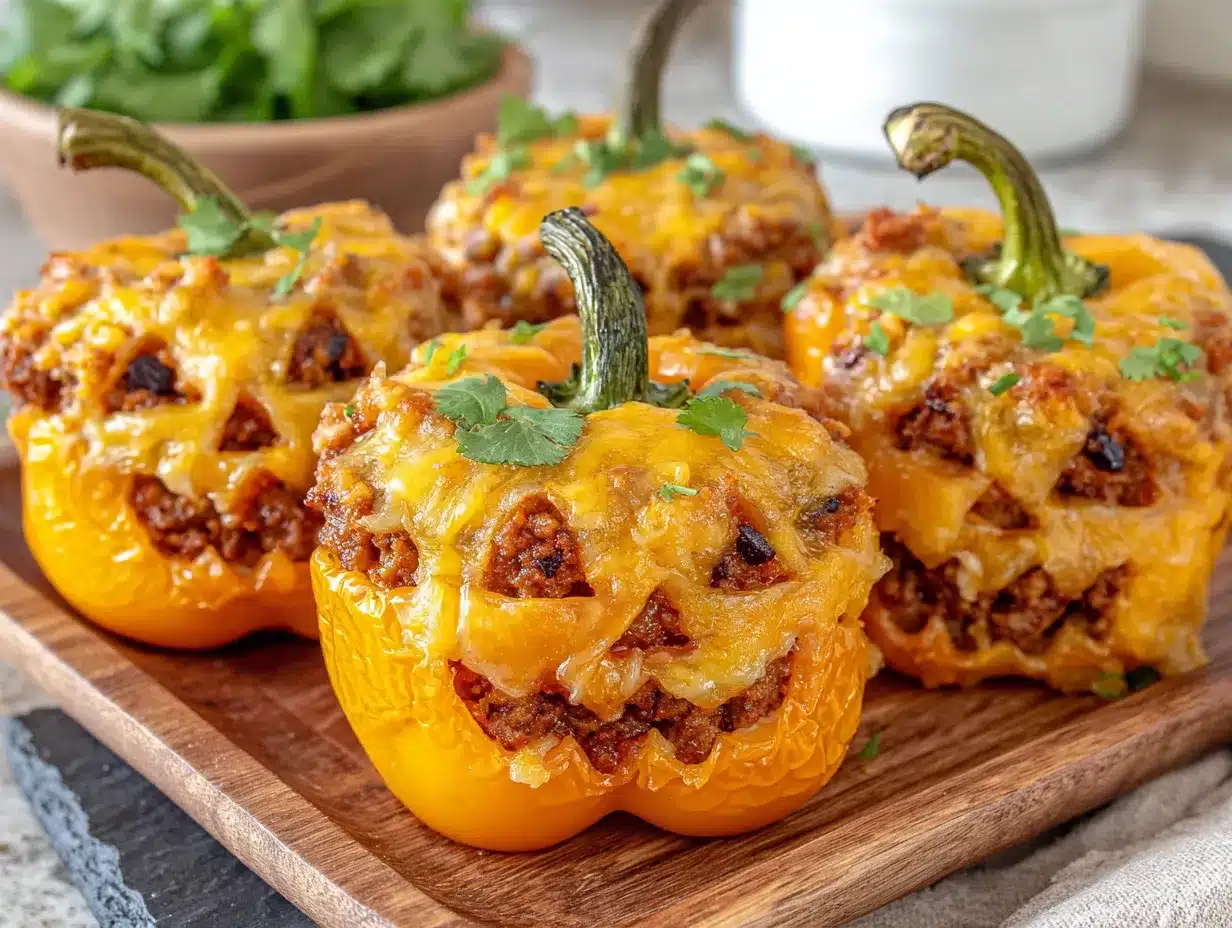
- 4 large orange bell peppers (look for ones that sit flat and have a wide, stable base)
- Optional: 1/4 cup chicken or vegetable broth (add to the bottom of the dish to keep peppers moist)
Let me talk about the peppers for a second. You want the biggest, roundest orange bell peppers you can find. The ones that look like they’re already trying to be pumpkins. I’ve tried this with red and yellow peppers too, and they work fine, but orange gives you that classic jack-o-lantern look. For the cheese, I recommend Tillamook or Cabot for the best melt—it’s worth the extra dollar, honestly. If you’re dairy-free, a good vegan cheddar shred melts surprisingly well here. And for the rice, any leftover grain works. I’ve used quinoa and even cauliflower rice (just cook it a little less time so it doesn’t get mushy).
Equipment Needed
You don’t need a fancy kitchen to pull these off. Here’s what you’ll need:
- Large skillet or frying pan (for cooking the filling)
- Sharp paring knife (for carving the faces—a small serrated knife also works great)
- Baking dish (9×13 works perfectly, or any dish that holds the peppers snugly)
- Mixing bowl (for combining the filling)
- Cutting board
- Measuring cups and spoons
- Aluminum foil (for covering the dish while baking)
- Small spoon (for scooping out the seeds)
If you don’t have a baking dish, a cast-iron skillet works beautifully. Just make sure the peppers fit snugly so they don’t tip over. I learned that lesson the hard way—first time I made these, two peppers fell over and the filling spilled everywhere. A total mess, but honestly, it still tasted great. For the carving, a simple paring knife is all you need. I’ve used a pumpkin carving kit before (don’t judge me, I was desperate), and it actually worked fine for the tiny details.
Preparation Method
- Preheat your oven to 375°F (190°C). While it’s heating, start prepping your peppers. Wash them well, then slice the top off each pepper—about half an inch from the stem. Set the tops aside (you can use them later for dipping if you want). Scoop out all the seeds and membranes from inside. Give them a little rinse to get any stragglers out.
- Now for the fun part—carving the faces. Using your sharp paring knife, carefully cut small triangles for eyes and a little zigzag or smile for the mouth. Keep the cuts small—about half an inch wide. Remember, you can always make a hole bigger, but you can’t make it smaller. I usually do two triangle eyes and a little crooked smile. It doesn’t have to be perfect. In fact, the wonky ones have more personality. Place the carved peppers in your baking dish, standing upright.
- Heat 2 tablespoons of olive oil in your large skillet over medium heat. Add the diced onion and cook for about 3-4 minutes until it starts to get soft and translucent. Add the minced garlic and cook for another 30 seconds until it smells amazing. Don’t let the garlic burn—it gets bitter fast.
- Add the ground turkey (or beef) to the skillet. Break it up with a wooden spoon and cook until it’s browned, about 6-8 minutes. If there’s a lot of excess fat, drain it off. I usually tilt the pan and spoon it out. Season with smoked paprika, cumin, chili powder, salt, and pepper. Stir everything together and let it cook for another minute so the spices get toasty.
- Remove the skillet from heat. Stir in the cooked rice, drained diced tomatoes, and half of the shredded cheese. Mix until everything is well combined. Taste it—this is important. Adjust the seasoning if you need to. I always add a little more smoked paprika at this stage because I can’t help myself.
- Spoon the filling into each carved pepper. Pack it in gently but firmly—you want it full but not exploding. The filling should come right to the top. If you have extra filling, just pile it on top or bake it in a small dish on the side (trust me, someone will eat it).
- Sprinkle the remaining cheese over the tops of the peppers. If you’re using broth, pour it carefully into the bottom of the baking dish—not over the peppers. This creates steam and keeps everything moist. Cover the dish tightly with aluminum foil.
- Bake for 25 minutes covered. Then remove the foil and bake for another 10-15 minutes until the cheese is bubbly and the peppers are tender but still holding their shape. You want them to be fork-tender but not collapsing. The faces should be visible and slightly caramelized around the edges.
- Let them rest for 5 minutes before serving. This is the hardest part, I know. But it lets the filling set so everything stays together when you take a bite. Serve warm, with the little pepper tops on the side for dipping if you want.
Cooking Tips & Techniques
I’ve made these peppers more times than I can count, and I’ve definitely made my share of mistakes. Here’s what I’ve learned so you don’t have to make the same ones.
Don’t overbake the peppers. The first time I made these, I left them in the oven for 45 minutes because I got distracted folding laundry. The peppers turned into sad, wrinkled blobs, and the faces basically melted shut. You want them tender but still firm enough to hold their shape. Stick to the 35-40 minute total bake time, and check them at the 30-minute mark.
Carve carefully. I once got a little too excited with the knife and cut a giant hole in the side of a pepper. The filling just oozed out like lava. Keep your cuts small and deliberate. If you accidentally make a hole too big, you can patch it with a piece of raw pepper and a toothpick—not pretty, but it works.
Use room temperature ingredients. This is one of those little things that makes a big difference. If your cheese and meat are cold, the filling takes longer to cook through, and the peppers end up overdone. Let everything sit out for 15 minutes before you start cooking.
Multitask like a pro. While the filling is browning, you can carve the peppers. While the peppers are baking, make a quick side salad or set the table. The actual hands-on time for this recipe is only about 20 minutes, so use the oven time to get everything else ready.
Make extra filling. I always double the filling recipe now. I use half for the peppers and save the rest for quick lunches during the week. It reheats beautifully and tastes great on its own with a little hot sauce.
Variations & Adaptations
This recipe is super flexible, which is one of the reasons I love it. Here are some ways to switch it up:
- Vegetarian Version: Swap the ground meat for a can of black beans (drained and rinsed) and add an extra 1/2 cup of corn. The beans add protein and that same hearty texture. I’ve made this for my vegetarian sister-in-law, and she said it was the best stuffed pepper she’d ever had.
- Spicy Southwest Style: Add a diced jalapeño to the onion mixture, use pepper jack cheese instead of cheddar, and throw in a tablespoon of chopped cilantro at the end. It gives the whole dish a kick that warms you up from the inside out.
- Low-Carb Option: Skip the rice entirely and use 1 cup of riced cauliflower instead. You don’t even need to cook it first—just stir it in raw with the tomatoes, and it will steam perfectly inside the pepper. My friend who’s on keto loves this version.
- Breakfast Stuffed Peppers: This sounds weird, but hear me out. Use breakfast sausage instead of ground meat, add a beaten egg to the filling mixture, and top with a fried egg after baking. It’s a fun weekend brunch that feels festive and indulgent.
- Greek-Inspired Twist: Swap the cumin and chili powder for oregano and thyme. Use ground lamb instead of turkey, and add crumbled feta cheese along with the cheddar. Serve with a dollop of tzatziki on the side. I tried this on a whim one night, and it was surprisingly incredible.
Serving & Storage Suggestions
These peppers are best served warm, right out of the oven, when the cheese is still stretchy and the filling is piping hot. I like to put them on a plate with the little pepper top sitting next to them, almost like a lid. It makes the presentation feel complete.
For sides, a simple green salad with a tangy vinaigrette cuts through the richness beautifully. I also love serving them with a side of crusty bread to soak up any juices that pool in the plate. If you’re feeling extra cozy, a bowl of tomato soup on the side makes this a complete fall meal.
Storage: Leftover stuffed peppers keep well in an airtight container in the refrigerator for up to 4 days. The flavors actually get better as they sit—the smoked paprika and cumin meld together overnight in a way that’s just lovely.
Reheating: The best way to reheat these is in the oven at 350°F for about 15 minutes. The microwave works in a pinch, but the peppers get a little soft. If you’re using the microwave, just do 60-second intervals until heated through. I’ve also reheated them in an air fryer at 350°F for 8 minutes, and they come out almost as good as fresh.
Freezing: You can freeze these for up to 3 months. Assemble the peppers completely but don’t bake them. Wrap each one individually in plastic wrap, then place them in a freezer bag. When you’re ready to eat, thaw them in the fridge overnight and bake as directed, adding about 10 extra minutes to the covered baking time.
Nutritional Information & Benefits
Here’s a rough estimate for one stuffed pepper (using ground turkey and white rice):
- Calories: Approximately 380
- Protein: 28g
- Fat: 14g
- Carbohydrates: 32g
- Fiber: 5g
These numbers will vary based on your specific ingredients, but overall, this is a well-balanced meal. The bell peppers themselves are packed with vitamin C—actually, one orange bell pepper has more vitamin C than an orange. They’re also a great source of vitamin A, which is good for your eyes and immune system.
The protein from the turkey or beef keeps you full and satisfied, and the rice provides steady energy. If you’re watching your sodium, use low-sodium diced tomatoes and go easy on the added salt. I’ve made this recipe gluten-free by using certified gluten-free rice, and it works perfectly. The main allergens here are dairy (from the cheese), but as I mentioned, a good vegan cheese substitute works well.
Conclusion
These cozy jack-o-lantern stuffed bell peppers are more than just a fun dinner—they’re the kind of meal that makes you remember why you love cooking. They’re playful without being childish, comforting without being boring, and impressive without being stressful. Whether you’re making them for a Halloween party, a fall family dinner, or just a Tuesday that needs a little brightness, they deliver every single time.
I hope you give them a try and make them your own. Maybe you’ll add extra spice, or swap in a different protein, or carve a face that looks like your cat. That’s the beauty of this recipe—it’s a starting point, not a rulebook. I’d love to hear how yours turn out. Drop a comment below and tell me what faces you carved, or tag me in your photos if you share them online. There’s something special about seeing other people make a recipe that started in your own kitchen.
So go ahead. Grab those orange peppers, get a little silly with the knife, and make yourself a dinner that feels like a warm hug. You deserve it.
Frequently Asked Questions
Can I make these ahead of time?
Absolutely. You can assemble the peppers completely (carved, filled, and topped with cheese) up to 24 hours in advance. Just cover them and keep them in the fridge. When you’re ready to bake, add about 10 minutes to the covered baking time since they’ll be cold from the fridge.
Do I have to carve the faces?
Not at all! If you’re short on time or just not feeling the jack-o-lantern vibe, you can skip the carving entirely and just stuff the peppers as is. They’ll still taste amazing. But honestly, the carving takes maybe 5 extra minutes, and the smile it puts on people’s faces is totally worth it.
Can I use different colored peppers?
Yes, but orange really gives you that pumpkin look. Red peppers are sweeter and work fine, and green peppers are more savory but a little bitter. Yellow peppers look nice but aren’t as sweet as orange. If you’re making these for a Halloween party, stick with orange for the full effect.
How do I keep the peppers from tipping over?
This is a common issue! First, make sure you slice the bottom of the pepper just slightly flat if it’s rounded. Second, choose a baking dish that’s just big enough to hold all the peppers snugly. If they’re touching each other, they’ll support each other and stay upright. You can also crumple a piece of aluminum foil and place it between peppers to keep them stable.
Can I make this dairy-free?
Yes, easily. Just use your favorite dairy-free shredded cheese. I’ve used both Daiya and Violife brands with good results. You can also skip the cheese entirely and add a tablespoon of nutritional yeast to the filling for a cheesy flavor without the dairy. The peppers will still be delicious and satisfying.
Pin This Recipe!
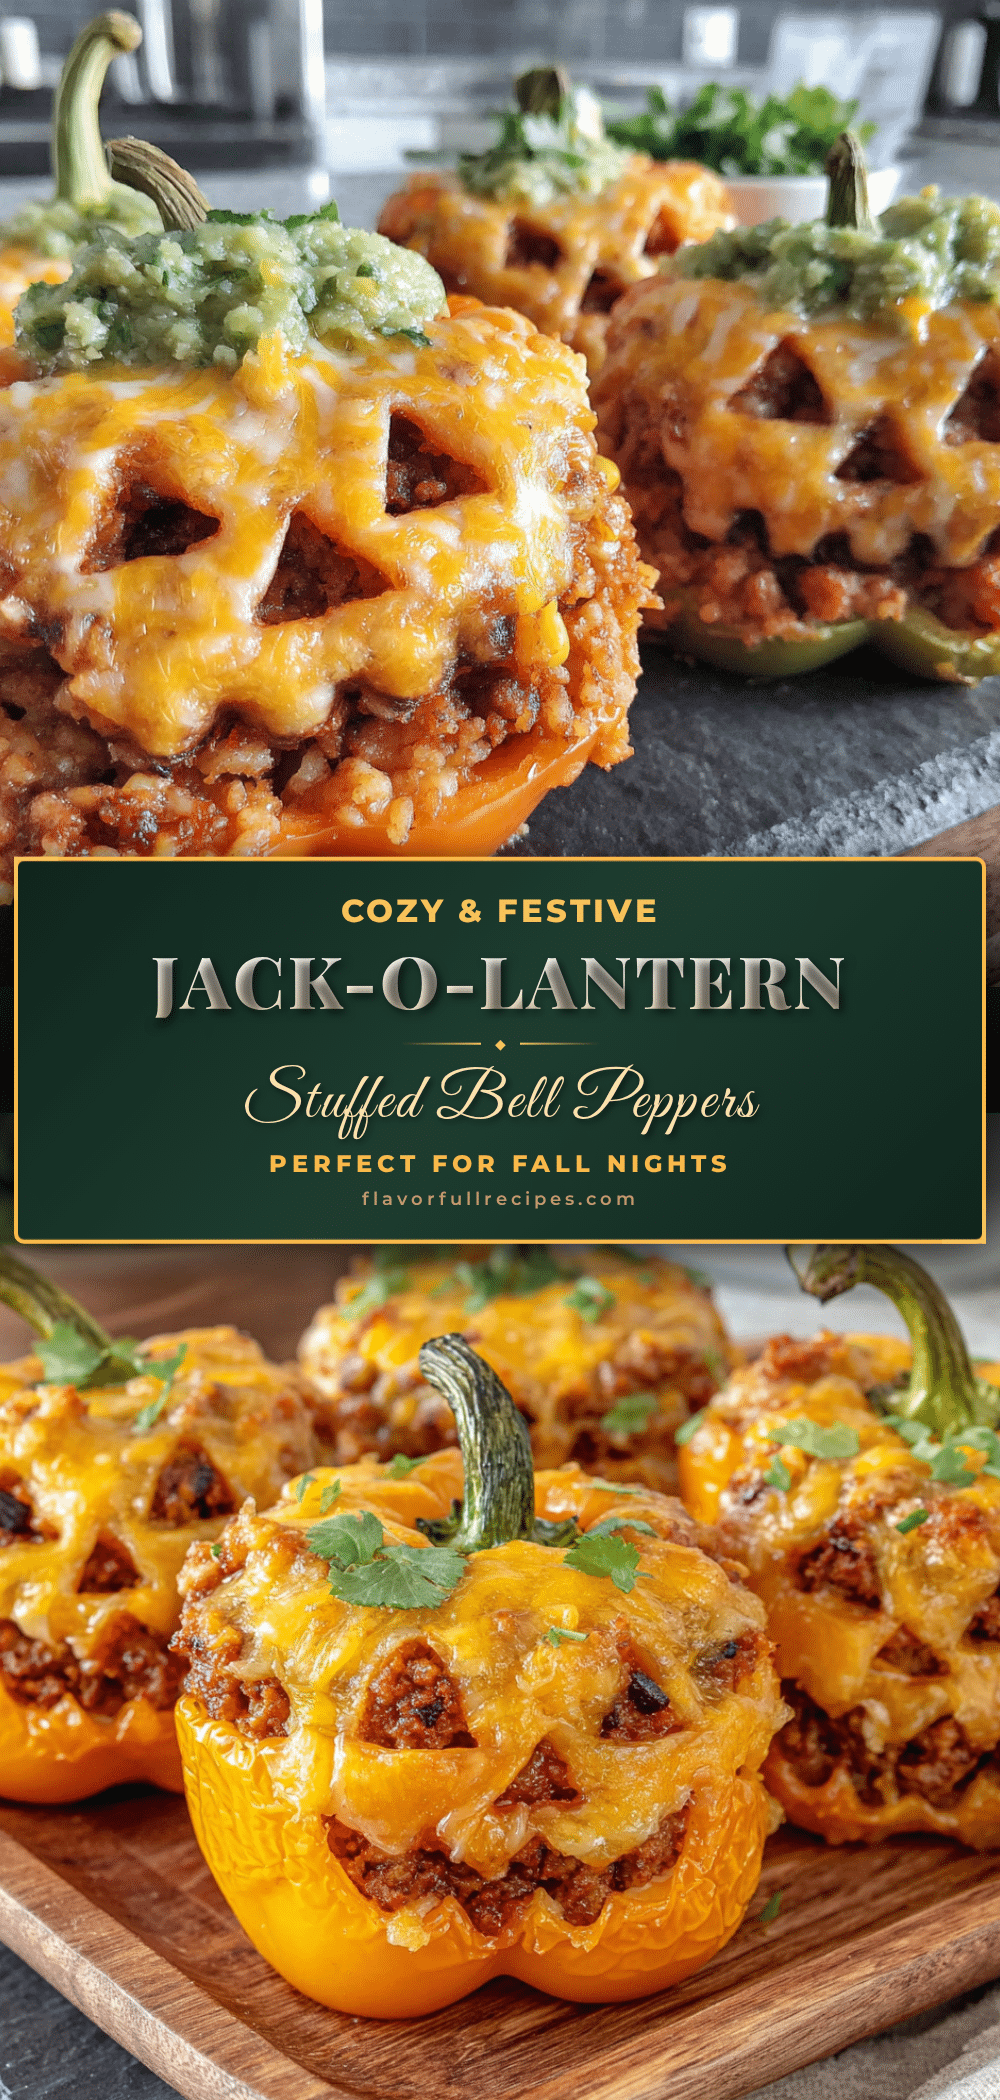

Cozy Jack-o-Lantern Stuffed Bell Peppers: Easy Fall Dinner
- Total Time: 55-60 minutes
- Yield: 4 servings 1x
Description
These fun and festive jack-o-lantern stuffed bell peppers are filled with a savory ground turkey and rice mixture, then baked until tender. Perfect for a cozy fall dinner or Halloween party, they’re quick, easy, and sure to please even picky eaters.
Ingredients
- 1 lb ground turkey or beef
- 1 cup cooked rice (white or brown)
- 1 small onion, diced
- 2 cloves garlic, minced
- 1 can (15 oz) diced tomatoes, drained (fire-roasted recommended)
- 1 teaspoon smoked paprika
- 1/2 teaspoon cumin
- 1/2 teaspoon chili powder
- Salt and black pepper to taste
- 1 cup shredded cheese (cheddar or Monterey Jack), divided
- 2 tablespoons olive oil
- 4 large orange bell peppers
- Optional: 1/4 cup chicken or vegetable broth
Instructions
- Preheat your oven to 375°F (190°C). Wash the peppers, slice off the tops about half an inch from the stem, and scoop out the seeds and membranes. Rinse the insides.
- Using a sharp paring knife, carve small triangles for eyes and a zigzag or smile for the mouth on each pepper. Keep cuts about half an inch wide. Place the carved peppers upright in a baking dish.
- Heat 2 tablespoons of olive oil in a large skillet over medium heat. Add the diced onion and cook for 3-4 minutes until soft and translucent. Add the minced garlic and cook for 30 seconds.
- Add the ground turkey (or beef) to the skillet. Break it up and cook until browned, about 6-8 minutes. Drain excess fat if needed. Season with smoked paprika, cumin, chili powder, salt, and pepper. Stir and cook for another minute.
- Remove the skillet from heat. Stir in the cooked rice, drained diced tomatoes, and half of the shredded cheese. Mix well and adjust seasoning to taste.
- Spoon the filling into each carved pepper, packing gently but firmly. Fill to the top. Sprinkle the remaining cheese over the tops. If using broth, pour it into the bottom of the baking dish, not over the peppers. Cover tightly with aluminum foil.
- Bake covered for 25 minutes. Remove the foil and bake for another 10-15 minutes until the cheese is bubbly and the peppers are tender but still hold their shape.
- Let the peppers rest for 5 minutes before serving. Serve warm, with the pepper tops on the side if desired.
Notes
For best results, use large, round orange bell peppers that sit flat. Don’t overbake—peppers should be tender but still hold their shape. Carve carefully to avoid large holes. Let ingredients come to room temperature before cooking. Extra filling can be baked separately or saved for lunches. Leftovers keep in the fridge for up to 4 days; reheat in the oven at 350°F for 15 minutes or microwave in 60-second intervals. Freeze unbaked, wrapped individually, for up to 3 months.
- Prep Time: 20 minutes
- Cook Time: 35-40 minutes
- Category: Main Course
- Cuisine: American
Nutrition
- Serving Size: 1 stuffed pepper
- Calories: 380
- Sugar: 8
- Sodium: 480
- Fat: 14
- Saturated Fat: 5
- Carbohydrates: 32
- Fiber: 5
- Protein: 28
Keywords: stuffed bell peppers, jack-o-lantern peppers, fall dinner, Halloween recipe, ground turkey, easy weeknight dinner, cozy dinner