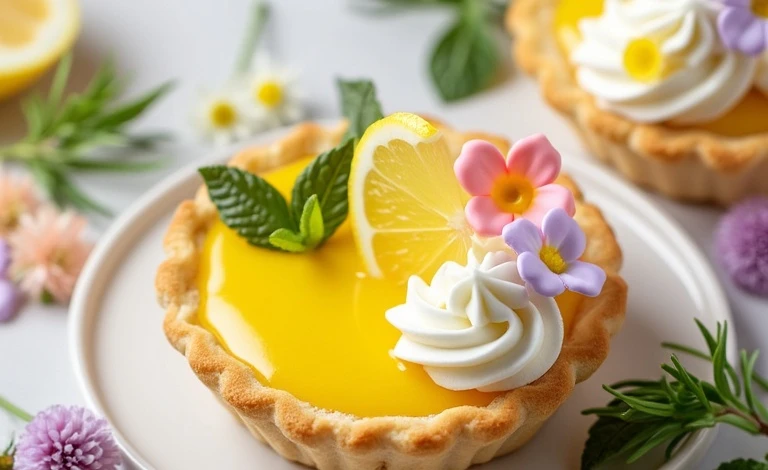
There’s something about the arrival of spring that makes me crave bright, zesty flavors, and these Mini Spring Lemon Pies are the perfect embodiment of the season. Imagine biting into a buttery, crisp crust filled with smooth, tangy lemon curd, all topped with a dollop of fresh whipped cream. It’s the kind of dessert that makes your taste buds sing!
This recipe is not only incredibly delicious but also surprisingly simple to make. Whether you’re hosting a spring brunch, celebrating Easter, or just indulging in a mid-week treat, these mini lemon pies are the perfect choice. Plus, their adorable size makes them ideal for serving at parties or gifting to friends and family. Let’s dive into this easy, sweet, and tangy delight that’s sure to brighten your day!
The Story Behind Mini Spring Lemon Pies
For me, lemon desserts have always been a symbol of spring. Growing up, my grandmother would make the most amazing lemon meringue pies whenever the weather started to warm up. The fresh, citrusy aroma of her pies would fill the kitchen, and I couldn’t wait to dig in.
These Mini Spring Lemon Pies are inspired by her recipes but with a modern twist. I’ve scaled them down into individual portions, making them perfect for casual gatherings or more formal occasions. The mini size makes them feel fancy, but they’re still easy to whip up with pantry staples.
Traditionally, lemon pies are associated with spring because lemons are at their peak freshness during the late winter and early spring months. Their bright flavor and sunny color feel like a refreshing way to say goodbye to winter. These pies bring that same sense of renewal and joy, but in a portable, bite-sized form!
Ingredients You’ll Need
Each ingredient in these mini lemon pies plays an important role in creating the perfect balance of flavors and textures. Here’s a breakdown:
- Mini pie crusts: You can use pre-made mini tart shells for convenience, or make your own using graham crackers or shortbread cookies. Homemade crusts allow you to control the flavor and texture.
- Fresh lemons: Always go for fresh, juicy lemons to get the brightest flavor. Meyer lemons can be used for a slightly sweeter and less tangy result.
- Egg yolks: These add richness and help thicken the lemon curd filling.
- Granulated sugar: Balances out the tartness of the lemons and gives the filling its creamy texture.
- Butter: Adds a silky finish to the lemon curd and enhances the overall richness.
- Whipped cream: A light and airy topping that complements the tangy lemon curd beautifully.
- Optional garnish: Fresh berries, mint leaves, or a sprinkle of powdered sugar for added flair.
If you’re making these pies gluten-free, swap out the crust with gluten-free cookies or crackers. For a dairy-free version, use a plant-based butter alternative and coconut whipped cream.
Equipment Needed
- Zester: For getting that vibrant lemon zest without the bitter pith.
- Juicer: A handheld citrus juicer works perfectly to extract every drop of juice.
- Mixing bowls: You’ll need a few bowls for preparing the crust and filling.
- Saucepan: Used to cook the lemon curd until it’s thick and glossy.
- Whisk: Essential for keeping the curd smooth and lump-free.
- Baking sheet: To hold the mini crusts while they bake.
If you don’t have mini tart pans, you can use a muffin tin lined with cupcake wrappers as an alternative. They work just as well and are super easy to clean up afterward!
Preparation Method
- Prepare the crust: If making your own crust, crush 1 ½ cups (150 g) of graham crackers or shortbread cookies until fine. Mix with 6 tablespoons (85 g) of melted butter and 2 tablespoons (25 g) of sugar. Press the mixture firmly into mini tart pans or lined muffin tins. Bake at 350°F (175°C) for 8-10 minutes, then let cool.
- Make the lemon curd: In a medium saucepan, whisk together 4 large egg yolks, 1 cup (200 g) of sugar, ½ cup (120 ml) of fresh lemon juice, and 1 tablespoon (6 g) of lemon zest. Cook over medium heat, stirring constantly, until the mixture thickens (about 10 minutes).
- Add the butter: Remove the curd from the heat and stir in 6 tablespoons (85 g) of cubed butter until fully melted and incorporated. Let the curd cool slightly before filling the crusts.
- Assemble the pies: Spoon the lemon curd into the cooled crusts, filling each one to the brim. Smooth the tops with the back of a spoon.
- Chill: Refrigerate the pies for at least 2 hours to set the filling. This step is crucial for achieving the perfect texture.
- Add toppings: Top each pie with a dollop of whipped cream, fresh berries, or a sprinkle of powdered sugar just before serving.
Cooking Tips & Techniques
Here are some tips to ensure your Mini Spring Lemon Pies turn out perfectly every time:
- Don’t rush the curd: Cooking the lemon curd over medium heat gives it time to thicken properly without curdling.
- Use room temperature eggs: This helps the curd cook evenly and prevents lumps.
- Chill thoroughly: Allowing the pies to set in the fridge is key to achieving that smooth, creamy filling.
- Keep it fresh: Assemble the pies just before serving to keep the whipped cream and garnishes looking their best.
- Adjust sweetness: Taste the curd before filling the crusts and add a touch more sugar if needed.
Variations & Adaptations
Here are a few fun ways to customize your Mini Spring Lemon Pies:
- Make it lime: Swap out the lemons for limes to create a tropical twist!
- Berry swirl: Add a swirl of raspberry or strawberry puree to the filling for a fruity variation.
- Vegan-friendly: Use a plant-based crust, egg substitute, and coconut cream for a vegan version.
- Chocolate crust: Try using crushed chocolate cookies for a richer, contrasting flavor.
I once added a layer of lemon curd on top of a cheesecake base, and let me tell you—it was a game-changer!
Serving & Storage Suggestions
These mini lemon pies are best served chilled, straight from the fridge. Arrange them on a pretty platter and garnish with a slice of lemon, fresh mint, or a dusting of powdered sugar for a beautiful presentation.
Leftovers can be stored in an airtight container in the refrigerator for up to 3 days. If you want to freeze them, skip the whipped cream topping and wrap each pie tightly in plastic wrap before placing them in a freezer-safe bag. They’ll keep well for up to 2 months. To thaw, simply transfer them to the fridge overnight and top with whipped cream before serving.
Nutritional Information & Benefits
Each mini lemon pie contains approximately:
- Calories: 180
- Fat: 10 g
- Carbohydrates: 22 g
- Protein: 2 g
Lemons are a fantastic source of vitamin C, which is known to boost your immune system and promote healthy skin. Plus, these pies are portion-controlled, so you can indulge without feeling guilty!
Conclusion
These Mini Spring Lemon Pies are the perfect way to welcome spring into your kitchen. With their tangy lemon filling, buttery crust, and fresh toppings, they’re bound to be a crowd favorite. Whether you’re making them for a special occasion or just because, they’re sure to bring a little sunshine to your day.
If you try this recipe, I’d love to hear how it turned out! Leave a comment below or share your photos on social media. Happy baking, and enjoy every tangy, sweet bite!
FAQs
Can I make these pies ahead of time?
Yes! You can make the crust and filling a day in advance. Just assemble and garnish them right before serving.
What if I don’t have mini tart pans?
No problem! A muffin tin lined with cupcake wrappers works just as well.
Can I use store-bought lemon curd?
Absolutely. While homemade curd has a fresher taste, store-bought is a great time-saver.
How do I prevent the crust from crumbling?
Make sure to press the crust mixture firmly into the pans and bake it long enough to set.
What’s the best way to zest a lemon?
Use a microplane or fine grater, and avoid the white pith for the best flavor.