
Third time in two weeks and I finally stopped overthinking the cream cheese situation. Let it sit out for forty minutes—not twenty, not an hour—and the spread came together like actual butter instead of that lumpy, frustrating mess that fights your tortilla. These Easy Bacon Ranch Pinwheel Football Snacks were born from a very specific kind of desperation: the kind where you have seventeen people showing up in three hours and absolutely nothing prepared that isn’t a bag of tortilla chips. I needed something that looked like I planned ahead without actually planning ahead. And honestly? These little spirals of bacon, ranch, and cheese saved my reputation that day. They disappeared before halftime. Not exaggerating—gone. Someone actually asked if there were more in the kitchen, and I had to admit there weren’t. That’s when I knew this recipe was sticking around.
There’s something about the combination of crispy bacon bits, cool creamy ranch, and that slight chew of a flour tortilla that just works for football food. It’s not fancy. It’s not complicated. But it’s the kind of snack people stand around eating without talking, which is the highest compliment at any party. I’ve tweaked the ratios over those three batches—more bacon, less mayo, a pinch more dill—and landed on a version that feels balanced without being fussy. You don’t need special equipment or culinary training. You just need a bowl, a spatula, and maybe some self-control if you’re making these before guests arrive. Because I won’t judge if you eat a few pinwheel ends while you’re rolling.
Why You’ll Love This Recipe
- Quick & Easy: From start to finish, you’re looking at about 20 minutes of active work. The hardest part is waiting for the cream cheese to soften.
- Simple Ingredients: Cream cheese, sour cream, ranch seasoning, bacon, cheddar, green onions, and tortillas. That’s it. No weird specialty items.
- Perfect for Game Day: These are tailor-made for football parties, tailgates, and any gathering where people need to eat with one hand while yelling at the TV.
- Crowd-Pleaser: I’ve brought these to three different gatherings now, and every single time, someone asks for the recipe before the second quarter ends.
- Make-Ahead Friendly: Assemble them the night before, slice when ready. The flavors actually get better after a few hours in the fridge.
What makes these different from every other pinwheel recipe you’ve seen? It’s the ratio, honestly. Most recipes skimp on the bacon or drown everything in cream cheese. I tested this until the filling felt substantial but not overwhelming—creamy enough to hold together, chunky enough that you actually taste the bacon and cheese in every bite. And the ranch seasoning? I use a full packet, not half. Trust me on this. The flavor needs to punch through the tortilla.
There’s also something deeply satisfying about watching people reach for these without even looking at the other snacks on the table. They’re not trying to be impressive. They’re just that good. The kind of appetizer where you take one bite and immediately start planning how many you’ll eat before anyone notices.
What Ingredients You Will Need
This recipe keeps things straightforward. No hunting down obscure ingredients or making special trips to three different stores. Everything here is standard grocery store fare, and most of it is probably in your kitchen right now.
- 8 ounces cream cheese, softened to room temperature (let it sit out for at least 30-40 minutes—cold cream cheese will give you lumpy filling and nobody wants that)
- 1/2 cup sour cream (full-fat works best for texture, but light sour cream is fine in a pinch)
- 1 packet (1 ounce) ranch seasoning mix (I use Hidden Valley, but any brand works—just don’t use the dip mix, get the seasoning mix)
- 1 cup cooked bacon, crumbled (about 8-10 strips, cooked until crispy—I like candied bacon-wrapped meatloaf levels of crispiness here)
- 1 cup shredded sharp cheddar cheese (shred it yourself if you can—pre-shredded has anti-caking agents that affect texture)
- 1/3 cup green onions, thinly sliced (both white and green parts—don’t skip these, they add freshness)
- 4 large flour tortillas (burrito-sized, about 10 inches—the bigger the better for rolling)
A few notes on ingredient choices. For the bacon, I prefer thick-cut because it holds up better texturally. Thin bacon can disappear into the filling, and you want those little salty, smoky bursts in every bite. If you’re feeling ambitious, you can cook the bacon specifically for this recipe—baking it at 400°F for about 15 minutes gives you perfectly even crispy strips without the mess of stovetop frying.
For the cream cheese, don’t even think about using the low-fat version. I know, I know, but this is one of those recipes where the full-fat version genuinely makes a difference. The filling needs that richness to balance the salty bacon and tangy ranch. If you’re dairy-sensitive, dairy-free cream cheese and sour cream alternatives work, but the texture will be slightly less creamy.
The tortilla choice matters more than you’d think. Flour tortillas roll easiest and hold their shape best. Corn tortillas will crack and fall apart. If you want to go whole wheat or spinach-flavored for color, go for it—just make sure they’re large and flexible. Warm them briefly in the microwave if they seem stiff.
Equipment Needed
You don’t need much for this recipe, which is part of the appeal. Here’s what you’ll need:
- Large mixing bowl (for combining the filling)
- Hand mixer or sturdy spatula (hand mixer makes the cream cheese situation effortless, but a good spatula and some elbow grease works too)
- Cutting board (for rolling and slicing)
- Sharp knife (a serrated knife works best for clean slices through the tortilla)
- Plastic wrap (for wrapping the rolls before chilling)
- Baking sheet or large plate (for chilling the rolls in the fridge)
If you don’t have a hand mixer, just let your cream cheese sit out a full hour and mash it with a fork before stirring in the other ingredients. It takes a little more effort, but the result is the same. I’ve done it both ways, and honestly, the fork method feels more satisfying—like you earned those pinwheels.
For slicing, a sharp chef’s knife works fine, but I’ve found a serrated knife gives you cleaner cuts without squishing the roll. If your knife is dull, you’ll end up with flattened, sad-looking pinwheels. Take the extra thirty seconds to sharpen it.
Preparation Method
- Soften the cream cheese. Take it out of the fridge at least 30-40 minutes before you start. If you forgot (I forget constantly), unwrap it, cut it into cubes, and microwave on low power for 10-15 seconds. Check it every 5 seconds—you want soft, not melted.
- Make the ranch cream cheese base. In your large mixing bowl, combine the softened cream cheese, sour cream, and ranch seasoning packet. Beat with a hand mixer on medium speed until smooth and fluffy—about 2 minutes. Scrape down the sides halfway through. If you’re doing this by hand, really work it until there are no lumps. This is the foundation of everything, so don’t rush it.
- Fold in the good stuff. Add the crumbled bacon, shredded cheddar, and sliced green onions to the bowl. Fold everything together with a spatula until evenly distributed. Taste it. Seriously, taste it. This is your moment to adjust—add more ranch seasoning if you want it punchier, more bacon if you’re feeling indulgent. The filling should be thick and spreadable, not runny.
- Prepare your tortillas. Lay one tortilla flat on your cutting board. If it’s cracking at the edges, microwave it for 10 seconds to make it more pliable. Spread about 1/4 of the filling evenly across the entire surface, leaving a 1-inch border around the edges. Don’t skimp on the edges—this is where people often go thin, and then the last few bites are just plain tortilla. Use the back of a spoon or an offset spatula to get an even layer.
- Roll it up tight. Starting at one end, roll the tortilla as tightly as you can without squeezing the filling out the sides. Think of it like rolling a sleeping bag—firm but gentle. Once it’s rolled, place it seam-side down on a piece of plastic wrap. Wrap it tightly, twisting the ends like a candy wrapper. This keeps the roll compact while it chills.
- Repeat with remaining tortillas. You should get four rolls total. Place them all on a baking sheet or large plate and refrigerate for at least 1 hour. Overnight is even better—the flavors meld and the rolls become much easier to slice cleanly.
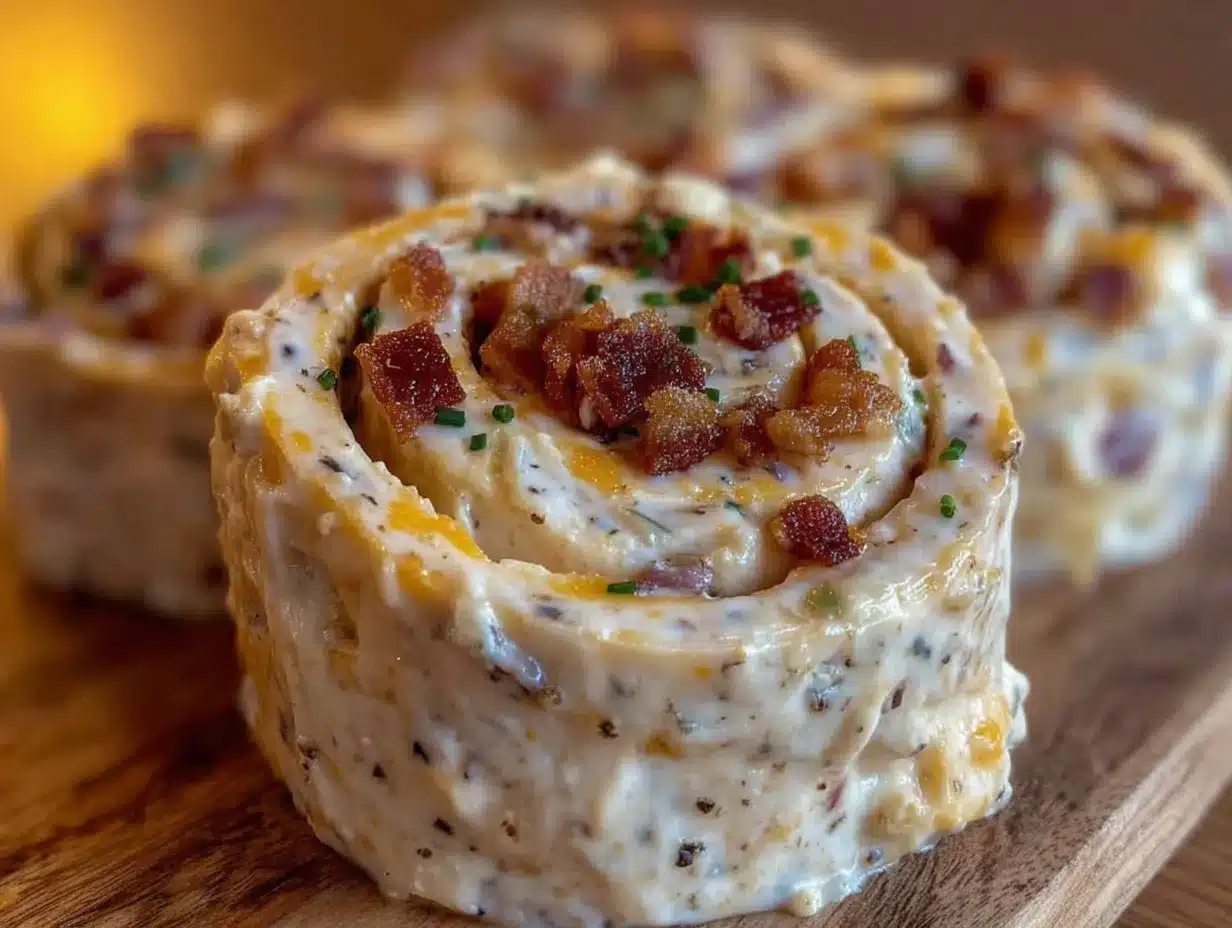
- Slice and serve. When you’re ready to serve, unwrap each roll and place it on the cutting board. Using a sharp serrated knife, slice into 1/2-inch to 3/4-inch rounds. A gentle sawing motion works better than pressing straight down. You should get about 8-10 pinwheels per tortilla, depending on how tightly you rolled and how thick you slice.
- Arrange and garnish. Place the pinwheels on a serving platter. If you want to get fancy, sprinkle a few extra green onions or a little crumbled bacon on top. Serve cold or at room temperature.
One thing I learned the hard way: don’t skip the chilling step. I tried rushing this once because guests were arriving in thirty minutes, and the pinwheels fell apart as I sliced them. The filling oozed out, the tortillas unrolled, and I ended up with a plate of sad, messy spirals that looked nothing like the pretty pictures. Give them the full hour. Your future self will thank you.
Cooking Tips & Techniques
I’ve made these pinwheels enough times to have a few battle scars and hard-won wisdom. Here’s what I wish someone had told me before my first attempt.
Don’t overfill. I know it’s tempting to pile on the filling, especially when it tastes this good straight from the bowl. But too much filling makes the tortilla impossible to roll tightly, and everything squishes out the ends. A generous 1/4-inch layer is perfect. You want every bite to have filling, but you also want the pinwheel to hold its shape.
Warm tortillas are your friend. If your tortillas are cold from the fridge, they’ll crack when you try to roll them. Let them come to room temperature, or give them a quick 10-second spin in the microwave. Warm tortillas bend without fighting you, and you get tighter, cleaner rolls.
Chill before slicing. I already mentioned this, but it bears repeating. Cold pinwheels slice like a dream. Room temperature pinwheels turn into a messy disaster. The cream cheese needs to firm up again after you’ve been handling it. Patience pays off here.
Use a serrated knife. This was a game-changer for me. A straight-edged knife tends to push the filling out as you cut, creating a flattened edge. A serrated knife saws through the tortilla and filling cleanly, giving you those beautiful spiral cross-sections that look like they came from a catering company.
Wipe your knife between cuts. After every two or three slices, run your knife under warm water and wipe it clean. This prevents the cream cheese from building up on the blade and dragging through your next cut. It adds maybe thirty seconds to the process, but the difference in presentation is huge.
I learned this last tip after ruining an entire batch for a Super Bowl party. I was rushing, using a dull knife, not wiping it clean, and ended up with pinwheels that looked like they’d been through a war. They still tasted great, but presentation matters when you’re trying to impress a room full of hungry football fans.
Variations & Adaptations
One of the best things about this recipe is how flexible it is. Here are some variations I’ve tried and loved:
Spicy Buffalo Version: Add 2-3 tablespoons of buffalo sauce to the cream cheese mixture and substitute half the cheddar with crumbled blue cheese. Top with a drizzle of ranch before serving. This version disappeared even faster than the original at my last party—people couldn’t get enough of that tangy heat.
Loaded Baked Potato Style: Swap the bacon for crispy fried potato bits (or even crushed potato chips for texture), add an extra 1/4 cup of sour cream, and throw in some chives alongside the green onions. It tastes exactly like a loaded baked potato in portable form.
Turkey and Spinach Twist: Add 1/2 cup of finely chopped cooked turkey and 1/3 cup of thawed, squeezed-dry frozen spinach. This version feels slightly healthier while still delivering on flavor. Great for post-holiday leftovers.
Keto-Friendly Option: Use low-carb tortillas or large lettuce leaves instead of flour tortillas. The filling itself is already low in carbs, so this swap makes the whole recipe keto-compliant. I’ve used butter lettuce wraps before, and while they’re messier to eat, the flavor combination still works beautifully.
Vegetarian Version: Skip the bacon and add 1/2 cup of finely chopped roasted red peppers, 1/3 cup of sundried tomatoes, and an extra 1/4 cup of shredded cheese. You lose the smoky element, but the roasted peppers add a sweetness that complements the ranch beautifully.
If you’re feeding a crowd with different dietary needs, you can easily make a few versions side by side. I often do a regular batch and a spicy buffalo batch—they use the same base, so it’s just a matter of dividing the filling and adding different mix-ins.
Serving & Storage Suggestions
These pinwheels are best served cold or at room temperature. I usually arrange them on a large platter, spirals facing up so everyone can see the pretty layers. A sprinkle of extra green onions or a few bacon crumbles on top makes them look intentional and polished.
For game day, I like to serve them alongside ultimate loaded nacho bar and creamy buffalo chicken dip stuffed bread bowl for a full spread. They also pair well with fresh Texas cowboy caviar if you want something lighter on the table. For drinks, a cold beer or a crisp white wine cuts through the richness nicely. Non-alcoholic options like sparkling water with lime work great too.
Storage: Keep leftover pinwheels in an airtight container in the refrigerator for up to 3 days. Place a paper towel at the bottom of the container to absorb any excess moisture—this keeps the tortillas from getting soggy.
Make Ahead: You can assemble the rolls up to 24 hours in advance. Keep them wrapped tightly in plastic wrap in the fridge, then slice right before serving. The flavors actually improve overnight as the ranch seasoning melds with the cream cheese.
Freezing: I don’t recommend freezing these. The cream cheese mixture gets watery when thawed, and the tortillas turn mushy. If you absolutely must freeze them, freeze the rolls whole (unsliced), then thaw in the fridge overnight and slice before serving. The texture won’t be as good, but it’s passable in a pinch.
Reheating: Don’t. These are meant to be served cold. If you want a warm version, you’d need to make a completely different recipe—these are designed for that cool, creamy, refreshing bite that contrasts with everything else on the snack table.
Nutritional Information & Benefits
Per serving (about 4 pinwheels, based on 8 servings per batch):
- Calories: 285
- Fat: 19g
- Saturated Fat: 9g
- Cholesterol: 45mg
- Sodium: 620mg
- Carbohydrates: 16g
- Fiber: 1g
- Sugar: 2g
- Protein: 11g
These numbers are estimates and will vary based on the specific brands and ingredients you use. If you’re watching sodium, look for low-sodium bacon and reduced-sodium ranch seasoning.
On the health front, this isn’t exactly a health food—let’s be real. But the protein from the bacon and cheese helps keep you fuller longer than a purely carb-based snack. The green onions add a tiny bit of fiber and vitamin K. If you use whole wheat tortillas, you’ll get a few extra grams of fiber per serving.
For those with dietary restrictions: this recipe contains dairy (cream cheese, sour cream, cheddar) and gluten (tortillas). It’s not suitable for vegans or those with celiac disease unless you use appropriate substitutions. The keto-friendly variation mentioned above works well for low-carb diets.
Conclusion
These Easy Bacon Ranch Pinwheel Football Snacks have become my go-to for every game day gathering, and I don’t see that changing anytime soon. They’re simple enough to throw together on a weeknight, impressive enough to bring to a party, and delicious enough that people will ask you for the recipe before the first commercial break. That’s a winning combination in my book.
What I love most about this recipe is how forgiving it is. You can tweak the fillings, swap ingredients, adjust the ratios—and it still works. It’s the kind of recipe that builds confidence in the kitchen because it’s nearly impossible to mess up. Even my “ugly” batch that fell apart while slicing tasted amazing.
I’d love to hear how these turn out for you. Did you add your own twist? Did they disappear as fast at your party as they did at mine? Drop a comment below and let me know—I read every single one, and I’m always looking for new variations to try. And if you’re looking for more game day inspiration, check out the best easy crockpot pulled pork sliders for tailgating for another crowd-pleasing option. Happy snacking, friends!
Frequently Asked Questions
Can I make these pinwheels the night before?
Absolutely. In fact, I recommend it. Assemble the rolls, wrap them tightly in plastic wrap, and refrigerate overnight. Slice them right before serving for the best texture and presentation.
How do I keep pinwheels from getting soggy?
Don’t add any watery ingredients like fresh tomatoes or cucumbers. If you’re adding vegetables like bell peppers or spinach, make sure they’re patted completely dry. Also, place a paper towel in the storage container to absorb excess moisture.
Can I use low-fat cream cheese?
You can, but the texture won’t be as creamy and the filling might be slightly thinner. Full-fat cream cheese gives you that rich, spreadable consistency that holds the pinwheels together best.
How long do these pinwheels last in the fridge?
Stored in an airtight container, they’ll stay fresh for up to 3 days. After that, the tortillas start to dry out and the filling loses its creaminess.
Can I use turkey bacon instead of regular bacon?
Yes, but cook it until very crispy. Turkey bacon has less fat, so it won’t crisp up the same way. Bake it at 400°F for about 12-15 minutes and let it cool completely before crumbling.
Pin This Recipe!


Easy Bacon Ranch Pinwheel Snacks for Football Game Day
- Total Time: 1 hour 20 minutes (includes chilling)
- Yield: 8 servings 1x
Description
These Easy Bacon Ranch Pinwheel Football Snacks are the perfect game day appetizer—creamy, savory, and incredibly easy to make. With crispy bacon, cool ranch, and cheddar cheese rolled into flour tortillas, they disappear before halftime.
Ingredients
- 8 ounces cream cheese, softened to room temperature
- 1/2 cup sour cream
- 1 packet (1 ounce) ranch seasoning mix
- 1 cup cooked bacon, crumbled (about 8–10 strips)
- 1 cup shredded sharp cheddar cheese
- 1/3 cup green onions, thinly sliced
- 4 large flour tortillas (burrito-sized, about 10 inches)
Instructions
- Soften the cream cheese: Take it out of the fridge at least 30-40 minutes before you start. If you forgot, unwrap it, cut it into cubes, and microwave on low power for 10-15 seconds. Check it every 5 seconds—you want soft, not melted.
- Make the ranch cream cheese base: In a large mixing bowl, combine the softened cream cheese, sour cream, and ranch seasoning packet. Beat with a hand mixer on medium speed until smooth and fluffy—about 2 minutes. Scrape down the sides halfway through. If doing by hand, work until no lumps remain.
- Fold in the good stuff: Add the crumbled bacon, shredded cheddar, and sliced green onions to the bowl. Fold together with a spatula until evenly distributed. Taste and adjust seasoning if needed. The filling should be thick and spreadable, not runny.
- Prepare your tortillas: Lay one tortilla flat on a cutting board. If it’s cracking at the edges, microwave for 10 seconds to make it more pliable. Spread about 1/4 of the filling evenly across the entire surface, leaving a 1-inch border around the edges.
- Roll it up tight: Starting at one end, roll the tortilla as tightly as you can without squeezing the filling out the sides. Place it seam-side down on a piece of plastic wrap. Wrap it tightly, twisting the ends like a candy wrapper.
- Repeat with remaining tortillas: You should get four rolls total. Place them all on a baking sheet or large plate and refrigerate for at least 1 hour. Overnight is even better.
- Slice and serve: When ready to serve, unwrap each roll and place it on the cutting board. Using a sharp serrated knife, slice into 1/2-inch to 3/4-inch rounds. You should get about 8-10 pinwheels per tortilla.
- Arrange and garnish: Place the pinwheels on a serving platter. Sprinkle extra green onions or a little crumbled bacon on top. Serve cold or at room temperature.
Notes
Don’t skip the chilling step—it helps the rolls hold their shape when slicing. Use a serrated knife for clean cuts. Wipe the knife between cuts to prevent cream cheese buildup. For best results, let cream cheese sit out for 30-40 minutes before starting.
- Prep Time: 20 minutes
- Cook Time: 0 minutes
- Category: Appetizer
- Cuisine: American
Nutrition
- Serving Size: 4 pinwheels
- Calories: 285
- Sugar: 2
- Sodium: 620
- Fat: 19
- Saturated Fat: 9
- Carbohydrates: 16
- Fiber: 1
- Protein: 11
Keywords: bacon ranch pinwheels, game day snacks, easy appetizer, football party food, cream cheese pinwheels