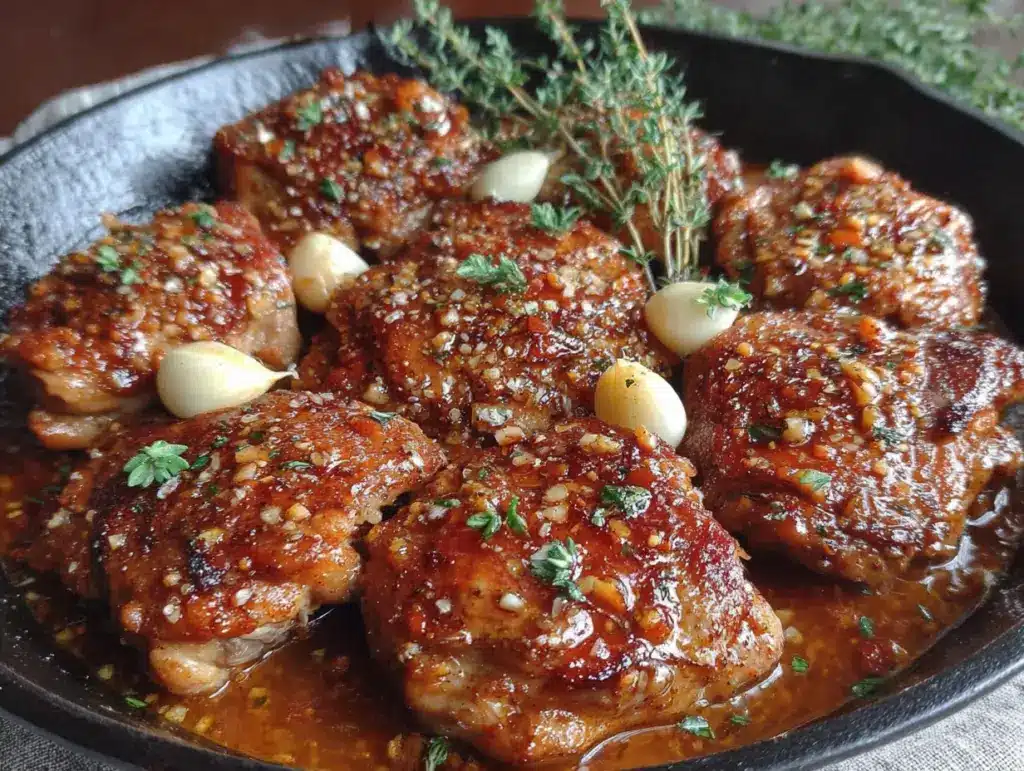
Third time this week, and I still hadn’t learned my lesson about the smoke detector. The first batch of garlic butter chicken thighs I made on Monday was good—not great, but good. The second attempt Tuesday night? Let’s just say I got distracted by a phone call and ended up with chicken that had more char than I’d like to admit. But by Wednesday, something clicked. I stopped overthinking, stopped fiddling with the heat, and just let the butter do its thing. The garlic sizzled without burning, the skin turned that deep golden brown you see on restaurant menus, and the smell—honestly, it drifted through the whole house and made my neighbor text me asking what I was cooking.
That’s the thing about this recipe. It’s not complicated. It’s not fancy. It’s the kind of dinner you make when you’re tired, hungry, and have exactly fifteen minutes to pull something together before your patience runs out. The kind where you don’t need a grocery run because you already have butter, garlic, and chicken thighs in the fridge. The kind where you can still sit down to eat before 6:30 PM and actually enjoy the meal instead of hovering over the stove.
I’ve made plenty of quick chicken dinners before, but this one stuck. Maybe it’s the way the butter sauce coats every bite. Maybe it’s how the garlic mellows out just enough to be rich without being sharp. Or maybe it’s just knowing I can have a real dinner—not a sad microwaved bowl of leftovers—on the table in the time it takes to watch one episode of a show. Either way, this one earned its spot in my weekly rotation.
Why You’ll Love This Recipe
I’ve tested this recipe more times than I care to count, and each iteration taught me something new about getting the most flavor out of minimal effort. Here’s why I keep coming back to it—and why I think you will too:
- Quick & Easy: From fridge to plate in exactly 15 minutes. No marinating, no complicated steps, no waiting around.
- Simple Ingredients: You probably have everything you need right now. Butter, garlic, chicken thighs, salt, pepper, and maybe some herbs if you’re feeling fancy.
- Perfect for Busy Weeknights: This is the dinner you make when you forgot to thaw something, when the kids are hungry, or when you just don’t want to spend an hour in the kitchen.
- One-Pan Wonder: Less cleanup means more time to actually relax after dinner.
- Unbelievably Delicious: The garlic butter sauce is rich, savory, and coats every bite of tender chicken. It tastes like something that took way longer than 15 minutes.
What makes this recipe different from the dozens of other garlic chicken recipes out there? It’s the technique. Most recipes tell you to throw everything in a pan and hope for the best. I spent three nights figuring out the exact heat level, the precise moment to add the garlic, and the perfect ratio of butter to chicken so you don’t end up with burnt garlic or greasy meat. This isn’t just another version—it’s the one I actually make for my family on Tuesday nights when I have zero energy left.
This recipe isn’t just good—it’s the kind that makes you close your eyes after the first bite. It’s comfort food that comes together faster than takeout delivery, with the same soul-soothing satisfaction. Perfect for impressing a partner on a weeknight date or feeding yourself something that actually feels like a real meal.
What Ingredients You Will Need
This recipe uses simple, everyday ingredients to deliver big flavor without the fuss. Most of these are pantry staples, so you can make this on a whim without a special trip to the store.
- Boneless, skinless chicken thighs (1.5 lbs or 680g): I prefer thighs over breasts here because they stay juicy and tender even with quick cooking. If you can find them, look for thighs that are roughly the same size so they cook evenly. I usually buy a pack from Costco or my local butcher.
- Unsalted butter (4 tablespoons or 56g): Butter is the star here, so use good quality. I like Kerrygold for its rich flavor, but any unsalted butter works. Salted butter will work too—just reduce the added salt slightly.
- Fresh garlic (6 cloves, minced): Please don’t use the pre-minced stuff from a jar. Fresh garlic makes a huge difference in flavor. Take the extra 30 seconds to peel and mince it yourself. Your taste buds will thank you.
- Salt (1 teaspoon or 5g): I use kosher salt for cooking. Diamond Crystal is my go-to because it’s less salty by volume, giving you more control.
- Black pepper (½ teaspoon or 1g): Freshly ground is best. It adds a subtle warmth that complements the garlic.
- Paprika (1 teaspoon or 2g): This is optional but adds a lovely color and a hint of smokiness. Smoked paprika works great here too.
- Garlic powder (½ teaspoon or 1g): A little extra garlic never hurt anyone. This adds depth without the sharpness of fresh garlic.
- Olive oil (1 tablespoon or 15ml): A touch of oil helps prevent the butter from burning and gives the chicken a nice sear.
- Fresh parsley (2 tablespoons, chopped): For garnish. It adds a pop of color and freshness. Flat-leaf parsley is my preference.
- Optional: Red pepper flakes (¼ teaspoon): If you like a little heat, sprinkle these in with the garlic. It won’t make the dish spicy, just adds a nice warmth.
I recommend using chicken thighs that are about ½ inch thick. If yours are thicker, you can butterfly them or simply pound them to an even thickness. This ensures they cook through in the 15-minute window without burning the butter.
Equipment Needed
You don’t need much for this recipe, which is part of the beauty. Here’s what I used during my testing:
- Large skillet (12-inch or 30cm): A stainless steel or cast iron skillet works best for getting a good sear. Non-stick will work too, but you won’t get quite as much browning. I used my trusty Lodge cast iron pan for most of my test batches.
- Sharp knife: For mincing garlic and chopping parsley. A dull knife makes both tasks frustrating and dangerous.
- Cutting board: Any board works, but I prefer a wooden one for garlic because it’s easier to clean.
- Tongs: Essential for flipping the chicken without piercing it and losing those precious juices. Silicone-tipped tongs won’t scratch your pan.
- Measuring spoons: For accurate seasoning. I have a set of magnetic ones that stay together in my drawer.
- Small bowl: For mixing the dry seasoning if you want to do it ahead of time.
If you don’t have a cast iron skillet, don’t worry. I tested this in a stainless steel pan and it worked beautifully. The key is making sure the pan is hot enough before you add the chicken. A non-stick pan will work in a pinch, but you won’t get that gorgeous golden crust. For a budget-friendly option, any heavy-bottomed skillet from a thrift store will do the job just fine.
Preparation Method
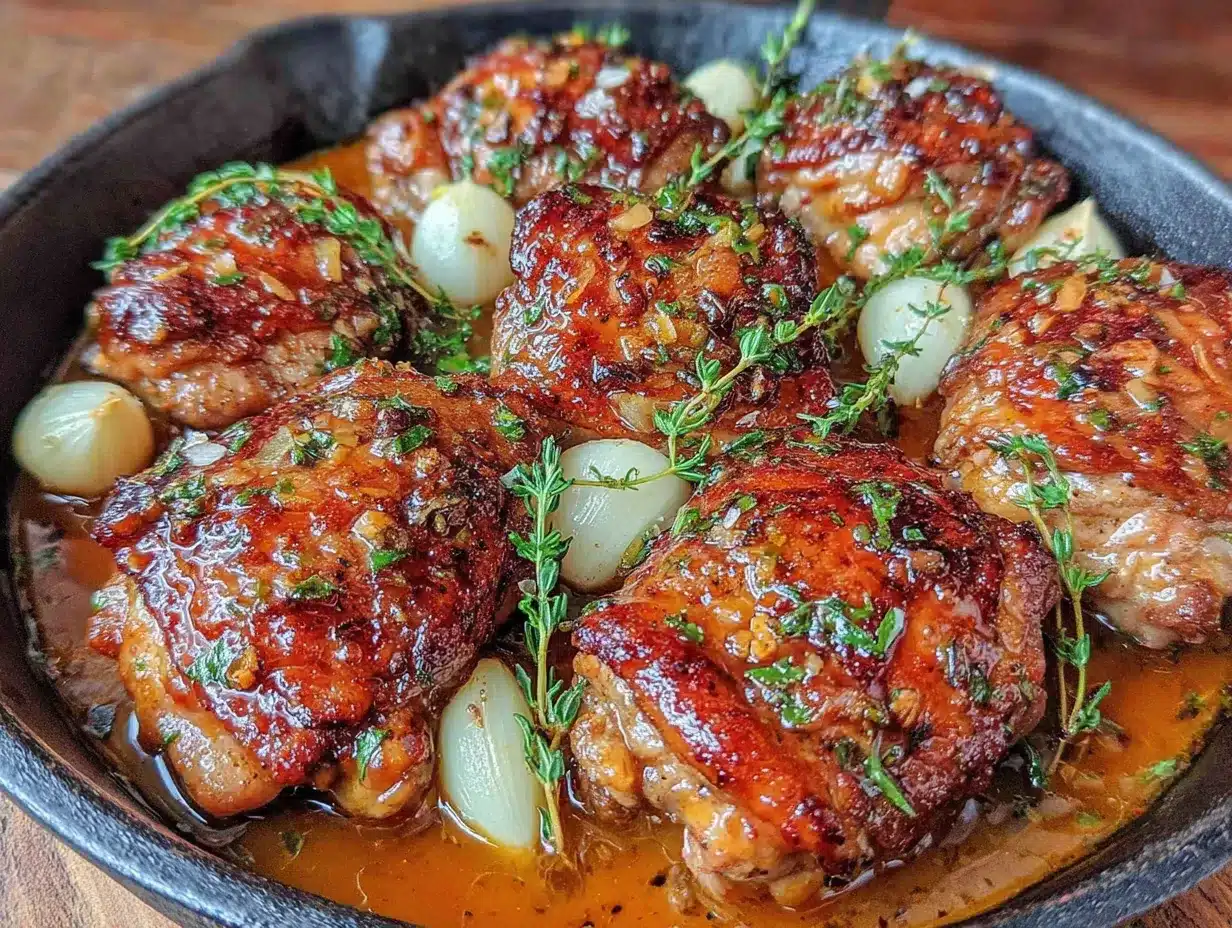
Let me walk you through this step by step. I’ve included all the little details I learned the hard way so you don’t have to repeat my mistakes.
- Pat the chicken dry (1 minute): Take your chicken thighs out of the package and pat them completely dry with paper towels. This is the most important step for getting a good sear. Wet chicken steams instead of browning, and we want that golden crust. Lay them on a plate and let them sit while you prep everything else.
- Season the chicken (1 minute): In a small bowl, mix 1 teaspoon salt, ½ teaspoon black pepper, 1 teaspoon paprika, and ½ teaspoon garlic powder. Sprinkle this mixture evenly over both sides of each chicken thigh. Don’t be shy—get it in every nook and cranny. Let the seasoned chicken rest for 5 minutes if you have time. This lets the salt penetrate the meat.
- Heat the pan (2 minutes): Place your skillet over medium-high heat and add 1 tablespoon olive oil. Wait until the oil shimmers and just starts to smoke—about 2 minutes. You want the pan hot enough that the chicken sizzles immediately when it hits the surface. If you’re not sure, flick a drop of water into the pan. If it dances and evaporates instantly, you’re ready.
- Sear the chicken (6 minutes): Carefully place the chicken thighs in the hot pan in a single layer. Don’t crowd them—if your pan is too small, cook in batches. Let them cook undisturbed for 3 minutes. I know it’s tempting to peek, but leave them alone. After 3 minutes, flip each piece with tongs. The bottom should be golden brown and release easily from the pan. Cook for another 3 minutes on the second side. The chicken should be cooked through (internal temperature of 165°F or 74°C) and beautifully browned.
- Remove chicken and make the sauce (2 minutes): Transfer the cooked chicken to a clean plate and tent loosely with foil. Reduce the heat to medium-low. Add 4 tablespoons of butter to the pan. Let it melt, scraping up any browned bits from the bottom of the pan with a wooden spoon. Those bits are pure flavor. Once the butter is melted and bubbling, add the minced garlic. Stir constantly for 30-45 seconds until the garlic is fragrant. Don’t walk away—garlic burns in seconds and turns bitter.
- Finish the dish (1 minute): Return the chicken to the pan, spooning the garlic butter sauce over each piece. Let everything warm through together for about 30 seconds. Sprinkle with fresh parsley and red pepper flakes if using. The sauce should be glossy and coating every piece of chicken.
- Rest and serve (2 minutes): Let the chicken rest in the pan off the heat for 2 minutes before serving. This lets the juices redistribute so every bite is tender and moist. Spoon extra sauce over the top when you plate it.
One thing I learned the hard way: if your garlic starts to brown too quickly, remove the pan from the heat immediately. The residual heat will continue cooking the garlic without burning it. Better to have slightly undercooked garlic than burnt garlic that ruins the whole dish.
Cooking Tips & Techniques
After making this recipe three times in one week, I picked up a few tricks that make a real difference. Here are the ones I wish I’d known from the start:
Get the pan hot enough. My first batch was mediocre because I was impatient and added the chicken to a barely warm pan. The chicken released moisture instead of browning, and I ended up with pale, sad-looking thighs. Wait until the oil shimmers and you see the first wisp of smoke. That’s your cue.
Don’t move the chicken. I know it’s tempting to poke, prod, and check every 30 seconds. Resist. Let the chicken develop a crust before you flip it. If you try to flip it and it sticks, it’s not ready yet. Give it another 30 seconds and try again.
Watch the garlic like a hawk. This is where I messed up on Tuesday. I got distracted by my phone and let the garlic cook for maybe 10 seconds too long. Suddenly my beautiful butter sauce tasted bitter and acrid. Garlic goes from perfect to burnt in about 15 seconds. Stay at the stove, keep stirring, and pull it off the heat the second it smells fragrant.
Use a meat thermometer if you have one. Chicken thighs are forgiving, but for perfect results, cook them to 165°F (74°C) at the thickest part. If you don’t have a thermometer, cut into the thickest thigh—the juices should run clear with no pink.
Double the sauce. Honestly, I always make extra butter sauce now. The recipe as written gives you just enough for the chicken, but you’ll want extra for drizzling over rice or bread. I double the butter and garlic and keep the extra sauce in a small jar in the fridge for up to a week.
Timing is everything. Start your rice or vegetables before you begin the chicken. The chicken takes exactly 15 minutes, so have everything else ready to go. I like to serve this with a simple green salad or steamed broccoli that I start right when I put the chicken in the pan.
Variations & Adaptations
This recipe is incredibly versatile, and I’ve tried several variations during my testing week. Here are my favorites:
Lemon Garlic Butter Chicken: Add the zest of one lemon and 2 tablespoons of fresh lemon juice to the butter sauce right after the garlic. The acidity cuts through the richness beautifully. I made this version on Thursday and it was my husband’s favorite.
Herb Butter Chicken: Stir in 1 tablespoon each of fresh thyme and rosemary (finely chopped) with the garlic. The herbs infuse the butter and make the whole dish smell like a fancy restaurant. This version is perfect for when you want to impress guests.
Spicy Garlic Chicken: Add ½ teaspoon of cayenne pepper to the seasoning mix and throw in a chopped Thai chili with the garlic. My spice-loving friend requested this version and declared it “the best chicken I’ve ever eaten.”
Dairy-Free Version: Substitute the butter with a high-quality vegan butter or ghee (which is lactose-free). I tested this with Miyoko’s vegan butter and it worked surprisingly well—the sauce was slightly thinner but still delicious.
Air Fryer Adaptation: Season the chicken as directed, then cook at 400°F (200°C) for 10-12 minutes, flipping halfway. While it cooks, melt the butter and garlic in a small saucepan on the stove. Toss the cooked chicken in the garlic butter before serving. This method gives you extra crispy skin with the same great flavor.
For a complete meal, try serving this alongside my creamy garlic parmesan chicken and rice for a double-dose of garlic goodness, or pair it with my easy crockpot honey garlic chicken thighs for a sweet and savory twist on the same theme.
Serving & Storage Suggestions
This chicken is best served hot, right after you make it, with the garlic butter sauce spooned generously over the top. I love serving it over a bed of fluffy white rice or creamy mashed potatoes to soak up all that extra sauce. A side of steamed green beans or roasted asparagus rounds out the meal perfectly.
For a low-carb option, serve the chicken over cauliflower rice or with a big green salad dressed with lemon vinaigrette. The garlic butter works as a dressing substitute—just drizzle it right over the greens.
If you have leftovers (which is rare in my house), store the chicken and sauce separately in airtight containers in the refrigerator for up to 3 days. The sauce will solidify when cold, so reheat it gently on the stove or in the microwave.
To reheat, place the chicken in a skillet over medium-low heat with a splash of chicken broth or water. Cover and heat for 3-4 minutes until warmed through. Add the sauce and stir until melted and hot. Avoid the microwave if possible—it tends to make the chicken rubbery and the sauce separate.
You can freeze the cooked chicken for up to 2 months. Wrap each piece individually in plastic wrap, then place in a freezer bag. The sauce can be frozen separately in an ice cube tray for easy portioning. Thaw overnight in the refrigerator before reheating.
One thing I’ve noticed: the flavors actually deepen overnight. The garlic mellows and melds with the butter in a way that’s even more delicious the next day. I’ve been known to make extra on purpose just for lunch the following day. If you’re meal prepping, this recipe works beautifully—just keep the sauce separate until you’re ready to eat.
Nutritional Information & Benefits
Here’s the approximate nutritional breakdown for one serving (based on 4 servings, using bone-in skin-on chicken thighs):
| Nutrient | Amount per Serving |
|---|---|
| Calories | 385 |
| Protein | 32g |
| Fat | 26g |
| Saturated Fat | 12g |
| Carbohydrates | 2g |
| Fiber | 0g |
| Sugar | 0g |
| Sodium | 680mg |
Chicken thighs are an excellent source of protein, iron, and B vitamins, particularly niacin and vitamin B6, which support energy metabolism and brain function. Garlic is packed with allicin, a compound known for its anti-inflammatory and immune-boosting properties. Butter provides fat-soluble vitamins A, D, E, and K, though it’s best enjoyed in moderation.
This recipe is naturally gluten-free and low-carb, making it suitable for keto and paleo diets. If you’re watching your sodium, reduce the added salt to ½ teaspoon and skip the garlic powder (which often contains added salt). For a lower-fat option, use skinless chicken thighs and reduce the butter to 2 tablespoons—the flavor will still be excellent.
As someone who tries to eat balanced meals without overcomplicating things, I love that this recipe gives me a solid protein source with healthy fats and minimal carbs. It’s the kind of meal that keeps me full and satisfied without feeling heavy.
Conclusion
Look, I get it. Weeknight dinners are hard. You’re tired, you’re hungry, and the last thing you want to do is spend an hour in the kitchen. But this recipe? It changes the game. Fifteen minutes from start to finish, one pan to clean, and a dinner that tastes like you actually tried.
I’ve made this chicken three times in one week, and I’m not embarrassed to admit it. Each batch taught me something—about heat control, about patience, about how a little butter and garlic can transform even the most ordinary Tuesday into something worth sitting down for. The best part? You don’t need to be a chef to nail it. You just need a hot pan, some good butter, and fifteen minutes.
So go ahead. Give it a try tonight. Swap in your favorite herbs, add a squeeze of lemon, or keep it simple with just garlic and butter. Make it your own. And when you do, come back and tell me how it turned out. Drop a comment below, share your twist on the recipe, or tag me in your photos. I genuinely want to hear about your version.
Because honestly? That’s the best part of cooking. Not the perfect recipe, but the one you actually make. The one that becomes yours. I hope this one becomes yours too.
Frequently Asked Questions
Can I use chicken breasts instead of thighs?
Yes, but you’ll need to adjust the cooking time. Chicken breasts cook faster and can dry out easily. Pound them to an even thickness (about ½ inch) and cook for 2-3 minutes per side instead of 3-4. Check for doneness at 160°F (71°C) and let them rest—they’ll come up to 165°F (74°C) as they sit.
What if I don’t have fresh garlic?
Fresh garlic really makes a difference here, but in a pinch, you can use 1½ teaspoons of jarred minced garlic or 1 teaspoon of garlic powder. Keep in mind that jarred garlic has a milder flavor and can be slightly bitter when cooked. If using garlic powder, add it with the other seasonings, not in the butter sauce.
Can I make this recipe dairy-free?
Absolutely. Substitute the butter with a high-quality vegan butter or ghee (which is lactose-free). I’ve tested this with Miyoko’s vegan butter and it worked well. The sauce will be slightly thinner, so you might want to add a teaspoon of cornstarch mixed with water to thicken it.
How do I prevent the garlic from burning?
This is the most common mistake I made during testing. The key is to add the garlic after you remove the chicken from the pan, when the heat is reduced to medium-low. Stir constantly and only cook for 30-45 seconds. If the garlic starts to brown too quickly, remove the pan from the heat entirely—the residual heat will finish cooking it.
Can I double this recipe?
Yes, but you’ll need to cook the chicken in batches. Crowding the pan will cause the chicken to steam instead of sear, and you’ll lose that beautiful golden crust. Cook the chicken in two batches, then make the sauce with double the butter and garlic. Return all the chicken to the pan at the end to warm through together.
Pin This Recipe!
Easy 15-Minute Garlic Butter Chicken Thighs Recipe
- Total Time: 15 minutes
- Yield: 4 servings 1x
Description
A quick and delicious garlic butter chicken thighs recipe that comes together in just 15 minutes. Perfect for busy weeknights, this one-pan wonder delivers rich, savory flavor with minimal effort.
Ingredients
- 1.5 lbs (680g) boneless, skinless chicken thighs
- 4 tablespoons (56g) unsalted butter
- 6 cloves fresh garlic, minced
- 1 teaspoon (5g) kosher salt
- ½ teaspoon (1g) freshly ground black pepper
- 1 teaspoon (2g) paprika (optional, adds color and smokiness)
- ½ teaspoon (1g) garlic powder
- 1 tablespoon (15ml) olive oil
- 2 tablespoons fresh parsley, chopped
- ¼ teaspoon red pepper flakes (optional, for heat)
Instructions
- Pat the chicken thighs completely dry with paper towels. This is crucial for a good sear.
- In a small bowl, mix salt, black pepper, paprika, and garlic powder. Sprinkle evenly over both sides of each chicken thigh. Let rest for 5 minutes if time allows.
- Place a large skillet (12-inch or 30cm) over medium-high heat and add olive oil. Heat until the oil shimmers and just starts to smoke, about 2 minutes.
- Carefully place chicken thighs in the hot pan in a single layer. Cook undisturbed for 3 minutes until golden brown. Flip with tongs and cook for another 3 minutes until cooked through (internal temperature of 165°F or 74°C).
- Transfer cooked chicken to a clean plate and tent loosely with foil. Reduce heat to medium-low.
- Add butter to the pan. Let it melt, scraping up browned bits from the bottom. Once melted and bubbling, add minced garlic. Stir constantly for 30-45 seconds until fragrant.
- Return chicken to the pan, spooning garlic butter sauce over each piece. Warm through for about 30 seconds. Sprinkle with fresh parsley and red pepper flakes if using.
- Let chicken rest in the pan off the heat for 2 minutes before serving. Spoon extra sauce over the top when plating.
Notes
For best results, ensure the pan is hot enough before adding chicken. Watch garlic carefully to prevent burning—it goes from perfect to burnt in about 15 seconds. Double the butter and garlic if you want extra sauce. Chicken thighs can be substituted with chicken breasts (adjust cooking time to 2-3 minutes per side). Leftovers can be stored in the refrigerator for up to 3 days.
- Prep Time: 5 minutes
- Cook Time: 10 minutes
- Category: Main Course
- Cuisine: American
Nutrition
- Serving Size: 1 serving (approxima
- Calories: 385
- Sodium: 680
- Fat: 26
- Saturated Fat: 12
- Carbohydrates: 2
- Protein: 32
Keywords: garlic butter chicken, quick chicken dinner, 15-minute meal, one-pan chicken, weeknight dinner, chicken thighs, easy chicken recipe