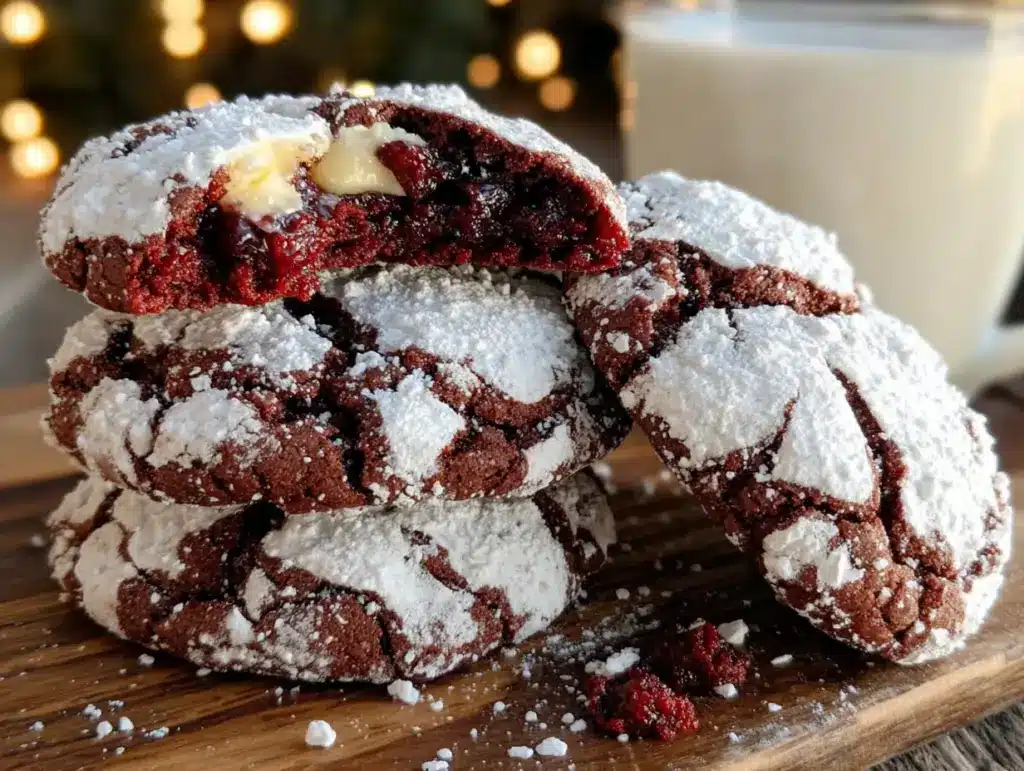
Mrs. Kowalski watched me fumbling with a piping bag at the community bake sale sign-up, my third attempt at getting the frosting right. She didn’t say anything at first. Then she just slid a tin of these deep crimson cookies across the table and said, “Try these. No piping required.” I bit into one, and honestly, I almost forgot about the frosting disaster entirely. The edges were perfectly crinkled, dusted with powdered sugar like fresh snow, and the inside was this impossibly fudgy, tender crumb with just a hint of cocoa. She told me the recipe came from her mother-in-law, who brought it over from a small bakery in Kraków, and she’d been making it for every family gathering for thirty years. I asked if I could share it, and she just waved her hand, already walking away. “It’s meant to be shared,” she called back.
I’ve tweaked it just a little—added a touch more vanilla, swapped the shortening for butter—but the soul of it is still hers. The first time I made them for a dinner party, my friend Dave grabbed three before the appetizers even came out. “These are dangerous,” he said, mouth half-full. And he was right. They’re the kind of cookie that disappears before you’ve even finished arranging the platter. Maybe you’ve been there, standing over a cooling rack, watching your hard work vanish in minutes. That’s the magic of these cookies. They’re unassuming until you bite into them, and then everyone wants the recipe. So here it is, straight from Mrs. Kowalski’s kitchen to yours.
Why You’ll Love This Recipe
I’ve tested this recipe at least a dozen times across different ovens, altitudes, and even a temperamental toaster oven during a power outage. It’s been stress-tested by my picky sister-in-law, my neighbor who swears she can’t bake, and a group of eight-year-olds at a birthday party. It passed every single time. Here’s why this one stands out from every other red velvet cookie out there:
- Quick & Easy: From mixing bowl to cooling rack in just 25 minutes. No chilling required, which is a game-changer when you’re hosting and time is tight.
- Simple Ingredients: You probably have most of these in your pantry right now. No obscure extracts or hard-to-find flours.
- Perfect for Hosting: These cookies are built for a crowd. They stack beautifully on a platter, travel well, and look stunning with minimal effort.
- Crowd-Pleaser: I’ve yet to meet someone who doesn’t love them. Kids go for the color, adults go for the texture, and everyone goes back for seconds.
- Unbelievably Delicious: The secret is the blend of cocoa and buttermilk, which gives them that classic red velvet tang without being overly sweet. The crinkled top is pure bakery magic.
What makes this recipe different from the rest is the technique. Instead of just rolling the dough in powdered sugar, I let it rest for exactly five minutes after mixing. This short wait allows the flour to fully hydrate, resulting in a cookie that’s fudgy in the center and perfectly chewy at the edges. It’s not just another red velvet cookie—it’s the one that makes you close your eyes after the first bite. Honestly, it’s comfort food reimagined: faster, easier, but with the same soul-soothing satisfaction. Perfect for impressing guests without stress, or turning a simple Tuesday into something memorable.
What Ingredients You Will Need
This recipe uses simple, wholesome ingredients to deliver that signature red velvet flavor and that gorgeous crinkled look. Most of these are pantry staples, which is exactly what you want when you’re hosting and don’t have time for a special grocery run.
- All-purpose flour (2 cups / 250g) – The backbone of the cookie. I use Gold Medal for consistent results, but any brand works. Spoon and level your flour for the best texture.
- Unsweetened cocoa powder (2 tablespoons / 15g) – This gives the cookies that subtle chocolate flavor. Don’t use Dutch-process here; natural cocoa works best for the right tang and color.
- Baking powder (1 teaspoon) – Helps the cookies spread just enough to create those beautiful crinkles.
- Salt (½ teaspoon) – Balances the sweetness and enhances the chocolate flavor.
- Unsalted butter (½ cup / 113g, softened) – I always use unsalted so I can control the salt level. Let it sit out for 30 minutes before starting.
- Granulated sugar (1 cup / 200g) – Provides sweetness and helps create the crinkled top. Don’t reduce the sugar or the texture will change.
- Large egg (1, room temperature) – Binds everything together. If you forgot to take it out of the fridge, place it in warm water for 5 minutes.
- Vanilla extract (1 teaspoon) – Adds warmth and depth. I prefer Nielsen-Massey, but any pure vanilla works.
- Buttermilk (2 tablespoons / 30ml) – The secret ingredient. It reacts with the cocoa to create that classic red velvet tang. No buttermilk? Add 2 teaspoons of lemon juice to regular milk and let it sit for 5 minutes.
- Red gel food coloring (1 tablespoon / 15ml) – Gel is better than liquid because it gives a vibrant color without thinning the dough. Start with 1 tablespoon and add more if you want a deeper red.
- White vinegar (1 teaspoon) – Sounds weird, I know. But it reacts with the buttermilk to keep the cookies tender and helps set the red color.
- Powdered sugar (½ cup / 60g, for rolling) – This creates the signature crinkled look. Sift it first to avoid clumps.
For substitutions: use dairy-free butter and oat milk with lemon juice for a dairy-free version. The texture will be slightly less tender, but still delicious. If you’re avoiding artificial colors, try beet powder—though the color will be more burgundy than bright red.
Equipment Needed
You don’t need a fancy bakery setup for these cookies. Here’s what I use every time:
- Mixing bowls – One large, one medium. I prefer glass or stainless steel.
- Electric hand mixer or stand mixer – A hand mixer works perfectly. I’ve also made these with a wooden spoon when my mixer broke, and they still turned out great.
- Baking sheets – Two standard half-sheet pans. If you only have one, let it cool completely between batches.
- Parchment paper or silicone baking mat – Non-negotiable. The cookies spread slightly, and parchment makes cleanup a breeze.
- Cooling rack – Wire rack for even cooling. Stacking warm cookies can make them soggy.
- Cookie scoop (1.5-tablespoon size) – Ensures uniform cookies. A regular spoon works too, but the scoop gives you that bakery consistency.
- Small bowl for powdered sugar – For rolling the dough balls.
- Measuring cups and spoons – Accuracy matters here, especially for the cocoa and buttermilk.
Budget-friendly tip: if you don’t have a cookie scoop, use two spoons to shape the dough. It takes a little longer, but the cookies will still look beautiful.
Preparation Method
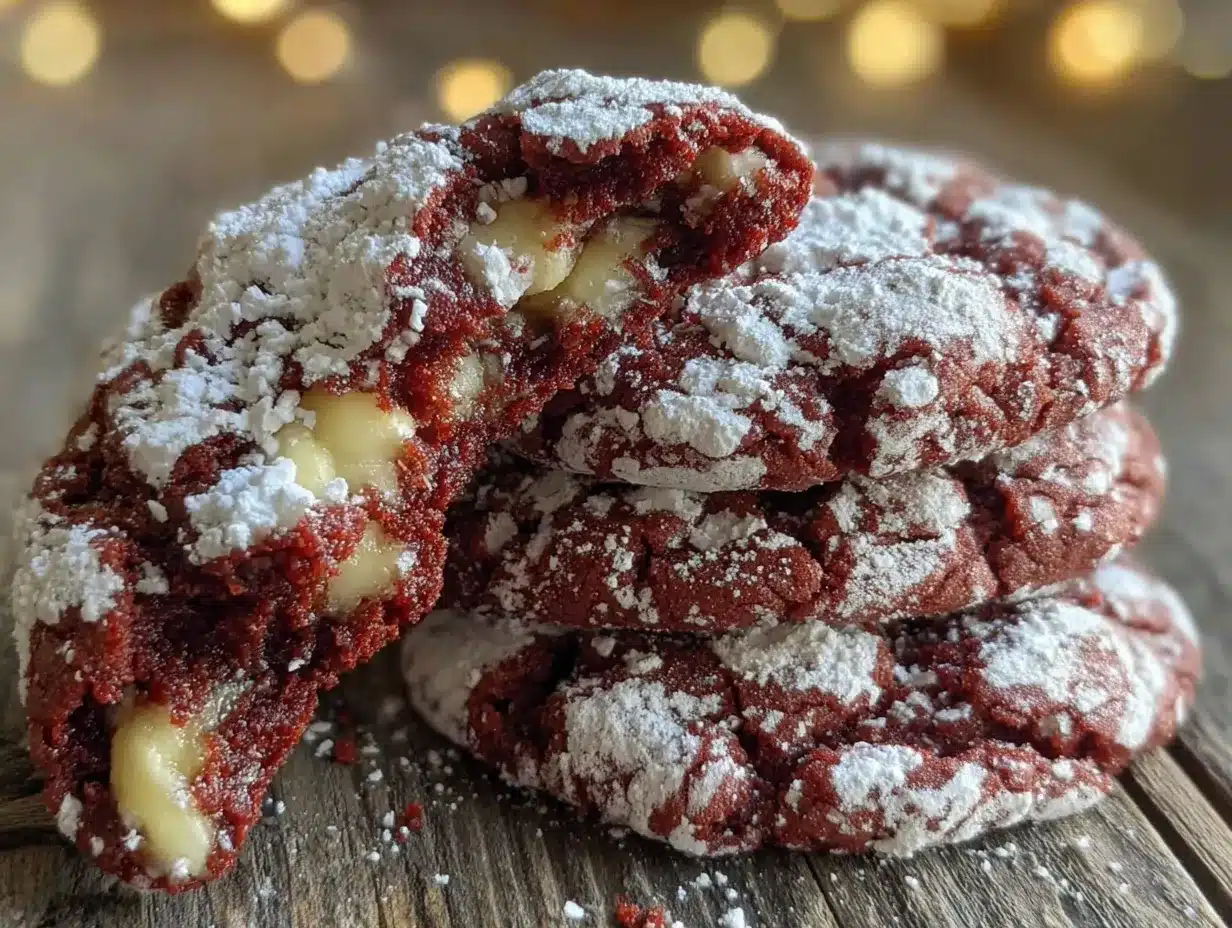
Let’s get baking. I’ve broken this down step by step so you can follow along without any hiccups. Set a timer for 25 minutes and let’s go.
- Preheat your oven to 350°F (175°C). Line two baking sheets with parchment paper. This is crucial—don’t skip the parchment, or the cookies will stick and lose their crinkled tops.
- Whisk the dry ingredients together. In a medium bowl, combine the flour, cocoa powder, baking powder, and salt. Whisk until evenly mixed. Set aside. This ensures there are no cocoa lumps later.
- Cream the butter and sugar. In a large bowl, beat the softened butter and granulated sugar together on medium speed until light and fluffy, about 2 minutes. Scrape down the sides. You’ll know it’s ready when it looks pale and slightly grainy.
- Add the wet ingredients. Beat in the egg, vanilla extract, buttermilk, red gel food coloring, and white vinegar. Mix on low speed until just combined. The dough will look a bit loose at this point—don’t worry, that’s normal.
- Combine wet and dry. Gradually add the flour mixture to the wet ingredients, mixing on low speed until a soft, cohesive dough forms. Don’t overmix. Stop as soon as you no longer see streaks of flour. The dough should be slightly sticky but hold together when pressed.
- Let the dough rest. Here’s the trick: let the dough sit for exactly 5 minutes. This allows the flour to fully absorb the moisture, which creates that fudgy center. I usually use this time to wash my mixing bowl or set out the powdered sugar.
- Prepare the powdered sugar coating. Sift the powdered sugar into a small bowl. Sifting prevents clumps from sticking to your cookies. Trust me, I learned this the hard way after one batch looked like it had snowed on lumpy rocks.
- Shape the cookies. Using a 1.5-tablespoon cookie scoop, scoop the dough and roll it into balls. Work quickly—the dough is soft. Drop each ball into the powdered sugar and roll to coat generously. The thicker the coating, the more dramatic the crinkles.
- Place on baking sheets. Arrange the coated dough balls on the prepared baking sheets, spacing them about 2 inches apart. They will spread slightly, so give them room.
- Bake immediately. Place one sheet on the center rack and bake for 9-11 minutes. The cookies should look puffed and cracked on top, with the edges just set. They will look underdone in the center—that’s exactly what you want. Overbaking leads to dry cookies.
- Cool on the baking sheet. Let the cookies rest on the hot baking sheet for 5 minutes. This allows them to finish setting without overbaking. Then transfer to a wire rack to cool completely.
- Repeat with the second batch. If you’re using one oven, let the baking sheet cool completely before placing the next batch. A hot sheet will cause the dough to spread too quickly.
Sensory cue: the cookies are done when the tops are covered in cracks and the powdered sugar has settled into the crevices. The edges should look matte, not shiny. If you gently press the center, it should spring back slightly.
Cooking Tips & Techniques
After making these cookies more times than I can count, I’ve collected a few hard-won lessons. Here’s what I wish someone had told me:
Don’t skip the vinegar. I know it seems like a weird addition, but the white vinegar reacts with the buttermilk to keep the cookies tender. I once forgot it and the cookies came out dense and flat. It makes a real difference.
Use gel food coloring, not liquid. Liquid coloring will thin out your dough and make the cookies spread too much. Gel gives you that vibrant red without changing the texture. If you want a deeper color, add an extra half-teaspoon of gel.
The resting step is non-negotiable. I learned this the hard way when I was rushing for a party and skipped the 5-minute rest. The cookies spread into flat discs with barely any crinkles. That short wait allows the flour to hydrate and the dough to firm up just enough for those beautiful cracks to form.
Powdered sugar coating is an art. Roll the dough balls generously. I mean, really coat them. The powdered sugar should look thick and almost clumsy. As the cookies bake, the dough expands and the sugar coating cracks, creating that signature look. If you skimp on the sugar, you’ll get pale, sad cookies.
Baking time is everything. Start checking at 9 minutes. The cookies should look puffed and cracked, with the edges just set but the center still soft. They will continue to bake on the hot sheet after you pull them out. Overbaked crinkle cookies lose their fudgy center and become cakey.
Multitasking tip: While the first batch bakes, scoop and coat the second batch. This keeps the process moving and ensures all cookies are baked fresh.
Variations & Adaptations
One of the best things about this recipe is how adaptable it is. Here are some variations I’ve tried and loved:
Dark Chocolate Red Velvet: Swap the natural cocoa for dark cocoa powder. The cookies will be richer and darker, with a more intense chocolate flavor. The red color will be slightly muted, but the taste is incredible.
Gluten-Free Version: Use a 1:1 gluten-free flour blend (I like Bob’s Red Mill). Add an extra tablespoon of buttermilk to compensate for the drier flour. The texture will be slightly more delicate, but the crinkles still form beautifully.
Vegan Adaptation: Replace the butter with vegan butter, the egg with a flax egg (1 tablespoon flaxseed meal + 3 tablespoons water), and the buttermilk with oat milk mixed with 1 teaspoon lemon juice. The cookies will be a bit less tender, but still delicious. I made these for a vegan friend’s birthday and they vanished in minutes.
Peppermint Red Velvet: Add ½ teaspoon peppermint extract along with the vanilla. Crush a candy cane and sprinkle the pieces on top of the cookies right after baking. Perfect for holiday parties.
White Chocolate Chip: Fold in ½ cup white chocolate chips after mixing the dough. The white chocolate adds sweetness and a creamy contrast to the tangy red velvet. This is my personal favorite for potlucks.
Mini Cookie Bites: Use a teaspoon scoop instead of a tablespoon and bake for 6-8 minutes. Perfect for party platters where guests want to sample multiple desserts.
Serving & Storage Suggestions
These cookies are best served at room temperature, straight from the cooling rack. The powdered sugar coating stays dry and the centers remain perfectly fudgy. If you’re hosting, arrange them on a large platter or cake stand. The contrast of the deep red cookies against a white or wooden surface is stunning.
What to serve alongside: A glass of cold milk is the classic pairing, but these cookies also shine with a cup of hot coffee or a rich hot chocolate. For a dessert board, pair them with fresh strawberries, dark chocolate truffles, and a cheese like brie or mascarpone. The tangy creaminess balances the sweetness of the cookies.
Storage: Store the cookies in an airtight container at room temperature for up to 5 days. Place a piece of bread in the container to keep them soft—the bread absorbs excess moisture and the cookies stay tender. Replace the bread every other day.
Freezing: These cookies freeze beautifully. Place them in a single layer in a freezer-safe container, separating layers with parchment paper. They’ll keep for up to 3 months. Thaw at room temperature for about 30 minutes before serving. You can also freeze the unbaked dough balls. Roll them, coat them in powdered sugar, and freeze on a baking sheet. Once frozen solid, transfer to a freezer bag. Bake from frozen, adding 2-3 minutes to the baking time.
Reheating: Pop a cookie in the microwave for 10 seconds for that just-baked warmth. Or warm them in a 300°F oven for 5 minutes if you’re serving a crowd.
Flavor development: These cookies actually taste better the next day. The flavors meld together and the texture becomes even more fudgy. If you can resist eating them all on day one, you’re in for a treat on day two.
Nutritional Information & Benefits
Here’s the estimated nutritional breakdown per cookie (based on 24 cookies):
- Calories: 135
- Fat: 6g
- Saturated Fat: 3.5g
- Carbohydrates: 20g
- Sugar: 13g
- Protein: 2g
- Fiber: 0.5g
- Sodium: 55mg
While these cookies are definitely a treat, there are some redeeming qualities. The cocoa powder provides a small amount of antioxidants called flavonoids, which are linked to heart health. The buttermilk adds calcium and probiotics, which support digestion. And the butter, in moderation, provides vitamin A for healthy skin and eyes.
Dietary considerations: This recipe contains gluten, dairy, and eggs. For a gluten-free version, use a 1:1 gluten-free flour blend. For a dairy-free version, use vegan butter and oat milk with lemon juice. The cookies are naturally nut-free, making them safe for school events and parties.
Potential allergens: Wheat, milk, eggs. Always check your specific ingredient labels if cooking for someone with allergies.
I’m not a nutritionist, but I believe in balance. These cookies are meant to be enjoyed in the moment—at a party, a holiday gathering, or a cozy night in. They’re not an everyday snack, but they’re absolutely worth every bite when the occasion calls for something special.
Conclusion
These red velvet crinkle cookies are more than just a dessert—they’re a conversation starter, a crowd-pleaser, and honestly, a little bit of magic in cookie form. Mrs. Kowalski was right: this recipe is meant to be shared. Whether you’re hosting a holiday party, bringing a dish to a potluck, or just want to make a Tuesday feel special, these cookies deliver every single time.
I hope you make them your own. Add a pinch of cinnamon if that’s your thing. Swap the red coloring for beet powder if you’re feeling adventurous. The beauty of this recipe is that it’s forgiving enough to adapt and sturdy enough to always work. And when you pull that first batch out of the oven, all crinkled and powdered and perfect, you’ll understand why I keep coming back to it.
I’d love to hear how yours turn out. Drop a comment below and let me know if you tried any variations, or just tell me how many you ate before they made it to the serving platter. No judgment here—I’ve been there. Happy baking, friends!
Frequently Asked Questions
Why didn’t my cookies crinkle?
The most common reason is not enough powdered sugar coating. Make sure you roll the dough balls generously—the coating should look thick and almost messy. Another culprit is overmixing the dough, which develops too much gluten and prevents the cookies from spreading and cracking.
Can I make the dough ahead of time?
Absolutely. You can refrigerate the dough for up to 24 hours before baking. Just let it sit at room temperature for 10 minutes before scooping and rolling, as cold dough is harder to work with. You can also freeze the shaped, coated dough balls for up to 3 months.
My cookies spread too much. What went wrong?
This usually happens if the dough is too warm or if you skipped the 5-minute rest. Make sure your butter is softened but not melted. Also, check that your baking sheet is completely cool before placing the next batch. A hot sheet will cause the dough to spread immediately.
Can I use liquid food coloring instead of gel?
You can, but I don’t recommend it. Liquid food coloring adds extra moisture to the dough, which can make the cookies spread too much and lose their crinkled texture. If you only have liquid, reduce the buttermilk by 1 tablespoon to compensate.
How do I get a deeper red color?
Start with 1 tablespoon of red gel food coloring. If you want a more vibrant red, add up to ½ teaspoon more. You can also add a tiny drop of burgundy or violet gel to deepen the color. Remember that the color will darken slightly as the cookies bake and cool.
Pin This Recipe!


Best Red Velvet Crinkle Cookies: Easy 25-Minute Recipe
- Total Time: 25 minutes
- Yield: 24 cookies 1x
Description
These red velvet crinkle cookies are fudgy, tender, and dusted with powdered sugar. Ready in just 25 minutes with no chilling required, they’re perfect for hosting, potlucks, or a cozy night in.
Ingredients
- 2 cups (250g) all-purpose flour
- 2 tablespoons (15g) unsweetened cocoa powder
- 1 teaspoon baking powder
- ½ teaspoon salt
- ½ cup (113g) unsalted butter, softened
- 1 cup (200g) granulated sugar
- 1 large egg, room temperature
- 1 teaspoon vanilla extract
- 2 tablespoons (30ml) buttermilk
- 1 tablespoon (15ml) red gel food coloring
- 1 teaspoon white vinegar
- ½ cup (60g) powdered sugar, for rolling
Instructions
- Preheat your oven to 350°F (175°C). Line two baking sheets with parchment paper.
- In a medium bowl, whisk together the flour, cocoa powder, baking powder, and salt. Set aside.
- In a large bowl, beat the softened butter and granulated sugar together on medium speed until light and fluffy, about 2 minutes. Scrape down the sides.
- Beat in the egg, vanilla extract, buttermilk, red gel food coloring, and white vinegar on low speed until just combined.
- Gradually add the flour mixture to the wet ingredients, mixing on low speed until a soft, cohesive dough forms. Do not overmix.
- Let the dough rest for exactly 5 minutes.
- Sift the powdered sugar into a small bowl.
- Using a 1.5-tablespoon cookie scoop, scoop the dough and roll into balls. Roll each ball generously in the powdered sugar to coat.
- Place the coated dough balls on the prepared baking sheets, spacing them about 2 inches apart.
- Bake one sheet at a time on the center rack for 9-11 minutes. The cookies should look puffed and cracked on top, with the edges just set.
- Let the cookies rest on the hot baking sheet for 5 minutes, then transfer to a wire rack to cool completely.
- Repeat with the second batch, ensuring the baking sheet is cool before placing the next batch.
Notes
Don’t skip the 5-minute rest—it allows the flour to hydrate for a fudgy center. Use gel food coloring, not liquid, to avoid thinning the dough. Roll dough balls generously in powdered sugar for the best crinkles. Start checking cookies at 9 minutes to avoid overbaking.
- Prep Time: 15 minutes
- Cook Time: 10 minutes
- Category: Dessert
- Cuisine: American
Nutrition
- Serving Size: 1 cookie
- Calories: 135
- Sugar: 13
- Sodium: 55
- Fat: 6
- Saturated Fat: 3.5
- Carbohydrates: 20
- Fiber: 0.5
- Protein: 2
Keywords: red velvet crinkle cookies, easy cookie recipe, 25-minute cookies, fudgy cookies, holiday cookies, no-chill cookies