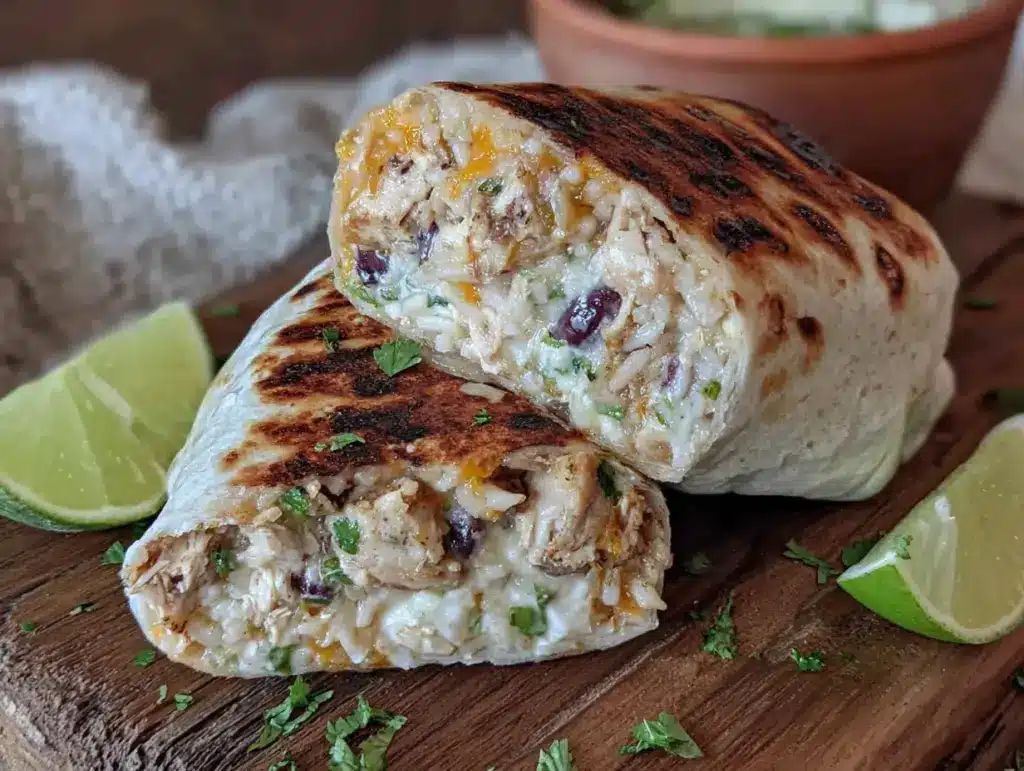
I was standing in the middle of Target last August, somewhere between the lunchbox aisle and the clearance rack of spiral notebooks, when the smell hit me. It wasn’t a perfume or a candle—it was the faint, dusty scent of a new backpack mixed with the artificial grape of a generic juice box. And suddenly I was seven years old, sitting cross-legged on my grandmother’s linoleum floor, watching her wrap foil around a burrito the size of my forearm. She worked fast, her hands moving like she’d done it a thousand times, because she had. Every August, she’d make a mountain of these things—chicken and rice and cheese, all wrapped up tight—and stack them in her freezer like little golden bricks. She called them “school savers,” and they were the only thing that made the first week of September bearable.
I haven’t thought about those burritos in years. But there I was, frozen in the school supply section, holding a pack of wide-ruled notebook paper, trying not to cry over a memory I could barely hold onto. My grandmother passed when I was sixteen, and I never thought to ask her for the recipe. Honestly, I didn’t even know there was a recipe—I just thought she magically produced burritos from the freezer whenever we needed them. So for the last decade, I’ve been trying to recreate that taste. The slightly crispy tortilla, the creamy rice, the chicken that somehow stayed juicy even after a month in the deep freeze. And you know what? I finally got it. Maybe you’ve been there too—chasing a flavor from your childhood that you can’t quite pin down, something that feels like home but you can’t find the key to.
This recipe is that key. These back-to-school freezer chicken and rice burritos are the ones I make now, every August, for my own family. They’re not a perfect replica of my grandmother’s—I’ve tweaked the spices, added a little more heat, swapped in brown rice for a heartier bite. But the feeling is the same. That first bite, warm and familiar, like a hug from someone you miss. That’s why I keep making them. That’s why I’m sharing them with you.
Why You’ll Love This Recipe
Let me tell you why these back-to-school freezer chicken and rice burritos have become a non-negotiable part of my meal prep rotation. I’ve tested this recipe about seven times now—yes, seven—to get the texture just right, because nobody wants a soggy burrito after a month in the freezer. Here’s what makes them stand out:
- Quick & Easy: From start to finish, you’re looking at about 45 minutes of active prep time. That’s it. You’ll have a dozen burritos ready to stash away for those chaotic weekday evenings.
- Simple Ingredients: No fancy grocery trips here. Chicken, rice, cheese, beans, and a few spices—you probably have most of this in your kitchen right now.
- Perfect for Back-to-School Season: Whether you’re packing lunches, feeding hungry kids after practice, or just trying to survive the first month of homework, these burritos are your secret weapon.
- Crowd-Pleaser: My kids gobble these up, and so do the adults. They’re mild enough for picky eaters but seasoned well enough that you won’t feel like you’re eating baby food.
- Unbelievably Delicious: The key is in the filling—it’s creamy without being heavy, and the chicken stays tender even after reheating. I use a little trick with the rice that makes all the difference.
What makes this recipe different from the dozens of other burrito recipes out there? It’s the technique. I cook the rice in the same pan as the chicken after browning it, so every grain soaks up that savory flavor. Then I let the filling cool completely before assembling—this is the secret to avoiding freezer burn and soggy tortillas. Trust me, I learned that one the hard way after a batch of sad, ice-crystal-covered burritos.
These burritos aren’t just convenient—they’re the kind of meal that makes you feel like you’ve got your life together, even when you’re running on three hours of sleep and a cup of cold coffee. They’re comfort food you can actually plan ahead for, and that’s a beautiful thing.
What Ingredients You Will Need
This recipe uses simple, wholesome ingredients that come together to create a filling that’s flavorful, satisfying, and freezer-friendly. Most of these are pantry staples, so you probably won’t need a special trip to the store.
For the Chicken Filling
- 1.5 pounds boneless, skinless chicken breasts (about 2-3 breasts) — I prefer using chicken thighs sometimes for extra moisture, but breasts work great here too. Look for evenly sized pieces so they cook at the same rate.
- 2 tablespoons olive oil — Avocado oil works too, but olive oil gives a nice subtle flavor. I use California Olive Ranch for everyday cooking.
- 1 medium yellow onion, diced — About 1 cup. You can use a white onion if that’s what you have, but yellow onions get sweeter when cooked.
- 3 cloves garlic, minced — Fresh garlic is non-negotiable here. The jarred stuff just doesn’t hit the same.
- 1 teaspoon ground cumin — This is the backbone of the flavor. Don’t skip it.
- 1 teaspoon chili powder — I use a mild chili powder so the kids don’t complain. Add more if you like heat.
- 1/2 teaspoon smoked paprika — This adds a subtle smokiness that makes the burritos taste like they’ve been grilled.
- 1/2 teaspoon salt — More to taste. I use fine sea salt.
- 1/4 teaspoon black pepper — Freshly ground is best.
- 1 cup low-sodium chicken broth — This helps keep the chicken moist and adds flavor to the rice later.
For the Rice
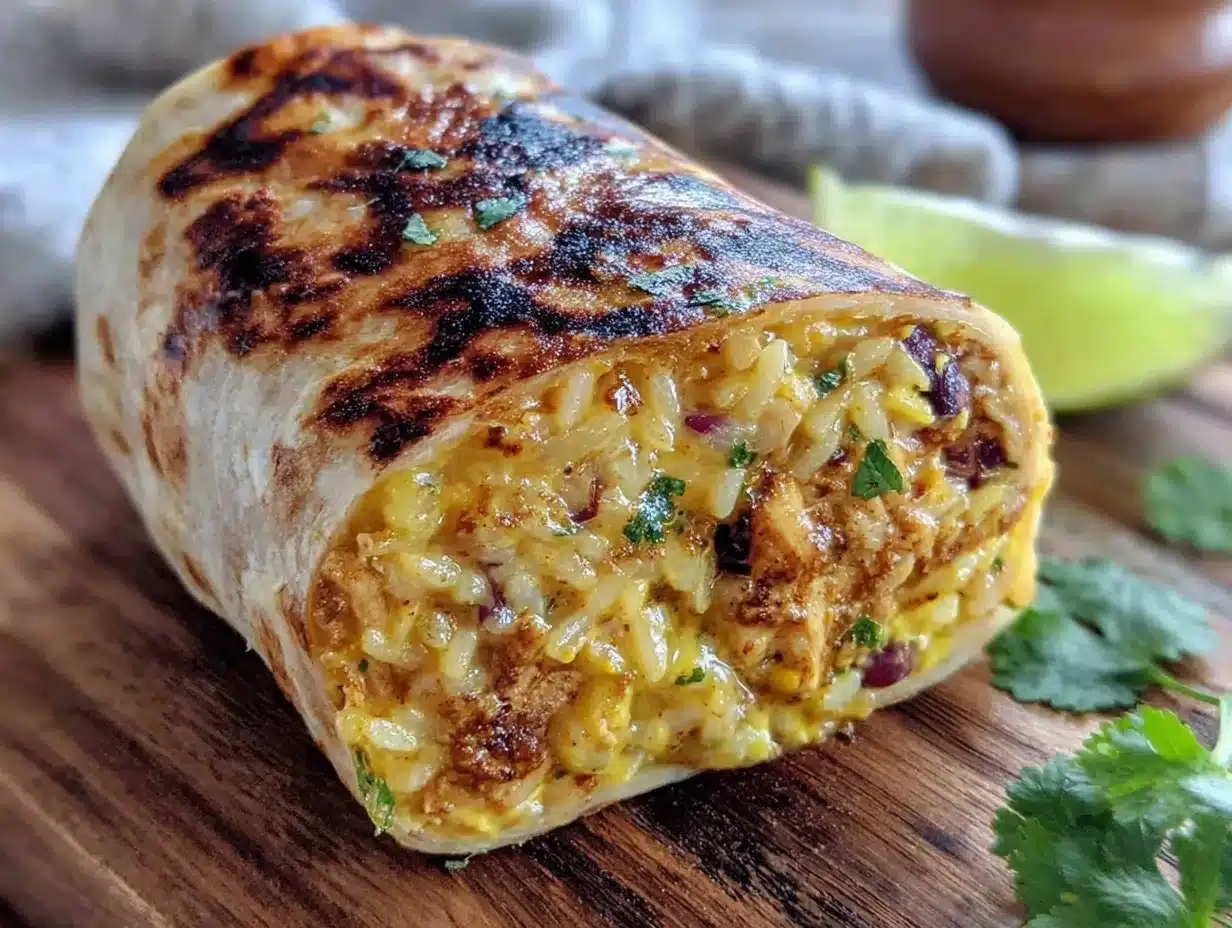
- 1 cup long-grain white rice — Brown rice works, but you’ll need to increase the cooking time and liquid. Basmati or jasmine are lovely here too.
- 1 1/2 cups water — Or use chicken broth for extra flavor. I do half and half sometimes.
- 1 tablespoon butter — Optional, but it makes the rice fluffier and adds richness. Use dairy-free butter if needed.
For Assembly
- 1 can (15 ounces) black beans, drained and rinsed — Pinto beans work too, but black beans hold their shape better in the freezer. I prefer Bush’s or Goya.
- 1 1/2 cups shredded cheddar cheese — Monterey Jack or a Mexican blend are great substitutes. Shred it yourself for better melting—the pre-shredded stuff has anti-caking agents that don’t melt as smoothly.
- 1 cup frozen corn, thawed — Fire-roasted corn adds a nice smoky sweetness if you can find it.
- 6-8 large flour tortillas — Look for burrito-sized tortillas (10 inches). I like Mission or Guerrero brand. Corn tortillas won’t hold up well for freezing.
- Optional: 1/4 cup chopped fresh cilantro — For brightness. My kids pick it out, so I leave it on the side.
- Optional: 1 lime, juiced — A squeeze of lime right before serving wakes everything up.
For Freezing
- Aluminum foil or freezer paper — Foil is easier to mold around the burritos. Freezer paper is great too, but you’ll need tape.
- Freezer-safe zip-top bags — Quart or gallon size, depending on how many you’re storing.
Equipment Needed
You don’t need a professional kitchen to make these back-to-school freezer chicken and rice burritos. Here’s what you’ll need:
- Large skillet or sauté pan — A 12-inch pan with a lid is ideal. I use my trusty cast iron skillet, but a non-stick pan works fine too. Just avoid scratching it with metal utensils.
- Medium saucepan — For cooking the rice. Any pot with a tight-fitting lid will do.
- Cutting board and sharp knife — A good chef’s knife makes dicing the onion and mincing garlic so much easier. I learned that the hard way after years of using dull knives and crying over uneven onion chunks.
- Mixing bowl — Large enough to hold all the filling ingredients. A glass or stainless steel bowl works best.
- Spatula or wooden spoon — For stirring the filling. I prefer a wooden spoon because it doesn’t scratch my pans.
- Measuring cups and spoons — Pretty standard, but make sure you have a set for dry and liquid ingredients.
- Baking sheet — Optional, but helpful for laying out the assembled burritos before freezing. Line it with parchment paper for easy cleanup.
- Aluminum foil — Heavy-duty foil is best for freezing. It holds up better and doesn’t tear as easily.
If you don’t have a large skillet, you can use a Dutch oven or even a large pot. The key is having enough surface area to brown the chicken properly. And if you don’t have a baking sheet, a large cutting board or even a clean countertop works for staging the burritos before wrapping.
Preparation Method
Let’s get cooking. This method is broken down into clear steps so you can follow along without getting lost. I’ve included time estimates and sensory cues so you know exactly what to look for.
Step 1: Cook the Rice (15-20 minutes)
Rinse the rice under cold water until the water runs clear. This removes excess starch and prevents the rice from getting gummy. In a medium saucepan, combine the rinsed rice, water, and butter (if using). Bring to a boil over high heat, then reduce the heat to low, cover, and simmer for 15 minutes. Don’t lift the lid—I know it’s tempting, but you’ll let the steam escape. After 15 minutes, remove from heat and let it sit, covered, for another 5 minutes. Fluff with a fork and set aside to cool. The rice should be tender but not mushy, with separate grains.
Step 2: Cook the Chicken (15-20 minutes)
While the rice is cooking, heat the olive oil in your large skillet over medium-high heat. Pat the chicken breasts dry with paper towels—this helps them brown instead of steam. Season both sides with salt and pepper. Place the chicken in the hot skillet and cook for 5-6 minutes per side, until golden brown and cooked through. The internal temperature should reach 165°F on an instant-read thermometer. Transfer the chicken to a cutting board and let it rest for 5 minutes. This resting step is crucial—it keeps the juices inside instead of running all over your cutting board.
Step 3: Sauté the Aromatics (5 minutes)
Reduce the heat to medium. Add the diced onion to the same skillet (don’t clean it—those browned bits are flavor gold). Cook for 3-4 minutes, stirring occasionally, until the onion is soft and translucent. Add the minced garlic, cumin, chili powder, and smoked paprika. Cook for another 30 seconds until fragrant. Your kitchen should smell incredible at this point. If the pan looks dry, add a splash of chicken broth.
Step 4: Shred the Chicken and Combine (5 minutes)
Using two forks, shred the rested chicken into bite-sized pieces. Add the shredded chicken back to the skillet with the onions and spices. Pour in the chicken broth and stir to combine. Let it simmer for 2-3 minutes, allowing the chicken to absorb some of that flavored liquid. The broth should reduce slightly, creating a light sauce that coats the chicken.
Step 5: Assemble the Filling (10 minutes)
In a large mixing bowl, combine the cooked rice, shredded chicken mixture, black beans, thawed corn, and cilantro (if using). Stir gently until everything is evenly distributed. Taste and adjust seasoning—you might want a little more salt or a squeeze of lime. Now, here’s the important part: let the filling cool completely. I usually spread it out on a baking sheet to speed things up. Warm filling will make the tortillas soggy and create ice crystals in the freezer. Trust me, I learned this after a batch of sad, watery burritos.
Step 6: Assemble the Burritos (15-20 minutes)
Lay a tortilla on a clean work surface. Spoon about 1/2 to 3/4 cup of the filling into the center, leaving a 2-inch border on all sides. Sprinkle a generous tablespoon of shredded cheese on top of the filling. Fold the sides of the tortilla inward over the filling, then fold the bottom edge up and over the filling, tucking it tightly. Roll the burrito away from you, keeping the sides tucked in, until you have a tight cylinder. Place it seam-side down. Repeat with the remaining tortillas and filling. You should get 6-8 burritos, depending on how generous you are with the filling.
Step 7: Wrap for Freezing (10 minutes)
Cut sheets of aluminum foil large enough to wrap each burrito completely. Place a burrito seam-side down in the center of the foil. Fold the foil over the burrito, tuck the ends, and roll tightly. Make sure there are no exposed spots—air is the enemy of frozen food. Place the wrapped burritos in a freezer-safe zip-top bag, squeeze out as much air as possible, and seal. Label the bag with the date and contents. They’ll keep for up to 3 months.
Cooking Tips & Techniques
I’ve made enough mistakes with freezer burritos to fill a cookbook, so let me save you some trouble. Here are the tips that actually matter.
First, don’t skip the cooling step. I know it’s tempting to rush through assembly when you’re tired, but warm filling creates condensation inside the foil, which turns into ice crystals. Those ice crystals make the tortilla soggy when you reheat it. I once made a batch in a hurry and ended up with burritos that tasted more like frozen soup. Spread the filling on a baking sheet and pop it in the fridge for 15 minutes—it’s worth the extra time.
Second, use large tortillas. I made the mistake of using standard-sized tortillas once, and I ended up with these sad little bundles that barely held together. Burrito-sized tortillas (10 inches) give you enough room to wrap tightly without the filling spilling out. If you can only find smaller ones, just use less filling—about 1/3 cup per tortilla.
Third, don’t overfill. I know it’s tempting to pack in as much filling as possible, but overstuffed burritos are impossible to roll tightly, and they’re more likely to burst open during reheating. Aim for a generous but manageable amount. You’ll get a feel for it after the first one or two.
Fourth, if you’re reheating from frozen, unwrap the foil first. I learned this the hard way when I microwaved a foil-wrapped burrito and nearly started a fire. Unwrap, place on a microwave-safe plate, and microwave for 2-3 minutes, flipping halfway through. For a crispy exterior, finish it in a dry skillet over medium heat for 1-2 minutes per side.
Finally, label everything. I thought I’d remember what was in those foil packets, but three weeks later, I was unwrapping mystery burritos. Write the date and contents on the bag with a permanent marker. Your future self will thank you.
Variations & Adaptations
These back-to-school freezer chicken and rice burritos are endlessly adaptable. Here are some variations I’ve tried and loved:
Vegetarian Version
Skip the chicken and double up on the black beans. Add a can of drained and rinsed pinto beans too. You can also throw in some sautéed bell peppers and zucchini for extra veggies. The texture will be slightly different, but it’s just as satisfying. I made this version for my sister who’s vegetarian, and she asked for the recipe immediately.
Spicy Southwest Version
Add 1/2 teaspoon of cayenne pepper to the spice mix, and use pepper jack cheese instead of cheddar. Toss in a diced jalapeño (seeds removed unless you want serious heat) when you sauté the onions. For extra kick, add a tablespoon of chopped chipotle peppers in adobo sauce. This is my personal favorite—it wakes up your taste buds without being overwhelming.
Low-Carb/Keto Version
Use cauliflower rice instead of white rice. Cook it in the same skillet after the chicken, letting any excess moisture evaporate. Use low-carb tortillas (I like the ones from La Tortilla Factory). The filling will be a bit less cohesive, but it works. This version has become my go-to during January when I’m trying to reset my eating habits.
Breakfast Burrito Version
Add scrambled eggs to the filling and swap the chicken for breakfast sausage or bacon. Use a milder cheese like mozzarella or provolone. These are perfect for busy mornings when you need something hearty but fast. I’ve been known to eat these for dinner too—no judgment here.
Serving & Storage Suggestions
These burritos are designed to be served straight from the freezer, but here are some tips to make them even better.
Serving Temperature: For best results, reheat from frozen. Unwrap the foil, place the burrito on a microwave-safe plate, and microwave for 2-3 minutes, flipping once. If you have time, finish it in a dry skillet over medium heat for 1-2 minutes per side. This gives the tortilla a slightly crispy exterior that contrasts beautifully with the soft, warm filling. Serve with sour cream, salsa, or guacamole on the side.
Storage: Wrapped in foil and sealed in a freezer bag, these burritos will keep for up to 3 months. I usually make a double batch and stash them in the back of the freezer. They’re perfect for those days when you just can’t face cooking. The flavors actually meld together over time, so they taste even better after a week or two in the freezer.
Reheating from Refrigerator: If you’ve thawed a burrito in the fridge overnight, microwave it for 1-2 minutes, then finish in a skillet. The texture is slightly better when reheated from thawed, but honestly, I usually just go straight from frozen because convenience wins.
Flavor Development: The filling tastes best after it’s had time to sit. The spices mellow and blend together, creating a more cohesive flavor. I actually prefer the burritos after they’ve been frozen for at least a week. Something about that time in the cold just makes everything taste better.
Nutritional Information & Benefits
Here’s the approximate nutritional breakdown for one burrito (based on 8 servings):
| Nutrient | Amount |
|---|---|
| Calories | 420 |
| Protein | 28g |
| Carbohydrates | 45g |
| Fiber | 6g |
| Fat | 14g |
| Saturated Fat | 5g |
| Sodium | 680mg |
These burritos are a solid source of protein from the chicken and beans, which helps keep you full and satisfied. The black beans add fiber, which is great for digestion and steady energy levels. The rice provides carbohydrates for quick energy—perfect for busy school days or after-work activities.
If you’re watching your sodium, use low-sodium chicken broth and reduce the added salt. You can also rinse the black beans thoroughly to remove some of the sodium from the canning liquid. For a lower-carb option, use cauliflower rice as mentioned in the variations section.
Potential allergens include dairy (cheese) and gluten (tortillas). Use dairy-free cheese and gluten-free tortillas for allergy-friendly versions. The recipe is naturally nut-free and egg-free as written.
Conclusion
These back-to-school freezer chicken and rice burritos are more than just a meal prep recipe—they’re a little piece of sanity in the chaos of the school year. They’re the reason you can walk through the door at 6 PM, tired and hungry, and have dinner on the table in under five minutes. They’re the reason your kids can have a hot, homemade lunch even on the busiest days. And honestly, they taste like comfort in a tortilla.
I’ve tweaked this recipe over the years, adding a little more cumin here, a little less salt there, until it felt just right. But the heart of it—the warmth, the convenience, the love—that’s all my grandmother’s doing. I hope these burritos become a tradition in your home too. Make a batch this weekend, stash them in your freezer, and thank yourself later.
I’d love to hear how yours turn out. Did you add your own twist? Did your kids love them? Drop a comment below and let me know. And if you’re looking for more back-to-school meal prep ideas, check out my quick chicken stir-fry recipe—it’s another lifesaver for busy weeknights.
Frequently Asked Questions
Can I use brown rice instead of white rice?
Yes, absolutely. Brown rice works well in this recipe, but you’ll need to adjust the cooking time and liquid. Use 1 cup brown rice with 2 cups water or broth, and cook for about 40-45 minutes. The texture will be chewier, which some people actually prefer in burritos.
How long do these burritos last in the freezer?
Properly wrapped and stored in a freezer-safe bag, these burritos will stay fresh for up to 3 months. After that, they’re still safe to eat, but the quality might decline slightly—the tortilla can get a bit dry or the filling might develop freezer burn.
Can I use chicken thighs instead of chicken breasts?
Definitely. Chicken thighs are actually more forgiving because they have a higher fat content, which keeps them moist during reheating. Just cook them until they reach 165°F internally, and shred them the same way you would breasts. They’ll add a richer flavor to the filling.
What’s the best way to reheat these burritos without a microwave?
If you don’t have a microwave, unwrap the burrito and place it in a skillet over medium-low heat. Cover the skillet with a lid and cook for 5-7 minutes, flipping once. You can also reheat them in a 350°F oven for 15-20 minutes. Both methods give you a crispy exterior and a warm, melty interior.
Can I make these burritos ahead and refrigerate them instead of freezing?
Yes, you can refrigerate them for up to 3 days. Just wrap them individually in foil or plastic wrap and store them in an airtight container. Reheat in the microwave or skillet as directed. They won’t hold up as long as frozen burritos, but they’re perfect for a few days of meal prep.
Pin This Recipe!
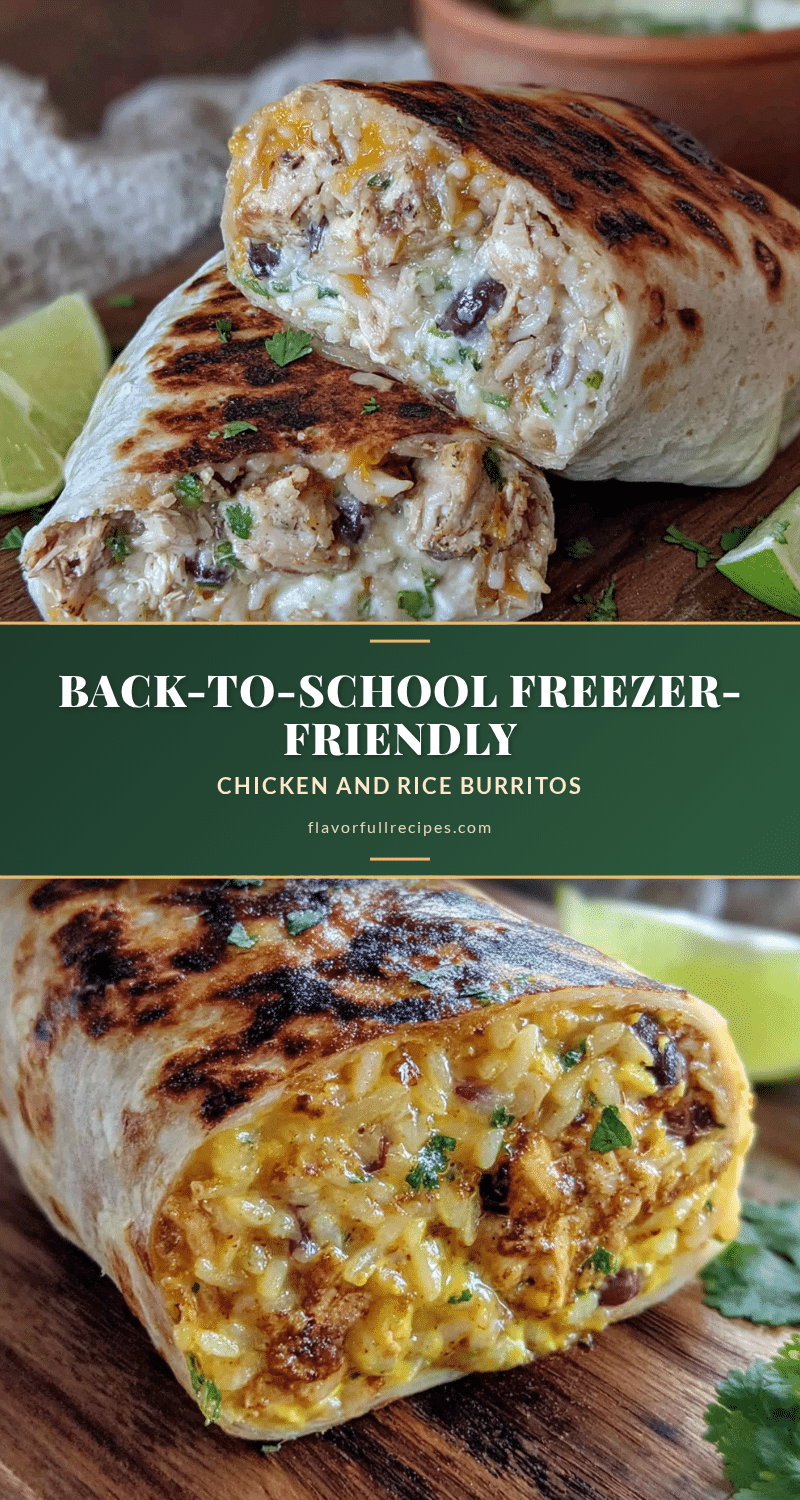

Back-to-School Freezer Chicken and Rice Burritos
- Total Time: 1 hour 15 minutes
- Yield: 8 servings 1x
Description
These freezer-friendly chicken and rice burritos are perfect for busy school nights. Packed with tender chicken, fluffy rice, black beans, and cheese, they’re a comforting and convenient meal that can be made ahead and stored for up to 3 months.
Ingredients
- 1.5 pounds boneless, skinless chicken breasts (about 2–3 breasts)
- 2 tablespoons olive oil
- 1 medium yellow onion, diced (about 1 cup)
- 3 cloves garlic, minced
- 1 teaspoon ground cumin
- 1 teaspoon chili powder
- 1/2 teaspoon smoked paprika
- 1/2 teaspoon salt
- 1/4 teaspoon black pepper
- 1 cup low-sodium chicken broth
- 1 cup long-grain white rice
- 1 1/2 cups water
- 1 tablespoon butter (optional)
- 1 can (15 ounces) black beans, drained and rinsed
- 1 1/2 cups shredded cheddar cheese
- 1 cup frozen corn, thawed
- 6–8 large flour tortillas (10 inches)
- Optional: 1/4 cup chopped fresh cilantro
- Optional: 1 lime, juiced
- Aluminum foil or freezer paper
- Freezer-safe zip-top bags
Instructions
- Rinse the rice under cold water until the water runs clear. In a medium saucepan, combine the rinsed rice, water, and butter (if using). Bring to a boil over high heat, then reduce the heat to low, cover, and simmer for 15 minutes. Remove from heat and let it sit, covered, for another 5 minutes. Fluff with a fork and set aside to cool.
- While the rice is cooking, heat the olive oil in a large skillet over medium-high heat. Pat the chicken breasts dry with paper towels and season both sides with salt and pepper. Cook for 5-6 minutes per side, until golden brown and cooked through (internal temperature of 165°F). Transfer the chicken to a cutting board and let it rest for 5 minutes.
- Reduce the heat to medium. Add the diced onion to the same skillet and cook for 3-4 minutes, until soft and translucent. Add the minced garlic, cumin, chili powder, and smoked paprika. Cook for another 30 seconds until fragrant.
- Using two forks, shred the rested chicken into bite-sized pieces. Add the shredded chicken back to the skillet with the onions and spices. Pour in the chicken broth and stir to combine. Let it simmer for 2-3 minutes, allowing the chicken to absorb the liquid.
- In a large mixing bowl, combine the cooked rice, shredded chicken mixture, black beans, thawed corn, and cilantro (if using). Stir gently until evenly distributed. Taste and adjust seasoning. Let the filling cool completely (spread on a baking sheet to speed up).
- Lay a tortilla on a clean work surface. Spoon about 1/2 to 3/4 cup of the filling into the center, leaving a 2-inch border. Sprinkle a generous tablespoon of shredded cheese on top. Fold the sides inward, then fold the bottom edge up and over the filling, tucking tightly. Roll the burrito away from you into a tight cylinder. Place seam-side down. Repeat with remaining tortillas and filling.
- Cut sheets of aluminum foil large enough to wrap each burrito completely. Place a burrito seam-side down in the center of the foil. Fold the foil over the burrito, tuck the ends, and roll tightly. Place the wrapped burritos in a freezer-safe zip-top bag, squeeze out as much air as possible, and seal. Label with the date and contents. Freeze for up to 3 months.
Notes
Let the filling cool completely before assembling to prevent soggy tortillas and freezer burn. Use burrito-sized tortillas (10 inches) for best results. For reheating from frozen, unwrap foil, microwave for 2-3 minutes (flipping halfway), then finish in a dry skillet for 1-2 minutes per side for a crispy exterior. Label freezer bags with date and contents.
- Prep Time: 45 minutes
- Cook Time: 30 minutes
- Category: Main Course
- Cuisine: Mexican
Nutrition
- Serving Size: 1 burrito
- Calories: 420
- Sugar: 2
- Sodium: 680
- Fat: 14
- Saturated Fat: 5
- Carbohydrates: 45
- Fiber: 6
- Protein: 28
Keywords: freezer burritos, chicken and rice burritos, back-to-school meals, meal prep, freezer-friendly, easy dinner