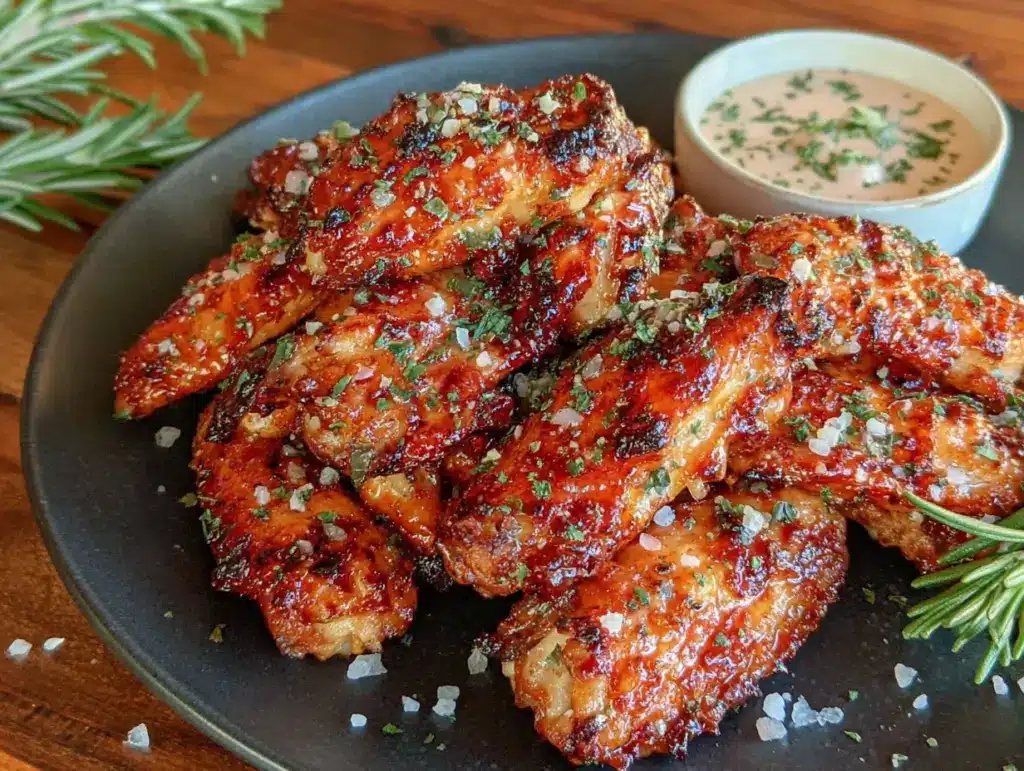
“Wait, these are baked?” My friend Jenna was holding a wing mid-air, squinting at it like it had just told her a lie. We were three hours into the biggest game of the season, and the coffee table was a war zone of napkins and empty dip bowls. I had just watched her demolish six of these things without looking up once. So when she finally asked, I just smiled.
Honestly, I didn’t set out to make a “healthy” wing. I set out to make a wing that didn’t leave my kitchen smelling like a fast-food joint for three days. And I really wanted to be able to eat more than four of them without my fingers feeling like I’d been finger-painting with butter. So I started messing around with a baking powder trick I’d heard about years ago, and somewhere between a too-salty batch and a batch that was just sad, these crispy healthy baked chicken wings for game day were born.
They come out of the oven with that shatter-crisp skin you normally only get from a deep fryer. No oil bath required. No guilt. Just a pile of wings that disappear before halftime. And honestly? That moment when Jenna found out they were baked and just shrugged and grabbed another one—that’s when I knew the recipe was a keeper.
Why You’ll Love This Recipe
I have tested this recipe more times than I care to admit. I have pulled sad, soggy wings out of the oven. I have burned the tips and undercooked the flats. I have learned what works, and this version is the one I bring to every single game day gathering. It’s backed by trial and error, not guesswork.
- Quick & Easy: These wings come together in about 45 minutes total. The active prep time is maybe 10 minutes. You can make them during a timeout and not miss a play.
- Simple Ingredients: You probably have everything in your pantry right now. No trips to a specialty store for obscure spices or fancy oils.
- Perfect for Game Day: Whether you are hosting a crowd or just watching with your family, these wings are the kind of thing people stand around the kitchen island eating straight off the baking sheet.
- Crowd-Pleaser: I have served these to kids, health-conscious friends, and guys who swear by fried food. Everyone goes back for more.
- Unbelievably Delicious: The texture is the star. That crispy skin with juicy, tender meat underneath. It is comfort food that doesn’t weigh you down.
This isn’t just another baked wing recipe. The technique is what makes the difference. The baking powder and low-then-high heat method creates a crust that rivals frying. It is the kind of recipe that makes people say, “Wait, these are baked?” and then they just keep eating.
What Ingredients You Will Need
The beauty of these crispy healthy baked chicken wings for game day is how simple the ingredient list is. You don’t need a dozen exotic spices or a gallon of oil. Just a few pantry staples and good quality chicken.
- Chicken wings: About 2 pounds. I use whole wings and separate them myself, but you can buy them already separated into drums and flats. Pat them very dry with paper towels—this is non-negotiable for crispy skin.
- Baking powder: This is the secret. Not baking soda. Baking powder. It raises the pH of the skin and helps it dry out and crisp up in the oven. Use about 1 tablespoon per pound of wings.
- Cornstarch: A small amount (about 1 teaspoon) helps absorb any remaining moisture and adds an extra layer of crunch. You can skip it, but don’t.
- Salt: I use kosher salt. About 1 teaspoon. It draws out moisture and seasons the meat all the way through.
- Black pepper: Freshly ground, about 1/2 teaspoon. It adds a subtle warmth.
- Garlic powder: 1 teaspoon. Not garlic salt. Garlic powder distributes evenly and doesn’t burn as easily.
- Onion powder: 1/2 teaspoon. It rounds out the savory flavor.
- Paprika: 1 teaspoon. I use smoked paprika for a deeper flavor, but sweet works too.
- Cooking spray or oil: A light spray of avocado or canola oil on the baking sheet prevents sticking without adding much fat.
For the sauce, you can go classic buffalo, but I love a simple toss in a mix of hot sauce and a tiny bit of melted butter. It keeps things light but still gives you that game day wing experience.
Equipment Needed
You don’t need a deep fryer or an air fryer for these wings. Just basic kitchen tools you probably already own.
- Baking sheet: A rimmed baking sheet is best. The rim catches any drips. I prefer a half-sheet pan.
- Wire rack: This is important. A wire rack set inside the baking sheet lets air circulate all around the wings, so the bottom gets crispy too. If you don’t have one, you can flip the wings halfway through, but the rack makes a big difference.
- Paper towels: Lots of them. You need to dry the wings thoroughly.
- Large bowl: For tossing the wings with the seasoning mixture.
- Tongs: For flipping and moving the wings around.
- Instant-read thermometer (optional but helpful): Chicken wings are done when they reach 165°F, but I find they are best around 175-180°F for tender meat that pulls cleanly from the bone.
If you have an air fryer, you can definitely use it for these wings. But the oven method is just as good and lets you cook a bigger batch at once.
Preparation Method
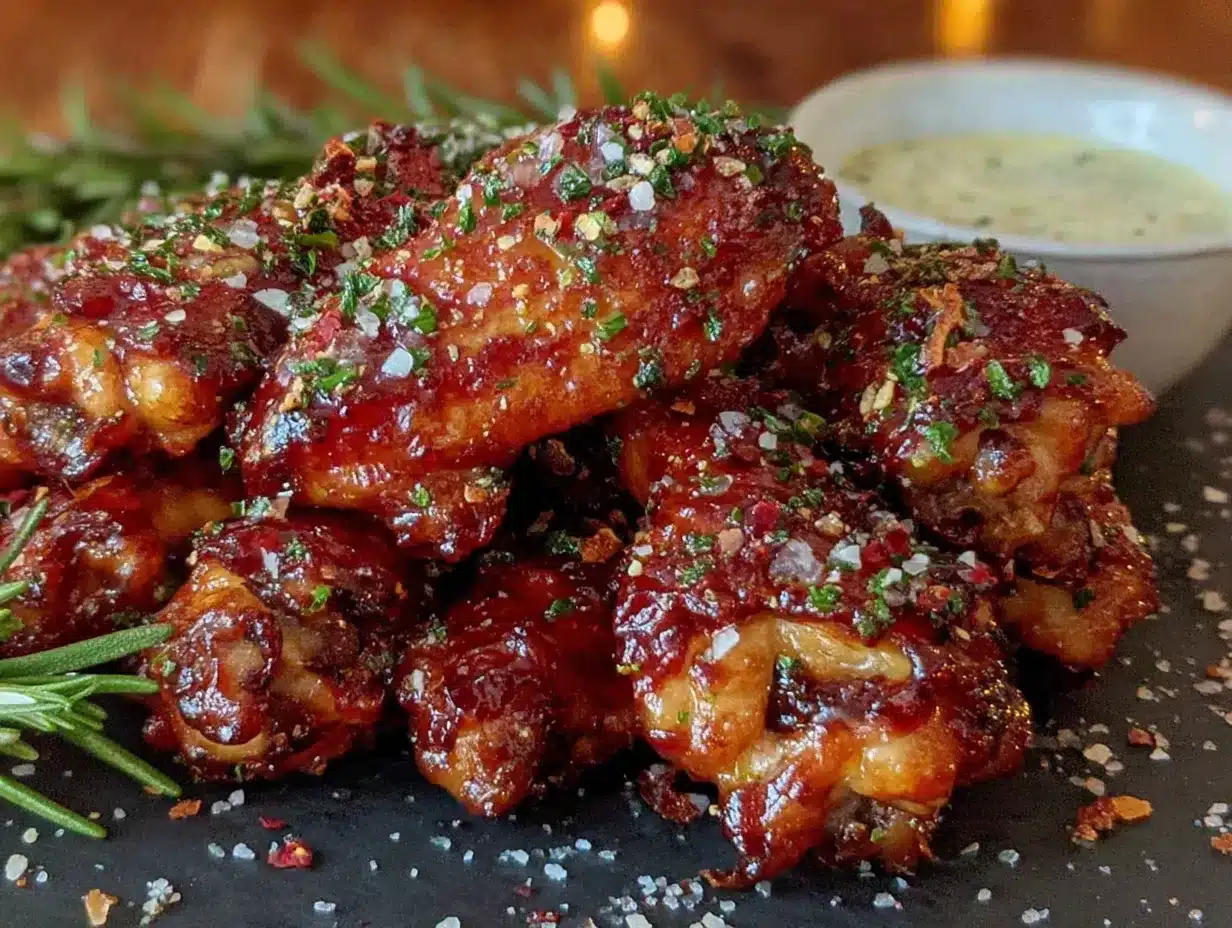
This is where the magic happens. Follow these steps closely, and you will have the crispiest baked wings of your life.
- Prep the chicken: Start by separating the wings if they are whole. Cut through the joint between the drumette and the flat, then cut through the joint between the flat and the tip. Discard the tips or save them for stock. Pat every single piece bone-dry with paper towels. This step is the most important one. Wet skin will not get crispy.
- Mix the dry rub: In a large bowl, whisk together the baking powder, cornstarch, salt, pepper, garlic powder, onion powder, and paprika. Make sure there are no lumps. The baking powder should be evenly distributed.
- Season the wings: Add the dried wings to the bowl. Use your hands to toss them until every piece is coated in the mixture. Don’t be shy. Really work it into the skin. You want it to look dusty and dry.
- Arrange on the rack: Place the wire rack over the baking sheet. Spray the rack lightly with cooking spray so the wings don’t stick. Arrange the wings in a single layer, skin side up. Leave a little space between each piece for air to circulate.
- Rest (optional but recommended): If you have time, let the wings sit in the fridge uncovered for 30 minutes to an hour. This dries out the skin even more. I do this when I am prepping ahead of a party, and it makes a noticeable difference.
- Preheat the oven: Set your oven to 250°F (120°C). Yes, low heat first. This slowly renders the fat under the skin without burning the outside.
- First bake: Place the baking sheet on the middle rack and bake for 20 minutes. The wings will look pale and unappetizing. That is fine.
- Crank the heat: Remove the wings from the oven. Increase the oven temperature to 425°F (220°C). Let it come to temperature while the wings sit on the counter.
- Second bake: Once the oven is hot, return the wings to the oven. Bake for another 25-30 minutes, flipping the wings halfway through. They should be deep golden brown and the skin should look crackly and tight.
- Check for doneness: If you are using a thermometer, the internal temperature should be at least 175°F. The skin should feel firm and crispy to the touch, not rubbery.
- Rest and sauce: Let the wings rest for 5 minutes. If you are saucing them, toss them in a bowl with your sauce right before serving. If you sauce them too early, the skin will soften.
One time I skipped the rest in the fridge and they were still good, but the skin wasn’t quite as shattery. So if you can, do it. Your patience will be rewarded.
Cooking Tips & Techniques
I have made a lot of mistakes with wings. Here is what I learned so you don’t have to repeat them.
Don’t skip drying the wings. I know it is tedious. I know you want to just toss them in the bowl. But moisture is the enemy of crispiness. Use a whole roll of paper towels if you have to. Get them as dry as a desert rock.
The baking powder matters. Make sure it is fresh. Old baking powder loses its potency and won’t help the skin crisp. Also, check the label. Some baking powders contain aluminum, which can leave a metallic aftertaste. I use an aluminum-free brand.
Don’t overcrowd the pan. If the wings are touching, they will steam instead of crisp. Use two baking sheets if you need to. It is worth the extra cleanup.
The low-then-high heat trick is non-negotiable. I tried skipping the low heat step once because I was in a hurry. The wings came out with burnt seasoning and raw-ish skin near the bone. The slow render at 250°F allows the fat to melt away gradually, so the high heat can do its job without burning.
Flip them. Halfway through the high-heat bake, flip each wing. This ensures even browning on both sides. If you are using a wire rack, you can skip this step, but I still do it for good measure.
Variations & Adaptations
These wings are a blank canvas. Once you have the crispy base down, you can take them in any direction.
- Classic Buffalo: Toss the baked wings in a mixture of 1/3 cup hot sauce (Frank’s RedHot is my go-to) and 2 tablespoons melted butter. It is the gold standard for a reason.
- Garlic Parmesan: After baking, toss with 2 tablespoons melted butter, 2 minced garlic cloves, and 1/4 cup grated Parmesan cheese. The cheese sticks to the crispy skin and it is insane.
- Honey Sriracha: Mix 3 tablespoons honey, 2 tablespoons sriracha, and a squeeze of lime. Toss the wings right before serving. The sweet heat combo is addictive.
- Dry Rub Only: Sometimes I skip the sauce entirely and just double the dry rub. Add a teaspoon of cayenne for heat or some dried herbs like thyme or oregano for a different flavor profile.
- Air Fryer Method: If you have an air fryer, cook the seasoned wings at 250°F for 15 minutes, then crank it to 400°F for another 10-12 minutes, shaking the basket halfway through. They come out just as crispy, maybe even a little faster.
I made a batch with a creamy butternut squash soup on the side once, and the contrast of the crispy wings with the smooth, velvety soup was a total accident that turned into a regular combo for me.
Serving & Storage Suggestions
These wings are best served hot and fresh, right out of the oven. But here is how to handle them if you are planning ahead.
Serving: Arrange the wings on a platter with celery and carrot sticks. Serve with your favorite dips. Ranch, blue cheese, or even a simple yogurt-based sauce work great. I like to set out a few different sauce options so people can customize their own wings at the table.
Storage: Leftover wings can be stored in an airtight container in the fridge for up to 3 days. The skin will soften in the fridge, so don’t expect them to be as crispy when you reheat them.
Reheating: The best way to bring back the crunch is to reheat them in the oven or air fryer. Pop them on a wire rack over a baking sheet at 400°F for about 5-7 minutes. The microwave will make them rubbery. Don’t do it.
Freezing: You can freeze baked wings for up to 2 months. Let them cool completely, then freeze them in a single layer on a baking sheet. Once frozen, transfer them to a freezer bag. Reheat from frozen at 400°F for about 15 minutes, flipping halfway through.
I have also served these alongside some easy slow cooker beer braised pulled pork sandwiches for a full game day spread. The wings disappear first every time.
Nutritional Information & Benefits
Compared to traditional fried wings, these are a lighter option without sacrificing the crunch. Here is an approximate breakdown per serving (about 4-5 wings, without sauce):
- Calories: 280-320
- Protein: 24g
- Fat: 18g (mostly from the skin)
- Carbohydrates: 2g
- Fiber: 0g
- Sugar: 0g
Chicken wings are a good source of protein and contain essential nutrients like selenium and B vitamins. Baking instead of frying significantly reduces the fat and calorie content. You are still getting that indulgent wing experience, but without the heavy oil absorption.
If you are watching your sodium, you can reduce the salt in the dry rub and use a low-sodium hot sauce. The baking powder does add some sodium, so keep that in mind if you are on a strict low-sodium diet.
These wings are naturally gluten-free as long as you check your baking powder label. Most brands are, but it is worth verifying.
Conclusion
These crispy healthy baked chicken wings for game day have become my go-to for every gathering. They deliver the crunch you crave without the grease, and they are so simple to make that you will wonder why you ever bothered with frying. The secret is in the technique, and once you master it, you can apply it to all kinds of recipes.
I love that I can make a big batch, set them out, and not worry about anyone feeling heavy or sluggish after eating. They are the kind of food that brings people together around the table, reaching for just one more. And honestly, that is what game day is all about.
Try these wings for your next game day and let me know how they turn out. Did you go with buffalo sauce or something totally different? I would love to hear about your variations in the comments. And if you are looking for more game day inspiration, check out these savory mini Philly cheesesteak sliders or this easy loaded bacon ranch football dip for a full spread that will have everyone talking.
Frequently Asked Questions
Can I use frozen chicken wings for this recipe?
Yes, but you need to thaw them completely first. Pat them extra dry because frozen wings release a lot of moisture as they thaw. I recommend thawing them in the fridge overnight for best results.
Why did my wings come out soggy?
This usually happens for one of two reasons. Either the wings were not dried thoroughly before seasoning, or the baking sheet was overcrowded. Make sure to pat them bone-dry and leave space between each wing on the rack.
Can I make these wings ahead of time?
You can prep them up to the point of the first bake. Season the wings, arrange them on the rack, and keep them in the fridge uncovered for up to 8 hours. Then just follow the baking instructions when you are ready.
Is baking powder the same as baking soda?
No. They are different. Baking soda will leave a bitter, metallic taste on the wings. Baking powder is what you need for that crispy skin. Do not substitute one for the other.
Can I use this method for chicken thighs or drumsticks?
Absolutely. The same low-then-high heat technique works for any bone-in, skin-on chicken pieces. Just adjust the cooking time based on the size of the pieces. Thighs and drumsticks may need a few extra minutes in the high-heat stage.
Pin This Recipe!


Crispy Healthy Baked Chicken Wings: Best Game Day Recipe
- Total Time: 55 minutes
- Yield: 4 servings 1x
Description
These baked chicken wings come out with shatter-crisp skin without deep frying. A simple baking powder trick and low-then-high heat method create the perfect game day appetizer that everyone loves.
Ingredients
- 2 pounds chicken wings, separated into drums and flats
- 2 tablespoons baking powder
- 1 teaspoon cornstarch
- 1 teaspoon kosher salt
- 1/2 teaspoon freshly ground black pepper
- 1 teaspoon garlic powder
- 1/2 teaspoon onion powder
- 1 teaspoon smoked paprika (or sweet paprika)
- Cooking spray or oil (avocado or canola)
Instructions
- Separate chicken wings if whole: cut through joints between drumette, flat, and tip. Discard tips or save for stock. Pat every piece bone-dry with paper towels.
- In a large bowl, whisk together baking powder, cornstarch, salt, pepper, garlic powder, onion powder, and paprika until no lumps remain.
- Add dried wings to the bowl and toss with your hands until every piece is evenly coated. The wings should look dusty and dry.
- Place a wire rack over a rimmed baking sheet. Spray the rack lightly with cooking spray. Arrange wings in a single layer, skin side up, leaving space between each piece.
- Optional: Refrigerate wings uncovered for 30 minutes to 1 hour to further dry the skin.
- Preheat oven to 250°F (120°C).
- Bake wings on the middle rack for 20 minutes. They will look pale.
- Remove wings from oven. Increase oven temperature to 425°F (220°C) and let it come to temperature.
- Return wings to oven and bake for 25-30 minutes, flipping halfway through, until deep golden brown and skin is crackly.
- Check internal temperature: at least 175°F (79°C) for tender meat. Let rest 5 minutes before serving. If saucing, toss right before serving to keep skin crispy.
Notes
Pat wings bone-dry for crispiest results. Use fresh, aluminum-free baking powder. Do not overcrowd the pan. The low-then-high heat method is essential. For sauced wings, toss just before serving to maintain crispiness.
- Prep Time: 10 minutes
- Cook Time: 45 minutes
- Category: Appetizer
- Cuisine: American
Nutrition
- Serving Size: 4-5 wings
- Calories: 300
- Sodium: 600
- Fat: 18
- Saturated Fat: 5
- Carbohydrates: 2
- Protein: 24
Keywords: baked chicken wings, crispy chicken wings, healthy chicken wings, game day wings, baked wings recipe