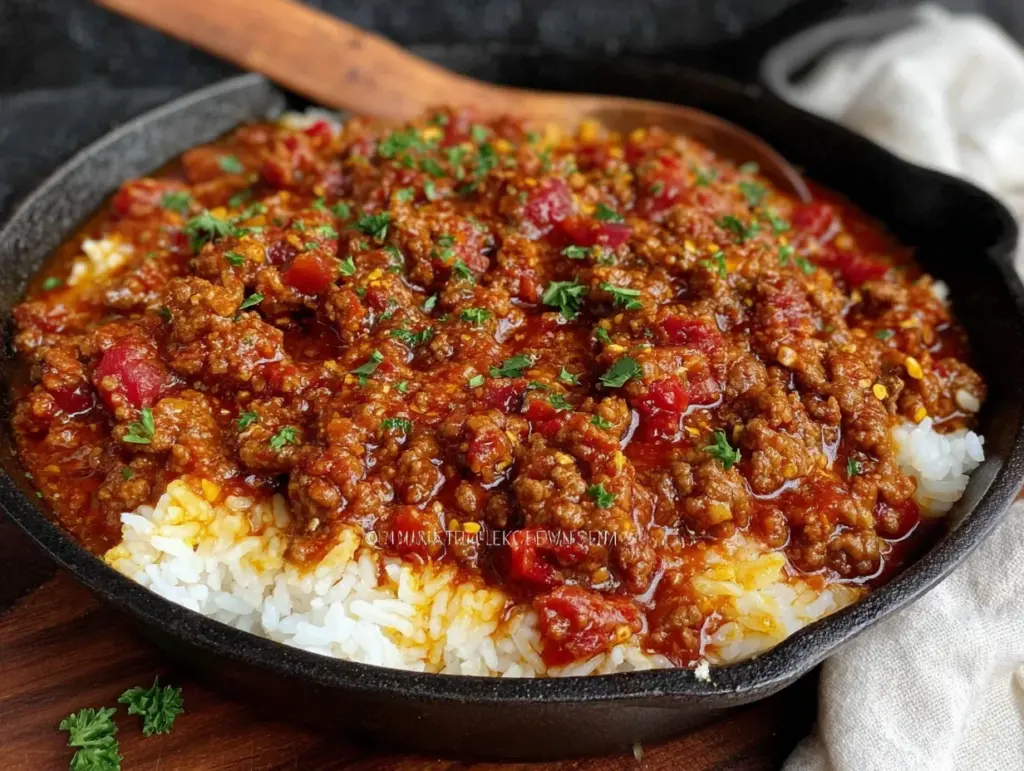
Dinner was forty-five minutes away and I had a pound of ground beef thawed, a half-empty bag of shredded cheddar, and a hungry family circling the kitchen like sharks. The fridge looked sad—some wilting spinach, half an onion, and not much else. I needed something fast, filling, and honestly, I needed it to not create a mountain of dishes. That’s when this Easy Cheesy One-Pan Ground Beef Rice was born, right there in the middle of a Tuesday night panic.
I grabbed the biggest skillet I own (the one that’s seen better days but still cooks like a dream), tossed in the beef, and just started adding things. Rice, broth, a can of diced tomatoes I’d forgotten about, and a handful of spices I was pretty sure would work together. The whole thing came together in about thirty minutes, and when I stirred in that last handful of cheddar, something magical happened. The silence at the table told me everything—this was a keeper.
Honestly, I’ve made this recipe at least twice a month since that night. It’s become my go-to when I don’t have a plan, when the grocery budget is tapped out, or when I just want something that tastes like I tried harder than I actually did. There’s something about a one-pan meal that feels like cheating, but in the best way possible. No complicated steps, no special ingredients, just real food that works.
Trust me when I say this is the kind of recipe you’ll make so often you won’t even need to look at the instructions anymore. It’s that simple, and that good.
Why You’ll Love This Recipe
I’ve tested this Easy Cheesy One-Pan Ground Beef Rice more times than I can count, tweaking the liquid ratio, the cheese type, and the cooking time until it was absolutely perfect. Here’s why it’s become a staple in my kitchen:
- Quick & Easy: From start to finish, this dish is on the table in about 30 minutes. Perfect for those nights when you’re staring at the clock and wondering how dinner will happen.
- Simple Ingredients: No fancy grocery store trips needed. Ground beef, rice, cheese, and a few pantry staples—you probably have everything right now.
- Perfect for Busy Weeknights: This is the definition of a weeknight hero. One pan, minimal cleanup, and maximum flavor.
- Crowd-Pleaser: Kids devour it. Adults ask for seconds. It’s one of those rare meals that makes everyone happy without any complaints.
- Unbelievably Delicious: The combination of savory beef, tender rice, and melty cheese is pure comfort food magic. It’s the kind of meal that makes you close your eyes after the first bite.
What makes this version different from all the other ground beef and rice recipes out there? It’s the ratio, honestly. I’ve nailed the perfect balance of liquid to rice so you get fluffy, perfectly cooked grains every single time—no mushy rice, no crunchy bites. Plus, I add a little Worcestershire sauce and smoked paprika that gives it a depth of flavor you wouldn’t expect from such simple ingredients.
This isn’t just another dinner recipe. It’s the one you’ll text your friends about. The one you’ll make for new parents. The one that saves you on a hundred different busy nights. It’s comfort food, simplified.
What Ingredients You Will Need
This recipe uses simple, wholesome ingredients that work together to create something truly satisfying. Most of these are pantry staples you probably already have on hand, which makes this dish perfect for those “I have no idea what to make” nights.
- Ground Beef (1 lb): I use 80/20 ground beef for the best flavor—the fat adds richness that leaner beef just can’t match. If you prefer something lighter, ground turkey or chicken works great too.
- Long-Grain White Rice (1 cup): This is my go-to for this recipe. It cooks up fluffy and separate, and it absorbs the broth beautifully. Basmati or jasmine rice work well too, just adjust the cooking time slightly. I don’t recommend short-grain rice here—it can get too sticky.
- Beef Broth (2 cups): Use low-sodium broth so you can control the salt level yourself. I’ve tried this with chicken broth in a pinch, and it works, but beef broth gives it that deeper, meatier flavor.
- Diced Tomatoes (14.5 oz can): I prefer fire-roasted diced tomatoes for a little smoky sweetness, but regular ones work perfectly. Don’t drain them—the liquid is part of what cooks the rice.
- Shredded Cheddar Cheese (1 ½ cups): Sharp cheddar is my favorite here because it melts beautifully and has a strong flavor that stands up to the beef. Pre-shredded cheese is fine, but freshly shredded melts even better (it has less anti-caking coating).
- Yellow Onion (1 medium, diced): Adds a savory base flavor. You could use a white onion or even shallots if that’s what you have.
- Garlic (3 cloves, minced): Fresh garlic makes a big difference here. I wouldn’t recommend the jarred stuff for this recipe—the fresh flavor really shines through.
- Worcestershire Sauce (1 tablespoon): This is my secret ingredient. It adds that umami depth that makes the whole dish taste like it simmered all day.
- Smoked Paprika (1 teaspoon): Adds a subtle smokiness that pairs perfectly with the beef and cheese. Regular paprika works too, but smoked is worth seeking out.
- Dried Oregano (½ teaspoon): A little Italian-inspired flavor that rounds everything out.
- Salt and Black Pepper (to taste): I start with about ½ teaspoon of salt and ¼ teaspoon of pepper, then adjust at the end.
- Olive Oil (1 tablespoon): For browning the beef and sautéing the onions.
- Optional Garnishes: Fresh parsley or green onions for a pop of color and freshness at the end.
I’ve made this recipe so many times that I’ve tested every possible substitution. For a gluten-free version, just double-check your Worcestershire sauce (some brands contain gluten). For a dairy-free option, use your favorite plant-based cheese shreds—they won’t melt quite the same, but the flavor is still great.
Equipment Needed
One of the best things about this recipe is how little equipment you need. Here’s what you’ll need:
- Large Skillet or Dutch Oven (12-inch): This is your main tool. I use a heavy-bottomed skillet with a tight-fitting lid. A Dutch oven works beautifully too. The key is having enough surface area to brown the beef properly and enough depth to hold all the liquid and rice.
- Wooden Spoon or Spatula: For breaking up the ground beef as it cooks. A flat-edged wooden spoon works best for scraping up those flavorful browned bits.
- Chef’s Knife and Cutting Board: For dicing the onion and mincing the garlic. Nothing fancy needed here.
- Measuring Cups and Spoons: Accurate measurements matter for the rice-to-liquid ratio, so don’t eyeball it.
- Box Grater (optional): If you’re shredding your own cheese, which I highly recommend for the best melt.
I’ve made this in a non-stick skillet, a cast-iron pan, and even a stainless steel pot. They all work, but cast iron gives you the best browning on the beef. Just make sure whatever you use has a lid that fits snugly—that steam is what cooks the rice perfectly.
Preparation Method
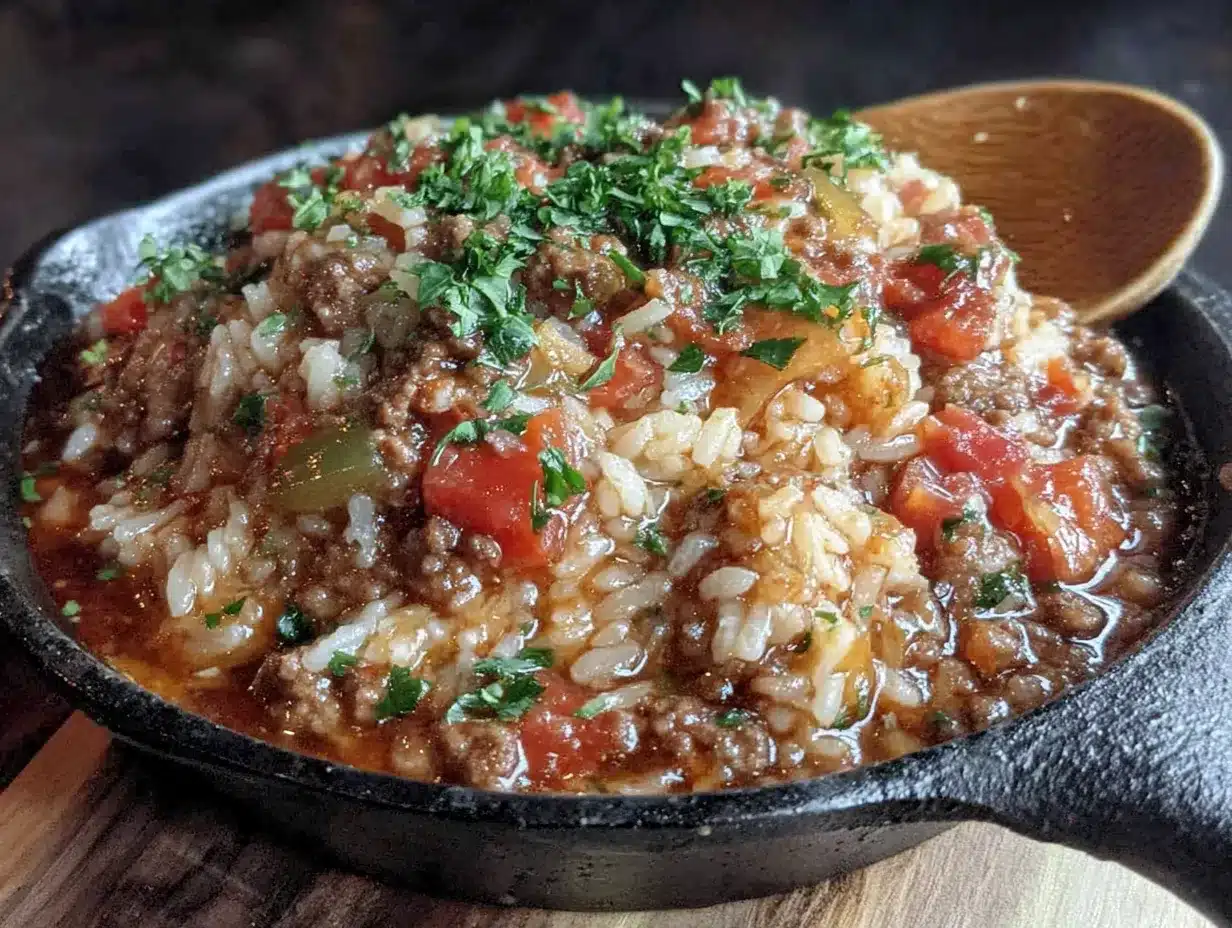
Let me walk you through this step by step. I’ve made this recipe dozens of times, so I’ll share all the little tricks I’ve learned along the way.
- Brown the Ground Beef: Heat 1 tablespoon of olive oil in your large skillet over medium-high heat. Add the ground beef and break it apart with your wooden spoon. Let it cook undisturbed for about 3-4 minutes to get a nice brown crust, then start breaking it into smaller pieces. Cook until no pink remains, about 6-8 minutes total. Don’t drain all the fat—leave about a tablespoon in the pan for flavor.
- Sauté the Aromatics: Reduce the heat to medium. Add the diced onion to the pan with the beef and cook for 3-4 minutes until it starts to soften and turn translucent. Add the minced garlic and cook for another 30 seconds until fragrant—you’ll smell it immediately. Stir constantly so the garlic doesn’t burn.
- Add the Seasonings: Sprinkle the smoked paprika, dried oregano, salt, and pepper over the beef mixture. Stir everything together and let it cook for about 30 seconds. This toasts the spices and wakes up their flavors. Add the Worcestershire sauce and stir to combine.
- Add the Rice and Liquids: Pour in the 1 cup of long-grain white rice and stir it into the beef mixture. Let it cook for about a minute, stirring constantly. This toasts the rice slightly and helps it stay separate as it cooks. Pour in the 2 cups of beef broth and the can of diced tomatoes (undrained). Stir everything together, scraping up any browned bits from the bottom of the pan.
- Bring to a Boil, Then Simmer: Increase the heat to high and bring the mixture to a rolling boil. Once it’s boiling, reduce the heat to low, cover the skillet with a tight-fitting lid, and let it simmer for 18-20 minutes. Don’t lift the lid during this time—the steam is what cooks the rice perfectly.
- Check the Rice: After 18 minutes, remove the lid carefully (steam will escape). The rice should be tender and most of the liquid should be absorbed. If the rice is still a little firm, add ¼ cup more broth or water, cover, and cook for another 3-5 minutes. Every stovetop is different, so trust your eyes here.
- Add the Cheese: Once the rice is tender, remove the pan from the heat. Sprinkle the shredded cheddar cheese evenly over the top. Cover the pan again and let it sit for 2-3 minutes until the cheese is completely melted and gooey. This is the hardest part—waiting!
- Finish and Serve: Give everything a gentle stir to incorporate the melted cheese throughout the rice. Taste and adjust seasoning if needed. Garnish with fresh parsley or sliced green onions if you’re feeling fancy. Serve hot and watch it disappear.
A few things I’ve learned the hard way: Don’t rush the browning step. That deep brown color on the beef adds so much flavor. Also, if your lid isn’t super tight, you might need a splash more liquid. I’ve had times where the rice was still crunchy because too much steam escaped—now I always check my seal before walking away.
Cooking Tips & Techniques
After making this Easy Cheesy One-Pan Ground Beef Rice more times than I can count, I’ve picked up some tricks that make a real difference.
Don’t Over-Stir the Rice. Once you add the rice and liquid, resist the urge to stir it constantly. Stirring releases starch and can make the rice gummy. Just one good stir after adding everything, then let it do its thing under the lid.
Toast the Rice First. This is a game-changer I learned from making pilafs. Letting the rice cook in the pan with the beef and spices for about a minute before adding the liquid gives it a nutty flavor and helps each grain stay separate. It’s a small step that makes a big difference.
Use the Right Pan Size. A 12-inch skillet is perfect. If your pan is too small, the rice won’t cook evenly. Too big, and the liquid might evaporate too quickly. I learned this the hard way when I used a tiny pan and ended up with crunchy rice and a burnt bottom.
Let It Rest. After you add the cheese and turn off the heat, let the pan sit covered for those 2-3 minutes. This resting time allows the rice to absorb any remaining liquid and the cheese to melt into every crevice. It’s worth the wait, I promise.
Watch Your Heat. Keep the heat on low during the simmering phase. Medium-low is okay if your stovetop runs cool, but anything higher and you’ll risk burning the bottom while the rice is still undercooked. I ruined my first batch this way—now I’m religious about that low simmer.
Variations & Adaptations
This recipe is incredibly flexible. Here are some ways I’ve changed it up over the years:
- Spicy Southwest Version: Add 1 teaspoon of chili powder, ½ teaspoon of cumin, and a can of drained black beans along with the tomatoes. Top with pepper jack cheese instead of cheddar. I make this version when I’m craving something with a little kick.
- Vegetable-Packed Version: Sauté a diced bell pepper and a cup of frozen corn along with the onion. Stir in a handful of fresh spinach right before adding the cheese. It’s an easy way to sneak in extra veggies without anyone really noticing.
- Mexican Street Corn Style: Stir in ½ cup of frozen corn and top with crumbled cotija cheese and a drizzle of crema. A squeeze of lime at the end brightens everything up.
- Low-Carb Adaptation: Swap the rice for cauliflower rice (about 3 cups frozen). Cook the cauliflower rice separately or stir it in at the end—just cook for 5-7 minutes until tender. The cheese still melts beautifully over everything.
- Italian-Inspired Version: Use Italian seasoning instead of smoked paprika, add a can of drained cannellini beans, and top with mozzarella and Parmesan. Serve with crusty bread for dipping.
I once made a Greek-inspired version with ground lamb, oregano, lemon zest, and feta cheese on top. It was incredible, and now it’s my go-to when I want to feel like I’m on vacation. Don’t be afraid to experiment—this recipe is forgiving.
Serving & Storage Suggestions
This dish is best served hot, straight from the pan, with the cheese still stretchy and melted. I like to serve it in shallow bowls with a simple side salad dressed with lemon vinaigrette to cut through the richness. If you’re feeding a crowd, it pairs beautifully with roasted vegetables or a crisp green salad.
For leftovers, let the rice cool completely before transferring to an airtight container. It will keep in the refrigerator for up to 4 days. The flavors actually get better overnight as everything melds together—I always look forward to lunch the next day.
To reheat, add a splash of broth or water to the pan and warm over medium-low heat, stirring occasionally. You can also microwave individual portions for 1-2 minutes, covered with a damp paper towel to add moisture back.
This recipe freezes beautifully. Portion it into freezer-safe containers or zip-top bags, and it will keep for up to 3 months. Thaw overnight in the refrigerator and reheat as directed. I often double the batch and freeze half for those nights when I just can’t cook.
One thing I’ve noticed—the rice will absorb more liquid as it sits, so leftovers will be a bit thicker. That’s normal, and honestly, I kind of love it that way. It’s like a rice casserole the next day, which is its own kind of comfort.
Nutritional Information & Benefits
Here’s an estimated breakdown per serving (based on 6 servings):
- Calories: 485
- Protein: 28g
- Carbohydrates: 38g
- Fat: 24g
- Fiber: 3g
- Iron: 4mg
- Calcium: 280mg
This dish provides a solid balance of protein from the ground beef, carbohydrates from the rice for sustained energy, and calcium from the cheese for bone health. The tomatoes add lycopene, an antioxidant linked to heart health, and the onions and garlic provide prebiotic fiber that supports gut health.
If you’re watching your sodium, use low-sodium broth and go easy on the added salt. For a lower-fat version, use lean ground beef (90/10) and reduce the cheese to 1 cup. The flavor will still be fantastic, just a little lighter.
I love that this meal feels indulgent but actually has a pretty decent nutritional profile. It’s the kind of dinner that satisfies without making you feel heavy, and that’s a win in my book.
Conclusion
This Easy Cheesy One-Pan Ground Beef Rice has saved my sanity on more weeknights than I can count. It’s the recipe I turn to when I’m tired, when I’m busy, and when I just want something that tastes like a hug in a bowl. The best part? It’s completely customizable to whatever you have in your fridge and whatever your family loves.
I’d love to hear how this recipe turns out for you. Did you add your own twist? Did your kids ask for seconds? Drop a comment below and let me know—I read every single one and I love seeing your creations. And if you’re looking for more easy weeknight dinners, you might also enjoy this Easy One-Pan Cheeseburger Pasta or this Classic Meatloaf with Brown Sugar Glaze for another comforting family meal.
Happy cooking, friends! May your pans be easy to clean and your bellies be full.
Frequently Asked Questions
Can I use brown rice instead of white rice?
Yes, but you’ll need to adjust the cooking time and liquid. Brown rice typically needs about 40-45 minutes to cook and requires about ½ cup more liquid. I’d recommend using parboiled or quick-cooking brown rice for the best results in this one-pan method.
Can I make this recipe in a slow cooker?
I wouldn’t recommend it for this particular recipe. The rice-to-liquid ratio is tricky in a slow cooker, and you’ll end up with mushy rice. Stick to the stovetop method for the best texture. If you’re looking for a slow cooker option, try this Easy Crockpot Beef and Barley Stew instead.
How do I keep the rice from getting mushy?
Don’t lift the lid while the rice is simmering, and make sure your heat is on low, not medium. Also, use long-grain rice instead of short-grain—it holds its shape better. If you’re still having trouble, try rinsing the rice in a fine-mesh strainer before adding it to remove excess starch.
Can I use ground turkey or chicken instead of beef?
Absolutely! Ground turkey or chicken works great, though you might want to add an extra tablespoon of olive oil since poultry is leaner. The cooking time stays the same. I’ve made it with ground turkey many times and it’s just as delicious.
What can I serve with this dish?
This is a complete meal on its own, but it pairs beautifully with a simple green salad, roasted broccoli, or steamed green beans. For a heartier meal, serve it with warm tortillas or crusty bread for soaking up every last bit of cheesy goodness.
Pin This Recipe!

Easy Cheesy One-Pan Ground Beef Rice
- Total Time: 35 minutes
- Yield: 6 servings 1x
Description
A quick and delicious one-pan meal featuring ground beef, rice, and melted cheddar cheese. Perfect for busy weeknights, this recipe comes together in about 30 minutes with minimal cleanup and simple pantry ingredients.
Ingredients
- 1 lb ground beef (80/20 recommended)
- 1 cup long-grain white rice
- 2 cups low-sodium beef broth
- 1 (14.5 oz) can diced tomatoes (fire-roasted preferred, undrained)
- 1 ½ cups shredded sharp cheddar cheese
- 1 medium yellow onion, diced
- 3 cloves garlic, minced
- 1 tablespoon Worcestershire sauce
- 1 teaspoon smoked paprika
- ½ teaspoon dried oregano
- ½ teaspoon salt (or to taste)
- ¼ teaspoon black pepper (or to taste)
- 1 tablespoon olive oil
- Optional: fresh parsley or green onions for garnish
Instructions
- Heat 1 tablespoon of olive oil in a large skillet (12-inch) over medium-high heat. Add the ground beef and break it apart with a wooden spoon. Let it cook undisturbed for 3-4 minutes to develop a brown crust, then break into smaller pieces. Cook until no pink remains, about 6-8 minutes total. Leave about 1 tablespoon of fat in the pan.
- Reduce heat to medium. Add the diced onion and cook for 3-4 minutes until softened and translucent. Add the minced garlic and cook for 30 seconds until fragrant, stirring constantly.
- Sprinkle the smoked paprika, dried oregano, salt, and pepper over the beef mixture. Stir and cook for 30 seconds to toast the spices. Add the Worcestershire sauce and stir to combine.
- Add the 1 cup of long-grain white rice and stir into the beef mixture. Cook for about 1 minute, stirring constantly, to toast the rice slightly.
- Pour in the 2 cups of beef broth and the can of diced tomatoes (undrained). Stir everything together, scraping up any browned bits from the bottom of the pan.
- Increase heat to high and bring to a rolling boil. Reduce heat to low, cover with a tight-fitting lid, and simmer for 18-20 minutes. Do not lift the lid during this time.
- After 18 minutes, remove the lid carefully. The rice should be tender and most liquid absorbed. If rice is still firm, add ¼ cup more broth or water, cover, and cook for another 3-5 minutes.
- Remove the pan from heat. Sprinkle the shredded cheddar cheese evenly over the top. Cover and let sit for 2-3 minutes until the cheese is completely melted.
- Gently stir to incorporate the melted cheese. Taste and adjust seasoning if needed. Garnish with fresh parsley or sliced green onions if desired. Serve hot.
Notes
Don’t lift the lid while the rice is simmering to ensure perfect texture. For best results, use a heavy-bottomed skillet with a snug lid. Leftovers can be stored in an airtight container in the refrigerator for up to 4 days or frozen for up to 3 months. Reheat with a splash of broth or water.
- Prep Time: 10 minutes
- Cook Time: 25 minutes
- Category: Main Course
- Cuisine: American
Nutrition
- Serving Size: 1 serving (about 1.5
- Calories: 485
- Sugar: 4
- Sodium: 680
- Fat: 24
- Saturated Fat: 10
- Carbohydrates: 38
- Fiber: 3
- Protein: 28
Keywords: one-pan dinner, ground beef recipe, cheesy rice, quick weeknight meal, easy dinner, comfort food, 30-minute meal