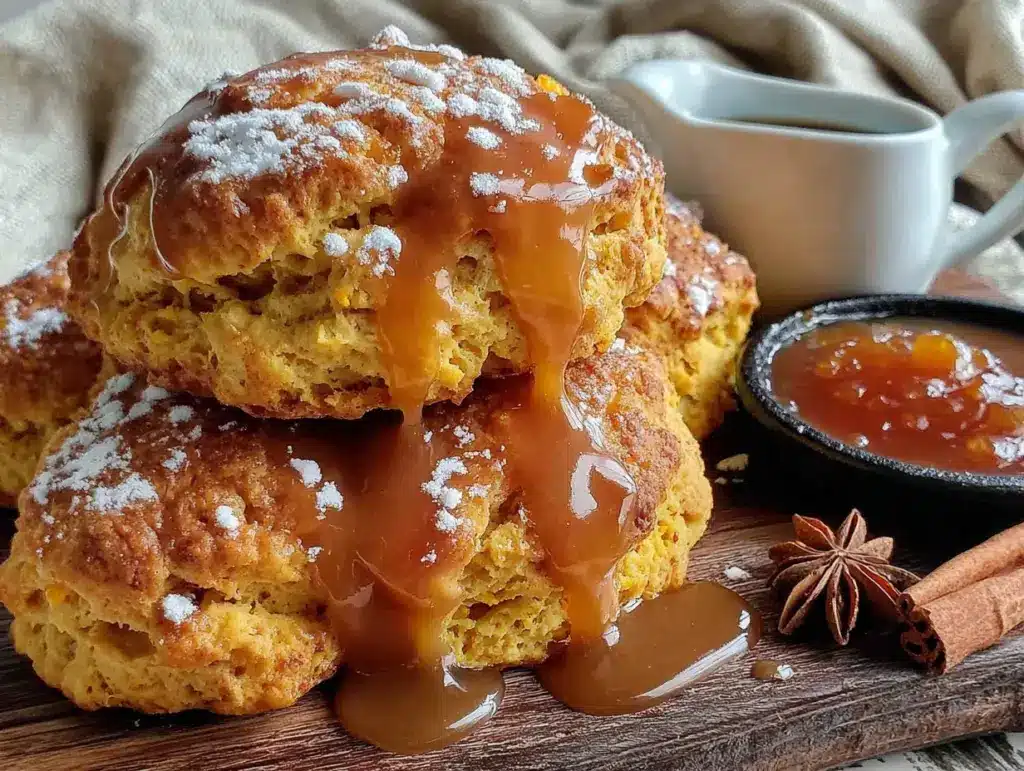
The first weekend of November, when the chill in the air finally settles into your bones and the last of the maple leaves have fallen, is when I start craving these. Not the overly sweet, dry bakery versions that crumble into dust the second you look at them. I wanted a pumpkin scone that was soft, almost pillowy, with a tender crumb that held together just long enough to be dunked in coffee. And a maple glaze that wasn’t just a thin, sad drizzle—something thick, creamy, and tasting unmistakably of real maple syrup, not artificial flavoring. After a few failed attempts (some were too dense, others too cake-like), this recipe finally hit that sweet spot. It’s the kind of scone that feels special enough for a holiday brunch but simple enough to throw together on a lazy Saturday morning when you want the house to smell like fall.
I remember the morning it all clicked. I was standing in my kitchen, the window fogged up from a pot of boiling water, and I had a half-can of pumpkin puree staring at me from the counter. I was tired of complicated recipes that required a million steps. I wanted something that felt like a hug. So, I grabbed my flour, some cold butter, and a bit of heavy cream, and I just started working. The dough came together in my hands, soft and forgiving, and when I pulled those golden, craggy triangles out of the oven, I knew I had something. The maple glaze, a simple mix of powdered sugar, a splash of cream, and a generous glug of pure maple syrup, melted into the warm scones, creating a crust that was slightly crunchy on the outside and meltingly soft on the inside. Honestly, it was the best bite of fall I had all season.
This recipe is built on trust. Trust that you don’t need a pastry blender or a fancy stand mixer to make something beautiful. Trust that using cold ingredients is the secret to that fluffy texture. And trust that a simple, honest glaze is all a good scone really needs. So, whether you’re making these for a crowd or just for yourself with a big mug of coffee, I think you’ll find they become a quick favorite. They certainly have in my house.
Why You’ll Love These Fluffy Pumpkin Scones with Maple Glaze
These aren’t your average scones. I’ve tested this recipe more times than I care to count, tweaking the butter temperature and the liquid ratio until I got that perfect, bakery-quality texture at home. Here is why I think you will absolutely love them.
- Unbelievably Fluffy: The secret is a combination of very cold butter and a gentle hand. We aren’t overworking the dough here. This creates layers of steam in the oven that puff the scones up into tender, flaky perfection. They are light, not dense or hockey-puck-like.
- Perfectly Spiced, Not Overpowering: We use a classic blend of cinnamon, ginger, nutmeg, and cloves. It compliments the earthy sweetness of the pumpkin without tasting like a candle. It’s a warm, cozy flavor that feels just right.
- Real Maple Glaze: This is non-negotiable for me. The glaze uses real maple syrup, which gives it a deep, complex sweetness that you just can’t get from artificial extracts. It sets up into a beautiful, crackly shell that contrasts perfectly with the soft scone.
- Simple, Pantry-Friendly Ingredients: You don’t need to hunt down obscure ingredients. Chances are, you have most of these in your kitchen right now. It’s a straightforward recipe that delivers impressive results without a complicated shopping list.
- Freezes Like a Dream: You can make the scones (unbaked or baked) and freeze them for later. It’s a lifesaver for holiday mornings or when you want a quick treat without the effort. Just pop them in the oven and you’re good to go.
If you are a fan of other fall treats, you will definitely love how these scones pair with a warm mug of spiked apple cider margarita for a cozy weekend brunch. The flavors just melt together.
What Ingredients You Will Need
This recipe relies on a few key ingredients to get that perfect texture and flavor. Let’s break down what you’ll need and why each one matters. You will be surprised how simple it all is.
- All-Purpose Flour: This is the base of our scones. It provides the structure. I prefer unbleached all-purpose flour for its slightly better protein content, which gives a more tender crumb. Make sure to spoon it into your measuring cup and level it off, don’t scoop it directly, or you might end up with too much flour and dry scones.
- Granulated Sugar: We use a modest amount of sugar in the scone dough itself. It adds just a hint of sweetness without making them taste like cake. The real sweetness comes from the glaze.
- Baking Powder: This is our primary leavening agent. Make sure your baking powder is fresh (within 6 months of opening) for the best rise. If it doesn’t fizz when you drop it in hot water, it’s time to buy a new can.
- Pumpkin Pie Spice: You can use a store-bought blend, or make your own by mixing cinnamon, ginger, nutmeg, allspice, and cloves. I often make my own because I like to control the amount of ginger. It’s really easy and tastes so much fresher.
- Salt: A pinch of salt is crucial. It doesn’t make the scones salty; it enhances all the other flavors and balances the sweetness. I use fine sea salt for baking.
- Cold Unsalted Butter: This is the most important ingredient for flaky scones. The butter must be very cold. I often cut it into small cubes and put it in the freezer for 15 minutes before I start. As the scones bake, the cold butter melts, creating steam pockets that make the scones light and tender. If the butter is warm, it will just get absorbed into the flour and you’ll have dense, tough scones.
- Pumpkin Purée: Be sure to use 100% pure pumpkin purée, not pumpkin pie filling. The pie filling has added sugar and spices, which will throw off the balance of the recipe. I like using Libby’s brand, but any store brand works fine. Just make sure to blot it with a paper towel to remove some of the excess moisture. This is a little trick that prevents soggy scones.
- Heavy Cream: This adds richness and tenderness to the dough. The high fat content in heavy cream gives scones a much better texture than milk. It’s a small change that makes a big difference. You can use whole milk in a pinch, but the scones will be slightly less tender.
- Vanilla Extract: A splash of pure vanilla extract rounds out the flavors and adds a warm, aromatic note. Avoid imitation vanilla if you can; the real stuff is worth the extra cost.
- For the Maple Glaze:
- Powdered Sugar: The base of the glaze. Sift it to avoid lumps.
- Pure Maple Syrup: This is the star of the glaze. Do not use pancake syrup or imitation maple flavoring. It will taste artificial. Grade A dark amber maple syrup has a stronger maple flavor that works beautifully here.
- Heavy Cream or Milk: This thins the glaze to the perfect drizzling consistency. Start with a little and add more as needed.
Equipment Needed
You don’t need a lot of fancy equipment to make these scones, which is part of their charm. Here is what I use to make the process smooth and easy.
- Large Mixing Bowl: For combining the dry ingredients and cutting in the butter.
- Pastry Cutter or Two Forks: A pastry cutter makes quick work of cutting the cold butter into the flour. If you don’t have one, you can use two forks or even your fingertips, working quickly so the butter stays cold. A food processor also works, but be careful not to over-process.
- Baking Sheet: A standard half-sheet pan lined with parchment paper. Parchment paper is essential for easy cleanup and preventing the bottoms from burning.
- Parchment Paper: I use this for lining the baking sheet and for shaping the dough. It makes transferring the scones so much easier.
- Sharp Knife or Bench Scraper: For cutting the dough into triangles. A bench scraper is great for this because it cuts cleanly through the dough without dragging.
- Wire Rack: For cooling the scones. You want air to circulate around them so they don’t get soggy on the bottom.
- Whisk: For mixing the glaze until smooth.
If you are looking for a quick, savory option to balance out all this sweetness, you might want to try these easy sheet pan nachos for a game day snack later in the week. They are the perfect contrast!
Preparation Method
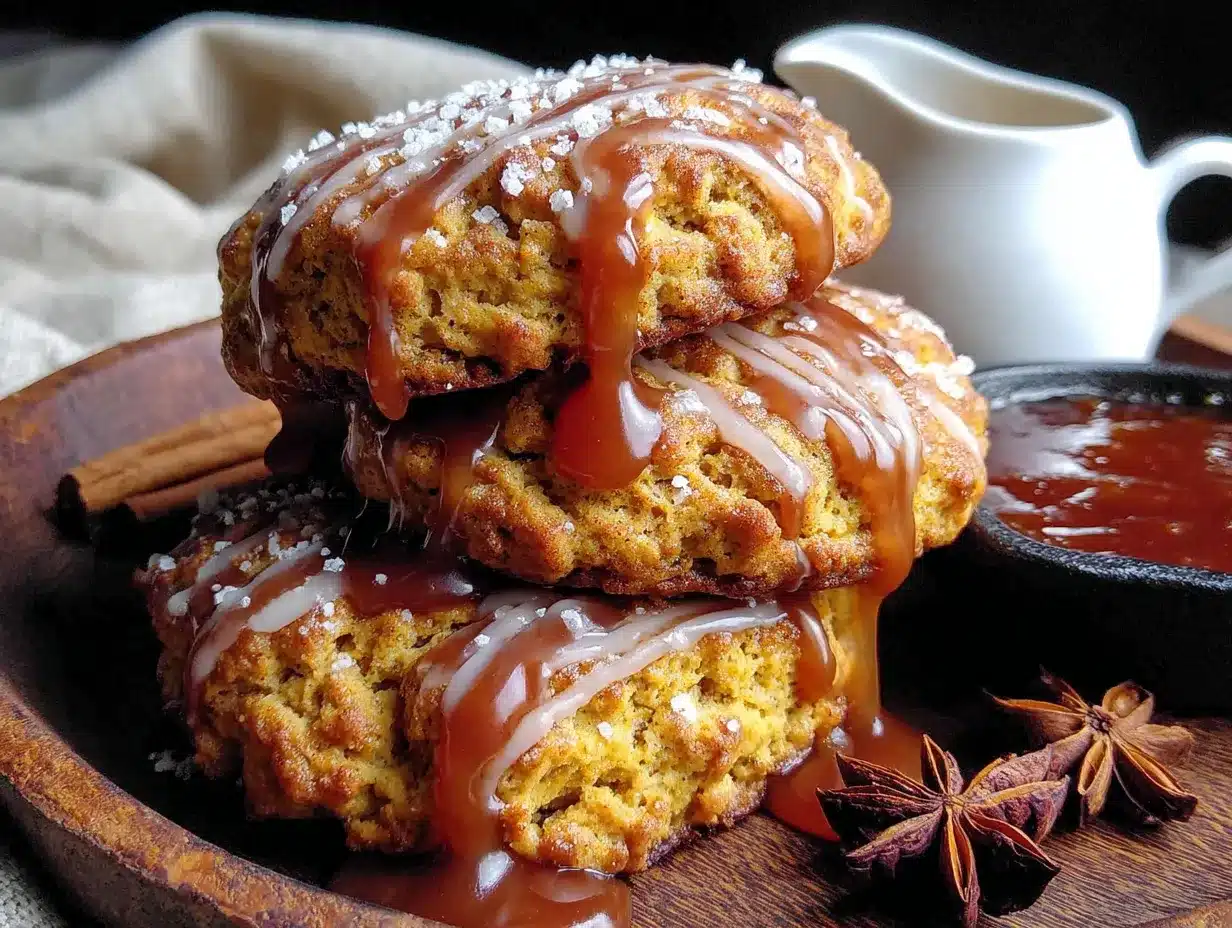
Alright, let’s get baking! Follow these steps, and you will have a tray of beautiful, fluffy pumpkin scones in no time. Take your time with the dough—it’s a forgiving recipe.
- Preheat and Prep: Preheat your oven to 400°F (200°C). Line a large baking sheet with parchment paper. This is a crucial first step because you want the oven hot and ready when the scones go in.
- Mix Dry Ingredients: In a large bowl, whisk together 2 cups (250g) all-purpose flour, 1/3 cup (65g) granulated sugar, 1 tablespoon baking powder, 1 ½ teaspoons pumpkin pie spice, and ½ teaspoon salt. Make sure everything is evenly distributed. This is your dry base.
- Cut in the Butter: Take 6 tablespoons (85g) of very cold unsalted butter and cut it into small cubes. Add the cubes to the flour mixture. Using a pastry cutter or your fingertips, work the butter into the flour until it resembles coarse meal with some pea-sized butter pieces remaining. You want visible bits of butter. This is what creates those flaky layers. Work quickly so the butter doesn’t soften.
- Combine Wet Ingredients: In a separate small bowl or liquid measuring cup, whisk together ½ cup (120g) pumpkin purée (blotted dry), ¼ cup (60ml) heavy cream, 1 large egg, and 1 teaspoon vanilla extract. Whisk until smooth and fully combined. The egg helps bind everything together.
- Form the Dough: Make a well in the center of the dry ingredients. Pour the wet ingredients into the well. Use a fork or a rubber spatula to stir everything together just until a shaggy dough forms. It will look a bit messy and dry in spots. Do not overmix! Overmixing develops gluten and will make your scones tough.
- Bring it Together: Turn the shaggy dough out onto a lightly floured surface. Gently knead the dough 4-5 times, just until it comes together. It should be soft and slightly sticky. If it’s too sticky, add a tiny bit more flour. If it’s too dry, add a splash more cream.
- Shape the Dough: Pat the dough into a ¾-inch thick circle, about 7-8 inches in diameter. Use your hands or a rolling pin. Don’t press too hard. You want it to be an even thickness so the scones bake uniformly.
- Cut the Scones: Using a sharp knife or bench scraper, cut the circle into 8 equal wedges, like you’re cutting a pizza. It helps to dip the knife in flour between cuts to prevent sticking. Place the wedges on the prepared baking sheet, spacing them about 2 inches apart. They will spread a little.
- Chill (Optional but Recommended): Place the baking sheet with the scones in the refrigerator for 15-20 minutes. This re-chills the butter and helps the scones hold their shape better while baking, resulting in a taller, fluffier scone. I never skip this step.
- Bake: Bake for 14-18 minutes, or until the scones are golden brown on the bottom and the tops are lightly browned. A toothpick inserted into the center should come out clean. They will feel firm to the touch.
- Cool: Let the scones cool on the baking sheet for 5 minutes. Then, transfer them to a wire rack to cool completely before glazing. If you glaze them while they are still hot, the glaze will just melt off and soak in.
- Make the Maple Glaze: While the scones are cooling, make the glaze. In a medium bowl, whisk together 1 cup (120g) sifted powdered sugar, 3 tablespoons pure maple syrup, and 1-2 tablespoons of heavy cream or milk. Whisk until smooth and glossy. The glaze should be thick but pourable. If it’s too thick, add a little more cream. If it’s too thin, add a bit more powdered sugar.
- Glaze the Scones: Once the scones are completely cool, drizzle the maple glaze generously over the tops. You can use a spoon or a piping bag with the tip snipped off. Let the glaze set for about 15-20 minutes before serving. It will form a beautiful, slightly crackly crust.
Cooking Tips & Techniques
Over the years, I’ve made a few mistakes so you don’t have to. Here are my best tips for perfect scones every single time.
Keep Everything Cold: This is the number one rule of scone-making. Cold butter is your best friend. If your kitchen is warm, pop your mixing bowl and flour in the fridge for a few minutes before you start. You can even chill the shaped scones on the baking sheet for 20 minutes before baking, as I mentioned. This step is non-negotiable for flaky layers.
Don’t Overwork the Dough: I know it’s tempting to keep kneading until it’s perfectly smooth, but please resist. Overworking the dough develops gluten, which makes scones tough and dense. You want to work it just until it comes together. A shaggy dough is a good dough. Think of it like making biscuits—gentle hands are key.
Blot Your Pumpkin: Pumpkin purée contains a lot of water. If you add it directly to the dough, your scones can turn out soggy and flat. Before measuring, spread the pumpkin purée on a plate lined with a paper towel. Place another paper towel on top and press gently to absorb the excess moisture. This simple step makes a huge difference in the final texture.
Use a Sharp Cutter: When you cut the scones, use a sharp knife or bench scraper and press straight down. Don’t twist the cutter. Twisting seals the edges of the dough, which prevents the scones from rising as high. Clean cuts help them rise tall and even.
Don’t Skip the Chill: I know it adds an extra 20 minutes to the process, but chilling the shaped scones before baking is a game-changer. It solidifies the butter again, which means it will melt later in the oven, creating those beautiful steam pockets. It also helps the scones hold their shape, so they don’t spread out into flat discs.
If you are looking for another sweet, pumpkin-filled treat to enjoy this season, you absolutely have to try my soft-baked pumpkin snickerdoodle cookies. They are another fall favorite in my house!
Variations & Adaptations
One of the best things about this recipe is how easily it adapts to different tastes and dietary needs. Don’t be afraid to make it your own. Here are a few of my favorite variations.
- Gluten-Free Version: You can swap the all-purpose flour for a good 1-to-1 gluten-free baking flour blend, like Bob’s Red Mill or King Arthur. The texture will be slightly more tender and a bit less flaky, but they are still delicious. Add an extra tablespoon of cream to help the dough bind.
- Vegan Version: To make these vegan, use a high-quality vegan butter that is solid when cold. Swap the heavy cream for full-fat canned coconut milk or a thick oat cream. Use a flax egg (1 tablespoon ground flaxseed mixed with 3 tablespoons water, let sit for 5 minutes) instead of the regular egg. The texture will be slightly different, but the flavor is still wonderful.
- Add-Ins: For a little extra texture, fold in ½ cup of mix-ins when you add the wet ingredients. Try chopped pecans or walnuts, dried cranberries or cherries, or even mini chocolate chips. White chocolate chips and dried cranberries are a particularly festive combination.
- Spice Swap: If you don’t have pumpkin pie spice, you can use a mix of 1 teaspoon cinnamon, ½ teaspoon ginger, ¼ teaspoon nutmeg, and ¼ teaspoon cloves. For a chai-inspired version, add ½ teaspoon of cardamom and a pinch of black pepper to the spice mix.
- Different Glaze: Not a maple fan? No problem. You can make a simple vanilla glaze by swapping the maple syrup for 2-3 tablespoons of milk and 1 teaspoon of vanilla extract. A cream cheese glaze is also incredible. Just beat 2 oz of softened cream cheese with 1 cup of powdered sugar and a splash of milk until smooth.
Serving & Storage Suggestions
These scones are best enjoyed the day they are made, but they store well too. Here is how to serve and store them for the best experience.
Serving: These scones are perfect for breakfast, brunch, or an afternoon snack. They are wonderful served slightly warm, but the glaze needs to be set. I love them with a hot cup of coffee, a chai latte, or a glass of cold milk. For a special brunch, serve them alongside a sausage and hash brown breakfast casserole for a hearty, satisfying meal.
Storage: Store leftover scones in an airtight container at room temperature for up to 2 days. If you stack them, place a piece of parchment paper between the layers to prevent the glaze from sticking. They will soften slightly over time, which some people actually prefer.
Freezing: You can freeze the baked, unglazed scones for up to 3 months. Let them cool completely, then wrap them tightly in plastic wrap and place them in a freezer-safe bag. When you are ready to enjoy them, thaw them at room temperature, then warm them in a 300°F (150°C) oven for 5-10 minutes. Glaze them after they have cooled. You can also freeze the unbaked, shaped scones on a baking sheet until solid, then transfer them to a freezer bag. Bake them directly from frozen, adding 2-3 minutes to the baking time.
Reheating: To reheat a single scone, pop it in a toaster oven or a 300°F (150°C) oven for 5 minutes. The microwave will make them soft and chewy, so I don’t recommend it. The oven helps restore some of that crisp exterior.
Nutritional Information & Benefits
While these are a treat, they do have some redeeming qualities! Here is a general overview. Please note that these values are estimates and can vary based on the specific ingredients you use.
| Nutrient | Amount per Scone (approx.) |
|---|---|
| Calories | 320-350 |
| Total Fat | 15-18g |
| Saturated Fat | 9-11g |
| Carbohydrates | 45-50g |
| Sugar | 25-30g |
| Protein | 4-5g |
| Vitamin A | High (from pumpkin) |
| Fiber | 1-2g |
Health Benefits: Pumpkin is a fantastic source of Vitamin A, which is great for your vision and immune system. It is also packed with antioxidants and fiber. The heavy cream and butter provide some calcium. Of course, the sugar and flour are not health foods, but when you use real ingredients like pure maple syrup and real pumpkin, you are avoiding the artificial additives found in many store-bought pastries.
Dietary Considerations: This recipe is vegetarian. As mentioned in the variations section, it can be adapted to be gluten-free or vegan. It is not low-carb or keto-friendly due to the flour and sugar. It contains dairy and gluten in its standard form.
Conclusion
These fluffy pumpkin scones with maple glaze are more than just a recipe; they are a little moment of fall you can create in your own kitchen. They are forgiving, adaptable, and incredibly rewarding. The combination of the tender, spiced scone with that thick, real maple glaze is just pure comfort. I love how they make my house smell, and I love how happy they make everyone who tries them.
I really hope you give them a try. Don’t be afraid to make them your own—throw in some pecans, swap the glaze, or just enjoy them plain. They are meant to be shared and enjoyed. When you do make them, I would love to hear how they turn out! Leave a comment below and let me know if you made any fun variations. And if you share a photo on Pinterest or Instagram, tag me so I can see your beautiful creations. Happy baking, friends!
Frequently Asked Questions
Can I use canned pumpkin pie filling instead of pumpkin purée?
No, I wouldn’t recommend it. Pumpkin pie filling is already sweetened and spiced, which will throw off the balance of the recipe and make the scones too sweet and dense. Always use 100% pure pumpkin purée for the best texture and flavor control.
Why did my scones turn out dry and crumbly?
This usually happens for one of two reasons: too much flour or overbaking. Make sure you are measuring your flour correctly by spooning it into the cup and leveling it off. Also, keep a close eye on the scones in the oven. They are done when the bottoms are golden brown and a toothpick comes out clean. Even an extra minute or two can dry them out.
Can I make the dough the night before?
Absolutely! You can prepare the scone dough, shape it into wedges, and place them on the baking sheet. Cover the sheet tightly with plastic wrap and refrigerate overnight. The next morning, you can bake them straight from the fridge, just add a minute or two to the baking time. This is a great time-saver for holiday mornings.
My glaze is too runny. How do I fix it?
If your glaze is too runny, it simply needs more powdered sugar. Add it one tablespoon at a time, whisking well after each addition, until you reach a thick, pourable consistency. It should coat the back of a spoon. If it is too thick, add a tiny splash of milk or cream.
Can I use a different type of sugar for the glaze?
Powdered sugar (confectioners’ sugar) is essential for this glaze because it dissolves easily and creates a smooth, lump-free texture. Granulated sugar will not dissolve properly and will result in a gritty, grainy glaze. Stick with powdered sugar for the best results.
Pin This Recipe!


Fluffy Pumpkin Scones with Easy Maple Glaze
- Total Time: 1 hour 10 minutes
- Yield: 8 servings 1x
Description
These fluffy pumpkin scones are soft, tender, and perfectly spiced, topped with a thick, creamy maple glaze made with real maple syrup. They’re simple enough for a lazy weekend morning but special enough for a holiday brunch.
Ingredients
- 2 cups (250g) all-purpose flour
- 1/3 cup (65g) granulated sugar
- 1 tablespoon baking powder
- 1 ½ teaspoons pumpkin pie spice
- ½ teaspoon salt
- 6 tablespoons (85g) cold unsalted butter, cut into small cubes
- ½ cup (120g) pumpkin purée, blotted dry
- ¼ cup (60ml) heavy cream
- 1 large egg
- 1 teaspoon vanilla extract
- 1 cup (120g) sifted powdered sugar
- 3 tablespoons pure maple syrup
- 1–2 tablespoons heavy cream or milk
Instructions
- Preheat oven to 400°F (200°C). Line a large baking sheet with parchment paper.
- In a large bowl, whisk together flour, sugar, baking powder, pumpkin pie spice, and salt.
- Cut cold butter into the flour mixture using a pastry cutter or fingertips until it resembles coarse meal with pea-sized butter pieces.
- In a separate bowl, whisk together pumpkin purée, heavy cream, egg, and vanilla extract until smooth.
- Make a well in the dry ingredients, pour in the wet mixture, and stir with a fork until a shaggy dough forms. Do not overmix.
- Turn dough onto a lightly floured surface and gently knead 4-5 times until it comes together.
- Pat dough into a ¾-inch thick circle, about 7-8 inches in diameter.
- Cut the circle into 8 equal wedges using a sharp knife or bench scraper. Place wedges on prepared baking sheet, spacing 2 inches apart.
- Chill the scones on the baking sheet in the refrigerator for 15-20 minutes (optional but recommended).
- Bake for 14-18 minutes, until golden brown on the bottom and lightly browned on top. A toothpick inserted in the center should come out clean.
- Cool on the baking sheet for 5 minutes, then transfer to a wire rack to cool completely.
- For the glaze: In a medium bowl, whisk together sifted powdered sugar, maple syrup, and 1-2 tablespoons of heavy cream or milk until smooth and glossy.
- Once scones are completely cool, drizzle glaze generously over the tops. Let set for 15-20 minutes before serving.
Notes
Keep all ingredients cold for flaky scones. Blot pumpkin purée to remove excess moisture. Do not overwork the dough. Chilling shaped scones before baking helps them rise taller. Use real maple syrup for the glaze, not imitation.
- Prep Time: 20 minutes
- Cook Time: 16 minutes
- Category: Breakfast
- Cuisine: American
Nutrition
- Serving Size: 1 scone
- Calories: 335
- Sugar: 27
- Sodium: 320
- Fat: 16
- Saturated Fat: 10
- Carbohydrates: 47
- Fiber: 1.5
- Protein: 4.5
Keywords: pumpkin scones, maple glaze, fall baking, breakfast, brunch, pumpkin spice