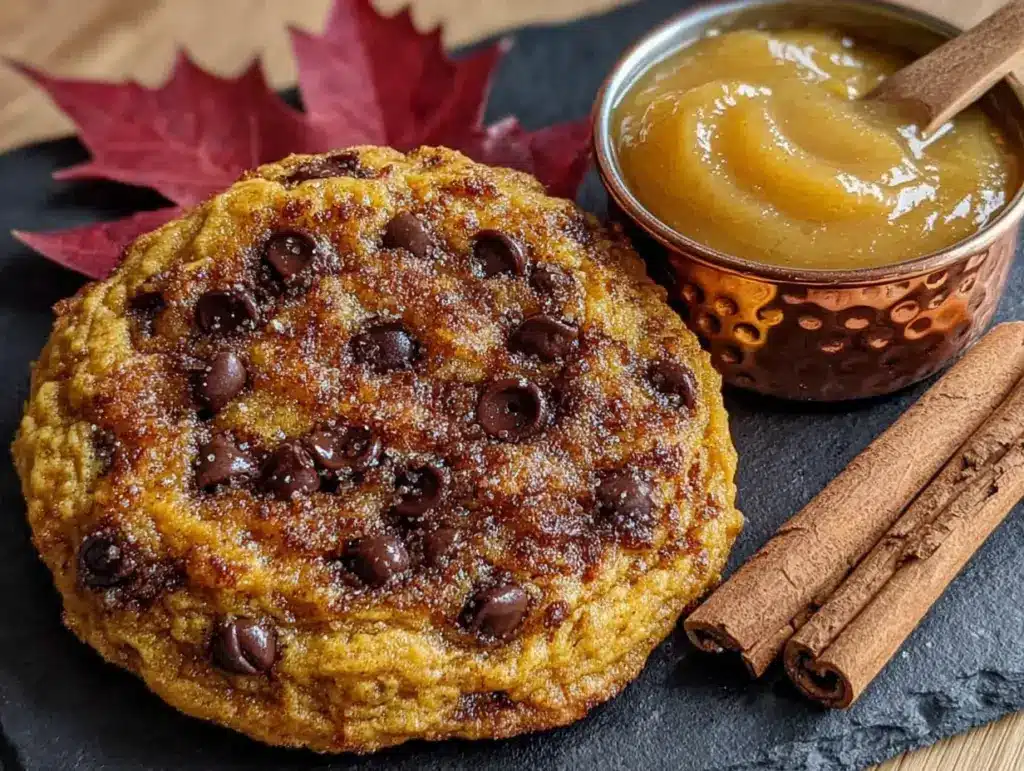
October, 4:17 PM on a Tuesday that felt like it would never end. The light through the kitchen window had gone that particular shade of gold that only happens when the air gets crisp and you realize you forgot to buy a proper jacket. I was standing at the counter with a stick of butter melting in a pan—not because I had a plan, but because I needed something to do with my hands. The pumpkin puree was leftover from a batch of healthy protein pumpkin muffins I’d made two days prior, and the chocolate chips were calling my name from the pantry. Honestly? I just wanted a cookie. But not a flat, sad cookie. Not a cake-in-disguise cookie. I wanted that perfect intersection of fall flavor and chewy, crisp-edged texture that feels like a hug you didn’t know you needed.
So I browned the butter. That’s where it started. The nutty, almost toasty smell filled the kitchen and suddenly the pumpkin didn’t seem like a compromise anymore—it felt like the whole point. I added a little more cinnamon than the recipe called for, because I always do, and folded in dark chocolate chips until my arm ached. The dough was soft and smelled like everything good about this season. I scooped it onto a tray, baked one test cookie, and stood there watching it spread just right in the oven. That first bite—warm, slightly crisp at the edges, tender in the middle, with that deep brown butter flavor wrapped around sweet pumpkin and melty chocolate—was the kind of moment you want to bottle. I knew right then this recipe was sticking around.
These Perfect Brown Butter Pumpkin Chocolate Chip Cookies aren’t fancy. They’re not trying to be. But they are the cookie you’ll make when you want to feel like you have your act together, even if the rest of the day was a mess. And honestly? That’s a pretty good reason to bake.
Why You’ll Love This Recipe
Let me tell you why these cookies are different. I’ve tested this recipe about seven times (my neighbors are very happy, by the way) to get the texture just right. Pumpkin can make baked goods gummy if you’re not careful, and brown butter can be tricky if you burn it. But when you balance them correctly? Magic happens.
- Quick & Easy: From start to finish, these come together in about 35 minutes. No chilling required—though you can if you want a thicker cookie.
- Simple Ingredients: You probably have most of this in your pantry right now. No weird extracts or hard-to-find flours.
- Perfect for Fall Gatherings: Bring these to a Friendsgiving, a cozy dinner, or just keep them all for yourself. I won’t judge.
- Crowd-Pleaser: Kids love them. Adults love them. Even my friend who “doesn’t like pumpkin” ate three.
- Unbelievably Delicious: The brown butter adds this deep, nutty richness that you just can’t get from regular melted butter. It’s the secret weapon here.
What makes this recipe different from all the other pumpkin cookies out there? It’s the technique. Browning the butter first removes some of the water content, which means less spreading and a chewier cookie. Plus, you’re getting that incredible flavor without any extra effort. I also use a specific ratio of pumpkin to flour that took me three failed batches to figure out—not too wet, not too dry. Just right.
This is the kind of cookie that makes you close your eyes after the first bite. It’s comfort food reimagined—faster than a pie, easier than a cake, and somehow more satisfying than either. Perfect for impressing guests without breaking a sweat, or just making a random Tuesday feel special.
What Ingredients You Will Need
This recipe uses simple, wholesome ingredients to deliver bold fall flavor and that perfect cookie texture. Most of these are pantry staples, so you might already have everything you need.
- Unsalted butter, 1 cup (2 sticks or 226g) — You’ll be browning this, so don’t use salted butter or the salt concentration will be off. I prefer Kerrygold for its lower water content, but any good-quality unsalted butter works.
- Pumpkin puree, ½ cup (120g) — Make sure you’re using 100% pure pumpkin puree, not pumpkin pie filling. The pie filling has added sugar and spices that will throw off the balance. I like Libby’s for consistency.
- Light brown sugar, ¾ cup (150g), packed — Brown sugar adds moisture and that molasses-y depth that pairs beautifully with pumpkin and brown butter. Dark brown sugar works too if you want an even richer flavor.
- Granulated sugar, ¼ cup (50g) — Just enough to help with spreading and crisp edges. Don’t skip it—the combination of both sugars is key.
- Large egg, 1, room temperature — A room-temperature egg incorporates more evenly into the brown butter. If you forgot to take it out ahead of time, place it in a bowl of warm water for 5 minutes.
- Vanilla extract, 1 teaspoon — Pure vanilla extract is best, but imitation works in a pinch. It rounds out the flavors nicely.
- All-purpose flour, 1¾ cups (220g) — Spoon and level your flour for accuracy. Scooping directly from the bag can pack in too much and make your cookies dry.
- Baking soda, 1 teaspoon — Helps the cookies spread just enough and gives them a little lift.
- Baking powder, ½ teaspoon — Adds a bit more rise for a softer center.
- Salt, ½ teaspoon — Don’t skip this. Salt balances the sweetness and enhances the brown butter flavor. I use fine sea salt.
- Ground cinnamon, 1½ teaspoons — The star spice here. I always add a little extra because I love cinnamon.
- Pumpkin pie spice, 1 teaspoon — You can use store-bought or make your own by mixing cinnamon, nutmeg, ginger, and allspice. It adds that classic fall warmth.
- Ground nutmeg, ¼ teaspoon — Freshly grated if you have it, but pre-ground works fine. Just a pinch adds depth.
- Semi-sweet chocolate chips, 1 cup (175g) — I prefer Ghirardelli for their size and meltability. Dark chocolate chips work beautifully here too, or even milk chocolate if you like things sweeter. You could also chop up a chocolate bar for those melty pools of chocolate.
- Optional: Flaky sea salt, for sprinkling — A tiny pinch on top of each cookie right after baking takes them from great to unforgettable. Trust me on this one.
Equipment Needed
You don’t need a fancy kitchen to make these cookies. Here’s what you’ll actually use:
- Light-colored saucepan or skillet — A stainless steel or light-colored pan is crucial for browning butter because you can see the color change. Dark nonstick pans make it hard to tell when the butter is properly browned. I learned this the hard way after burning three batches.
- Large mixing bowl — Any bowl will do, but a wide one makes mixing easier.
- Whisk — For combining the wet ingredients smoothly.
- Rubber spatula or wooden spoon — For folding in the dry ingredients and chocolate chips. A spatula is gentler on the dough.
- Baking sheets — I use two standard half-sheet pans. If you only have one, let it cool completely between batches.
- Parchment paper or silicone baking mat — Parchment paper is my go-to because it prevents sticking and makes cleanup a breeze. Silicone mats work too, but cookies might spread slightly more.
- Cookie scoop (about 1.5 tablespoons) — Not required, but it gives you evenly sized cookies that bake at the same rate. A regular spoon works if you don’t have one.
- Cooling rack — Lets air circulate so the bottoms don’t get soggy. If you don’t have one, transfer cookies to a plate after a few minutes.
Preparation Method
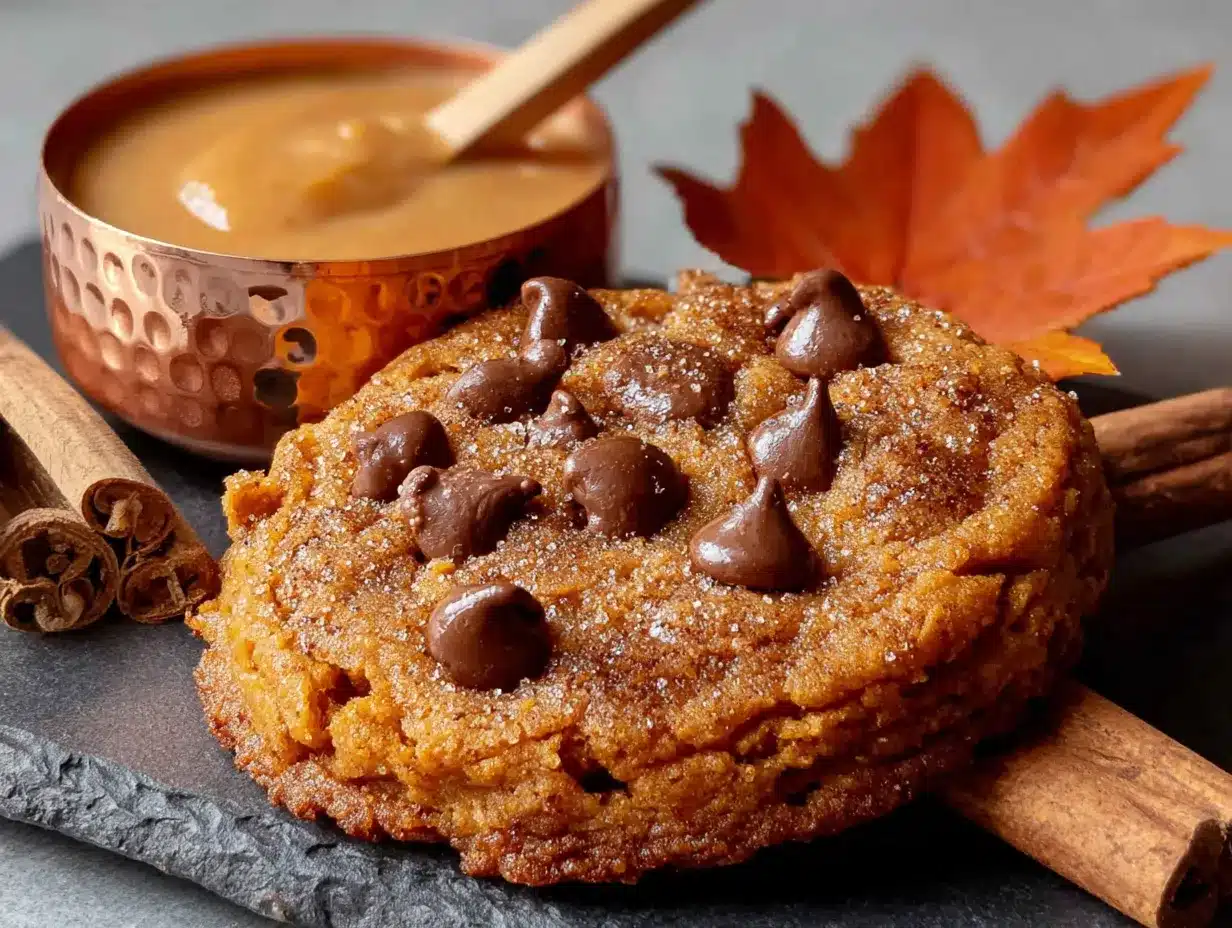
Let’s get to the good part. Follow these steps carefully, especially the brown butter part—it’s easier than you think, but it does require your full attention for about 5 minutes.
- Brown the butter. Place the 1 cup of unsalted butter in your light-colored saucepan over medium heat. Let it melt completely, then stir occasionally with a whisk or spatula. After a few minutes, the butter will start to foam and bubble. Keep stirring gently. You’ll see little brown specks forming at the bottom—that’s the milk solids toasting. Once the butter turns a golden-amber color and smells nutty (like toasted hazelnuts), remove it from the heat immediately. This usually takes about 5-7 minutes. Pour it into a heat-safe bowl to stop the cooking process. Let it cool for 10-15 minutes—it should be warm but not hot when you add the sugars.
- While the butter cools, prep your dry ingredients. In a medium bowl, whisk together the 1¾ cups all-purpose flour, 1 teaspoon baking soda, ½ teaspoon baking powder, ½ teaspoon salt, 1½ teaspoons cinnamon, 1 teaspoon pumpkin pie spice, and ¼ teaspoon nutmeg. Set aside.
- Mix the wet ingredients. In your large mixing bowl, combine the cooled brown butter with ¾ cup packed light brown sugar and ¼ cup granulated sugar. Whisk vigorously for about 1 minute until it looks like wet sand and there are no sugar clumps. Add the 1 large egg and 1 teaspoon vanilla extract, then whisk until smooth and glossy. Finally, add the ½ cup pumpkin puree and whisk until fully incorporated. The mixture might look slightly separated at first—keep whisking, it will come together.
- Combine wet and dry. Pour the dry ingredients into the wet mixture. Use your rubber spatula to fold everything together gently. Stop mixing as soon as you no longer see streaks of flour. Overmixing will make the cookies tough. The dough will be soft and a bit sticky—that’s normal.
- Fold in the chocolate chips. Add the 1 cup of semi-sweet chocolate chips and fold them in with a few strokes. Make sure they’re evenly distributed throughout the dough. If you want, reserve a handful to press onto the tops of the cookies before baking for that bakery-style look.
- Preheat your oven to 350°F (175°C). Line two baking sheets with parchment paper. While the oven heats, let the dough rest on the counter for about 10 minutes. This helps the flour hydrate and gives you a slightly thicker cookie.
- Scoop the dough. Using your cookie scoop or a spoon, drop rounded tablespoons of dough onto the prepared baking sheets, spacing them about 2 inches apart. Each cookie should be about 1.5 tablespoons of dough. If you reserved some chocolate chips, press a few into the tops of each dough ball now.
- Bake. Place one sheet in the oven at a time (for even baking) and bake for 10-12 minutes. The edges should be set and lightly golden, but the centers will still look soft and slightly underdone. That’s exactly what you want—they’ll continue baking on the hot sheet. For a softer, chewier cookie, bake closer to 10 minutes. For slightly crispier edges, go for 12 minutes.
- Cool on the baking sheet. Let the cookies rest on the baking sheet for 5 minutes. This step is important—if you try to move them too soon, they’ll fall apart. After 5 minutes, transfer them to a cooling rack. If you’re using flaky sea salt, sprinkle a tiny pinch on each cookie right after you transfer them. The salt crystals will stick to the slightly warm surface.
- Repeat. Continue with the remaining dough. If your baking sheets are still warm, run them under cold water and dry them before adding more parchment and dough. Warm sheets will cause the cookies to spread too much.
Cooking Tips & Techniques
I’ve made a lot of mistakes in the kitchen so you don’t have to. Here’s what I’ve learned about these cookies specifically.
Don’t rush the brown butter. I know it’s tempting to crank up the heat, but medium heat is your friend. High heat burns the milk solids before they can toast properly, and then you get bitter, not nutty. The first time I tried this, I walked away for “just a second” and came back to a smoking pan. Start over if that happens—it’s not worth salvaging. Watch for that amber color and that unmistakable nutty aroma. That’s your cue.
Pumpkin puree needs to be patted dry. This is a trick I picked up from a pastry chef friend. After you measure your ½ cup of pumpkin puree, spread it on a paper towel-lined plate and gently press another paper towel on top to absorb excess moisture. Pumpkin has a lot of water, and too much will make your cookies cakey instead of chewy. Just don’t press too hard or you’ll lose all the pumpkin flavor.
Let the dough rest. I mentioned this in the method, but it’s worth repeating. Those 10 minutes of resting time allow the flour to fully absorb the liquid ingredients. The result is a thicker, more cohesive cookie that doesn’t spread into a flat puddle. If you have time, you can even chill the dough for 30 minutes for an even thicker cookie.
Use a cookie scoop for consistency. When all your cookies are the same size, they bake at the same rate. No more burnt edges on some and raw centers on others. It’s a small investment that pays off every time you bake.
Rotate your baking sheet halfway through. Ovens have hot spots. About halfway through the baking time, spin the sheet 180 degrees. This ensures even browning across all the cookies. I forgot to do this once and half the batch came out darker than the other half. Lesson learned.
Variations & Adaptations
One of the best things about this recipe is how flexible it is. Here are some ways to make it your own.
Gluten-Free Version: Substitute the all-purpose flour with a 1:1 gluten-free baking flour blend that contains xanthan gum. I’ve tested this with Bob’s Red Mill 1:1 Baking Flour and it works beautifully. The texture is slightly more tender, but still chewy and delicious. Just be sure not to overmix the dough.
Dairy-Free Adaptation: Use a high-quality vegan butter for browning. I’ve had good results with Miyoko’s European Style Cultured Vegan Butter—it browns surprisingly well. Use dairy-free chocolate chips like Enjoy Life or Pascha. The texture will be slightly different, but the flavor is still incredible.
Spice It Up: If you love warm spices, add a pinch of ground cloves or cardamom along with the other spices. Cardamom pairs beautifully with pumpkin and chocolate. Start with ¼ teaspoon and adjust from there.
Nutty Addition: Fold in ½ cup of toasted pecans or walnuts along with the chocolate chips. Toast them in a dry skillet over medium heat for 3-4 minutes until fragrant, then let them cool completely before adding. The crunch is a lovely contrast to the soft cookie.
White Chocolate & Cranberry: Swap the semi-sweet chocolate chips for white chocolate chips and add ½ cup of dried cranberries. This variation tastes like a pumpkin scone in cookie form. It’s especially good for holiday cookie exchanges.
Extra Pumpkin Flavor: If you want a more pronounced pumpkin taste, add an extra tablespoon of pumpkin puree and reduce the flour by one tablespoon. The dough will be stickier, but the pumpkin flavor will shine through more.
Serving & Storage Suggestions
These cookies are best enjoyed warm, when the chocolate is still melty and the brown butter flavor is at its peak. But they’re pretty fantastic at room temperature too.
Serving: Serve these cookies slightly warm with a cold glass of milk or a hot cup of coffee. For an extra treat, sandwich two cookies with a scoop of vanilla ice cream for an easy fall ice cream sandwich. They also pair beautifully with a mug of homemade pumpkin chai latte for the ultimate cozy afternoon.
Presentation: Arrange the cookies on a rustic wooden board or a simple white platter. Sprinkle a little flaky sea salt over the top just before serving for a beautiful finish. If you’re gifting them, stack them in a clear cellophane bag tied with a cinnamon stick or a sprig of rosemary—it looks gorgeous and smells wonderful.
Storage: Store leftover cookies in an airtight container at room temperature for up to 4 days. Place a slice of bread in the container with the cookies—it absorbs excess moisture and keeps the cookies soft. Replace the bread slice every day if you’re keeping them longer. Do not refrigerate the cookies, as the cold air will dry them out.
Freezing: These cookies freeze beautifully. You have two options: freeze the baked cookies or freeze the dough. For baked cookies, let them cool completely, then place them in a single layer in a freezer-safe bag or container. They’ll keep for up to 3 months. Thaw at room temperature for about 15 minutes before serving. For the dough, scoop it into balls, place them on a parchment-lined baking sheet, and freeze until solid. Transfer the frozen dough balls to a freezer bag. When you’re ready to bake, add 1-2 minutes to the baking time—no need to thaw first. Fresh cookies anytime you want them!
Reheating: To revive leftover cookies, pop them in a 300°F (150°C) oven for 3-5 minutes. The edges will crisp up again and the centers will become soft and gooey. You can also microwave a cookie for 10-15 seconds for that just-baked experience.
Nutritional Information & Benefits
Let’s be real—these are cookies, not health food. But they do have some redeeming qualities, especially if you compare them to typical bakery cookies.
Per cookie (based on 24 cookies):
- Calories: 185
- Fat: 10g
- Saturated Fat: 6g
- Carbohydrates: 23g
- Sugar: 14g
- Fiber: 1g
- Protein: 2g
- Sodium: 95mg
Health Highlights: Pumpkin puree is packed with vitamin A (from beta-carotene), which supports eye health and immune function. It also adds fiber and moisture, allowing us to use a little less butter than a standard cookie recipe. The cinnamon in these cookies has anti-inflammatory properties and may help regulate blood sugar levels. Dark chocolate contains antioxidants called flavonoids, which are good for heart health. So while these are still a treat, they’re a treat with some actual benefits.
Dietary Considerations: This recipe contains gluten, dairy, and eggs. For gluten-free and dairy-free options, see the variations section above. The cookies are nut-free as written (unless you add nuts), making them safe for school lunches and parties.
Allergen Note: Always check your ingredient labels, especially for chocolate chips, which may be processed on shared equipment with nuts or dairy.
Conclusion
These Perfect Brown Butter Pumpkin Chocolate Chip Cookies are everything I want in a fall dessert—warm, spiced, slightly indulgent, and deeply satisfying. The brown butter adds a layer of complexity that makes them taste like you spent hours in the kitchen, when really they come together in about 35 minutes. That’s my favorite kind of recipe.
I love how versatile this recipe is. You can dress it up for a holiday party, make it gluten-free for a friend, or just bake a batch on a quiet Sunday afternoon because you deserve something good. The cookies freeze beautifully, so you can always have a little bit of fall waiting for you in the freezer.
Now I want to hear from you. Have you tried browning butter before? Did you add any fun mix-ins? Drop a comment below and let me know how your cookies turned out. And if you share them on social media, tag me—I love seeing your baking adventures. Happy fall baking, friends. You’ve got this.
Frequently Asked Questions
Can I use pumpkin pie filling instead of pumpkin puree?
No, please don’t. Pumpkin pie filling has added sugar, spices, and sometimes thickeners that will completely change the texture and sweetness of these cookies. Stick with 100% pure pumpkin puree for the best results. The difference is important—pumpkin puree is just pumpkin, while pie filling is a pre-seasoned product.
Why did my cookies turn out cakey instead of chewy?
This usually happens for one of two reasons: too much pumpkin puree or not browning the butter enough. Make sure you measure your pumpkin accurately and pat it dry with a paper towel to remove excess moisture. Also, ensure your brown butter has cooled properly before mixing—if it’s too hot, it can affect the texture. Next time, try reducing the pumpkin by one tablespoon for a chewier cookie.
Do I have to chill the dough?
Not for this recipe. Unlike many cookie recipes that require chilling to prevent spreading, the brown butter and pumpkin combination creates a dough that holds its shape well. That said, if you want a thicker cookie, you can chill the dough for 30 minutes before baking. Just add 1-2 minutes to the baking time if you do. The cookies will still be delicious either way.
Can I make these cookies ahead of time for a party?
Absolutely. You have two great options: bake the cookies up to 2 days in advance and store them in an airtight container at room temperature, or freeze the unbaked dough balls for up to 3 months. If you’re baking ahead, reheat them in a 300°F oven for 3-5 minutes just before serving to bring back that fresh-baked texture. Your guests will never know they weren’t baked that day.
What can I use instead of pumpkin pie spice?
If you don’t have pumpkin pie spice, make your own by combining ½ teaspoon cinnamon, ¼ teaspoon ground ginger, ¼ teaspoon ground nutmeg, and a pinch of ground cloves or allspice. This homemade blend will work perfectly in the recipe. You can also just use extra cinnamon if that’s all you have—the cookies will still be delicious, just with a slightly different spice profile.
Pin This Recipe!
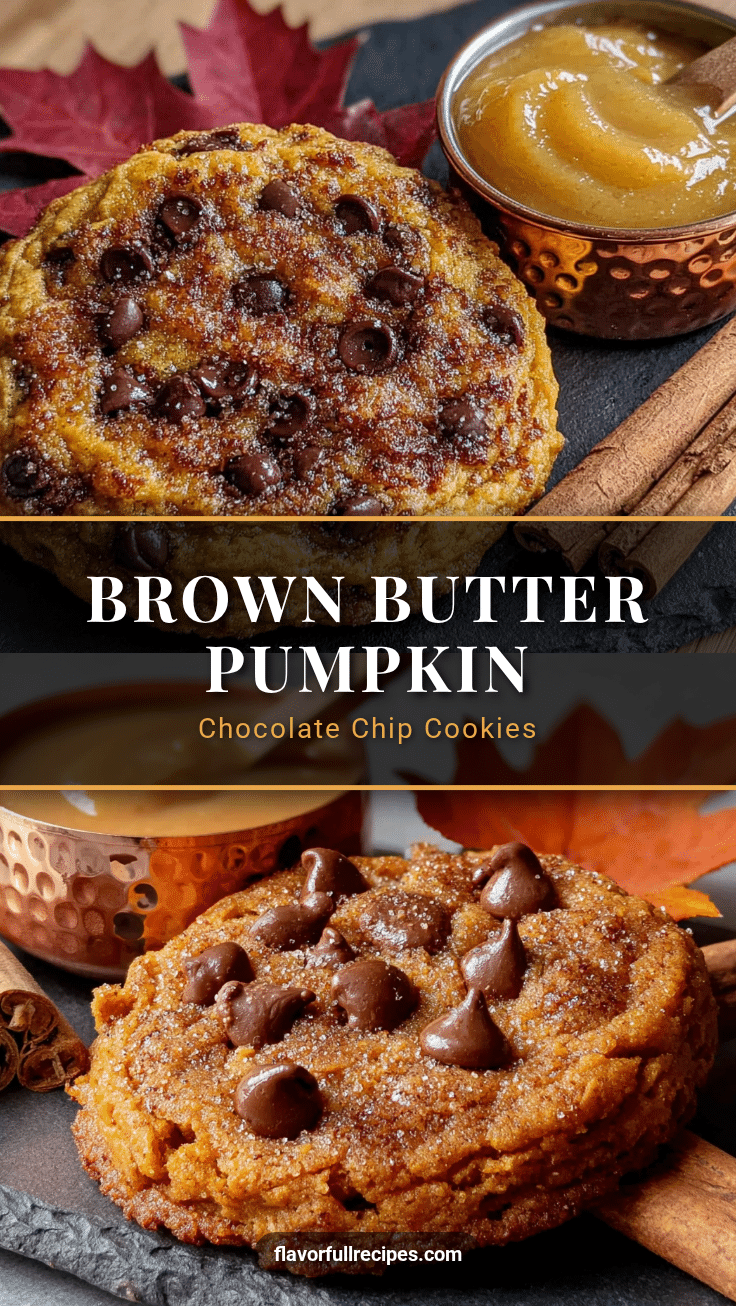
Perfect Brown Butter Pumpkin Chocolate Chip Cookies – Easy Fall Dessert
- Total Time: 35 minutes
- Yield: 24 cookies 1x
Description
These Perfect Brown Butter Pumpkin Chocolate Chip Cookies are the ultimate fall dessert—chewy, crisp-edged, and packed with nutty brown butter, warm spices, and melty chocolate. Ready in about 35 minutes with no chilling required, they’re easy enough for a weeknight treat and impressive enough for holiday gatherings.
Ingredients
- 1 cup (2 sticks or 226g) unsalted butter
- ½ cup (120g) pumpkin puree (100% pure, not pie filling)
- ¾ cup (150g) light brown sugar, packed
- ¼ cup (50g) granulated sugar
- 1 large egg, room temperature
- 1 teaspoon vanilla extract
- 1¾ cups (220g) all-purpose flour
- 1 teaspoon baking soda
- ½ teaspoon baking powder
- ½ teaspoon salt
- 1½ teaspoons ground cinnamon
- 1 teaspoon pumpkin pie spice
- ¼ teaspoon ground nutmeg
- 1 cup (175g) semi-sweet chocolate chips
- Optional: flaky sea salt for sprinkling
Instructions
- Brown the butter: Place 1 cup unsalted butter in a light-colored saucepan over medium heat. Melt completely, then stir occasionally. After a few minutes, the butter will foam and bubble. Keep stirring until golden-amber with brown specks and a nutty aroma (5-7 minutes). Remove from heat immediately and pour into a heat-safe bowl. Let cool 10-15 minutes until warm but not hot.
- While butter cools, whisk together flour, baking soda, baking powder, salt, cinnamon, pumpkin pie spice, and nutmeg in a medium bowl. Set aside.
- In a large mixing bowl, combine cooled brown butter with brown sugar and granulated sugar. Whisk vigorously for about 1 minute until it looks like wet sand. Add egg and vanilla, whisk until smooth and glossy. Add pumpkin puree and whisk until fully incorporated.
- Pour dry ingredients into wet mixture. Fold gently with a rubber spatula until no streaks of flour remain. Do not overmix. Dough will be soft and slightly sticky.
- Fold in chocolate chips until evenly distributed. Optionally reserve a handful to press onto tops before baking.
- Preheat oven to 350°F (175°C). Line two baking sheets with parchment paper. Let dough rest on counter for 10 minutes.
- Scoop rounded tablespoons of dough (about 1.5 tablespoons each) onto prepared sheets, spacing 2 inches apart. Press reserved chocolate chips onto tops if desired.
- Bake one sheet at a time for 10-12 minutes. Edges should be set and lightly golden; centers will look soft. For chewier cookies, bake 10 minutes; for crispier edges, bake 12 minutes.
- Let cookies rest on baking sheet for 5 minutes. Transfer to a cooling rack. If using flaky sea salt, sprinkle a tiny pinch on each cookie immediately after transferring.
- Repeat with remaining dough. If baking sheets are warm, cool under cold water and dry before adding new parchment and dough.
Notes
Don’t rush the brown butter—use medium heat and watch for amber color and nutty aroma. Pat pumpkin puree dry with paper towels to remove excess moisture for chewier cookies. Let dough rest 10 minutes for thicker cookies. For best results, use a cookie scoop for even sizing and rotate baking sheet halfway through. Cookies can be frozen baked or as dough balls for up to 3 months.
- Prep Time: 15 minutes
- Cook Time: 12 minutes
- Category: Dessert
- Cuisine: American
Nutrition
- Serving Size: 1 cookie
- Calories: 185
- Sugar: 14
- Sodium: 95
- Fat: 10
- Saturated Fat: 6
- Carbohydrates: 23
- Fiber: 1
- Protein: 2
Keywords: pumpkin cookies, brown butter cookies, chocolate chip cookies, fall dessert, easy cookie recipe, pumpkin chocolate chip cookies