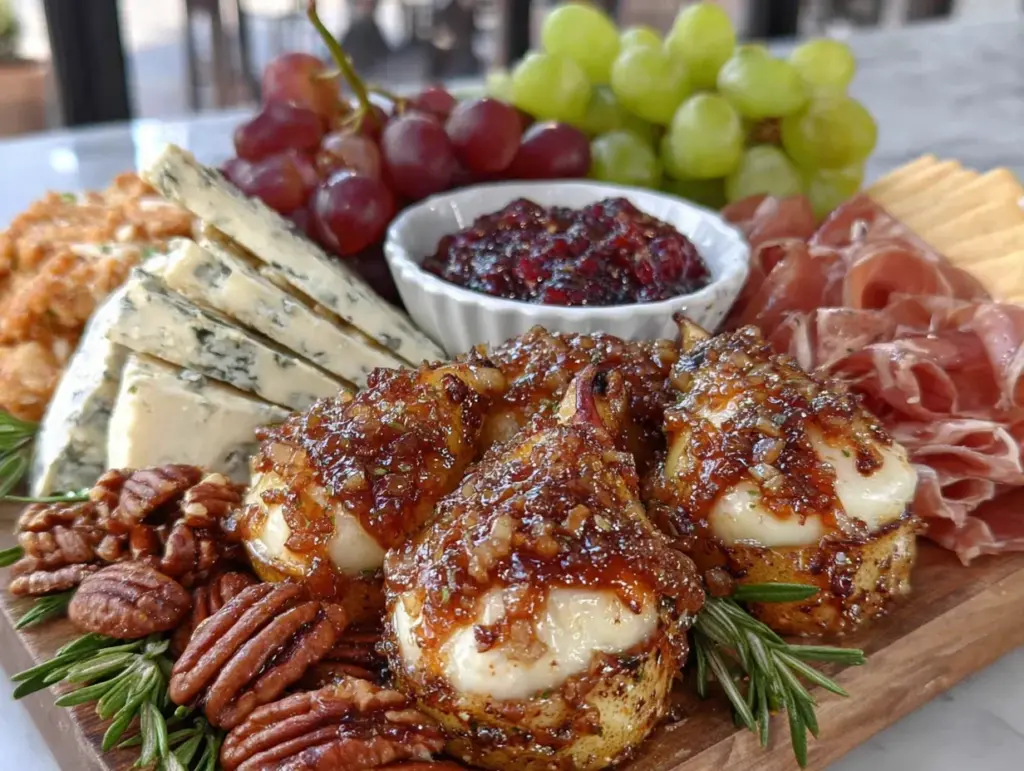
The leaves were at peak color, and I had promised to host a casual get-together for a few friends to watch the season’s first big football game. I had a gorgeous wheel of brie, some sharp cheddar, and a bag of apples, but the rest of my fridge was looking pretty sad. I needed something that felt special—worthy of the cozy fall vibes—without a frantic trip to the grocery store. That’s when I spotted a couple of firm but ripe pears sitting sadly in the fruit bowl and a half-empty bottle of apple cider from the weekend’s pancake breakfast. An idea started to form, and honestly, it felt a little risky. Poaching pears for a charcuterie board? That seemed like something you’d see in a magazine, not something you’d throw together on a Tuesday afternoon.
But I went for it. I simmered those pears in the cider with a cinnamon stick and a star anise I found buried in the spice drawer, and the smell that filled the kitchen was pure autumn. It was warm and spiced and immediately made the house feel like a celebration. When my friends arrived, they didn’t even notice the dip I’d forgotten to make or the crackers that were slightly too salty. They went straight for the pears, piling them onto slices of cheese and crusty bread. That night, the Stunning Fall Charcuterie Board with Cider Poached Pears became the star of the show, and it’s been my go-to for every fall gathering ever since. It’s the kind of recipe that makes you look like you spent hours in the kitchen, even though the pears practically cook themselves.
Why You’ll Love This Recipe
This isn’t just another pile of meat and cheese on a board. This is a curated experience that screams fall. I’ve tested this board at everything from casual movie nights to slightly fancier Thanksgiving appetizers, and it always delivers. Here’s why it works.
- Effortlessly Impressive: The cider poached pears are the showstopper. They look elegant and complicated, but they require about 15 minutes of active work. The rest is just simmering time.
- Perfect for Entertaining: This board is designed to feed a crowd. It’s ideal for game day, holiday parties, or a cozy night in with friends. It’s also a fantastic way to use up leftover apples and pears from a fall orchard trip.
- Sweet and Savory Balance: The spiced, tender pears cut through the richness of the cheese and cured meats beautifully. It’s a flavor combination that feels both sophisticated and comforting.
- Endlessly Customizable: Don’t like blue cheese? Swap it out. Have a nut allergy? Use seeds or dried fruit instead. This recipe is a template, not a rigid set of rules. You can easily make it your own.
- Make-Ahead Friendly: The pears can be poached up to three days in advance. This means when your guests arrive, you just have to arrange everything on a board. No last-minute stress.
I remember the first time I made this for my family. My husband, who usually just grabs a handful of crackers, actually sat down and built a little bite with pear, gouda, and a drizzle of honey. He looked at me and said, “Okay, this is different.” And it is. It’s the kind of recipe that makes you close your eyes after the first bite. It’s comfort food reimagined—fancy enough for a party, but simple enough for a Tuesday.
What Ingredients You Will Need
This recipe uses simple, wholesome ingredients that come together to create something truly special. Most of these are pantry staples or easy to find at your local grocery store, especially during the fall season.
For the Cider Poached Pears:
- 4 firm but ripe Bosc or Anjou pears: You want pears that hold their shape during poaching. Bosc pears are my top choice because they are naturally firmer and have a beautiful, elegant shape. Avoid overly ripe or soft pears, as they will turn to mush.
- 3 cups apple cider: Use a good quality, unfiltered apple cider for the best flavor. This is the base of the poaching liquid and adds a deep, sweet apple flavor.
- 1/2 cup maple syrup: Adds a rich, complex sweetness that pairs perfectly with the cider. Don’t use pancake syrup here—real maple syrup makes a big difference.
- 1 cinnamon stick: For that warm, classic fall spice.
- 3 whole star anise: This adds a subtle licorice note that makes the pears taste incredibly sophisticated. You can skip it if you don’t have it, but it really elevates the flavor.
- 1 vanilla bean, split (or 1 teaspoon vanilla extract): Adds a floral, creamy sweetness that rounds out the spices.
- Pinch of salt: Balances the sweetness and enhances all the other flavors.
For the Charcuterie Board:
- 8-10 ounces assorted cheeses: I like a mix of textures and flavors. Think a soft, creamy cheese like brie or camembert, a firm, nutty cheese like aged gouda or manchego, and a sharp, crumbly cheese like blue cheese or aged cheddar.
- 6-8 ounces cured meats: Prosciutto, salami, and soppressata are all excellent choices. Look for a variety of textures and flavors.
- 1 cup mixed nuts: Toasted pecans, walnuts, or almonds add a wonderful crunch. I love using candied pecans for an extra touch of sweetness.
- 1/2 cup dried fruit: Dried figs, apricots, or cranberries are perfect for fall. They add a chewy texture and a burst of concentrated sweetness.
- 1 cup fresh fruit: Sliced apples, grapes, or pomegranate seeds add freshness and color. Honeycrisp apples are a personal favorite for their crisp texture and sweet-tart flavor.
- 1 baguette or assorted crackers: You need a vehicle for all that cheese and pear! A crusty baguette, sliced and toasted, is my go-to. Look for a good quality cracker that can hold up to the toppings.
- Honey or balsamic glaze, for drizzling: A final drizzle of honey over the cheese and pears, or a balsamic glaze for a tangy kick, is the perfect finishing touch.
- Fresh herbs for garnish (rosemary, thyme, or sage): This is optional but adds a beautiful, aromatic finish that makes the board look professionally styled.
Equipment Needed
You don’t need a lot of fancy equipment to pull this off, which is part of the beauty of this recipe.
- Large saucepan or Dutch oven: You need a pot big enough to hold the pears in a single layer while they simmer. A Dutch oven works perfectly because it distributes heat evenly.
- Slotted spoon: For gently removing the pears from the hot poaching liquid without breaking them.
- Large wooden board or platter: This is your canvas. A large wooden cutting board, a marble slab, or even a large baking sheet will work. The key is to have enough surface area to arrange everything beautifully.
- Small bowls or ramekins: For holding the honey, balsamic glaze, or any dips you might want to add. I use small ceramic ramekins that I picked up at a thrift store.
- Paring knife and cutting board: For slicing the pears, cheese, and any fresh fruit.
- Cheese knives or spreaders: I have a set of three small cheese knives that I always put out. It makes it easier for guests to serve themselves.
If you don’t have a large board, you can use a couple of smaller cutting boards or even a large serving tray. I’ve also used a clean, rimmed baking sheet in a pinch. It’s not as pretty, but it gets the job done.
Preparation Method
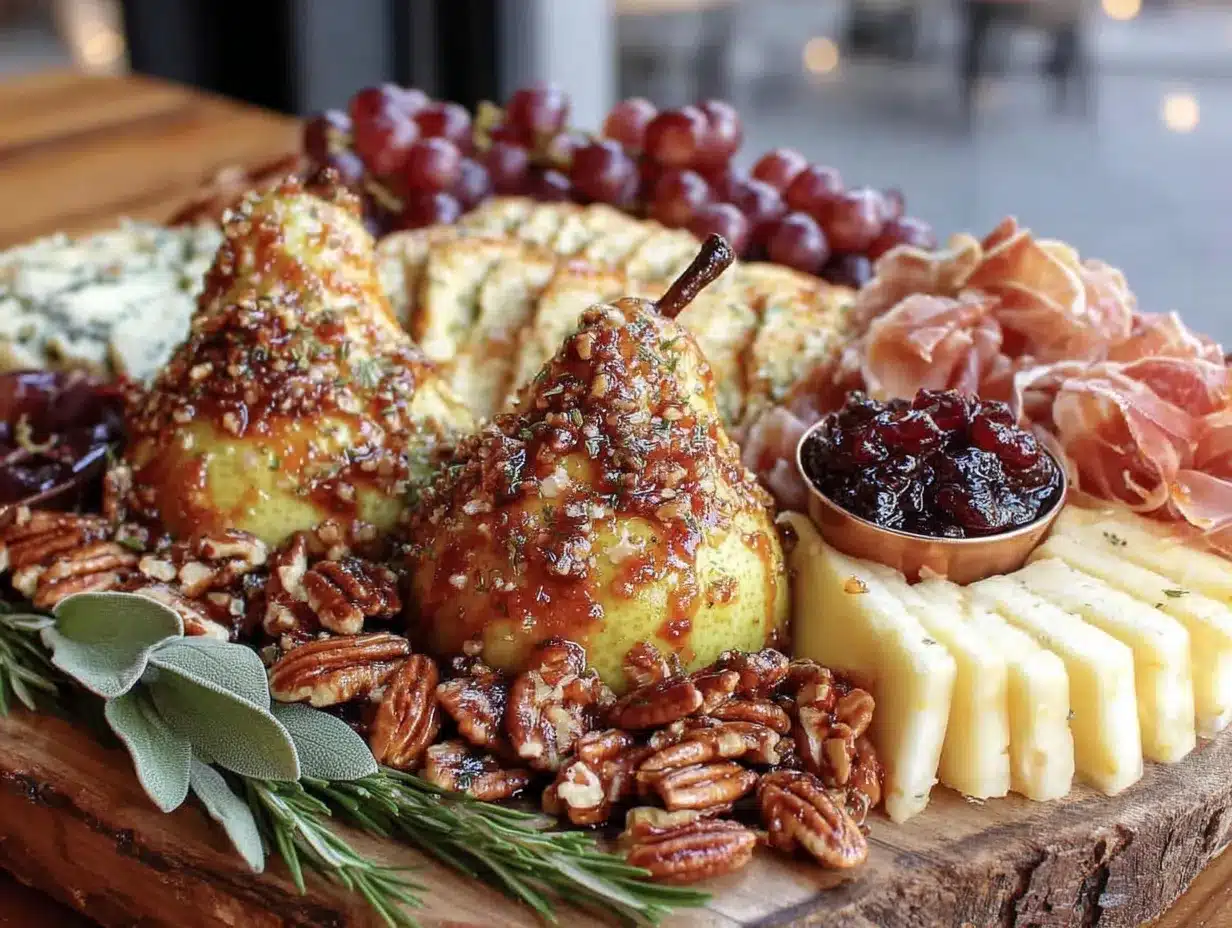
Let’s get to the fun part. This whole process is surprisingly relaxing, especially the poaching part. The smell is incredible.
- Poach the Pears: In your large saucepan or Dutch oven, combine the apple cider, maple syrup, cinnamon stick, star anise, vanilla bean (or extract), and a pinch of salt. Stir to combine and bring the mixture to a gentle simmer over medium heat.
- Prep the Pears: While the liquid is heating, peel the pears. Leave the stems on for a beautiful presentation. Use a melon baller or a small spoon to carefully core the pears from the bottom, removing the seeds. This step is important so the pears cook evenly and absorb the flavor from the inside out.
- Simmer: Gently place the peeled and cored pears into the simmering liquid. They should be mostly submerged. If they aren’t, you can add a little more cider or water. Reduce the heat to low, cover the pot, and let them simmer for 20-30 minutes. The exact time depends on the firmness of your pears. You want them to be tender when pierced with a knife, but not falling apart.
- Cool in the Liquid: This is a crucial step. Turn off the heat and let the pears cool completely in the poaching liquid. This allows them to absorb even more of that delicious spiced cider flavor. I usually let them sit for at least an hour, or I’ll make them the night before and let them sit in the fridge overnight.
- Slice the Pears: Once the pears are completely cool, remove them from the liquid with a slotted spoon. Place them on a cutting board. You can serve them whole, but I prefer to slice them in half lengthwise or into elegant wedges. If you’re slicing them, remove the core if you missed any seeds. Pat them dry gently with a paper towel so they don’t make the board soggy.
- Assemble the Board: This is where you can get creative. Start by placing your larger items—the bowls for honey and the cheeses. Place the cheese in different spots around the board. Next, arrange the sliced pears and cured meats, folding the prosciutto into loose ribbons. Fill in the gaps with the fresh fruit, dried fruit, and nuts. Finally, arrange the crackers and baguette slices around everything. Garnish with fresh herbs and drizzle a little honey over the brie and the pears. Serve immediately.
One time, I left the pears in the poaching liquid for way too long—like, two days—and they got a little too soft. They still tasted amazing, but they were harder to slice cleanly. So, stick to the 24-hour mark for the best texture.
Cooking Tips & Techniques
I’ve made this board more times than I can count, and I’ve learned a few things the hard way. Here are my best tips to make sure yours is perfect.
- Don’t Overcook the Pears: This is the biggest mistake people make. You want them to be tender, not mushy. Start checking them at the 20-minute mark. A sharp knife should slide in easily, but the pear should still hold its shape. Remember, they will continue to cook a little as they cool in the hot liquid.
- Use the Poaching Liquid Again: Don’t you dare pour that liquid down the drain! It’s liquid gold. You can reduce it down to a syrup to drizzle over the pears or use it as a base for a cocktail. I love adding a splash of bourbon to it and serving it warm. It’s also incredible in a batch of Salted Maple Brown Sugar Cold Brew Concentrate for a fall coffee treat.
- Room Temperature Cheese is Key: Take your cheese out of the fridge at least 30 minutes before you plan to serve the board. Cheese at room temperature has so much more flavor and a better, creamier texture. Cold cheese is sad cheese.
- Think About Texture: A great charcuterie board is all about variety. You want something creamy (brie), something crunchy (nuts, crackers), something chewy (dried fruit, salami), and something fresh (apples, pears). Make sure you have a good mix.
- Don’t Overcrowd the Board: It’s tempting to cram as much as possible onto the board, but it ends up looking messy and makes it hard for guests to grab things. Leave a little bit of space between items. You can always refill the board from the kitchen.
I once made the mistake of slicing all the cheese before putting it on the board. It looked fine at first, but after an hour, the edges of the cheese were all dried out. Now, I slice some of it and leave some in a wedge so people can cut their own. It stays fresher that way.
Variations & Adaptations
This recipe is incredibly flexible. Here are a few ways I’ve adapted it over the years to suit different tastes and occasions.
- Dietary Swaps: For a vegetarian version, just skip the meat and double up on the cheese and nuts. To make it gluten-free, use gluten-free crackers and a dedicated gluten-free baguette. Most cheeses and cured meats are naturally gluten-free, but always double-check the labels.
- Seasonal Twists: In the summer, I swap the pears for grilled peaches and use fresh berries instead of apples. In the winter, I add some pomegranate seeds and a little bit of dark chocolate for a festive touch. The poaching liquid stays the same, and it works beautifully with stone fruit.
- Flavor Profile Changes: If you’re not a fan of star anise, you can leave it out or use a couple of cardamom pods instead. For a spicy kick, add a small piece of fresh ginger to the poaching liquid. You can also swap the maple syrup for honey or brown sugar.
- Add a Dip: This board is amazing on its own, but I sometimes add a small bowl of Creamy Loaded Baked Potato Dip with Bacon for an extra savory, crowd-pleasing option. The creamy, cheesy dip is a fantastic contrast to the sweet pears and sharp cheese.
- Make it a Meal: To turn this into a more substantial meal, add some slices of crusty bread, a bowl of olives, and some marinated artichoke hearts. It becomes a fantastic light dinner or lunch, especially when paired with a simple green salad.
Serving & Storage Suggestions
This board is best served at room temperature, so assemble it about 30 minutes before your guests arrive. The pears should be at room temperature as well, not straight from the fridge.
Serving: I like to place the board in the center of the table so everyone can reach it. Make sure you have small plates and napkins for your guests. A few small bowls for discarded stems or pits are also a nice touch. This board pairs beautifully with a crisp, dry white wine like Sauvignon Blanc or a sparkling cider. For a non-alcoholic option, a spiced apple cider or a Homemade Iced Pumpkin Chai Latte would be perfect.
Storage: Leftovers are a beautiful thing. The pears will last in an airtight container in the refrigerator for up to 3 days. The cheese and meat should be stored separately in the fridge. The crackers and nuts can be stored at room temperature in a sealed bag or container. The flavors of the board actually meld together nicely overnight, so leftover bites are often even better the next day.
Reheating: You can enjoy the leftover pears cold, or you can gently warm them up in the microwave for about 15-20 seconds. They are also incredible chopped up and added to a bowl of oatmeal or yogurt for breakfast. Don’t try to reheat the whole board—just the pears if you want them warm.
Nutritional Information & Benefits
While this is definitely a treat-yourself board, it does have some surprising nutritional benefits, especially from the pears.
- Pears: Pears are an excellent source of fiber, which is great for digestion. They also contain vitamin C and copper. Poaching them in cider adds some antioxidants from the apples and spices.
- Cheese: Cheese is a good source of calcium and protein. The key is moderation. A little bit of a strong, flavorful cheese goes a long way.
- Nuts: Nuts are packed with healthy fats, protein, and fiber. They are very satisfying and can help keep you full.
- Estimated Values: It’s hard to give exact nutritional information for a board because everyone builds different bites. A reasonable serving (a few slices of cheese, a few slices of meat, a pear wedge, some nuts, and a few crackers) is roughly 400-500 calories. It’s a substantial snack or a light meal.
Dietary Considerations: This board can be easily adapted to be gluten-free (use GF crackers) or vegetarian (skip the meat). It contains dairy (cheese) and nuts. The pears themselves are naturally vegan and gluten-free.
I love that this board feels indulgent, but it’s built around real, whole ingredients. It’s not a processed snack—it’s a beautiful arrangement of actual food. And that makes me feel good about serving it to my family and friends.
Conclusion
This Stunning Fall Charcuterie Board with Cider Poached Pears is more than just a recipe. It’s a centerpiece. It’s a conversation starter. It’s the easiest way to make any gathering feel a little bit more special without spending all day in the kitchen. The pears are the star, but the whole experience is what makes it memorable.
I encourage you to make this your own. Swap in your favorite cheeses, use whatever nuts you have on hand, and don’t be afraid to experiment with the poaching spices. The first time you see someone’s face light up after they take a bite of that spiced pear with a piece of creamy brie, you’ll know exactly why I love this recipe so much.
Have you made this board? I’d love to hear about your favorite combinations! Drop a comment below and tell me what cheeses and meats you used. And if you loved it, please share this post with a friend who needs a show-stopping appetizer for their next fall party. Happy snacking!
Frequently Asked Questions
Can I make the pears a day ahead?
Absolutely! In fact, I recommend it. Let the pears cool completely in the poaching liquid, then transfer them (with the liquid) to an airtight container and store them in the refrigerator for up to 3 days. The flavor gets even better as they sit.
What if I can’t find Bosc pears?
No problem at all. Anjou or Comice pears are also excellent choices. Just make sure they are firm but ripe. Avoid Bartlett pears, as they are much softer and will likely fall apart during poaching.
Can I use a different fruit instead of pears?
Yes, this poaching liquid works beautifully with other fruits. Firm apples (like Honeycrisp or Granny Smith), peaches, or even plums would be fantastic. Just adjust the cooking time based on the fruit’s firmness.
How do I keep the board from getting messy?
Pat the pears dry with a paper towel after removing them from the poaching liquid. Place the honey or balsamic glaze in small bowls or ramekins so it doesn’t run all over the board. Also, try to keep wet ingredients (like fresh fruit) slightly separated from dry ingredients (like crackers).
Is this board expensive to make?
It can be, but it doesn’t have to be. You can use more affordable cheeses like a good cheddar or gouda instead of pricier options. The pears are very inexpensive, especially in the fall. You can also buy cured meats in smaller quantities from the deli counter to save money. The key is to focus on a few high-quality items rather than trying to have a little bit of everything.
Pin This Recipe!

Stunning Fall Charcuterie Board with Cider Poached Pears
- Total Time: 45 minutes
- Yield: 8-10 servings 1x
Description
An effortlessly impressive fall charcuterie board featuring spiced cider poached pears, assorted cheeses, cured meats, nuts, and fresh fruit. Perfect for entertaining, this board balances sweet and savory flavors with minimal active prep time.
Ingredients
- 4 firm but ripe Bosc or Anjou pears
- 3 cups apple cider
- 1/2 cup maple syrup
- 1 cinnamon stick
- 3 whole star anise
- 1 vanilla bean, split (or 1 teaspoon vanilla extract)
- Pinch of salt
- 8–10 ounces assorted cheeses (brie, aged gouda, blue cheese, etc.)
- 6–8 ounces cured meats (prosciutto, salami, soppressata)
- 1 cup mixed nuts (toasted pecans, walnuts, or almonds)
- 1/2 cup dried fruit (figs, apricots, or cranberries)
- 1 cup fresh fruit (sliced apples, grapes, or pomegranate seeds)
- 1 baguette or assorted crackers
- Honey or balsamic glaze, for drizzling
- Fresh herbs for garnish (rosemary, thyme, or sage)
Instructions
- In a large saucepan or Dutch oven, combine apple cider, maple syrup, cinnamon stick, star anise, vanilla bean (or extract), and a pinch of salt. Bring to a gentle simmer over medium heat.
- While the liquid heats, peel the pears, leaving the stems on. Use a melon baller or small spoon to carefully core the pears from the bottom, removing the seeds.
- Gently place the peeled and cored pears into the simmering liquid, ensuring they are mostly submerged. Reduce heat to low, cover, and simmer for 20-30 minutes until tender but not falling apart.
- Turn off the heat and let the pears cool completely in the poaching liquid (at least 1 hour, or overnight in the refrigerator).
- Once cool, remove pears with a slotted spoon. Slice in half lengthwise or into wedges. Pat dry gently with a paper towel.
- Assemble the board: Place larger items (bowls for honey, cheeses) first. Arrange sliced pears and cured meats, folding prosciutto into ribbons. Fill gaps with fresh fruit, dried fruit, and nuts. Arrange crackers and baguette slices around everything. Garnish with fresh herbs and drizzle honey over brie and pears. Serve immediately.
Notes
Pears can be poached up to 3 days in advance. Don’t overcook pears; they should be tender but hold their shape. Reserve poaching liquid to reduce into syrup or use in cocktails. Take cheese out of fridge 30 minutes before serving for best flavor. Pat pears dry to avoid soggy board.
- Prep Time: 15 minutes
- Cook Time: 30 minutes
- Category: Appetizer
- Cuisine: American
Nutrition
- Serving Size: 1 serving (approx. 3
- Calories: 450
- Sugar: 24
- Sodium: 680
- Fat: 28
- Saturated Fat: 12
- Carbohydrates: 38
- Fiber: 5
- Protein: 18
Keywords: fall charcuterie board, cider poached pears, charcuterie board recipe, fall appetizer, entertaining, cheese board, pear recipe