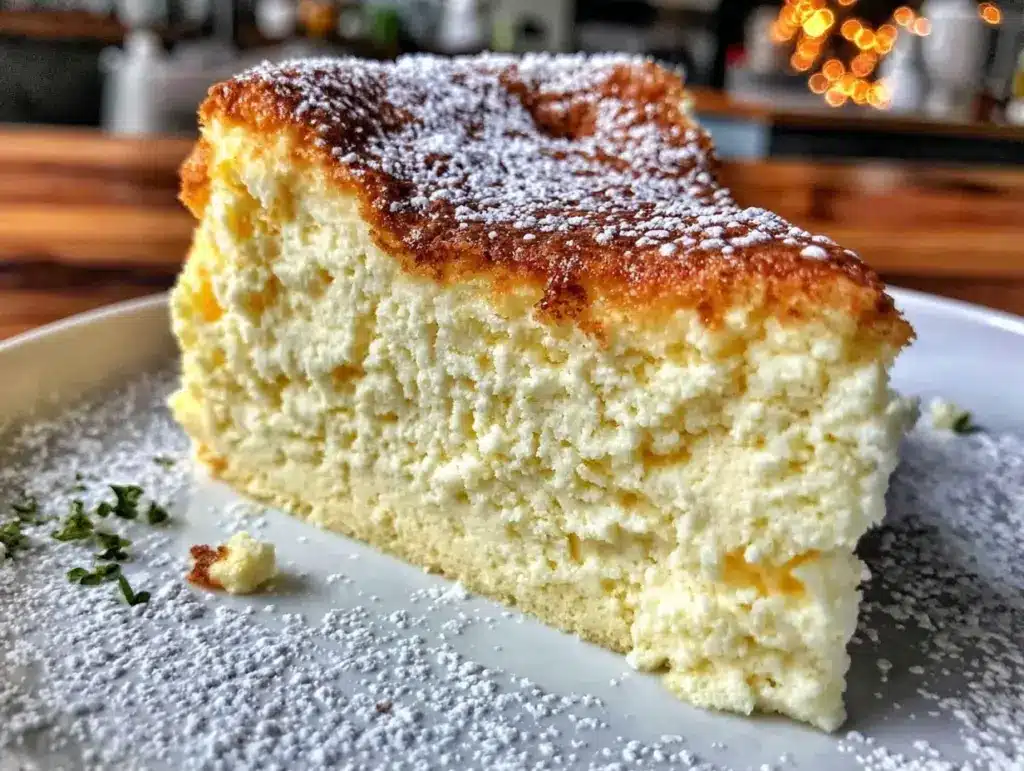
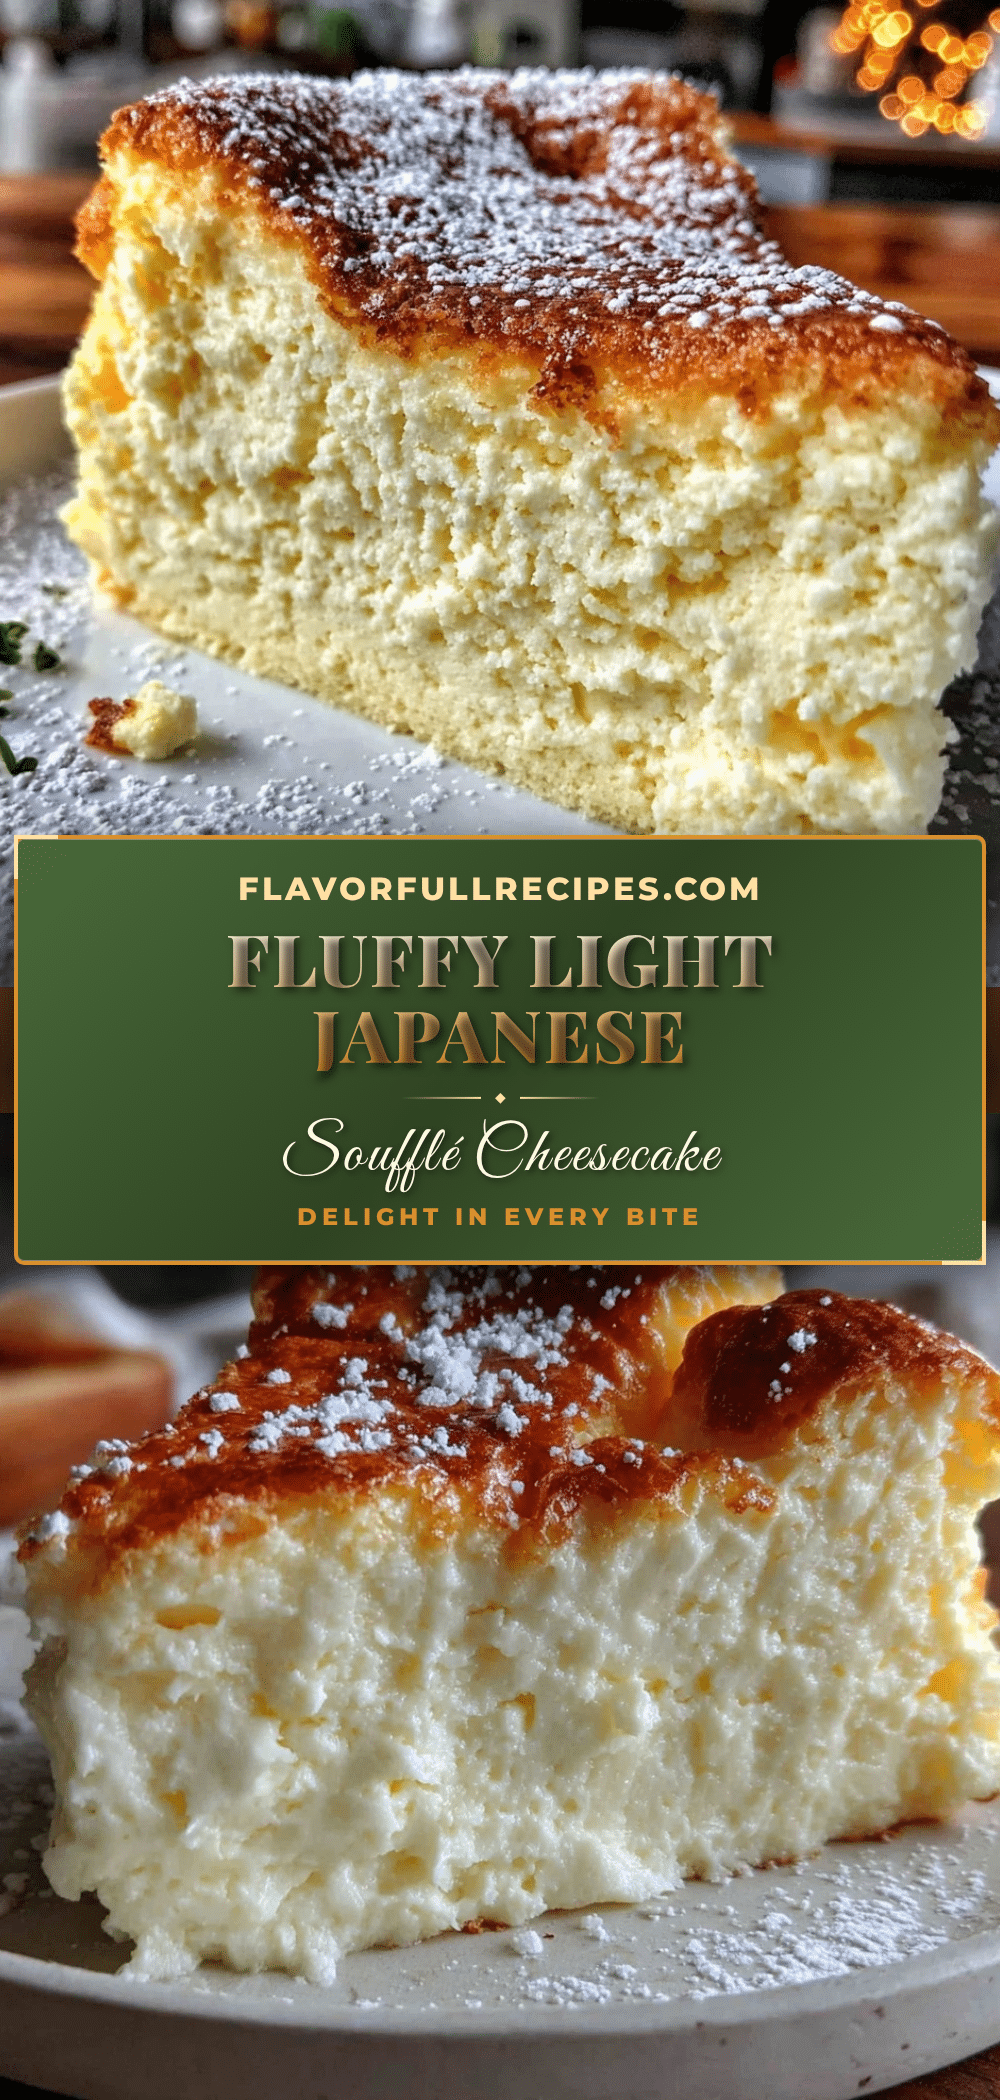
“You’re going to laugh, but I almost tossed this whole thing out,” I told my friend over text one evening. I was halfway through making the Japanese soufflé cheesecake, and honestly, it looked more like a sad pancake than the fluffy cloud I’d hoped for. The batter was tricky—so delicate, so unlike any other cheesecake I’d tackled. But something about the way it smelled—warm, buttery, with a hint of vanilla—kept me going. After a couple of tweaks and a lot of patience, the oven revealed a cake so light and airy it practically floated off the plate.
That moment stuck with me. It’s funny how a recipe that almost failed became one of my favorites to make again and again. The Japanese soufflé cheesecake isn’t your typical dense dessert; it’s more like a sweet, creamy cloud that melts on your tongue. I still remember the quiet satisfaction of slicing into it, the texture so soft it felt like eating a dream. Since then, it’s been a go-to when I want something special but not overwhelming, a dessert that feels fancy without the fuss.
It’s not just about the recipe itself—it’s the little moments during the process: folding the egg whites just right, the slow bake in a water bath, and that pause of anticipation before the reveal. If you’ve ever been skeptical about soufflé-style desserts, this one might just change your mind. It’s a gentle challenge that rewards you with something truly unique, a dessert that’s as delightful to make as it is to eat.
And honestly, it’s perfect for those times when you want to impress without stress—something like when friends unexpectedly drop by or when you want a sweet escape after a long day. This cheesecake has that quiet magic, the kind that lingers in memory long after the last bite.
Why You’ll Love This Fluffy Japanese Soufflé Cheesecake Recipe
This recipe has been tested multiple times in my kitchen (sometimes a few days in a row—I’m not kidding). It’s the kind of dessert that feels fancy but is surprisingly forgiving once you get the hang of it. Here’s why it stands out:
- Light and Airy Texture: Thanks to the whipped egg whites and gentle folding, the cheesecake is almost cloud-like, not dense or heavy like traditional cheesecakes.
- Simple Ingredients: You don’t need anything exotic—just cream cheese, eggs, sugar, and a few pantry staples. I always use Philadelphia cream cheese for the smoothest texture.
- Perfect for Special Occasions: Whether it’s a cozy dinner or an unexpected gathering, this cheesecake feels elegant without the fuss.
- Crowd-Pleasing: I’ve served this to cheesecake skeptics who were won over by its delicate flavor and texture.
- Unique Baking Technique: The water bath method keeps the cheesecake moist and prevents cracking, giving it that flawless finish.
What really sets this recipe apart is the balance between simplicity and the technique that makes it special. It’s not just another cheesecake; it’s a soufflé-style treat that’s light but rich, sweet but subtle, and impressive without requiring a pastry chef’s skills. If you’ve enjoyed desserts like moist rhubarb cake or brown sugar pavlova roll, you’ll appreciate the delicate play of texture and flavor here.
Honestly, this recipe invites you to slow down a bit, pay attention, and then enjoy a moment of pure delight. It’s a sweet reminder that sometimes the best treats come from patience and a little love.
What Ingredients You Will Need
This recipe uses simple, wholesome ingredients to deliver bold flavor and a delightfully airy texture without any fuss. Most are pantry staples, and I’ve included some tips to help you pick the best versions.
- Cream Cheese – 8 ounces (225 g), softened (Philadelphia is my go-to for its creamy consistency)
- Unsalted Butter – 2 tablespoons (28 g), softened (adds richness without overpowering)
- Whole Milk – 1/4 cup (60 ml), room temperature (helps create a smooth batter)
- Large Eggs – 4, separated (room temperature eggs whip better for that fluffy texture)
- Granulated Sugar – 3/4 cup (150 g), divided (use pure cane sugar for clean sweetness)
- All-Purpose Flour – 1/2 cup (65 g), sifted (for structure; you can swap with cake flour for extra tenderness)
- Cornstarch – 2 tablespoons (16 g), sifted (helps with lightness and stability)
- Vanilla Extract – 1 teaspoon (adds subtle aroma and flavor)
- Fresh Lemon Juice – 1 teaspoon (optional, brightens the flavor)
- Cream of Tartar – 1/4 teaspoon (stabilizes the egg whites; can substitute with a few drops of lemon juice)
Seasonal tip: If you want to add a twist, a teaspoon of yuzu juice or zest can give a lovely citrus lift. For a dairy-free version, try replacing cream cheese with a plant-based alternative like cashew cream cheese, but note the texture will be slightly different.
Equipment Needed
- Mixing Bowls: Two medium-sized bowls, preferably metal or glass for whipping egg whites effectively.
- Electric Mixer or Stand Mixer: Essential for whipping egg whites to stiff peaks. I’ve tried hand whipping before—let’s just say, it’s a workout!
- Sifter: For flour and cornstarch; you can use a fine mesh sieve as an alternative.
- 8-inch (20 cm) Round Springform Pan or Deep Cake Pan: A springform pan makes releasing the cake easier, but a deep cake pan lined with parchment works well too.
- Roasting Pan: For the water bath; a large enough pan that can accommodate the cake pan with some room for water.
- Kitchen Towels: To wrap around the bottom of the cake pan to prevent water leaks into the batter.
- Spatula: A silicone spatula for gentle folding.
Maintenance tip: Clean your mixing bowls and beaters thoroughly before whipping egg whites—any fat residue can stop them from whipping properly. A budget-friendly electric hand mixer can substitute for a stand mixer, but be mindful of the mixing speed to avoid overbeating.
Preparation Method
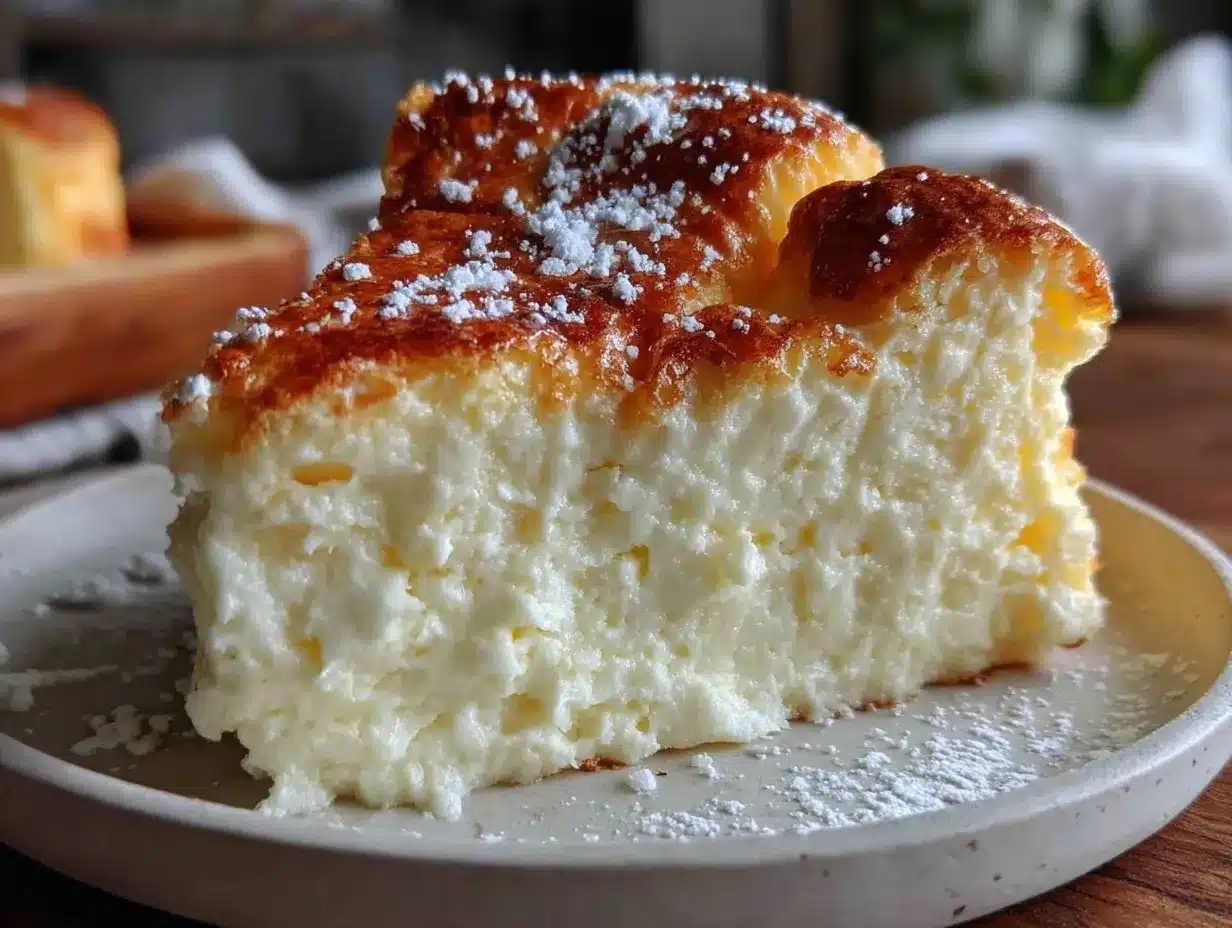
- Prep the Pan and Oven (10 minutes): Preheat your oven to 320°F (160°C). Line the bottom and sides of your 8-inch springform pan with parchment paper. Wrap a kitchen towel around the pan’s base to prevent water from seeping in during the water bath.
- Make the Cream Cheese Mixture (10 minutes): In a bowl, beat 8 ounces (225 g) softened cream cheese until smooth and lump-free. Add 2 tablespoons (28 g) softened butter, 1/4 cup (60 ml) whole milk, and 1 teaspoon vanilla extract. Mix until combined and silky. Gradually add 3/8 cup (75 g) sugar, beating until light and fluffy. This mixture should smell creamy and slightly sweet, with no lumps.
- Add Egg Yolks (2 minutes): Add the 4 egg yolks, one at a time, mixing gently after each addition until fully incorporated. The batter will thicken slightly and gain a pale yellow hue.
- Sift and Fold in Dry Ingredients (5 minutes): Sift together 1/2 cup (65 g) all-purpose flour and 2 tablespoons (16 g) cornstarch. Gradually fold the dry mix into the cream cheese batter using a spatula. Use gentle folding motions to avoid deflating the mixture. The batter should look smooth and thick but still light.
- Whip Egg Whites (10 minutes): In a separate clean, dry bowl, whisk the 4 egg whites with 1/4 teaspoon cream of tartar until foamy. Gradually add the remaining 3/8 cup (75 g) sugar in 3 additions, whipping until stiff, glossy peaks form (when you lift the whisk, the peaks should hold their shape without drooping).
- Fold Egg Whites into Batter (5 minutes): Add a third of the whipped egg whites to the batter to lighten it. Gently fold using a spatula, then fold in the remaining egg whites carefully to maintain volume. The batter should be light and airy, with no visible streaks of egg white.
- Pour and Prepare for Baking (2 minutes): Pour the batter into your prepared pan, smoothing the top with a spatula. Tap the pan gently on the counter to release any large air bubbles.
- Set Up Water Bath and Bake (50-60 minutes): Place the cake pan in a larger roasting pan. Pour hot water into the roasting pan until it reaches halfway up the sides of the cake pan. Carefully slide the whole setup into the oven. Bake at 320°F (160°C) for 50–60 minutes until the top is golden and a skewer inserted in the center comes out mostly clean (a few moist crumbs are okay). Avoid opening the oven during the first 40 minutes.
- Cool Gradually (30 minutes): Turn off the oven and leave the cake inside with the door slightly open for 30 minutes. This helps prevent the cake from collapsing due to sudden temperature changes.
- Remove, Unmold, and Chill (at least 2 hours): Take the cake out of the water bath and remove the kitchen towel. Let cool to room temperature before gently releasing it from the pan. Chill in the fridge for at least 2 hours to firm up and deepen the flavor.
Pro tip: If you notice any cracks forming, don’t panic—they add character! Also, do not overmix the batter or overwhip egg whites; both can cause the cake to deflate.
Cooking Tips & Techniques for the Perfect Soufflé Cheesecake
Getting this cheesecake just right takes a bit of finesse, but it’s worth the effort. Here are some tips I learned the hard way:
- Use Room Temperature Ingredients: Cold cream cheese or eggs can make the batter lumpy or resist whipping. Let them sit out for about 30 minutes before starting.
- Whip Egg Whites Properly: Be patient and whip until you get glossy, stiff peaks. Underwhipped whites won’t trap enough air; overwhipped whites become dry and break down when folded.
- Gentle Folding is Key: Use a spatula and fold with slow, deliberate motions. You want to keep the air bubbles intact, so no vigorous stirring or beating.
- Water Bath Helps Moisture: Baking in a water bath prevents cracking and keeps the cake moist. Be careful when pouring hot water to avoid spills or water entering the batter.
- Don’t Rush Cooling: Sudden temperature changes can cause the cake to sink. The gradual cooling inside the oven helps maintain its shape.
- Practice Makes Perfect: I’ve made this recipe more times than I can count, and each time I tweak the folding technique or baking time slightly based on my oven’s quirks.
Just like cooking hearty dishes such as pozole rojo or white chicken chili, mastering the timing and technique here makes all the difference in the final texture and flavor.
Variations & Adaptations
This Japanese soufflé cheesecake lends itself well to personal twists and dietary tweaks:
- Matcha Infusion: Add 1-2 teaspoons of matcha powder to the dry ingredients for a subtle green tea flavor and a pop of color.
- Fruit Toppings: Serve with fresh berries or a homemade fruit compote for a bright contrast to the creamy cake.
- Gluten-Free Version: Substitute all-purpose flour with almond flour or a gluten-free baking blend. The texture will be a bit denser but still delicious.
- Dairy-Free Adaptation: Use dairy-free cream cheese and substitute milk with almond or oat milk. The texture shifts slightly but still light and enjoyable.
- Chocolate Twist: Gently fold in 1/4 cup (30 g) of finely chopped white or dark chocolate into the batter before folding in egg whites.
Personally, I once tried a lemon zest and yuzu juice combo that gave the cake a refreshing twist perfect for spring. It paired beautifully with a cup of green tea, turning an ordinary afternoon into a little celebration.
Serving & Storage Suggestions
Serve this cheesecake chilled or slightly warmed for a different experience. I like it straight from the fridge when its texture is firm but still melts easily on the tongue. Dusting the top with powdered sugar or a light drizzle of honey adds a nice touch.
Try pairing it with a cup of jasmine tea or a light coffee to balance the sweetness. For a more indulgent touch, fresh whipped cream or a side of vanilla ice cream works beautifully.
Storage is straightforward: keep the cheesecake covered in the refrigerator for up to 4 days. It holds up well, and the flavors mellow and deepen overnight. For longer storage, it freezes nicely wrapped tightly in plastic wrap and foil for up to 1 month. Thaw overnight in the fridge before serving.
When reheating, warm gently in a low oven (about 250°F / 120°C) for 5-7 minutes to revive that soft texture without drying it out.
Nutritional Information & Benefits
This soufflé cheesecake is lighter than traditional versions, thanks to the whipped egg whites and modest sugar content. A typical serving (about 1/8 of the cake) contains approximately:
| Calories | 210 |
|---|---|
| Protein | 7 g |
| Fat | 15 g |
| Carbohydrates | 12 g |
| Sugar | 9 g |
The cream cheese provides a good source of calcium and protein, while the egg whites add lean protein with minimal fat. This dessert fits reasonably well into a balanced diet when enjoyed in moderation.
It’s gluten-containing unless you substitute flour, and obviously not suitable for those with dairy or egg allergies. For a health-conscious twist, using low-fat cream cheese and reducing sugar slightly can tone down the richness without sacrificing much flavor.
Conclusion
The fluffy Japanese soufflé cheesecake is more than just a dessert; it’s a little project that rewards patience and attention with a cloud-like treat that’s both elegant and approachable. Whether you’re a seasoned baker or someone looking to try something new, this recipe invites you to slow down and savor the process—and the payoff.
Feel free to customize it with your favorite flavors or enjoy it classic and simple. It’s a recipe that’s stuck with me because it balances lightness and richness in a way that feels just right. So, why not give it a try? I’d love to hear how you make it your own, whether you go for matcha, fruit, or keep it pure and simple.
And if you like dishes that bring comfort with a little flair, you might appreciate the cozy vibes of vegetable beef soup with barley or the soul-soothing loaded baked potato soup from this site. Sweet or savory, it’s all about good food that feels like home.
FAQs About Fluffy Japanese Soufflé Cheesecake
What makes Japanese soufflé cheesecake so fluffy?
It’s all about the whipped egg whites folded gently into the cream cheese batter. This traps air, giving the cake its light, airy texture.
Can I use a regular oven without a water bath?
The water bath keeps the cheesecake moist and prevents cracking. If you skip it, the cake might dry out or crack more easily, so it’s highly recommended for best results.
How do I store leftover cheesecake?
Keep leftovers covered in the refrigerator for up to 4 days or freeze tightly wrapped for up to a month. Thaw in the fridge before serving.
Can I make this cheesecake gluten-free?
Yes, swap the all-purpose flour for almond flour or a gluten-free blend. The texture might be slightly different but still delicious.
Why did my cheesecake sink after baking?
Common reasons include overmixing the batter, underbaking, or sudden temperature changes when cooling. Let the cake cool gradually in the oven with the door ajar to help prevent sinking.
Pin This Recipe!
Fluffy Japanese Soufflé Cheesecake
- Total Time: 3 hours
- Yield: 8 servings 1x
Description
A light and airy Japanese soufflé cheesecake with a delicate, cloud-like texture that melts on your tongue. Perfect for special occasions and impressing guests without the fuss.
Ingredients
- 8 ounces (225 g) cream cheese, softened
- 2 tablespoons (28 g) unsalted butter, softened
- 1/4 cup (60 ml) whole milk, room temperature
- 4 large eggs, separated, room temperature
- 3/4 cup (150 g) granulated sugar, divided
- 1/2 cup (65 g) all-purpose flour, sifted
- 2 tablespoons (16 g) cornstarch, sifted
- 1 teaspoon vanilla extract
- 1 teaspoon fresh lemon juice (optional)
- 1/4 teaspoon cream of tartar
Instructions
- Preheat oven to 320°F (160°C). Line an 8-inch springform pan with parchment paper and wrap a kitchen towel around the base to prevent water leaks.
- Beat cream cheese until smooth. Add softened butter, whole milk, and vanilla extract; mix until silky. Gradually add half the sugar (3/8 cup or 75 g) and beat until light and fluffy.
- Add egg yolks one at a time, mixing gently until incorporated.
- Sift together flour and cornstarch. Gradually fold into cream cheese mixture gently to maintain airiness.
- In a clean bowl, whisk egg whites with cream of tartar until foamy. Gradually add remaining sugar in three additions, whipping until stiff, glossy peaks form.
- Fold one-third of whipped egg whites into batter to lighten it, then gently fold in remaining egg whites until no streaks remain.
- Pour batter into prepared pan and smooth top. Tap pan gently to release large air bubbles.
- Place cake pan in a larger roasting pan. Pour hot water into roasting pan until it reaches halfway up the sides of the cake pan.
- Bake at 320°F (160°C) for 50–60 minutes until top is golden and a skewer comes out mostly clean. Avoid opening oven during first 40 minutes.
- Turn off oven and leave cake inside with door slightly open for 30 minutes to cool gradually.
- Remove cake from water bath and towel. Cool to room temperature, then release from pan and chill in refrigerator for at least 2 hours before serving.
Notes
Use room temperature ingredients for best results. Whip egg whites to stiff peaks but avoid overwhipping. Fold gently to maintain air bubbles. Use a water bath to keep the cake moist and prevent cracking. Cool gradually in the oven to avoid sinking. Cracks add character and are not a problem. For dairy-free or gluten-free versions, substitute cream cheese and flour accordingly.
- Prep Time: 30 minutes
- Cook Time: 50-60 minutes
- Category: Dessert
- Cuisine: Japanese
Nutrition
- Serving Size: 1 slice (1/8 of cake
- Calories: 210
- Sugar: 9
- Fat: 15
- Carbohydrates: 12
- Protein: 7
Keywords: Japanese soufflé cheesecake, fluffy cheesecake, light cheesecake, soufflé dessert, Japanese dessert, cloud cheesecake, water bath cheesecake