My niece asked why I couldn’t just melt the white chocolate chips in the microwave instead of using a double boiler. I started to explain why that wouldn’t work — then stopped. Honestly, I had no real reason. I’d just always done it the “proper” way because that’s what the recipe books said. So I handed her the bag of Ghirardelli white chocolate chips, shrugged, and said, “Go for it.”
She dumped them in a glass bowl, zapped them in thirty-second bursts, and stirred until they were silky smooth. No scorching. No seized chocolate. No fuss. I stood there, spatula in hand, feeling like a cooking snob who’d just been humbled by a seventeen-year-old with zero kitchen pretension. She looked at me and said, “See? It’s just melting chocolate, Auntie.”
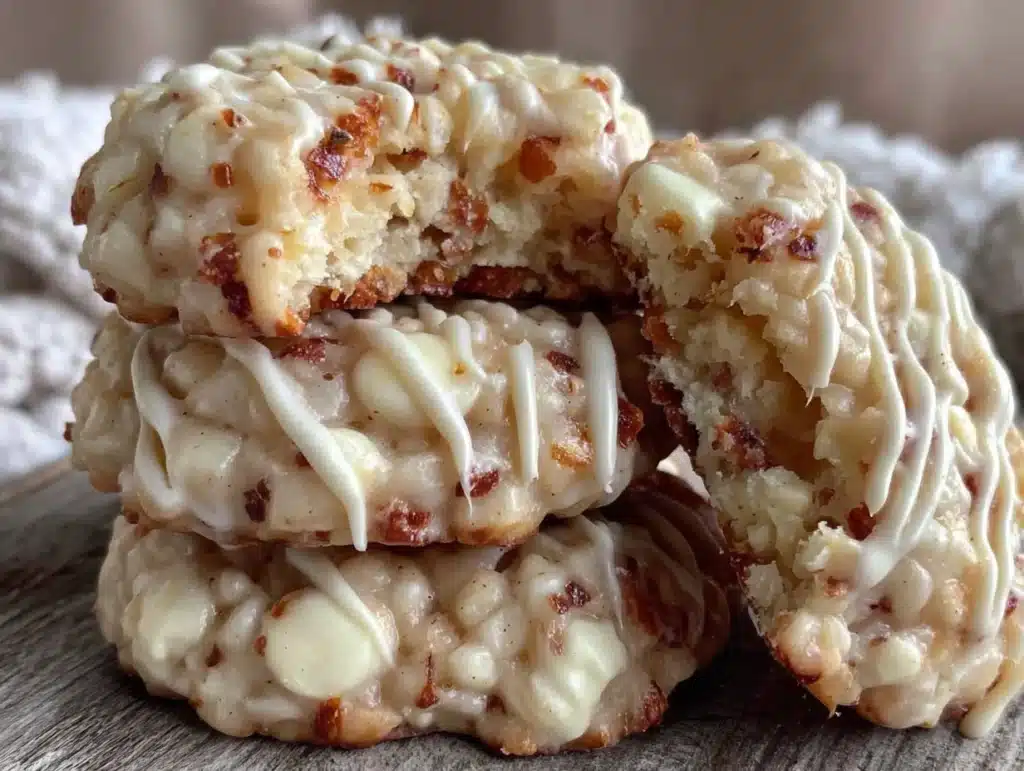
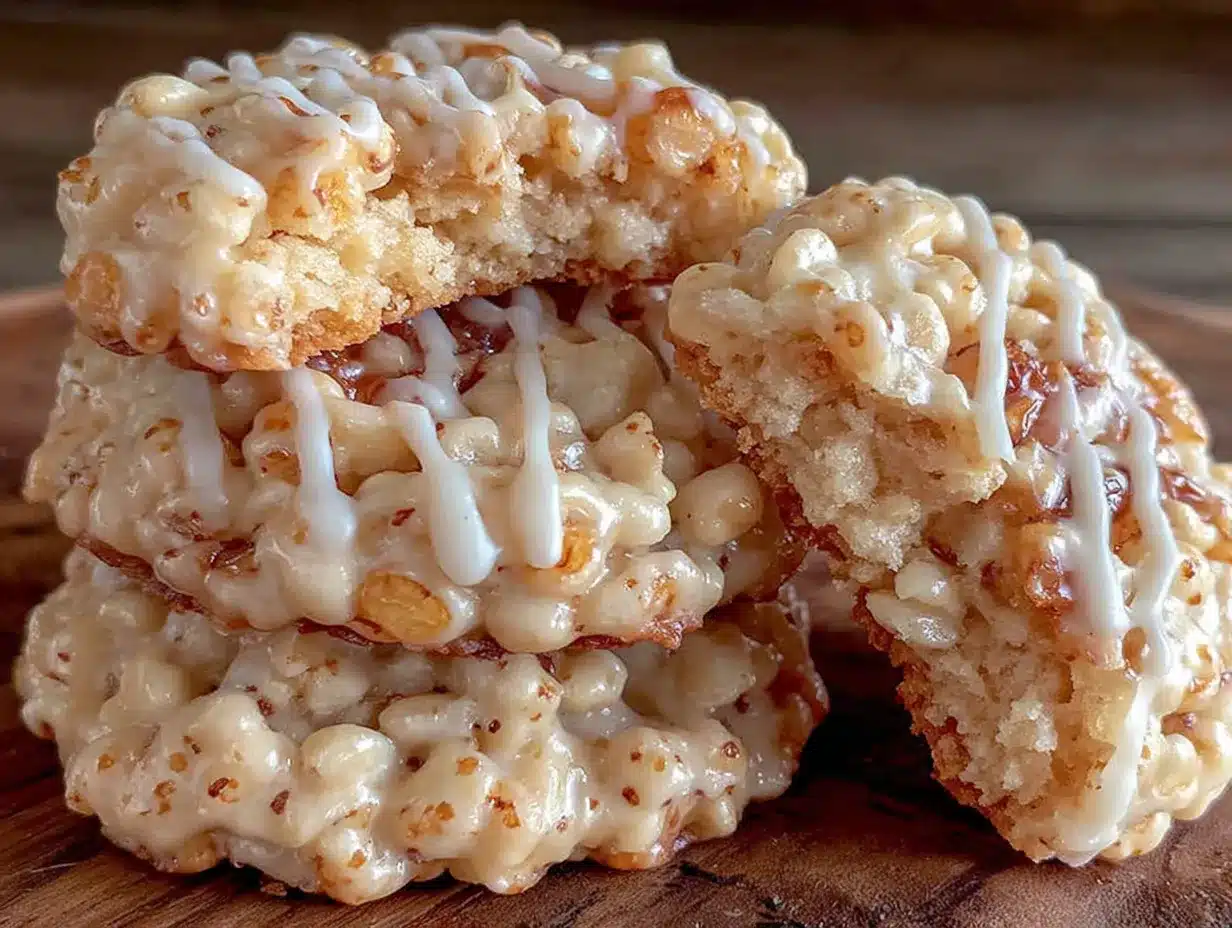
That moment changed how I approach this recipe entirely. These avalanche cookies — sometimes called snowball cookies or no-bake white chocolate clusters — have been my go-to for years. But after that night, I stopped overcomplicating them. The cookies turned out exactly the same: crunchy, sweet, loaded with peanut butter and crispy rice cereal, and completely irresistible. Maybe you’ve been there too — clinging to a technique just because it’s what you were taught, only to realize the simpler way works better.
These crowd-pleasing no-bake avalanche cookies with white chocolate are the kind of recipe you make when you need something impressive without breaking a sweat. They’re perfect for holiday cookie exchanges, last-minute potlucks, or when you just need a sweet fix without turning on the oven. The best part? You only need three ingredients — well, four if you count the peanut butter, but we’ll get to that. Let me show you how to make them.
Why You’ll Love This Recipe
I’ve tested this recipe more times than I care to admit, and each batch taught me something new. These avalanche cookies aren’t just easy — they’re genuinely foolproof when you follow a few simple tricks. Here’s why they’ve become my most-requested dessert for gatherings:
- Three Ingredients Only : White chocolate chips, creamy peanut butter, and crispy rice cereal. That’s it. No eggs, no butter, no flour, no oven.
- Ready in 15 Minutes : From start to finish, you can have a batch cooling in the fridge within a quarter of an hour. Perfect when guests show up unexpectedly.
- Perfect for Hosting : These cookies look like you spent hours in the kitchen. The white chocolate coating gives them a beautiful, bakery-style finish that impresses everyone.
- No-Bake Magic : Summer parties, hot kitchens, or dorm rooms — these work anywhere. No oven required means no heating up your house.
- Crowd-Pleaser Guaranteed : Kids love them, adults sneak extras, and they disappear faster than almost any baked cookie I’ve ever made.
What makes this version different from other avalanche cookie recipes? It’s the technique. Most recipes tell you to melt everything together and scoop. But I learned the hard way that the ratio matters. Too much white chocolate and you get greasy puddles. Too much cereal and they fall apart. After burning through three bags of white chocolate chips (and one very sad batch that went straight in the trash), I landed on the perfect balance. These cookies hold their shape, have that satisfying crunch, and the white chocolate sets up firm but not hard.
This is the kind of recipe that makes you close your eyes after the first bite. The sweet white chocolate hits first, then the salty peanut butter kicks in, and the crispy rice cereal gives that irresistible crunch. It’s comfort food reimagined — no oven, no stress, but all the satisfaction of a homemade treat. Perfect for impressing guests without breaking a sweat.
What Ingredients You Will Need
This recipe uses simple, pantry-friendly ingredients to deliver bold flavor and satisfying texture without the fuss. Most of these items you probably already have in your kitchen, which makes these avalanche cookies perfect for spontaneous baking sessions.
For the Cookie Base
- 12 ounces white chocolate chips (I recommend Ghirardelli or Guittard for the smoothest melt — cheaper brands sometimes contain less cocoa butter and can seize up)
- 1 cup creamy peanut butter (Jif or Skippy work great; avoid natural-style peanut butter that separates, as the oil can make the mixture greasy and prevent proper setting)
- 3 cups crispy rice cereal (Name brand like Kellogg’s Rice Krispies gives the best crunch, but generic works fine too — just check the expiration date for staleness)
Optional Add-Ins
- 1/2 cup mini marshmallows (adds a chewy texture contrast — fold in after the cereal)
- 1/4 cup chopped peanuts (for extra crunch and a salty kick)
- 1 teaspoon vanilla extract (enhances the white chocolate flavor)
- Flaky sea salt (sprinkle on top before the chocolate sets — trust me on this one)
Let me share a little secret I discovered after a particularly disastrous batch. The peanut butter you choose matters more than you’d think. I once used a natural, stir-it-yourself peanut butter from the health food store, thinking it would be “healthier.” The oils separated during melting, and the cookies never set properly — they stayed greasy and soft even after hours in the fridge. Stick with the standard processed peanut butter for this recipe. It has stabilizers that help the mixture bind and set correctly.
For the white chocolate chips, look for ones that list cocoa butter as an ingredient, not just vegetable oils. Real white chocolate melts more smoothly and has a creamier flavor. I’ve tested this with store-brand chips, and while they work, the texture isn’t quite as luxurious. If you’re making these for a party or holiday gift exchange, splurge on the good stuff.
One more thing about the crispy rice cereal — stale cereal makes sad cookies. If your box has been open for weeks, the cereal will crush into dust when you fold it in. Fresh cereal gives that satisfying snap when you bite into the cookie. I learned this the hard way when I made a batch for a cookie swap and ended up with dense, chewy lumps instead of light, crunchy clusters.
Equipment Needed
You don’t need fancy tools for these avalanche cookies. That’s part of the beauty. Here’s what you’ll need:
- Large microwave-safe bowl (glass or ceramic works best — plastic can absorb odors and stain)
- Rubber spatula (for folding without crushing the cereal)
- Baking sheet (lined with parchment paper or a silicone baking mat)
- Cookie scoop or two spoons (a 1.5-inch scoop makes uniform cookies that look professional)
- Measuring cups and spoons
- Small saucepan (if you prefer the double boiler method — but honestly, the microwave works fine)
If you don’t have a cookie scoop, don’t worry. Just use two spoons to drop the mixture onto the baking sheet. The cookies won’t be perfectly round, but they’ll taste the same. I actually prefer the rustic look for casual gatherings.
For the baking sheet, any rimmed sheet pan works. I use a half-sheet pan because it fits perfectly in my fridge. If you’re making a double batch, line two sheets so you can alternate chilling them.
Preparation Method
Let me walk you through this step by step. I’ve made these avalanche cookies dozens of times, and these are the exact steps that produce perfect results every time.
-
Line a baking sheet with parchment paper. Make sure the paper lies flat — curl the edges under the sheet if it keeps rolling up. You want a smooth surface so the cookies release easily. Silicone mats work great too.
-
Pour the white chocolate chips into a large microwave-safe bowl. Don’t use a small bowl — you need room to fold in the cereal later. Trust me, I learned this after white chocolate spilled over the edge of a too-small bowl and made a mess on my counter.
-
Microwave the white chocolate chips in 30-second intervals, stirring between each. This is crucial. White chocolate burns faster than you think. After the first 30 seconds, the chips will look mostly unchanged — keep stirring. After 60 seconds, they’ll start to soften. By 90 seconds, you should have a smooth, glossy mixture. My niece was right — this takes about 90 seconds total, not the 10 minutes a double boiler requires.
-
Add the peanut butter to the melted white chocolate. Stir until completely combined. The mixture will look thick and slightly grainy at first, but keep stirring. It smooths out into a beautiful, creamy consistency. This should take about 30 seconds of vigorous stirring.
-
Fold in the crispy rice cereal. Pour the cereal into the bowl and use a gentle folding motion — lift from the bottom, turn the spatula, and repeat. Don’t stir aggressively or you’ll crush the cereal into crumbs. You want whole pieces coated in the white chocolate mixture. This step takes about 1 minute.
-
Let the mixture cool for 2-3 minutes. This is a trick I stumbled upon by accident. If you scoop immediately, the cookies spread into flat puddles. Letting the mixture sit for a few minutes allows it to thicken slightly, making the cookies hold their shape better. The mixture should still be warm but not hot.
-
Scoop the mixture onto the prepared baking sheet. Use a 1.5-inch cookie scoop or two spoons. Drop mounds about 2 inches apart — they won’t spread much, but you want air to circulate around each cookie. For uniform cookies, press the mixture firmly into the scoop before releasing. Each cookie should be about 1.5 tablespoons of mixture.
-
Optional: Press a few extra cereal pieces on top. This makes the cookies look more rustic and gives a visual cue of what’s inside. I do this when I’m making them for a cookie exchange or holiday party.
-
Refrigerate for at least 30 minutes. The cookies need time to set completely. Don’t rush this step. I once tried to speed things up by putting them in the freezer for 10 minutes — the outside set but the inside was still soft, and they fell apart when I tried to pick them up. Thirty minutes in the fridge is the sweet spot.
-
Remove from the fridge and serve. The cookies should be firm to the touch and hold their shape. If they feel soft, give them another 10-15 minutes. Store any leftovers in the refrigerator.
Here’s a sensory cue to watch for: when you scoop the mixture, it should look like chunky cookie dough — the cereal pieces should be evenly coated but still visible. If the mixture looks soupy, you overheated the chocolate. If it looks dry and crumbly, you added too much cereal. The perfect texture is somewhere in between, where every cereal piece glistens with white chocolate.
Cooking Tips & Techniques
After making these avalanche cookies for every holiday, potluck, and last-minute dessert emergency for the past five years, I’ve collected a few hard-earned lessons. Let me save you some trouble.
Don’t overheat the white chocolate. This is the number one mistake I see. White chocolate burns at a lower temperature than milk or dark chocolate because of its milk solids. If it looks separated or grainy after melting, you’ve overheated it. The fix? Stir in a tablespoon of coconut oil or vegetable oil — it won’t fix it completely, but it helps smooth things out. Prevention is better: always use 30-second intervals and stir thoroughly between each.
Work quickly but gently. Once you add the cereal, you have about 5 minutes before the mixture starts to set. If it becomes too stiff to scoop, pop the bowl in the microwave for 10 seconds to soften it. But don’t do this more than once — repeated reheating can cause the white chocolate to seize.
Use a cookie scoop for consistent size. Uniform cookies not only look better, but they also set at the same rate. If you make some huge and some tiny, the small ones will be rock hard while the big ones are still soft. A 1.5-inch scoop gives you cookies that are about 2 inches across — perfect for a dessert table.
Let them set completely before stacking. I learned this one the messy way. I stacked warm cookies in a container to take to a party, and they all fused into one giant avalanche cookie blob. Not my finest moment. Wait the full 30 minutes, then store in a single layer with parchment between layers if you need to stack them.
Room temperature matters. If your kitchen is hot and humid, the cookies will take longer to set. On a humid summer day, I’ve had to refrigerate them for a full hour. On a cool winter day, 20 minutes sometimes does the trick. Check them at 20 minutes, then add time as needed.
Variations & Adaptations
One of the best things about these avalanche cookies is how adaptable they are. Here are some variations I’ve tried and loved:
Chocolate Avalanche Cookies
Swap the white chocolate chips for milk or dark chocolate chips. The process is exactly the same, but the flavor profile shifts to a more traditional chocolate-peanut butter combo. I make these for my brother who “doesn’t do white chocolate” — his loss, honestly, but these are still delicious.
Peanut-Free Version
Use sunflower seed butter or cookie butter instead of peanut butter. Sunflower seed butter works beautifully, though the cookies will have a slight green tint from a natural reaction between sunflower seeds and baking soda (don’t worry, it’s harmless). Cookie butter gives a speculoos-spiced flavor that’s amazing with white chocolate.
Holiday Sprinkle Avalanche Cookies
Fold in 1/4 cup of holiday sprinkles after the cereal. Red and green for Christmas, pastels for Easter, orange and black for Halloween — the options are endless. The sprinkles add a festive pop of color and a slight crunch. I do this for every holiday cookie exchange and they always disappear first.
Salty-Sweet Version
Sprinkle flaky sea salt on top of each cookie right after scooping, before they go in the fridge. The salt crystals contrast beautifully with the sweet white chocolate. This is my personal favorite variation — the salty-sweet combo is addictive.
Gluten-Free Option
These cookies are naturally gluten-free if you use certified gluten-free crispy rice cereal. Regular Rice Krispies contain malt flavoring from barley, which has gluten. Look for specific gluten-free versions or use a generic store brand that doesn’t contain malt.
Serving & Storage Suggestions
These avalanche cookies are best served cold or at cool room temperature. If you’re hosting a party, take them out of the fridge about 10 minutes before serving — this takes the chill off without letting them get soft.
For presentation, arrange them on a white platter or cake stand. The white cookies against a dark surface look stunning. I like to scatter a few extra cereal pieces around the plate for visual interest. If you made the salted version, the glistening salt crystals catch the light beautifully.
These cookies pair wonderfully with coffee, tea, or a cold glass of milk. For holiday parties, I serve them alongside peppermint bark and sugar cookies for a varied dessert spread. They also make excellent gifts — pack them in a decorative tin lined with parchment paper, and they’ll keep for up to a week in the fridge.
Storage: Keep avalanche cookies in an airtight container in the refrigerator for up to 7 days. They also freeze beautifully for up to 3 months. To freeze, arrange them in a single layer on a baking sheet and freeze until solid (about 1 hour), then transfer to a freezer-safe bag or container. Thaw in the refrigerator for about 30 minutes before serving.
Reheating: These are meant to be eaten cold or at room temperature, so no reheating needed. If they’ve been in the fridge for a few days and seem too firm, let them sit at room temperature for 15 minutes before serving.
One thing I love about these cookies is how the flavors develop over time. The first day, they’re all about the sweet white chocolate and crunchy cereal. By day three, the peanut butter flavor has melded with the white chocolate, creating a more complex, balanced taste. They rarely last that long in my house, but when they do, they’re even better.
Nutritional Information & Benefits
Let’s be real — these are cookies, not health food. But here’s what you should know:
Estimated per cookie (based on 24 cookies):
- Calories: 145
- Fat: 9g
- Carbohydrates: 15g
- Protein: 3g
- Sugar: 10g
- Sodium: 75mg
The peanut butter provides a small amount of protein and healthy fats, while the white chocolate adds calcium from the milk solids. The crispy rice cereal is low in fiber but provides a satisfying crunch with minimal added sugar compared to other mix-ins.
Dietary considerations: These cookies are naturally egg-free and can be made gluten-free and vegan with simple substitutions. For a vegan version, use dairy-free white chocolate chips and peanut butter (most peanut butter is vegan). For a lower-sugar option, use sugar-free white chocolate chips — though the texture may be slightly different.
I don’t pretend these are a health food, but I appreciate that they’re made with real ingredients you can pronounce. No preservatives, no artificial flavors, just simple pantry staples transformed into something special. Everything in moderation, right?
Conclusion
These crowd-pleasing no-bake avalanche cookies with white chocolate have become my signature dessert for a reason. They’re simple enough for a Tuesday night craving but impressive enough for a holiday party. The three-ingredient base makes them accessible to anyone, and the variations mean you can customize them endlessly without changing the fundamental recipe.
I love that these cookies remind me of that night with my niece — the night I learned that sometimes the simplest way really is the best way. She still brings up that moment every time I make them. “Remember when you thought the microwave would ruin everything?” she says, grinning. I do remember. And I’m grateful she pushed me to try something different.
Now I want to hear from you. Have you made avalanche cookies before? What variations did you try? Drop a comment below and let me know — I’m always looking for new ideas to test in my kitchen. And if you make these for your next gathering, tag me in your photos. Nothing makes my day like seeing these cookies on your dessert table.
Go ahead, grab that bag of white chocolate chips and give these a try. Your guests will thank you — and you’ll wonder why you ever bothered turning on the oven.
Frequently Asked Questions
Can I use crunchy peanut butter instead of creamy?
Yes, you can use crunchy peanut butter for extra texture. The small peanut pieces add a nice crunch, but keep in mind that the mixture might be slightly harder to scoop evenly. I’ve used both, and honestly, I prefer creamy for a smoother texture, but crunchy works great if that’s what you have on hand.
Why did my avalanche cookies turn out greasy?
Greasy cookies usually mean the white chocolate was overheated or the peanut butter had too much oil. Natural peanut butter that separates is the most common culprit. Stick with processed peanut butter like Jif or Skippy, and make sure you’re melting the white chocolate gently in 30-second intervals.
Can I make these avalanche cookies vegan?
Absolutely. Use dairy-free white chocolate chips (many brands are now available) and check that your peanut butter is vegan (most are). The crispy rice cereal is typically vegan, but double-check the label if you’re concerned about vitamin D3, which is sometimes derived from animal sources.
How long do avalanche cookies last?
Stored in an airtight container in the refrigerator, these cookies stay fresh for up to 7 days. They also freeze beautifully for up to 3 months. Just make sure they’re fully set before freezing, and thaw them in the fridge before serving.
My cookies fell apart when I tried to pick them up. What went wrong?
This usually happens for one of three reasons: the mixture wasn’t chilled long enough (needs at least 30 minutes), there wasn’t enough white chocolate to bind the cereal, or the peanut butter was too oily. Next time, make sure you’re using the right ratio and giving them enough time in the fridge.
Pin This Recipe!


3-Ingredient Avalanche Cookies: Best No-Bake White Chocolate Dessert
- Total Time: 42 minutes
- Yield: 24 cookies 1x
Description
These crowd-pleasing no-bake avalanche cookies with white chocolate are the kind of recipe you make when you need something impressive without breaking a sweat. They’re perfect for holiday cookie exchanges, last-minute potlucks, or when you just need a sweet fix without turning on the oven.
Ingredients
- 12 ounces white chocolate chips (Ghirardelli or Guittard recommended)
- 1 cup creamy peanut butter (Jif or Skippy recommended)
- 3 cups crispy rice cereal (Kellogg’s Rice Krispies recommended)
- 1/2 cup mini marshmallows (optional)
- 1/4 cup chopped peanuts (optional)
- 1 teaspoon vanilla extract (optional)
- Flaky sea salt (optional, for topping)
Instructions
- Line a baking sheet with parchment paper or a silicone baking mat.
- Pour the white chocolate chips into a large microwave-safe bowl.
- Microwave the white chocolate chips in 30-second intervals, stirring between each, until smooth and glossy (about 90 seconds total).
- Add the peanut butter to the melted white chocolate and stir until completely combined and smooth.
- Fold in the crispy rice cereal gently using a rubber spatula, being careful not to crush the cereal.
- Let the mixture cool for 2-3 minutes to thicken slightly.
- Scoop the mixture onto the prepared baking sheet using a 1.5-inch cookie scoop or two spoons, placing mounds about 2 inches apart.
- Optional: Press a few extra cereal pieces on top for a rustic look.
- Refrigerate for at least 30 minutes until firm.
- Remove from the fridge and serve cold or at cool room temperature.
Notes
Don’t overheat the white chocolate—use 30-second intervals. Use processed peanut butter (not natural) for best results. Let cookies set completely before stacking. For vegan version, use dairy-free white chocolate chips. Cookies keep in the refrigerator for up to 7 days or freeze for up to 3 months.
- Prep Time: 10 minutes
- Cook Time: 2 minutes
- Category: Dessert
- Cuisine: American
Nutrition
- Serving Size: 1 cookie
- Calories: 145
- Sugar: 10
- Sodium: 75
- Fat: 9
- Saturated Fat: 4
- Carbohydrates: 15
- Fiber: 1
- Protein: 3
Keywords: avalanche cookies, no-bake cookies, white chocolate cookies, peanut butter cookies, 3-ingredient cookies, easy dessert, holiday cookies