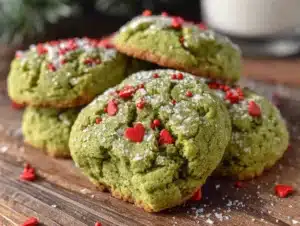
I’ll never forget the moment I realized I’d grabbed the wrong bag of flour. It was the week before Christmas, I had a toddler clinging to my leg, and I was supposed to be making a double batch of classic sugar cookies for a cookie swap. The plan was simple: buttery, crisp, perfectly shaped little trees and stars. But in my sleep-deprived haze, I reached for the bag of cake flour instead of all-purpose. The dough came together too soft, almost fluffy, and when I tried to roll it out, it stuck to everything—my rolling pin, the counter, my hands. Honestly, I was ready to cry. I had no time to run to the store, and the swap was in three hours.
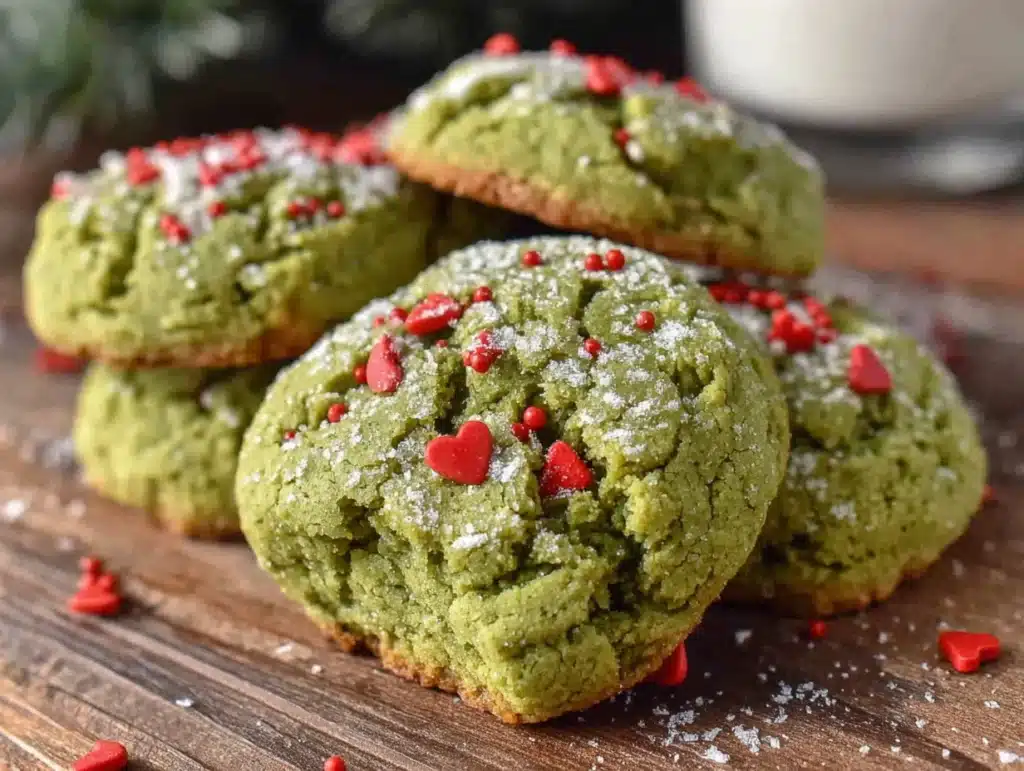
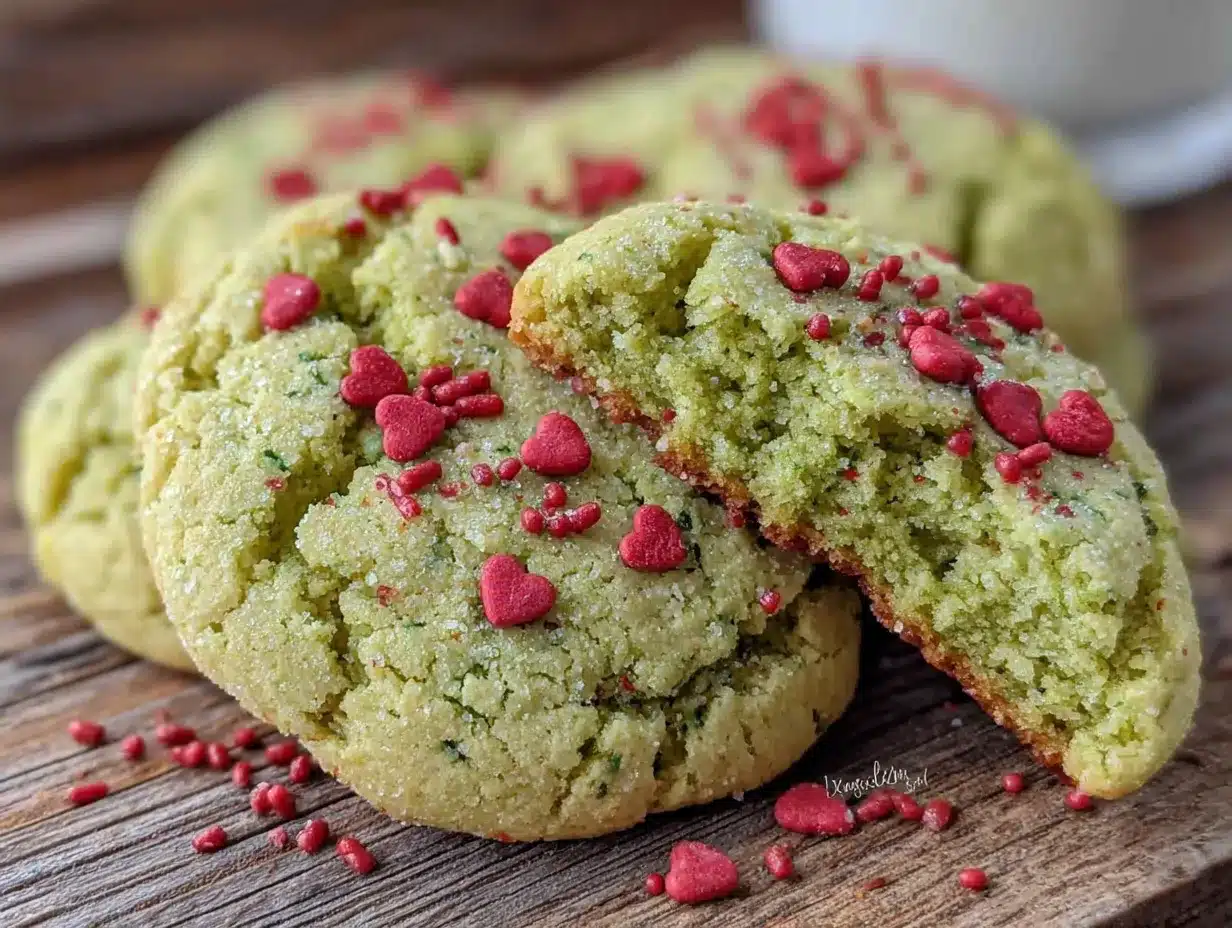
So, I did what any desperate, slightly frazzled home cook would do. I scraped the sticky mess into a bowl, tossed it in the fridge to chill, and hoped for a miracle. Twenty minutes later, I pulled out a dough that was still softer than usual, but workable. I scooped it into balls, rolled them in powdered sugar (a last-minute whim), and baked them off. When they came out of the oven, they weren’t the perfect little trees I’d imagined. They were cracked, puffy, and honestly, a little ugly. But the smell—that buttery, vanilla warmth—filled the kitchen, and my toddler stopped crying to stare at the oven. I let them cool, dipped half of each cookie in red gel food coloring (don’t ask me why, it was a blur), and stuck a single red heart sprinkle right in the center. What came out was nothing like the plan—and better. These little green-tinted, heart-topped cookies looked exactly like the Grinch’s heart growing three sizes. And let me tell you, my heart did the same thing when I took that first bite.
Why You’ll Love These Festive Grinch Cookies with Red Heart Sprinkles
These aren’t just another Christmas cookie. They are the cookie that will make people stop, laugh, and ask for the recipe before they’ve even finished one. You know that feeling when a dessert is both delicious and a conversation starter? That’s this cookie.
- Quick & Easy: From mixing bowl to cooling rack in under 30 minutes. Perfect for those last-minute holiday parties or a snowy afternoon baking session with the kids.
- Simple Ingredients: You probably already have everything in your pantry. No weird extracts or hard-to-find decorations. Just butter, sugar, flour, and a little green food coloring.
- Perfect for Christmas: These cookies were practically made for a How the Grinch Stole Christmas movie night, a school party, or a festive cookie exchange. They scream holiday fun.
- Crowd-Pleaser: Kids go wild for the heart sprinkles, and adults appreciate the clever nod to the classic story. I’ve never brought a plate of these anywhere that didn’t come back empty.
- Unbelievably Delicious: The texture is the real star here. The outside is slightly crisp from the powdered sugar coating, while the inside stays soft, tender, and almost cake-like. That little heart sprinkle adds a tiny, sweet crunch that just works.
What makes this recipe different from the thousands of other sugar cookies out there? It’s the happy accident of using cake flour. That mistake gave these cookies a uniquely soft, pillowy crumb that you just don’t get with a standard recipe. Plus, the powdered sugar coating creates a beautiful crackled look that’s pure Grinch—imperfect, charming, and completely intentional. This isn’t just another version of a sugar cookie. It’s my best version, born from a moment of panic and perfected over many batches since.
What Ingredients You Will Need
This recipe uses simple, wholesome ingredients to deliver that signature soft texture and festive look. Most of these are pantry staples, but a couple of notes will help you get the best results. I’ve tested this with different brands, and I really do recommend sticking with the ones I mention here for the perfect crumb.
- Unsalted Butter (1 cup / 2 sticks), softened: This is non-negotiable for me. Unsalted butter lets you control the salt level. I always use Kerrygold for its rich flavor, but any good-quality unsalted butter works. Make sure it’s truly softened—leave it out for about an hour before you start.
- Granulated Sugar (1 cup / 200g): Standard white sugar. It gives the cookies structure and sweetness. No need for anything fancy here.
- Large Egg (1), room temperature: A room-temperature egg emulsifies into the butter-sugar mixture much better than a cold one, creating a smoother dough. Just set it on the counter with your butter.
- Vanilla Extract (1 teaspoon): Pure vanilla extract, not imitation. It makes a real difference in the flavor depth. I’m a fan of Nielsen-Massey for its strong, clean taste.
- Cake Flour (2 cups / 240g): This is the secret ingredient! Cake flour has a lower protein content than all-purpose flour, which results in a softer, more tender cookie. Don’t substitute with all-purpose—the texture won’t be the same. If you don’t have cake flour, you can make a quick substitute: for every cup of all-purpose flour, remove 2 tablespoons and replace with 2 tablespoons of cornstarch. Sift it together well.
- Baking Powder (1 teaspoon): This gives the cookies their lift and that beautiful crackled top.
- Salt (1/2 teaspoon): Balances the sweetness and enhances the butter flavor. I use fine sea salt.
- Green Gel Food Coloring: Gel is much better than liquid drops. It gives you a vibrant, true Grinch-green color without thinning out your dough. I prefer the Americolor brand in “Leaf Green” or “Electric Green.” Start with a few drops and add more until you get the shade you want.
- Powdered Sugar (1/2 cup / 60g), for rolling: This is what creates that iconic crackled, snowy look. Don’t skip it!
- Red Heart Sprinkles (about 50): The star of the show! You can find these at most craft stores or online. I like the Wilton brand red heart sprinkles. They’re the perfect size and hold their color well during baking.
Equipment Needed
You don’t need a professional bakery setup for these cookies. Most of this you probably already own. Here’s what you’ll need:
- Electric Mixer: A stand mixer with a paddle attachment is ideal, but a hand mixer works perfectly too. You need to cream the butter and sugar until light and fluffy, and doing it by hand is a serious arm workout.
- Large Mixing Bowls: One for the dry ingredients and one for the wet.
- Baking Sheets: Standard half-sheet pans are perfect. Line them with parchment paper or a silicone baking mat for easy cleanup.
- Cooling Rack: Essential for letting the cookies cool evenly so the bottoms don’t get soggy.
- Cookie Scoop (1.5 tablespoon size): This is my favorite tool for getting uniform cookies that bake evenly. A small ice cream scoop works too. If you don’t have one, just use a spoon, but the cookies might vary in size.
- Small Bowl: For the powdered sugar to roll the dough balls in.
Preparation Method
Let’s get baking! This method is straightforward, but I’ve included all the little details that I’ve learned from making these dozens of times. Follow these steps, and you’ll have perfect Grinch cookies every time.
- Preheat and Prep: Preheat your oven to 350°F (175°C). Line two baking sheets with parchment paper. This ensures the cookies don’t stick and makes cleanup a breeze.
- Cream the Butter and Sugar: In your large mixing bowl, beat the softened butter and granulated sugar together on medium speed until it’s light, pale, and fluffy. This takes about 2-3 minutes. You’re incorporating air here, which helps the cookies rise. Don’t rush it—scrape down the sides of the bowl once or twice.
- Add the Egg and Vanilla: Crack the room-temperature egg into the bowl and add the vanilla extract. Beat on low until just combined. It might look a little curdled for a second—that’s okay. Scrape the bowl again.
- Incorporate the Green: Add a few drops of your green gel food coloring. Beat on low until the color is evenly distributed. I usually start with 4-5 drops and then add more if I want a deeper green. Remember, the color will lighten slightly as the cookies bake, so go a shade darker than you think you want.
- Mix Dry Ingredients: In a separate, medium bowl, whisk together the cake flour, baking powder, and salt. Whisking aerates the flour and ensures the leavening agents are evenly distributed. No one wants a pocket of baking powder in one cookie!
- Combine Wet and Dry: Gradually add the dry ingredient mixture to the wet ingredients, mixing on low speed. Mix just until the flour disappears. Overmixing at this stage will develop gluten and make the cookies tough. Stop as soon as you see no more streaks of flour. The dough will be very soft and slightly sticky—that’s exactly what we want.
- Chill the Dough (Crucial Step!): This is the most important step for the crackled look. Cover the bowl with plastic wrap and refrigerate the dough for at least 30 minutes. Chilling firms up the butter, which prevents the cookies from spreading too much in the oven. It also allows the flavors to meld. I’ve chilled it for up to 2 hours with great results.
- Shape and Coat: Once chilled, place the 1/2 cup of powdered sugar in a small, shallow bowl. Using your cookie scoop or a spoon, scoop out rounded tablespoons of dough (about 1.5 tablespoons each). Roll each portion into a smooth ball between your palms. Drop the ball into the powdered sugar and roll it around until it’s completely coated. Don’t be shy—you want a thick, snowy layer.
- Bake: Place the sugar-coated dough balls on your prepared baking sheets, spacing them about 2 inches apart. They will spread a bit. Bake for 10-12 minutes. The cookies should look puffed and cracked, and the bottoms should be just lightly golden. The centers will look soft and slightly underdone—that’s perfect. They will continue to set as they cool.
- Add the Heart: This step needs to happen immediately. As soon as the cookies come out of the oven, gently press one red heart sprinkle into the center of each cookie. The residual heat will soften the cookie just enough to hold the sprinkle in place without it falling off later. If you wait until they cool, the sprinkle won’t stick as well.
- Cool Completely: Let the cookies cool on the baking sheet for 5 minutes. This allows them to firm up. Then, transfer them to a wire cooling rack to cool completely. The crackled top will become more pronounced as they cool.
Cooking Tips & Techniques
I’ve made every mistake in the book with these cookies, so you don’t have to. Here are the biggest lessons I’ve learned the hard way.
Don’t Skip the Chill. The first time I made these, I was in a hurry and skipped the chilling step. The cookies spread into flat, green puddles. They still tasted good, but they lost all their character. The chill is what gives you those thick, puffy, crackled tops. Trust me on this.
The Powdered Sugar Coating is Key. I once tried using granulated sugar for the coating, thinking it would give a similar effect. It didn’t. The granules melted into the dough and the cookies came out smooth and shiny, not crackled. The powdered sugar stays on the surface, creating that beautiful, snowy crust that cracks as the cookie expands in the oven.
Watch the Bake Time. Ovens vary wildly. Start checking your cookies at the 9-minute mark. You want them just set around the edges but still soft in the center. Overbaking will give you dry, hard cookies. Remember, they continue to cook on the hot baking sheet for those 5 minutes after you pull them out.
Gel vs. Liquid Coloring. This is a non-negotiable for me. Liquid food coloring will thin your dough out too much, making it sticky and hard to work with. Gel coloring gives you a vibrant color with just a few drops and doesn’t affect the dough’s consistency. I learned this lesson after a particularly neon-green, sticky disaster.
Variations & Adaptations
One of the best things about this recipe is how easy it is to tweak. Here are a few ways I’ve changed it up, depending on the occasion or who I’m baking for.
- Gluten-Free Version: I’ve had success swapping the cake flour with a high-quality gluten-free 1-to-1 baking flour blend (like King Arthur Measure for Measure). The texture is slightly more crumbly, but the crackled effect and the taste are still spot-on.
- Peppermint Twist: For a more festive flavor, add 1/2 teaspoon of peppermint extract along with the vanilla. The cool mint pairs beautifully with the sweet, buttery cookie. Just be careful—peppermint extract is strong. A little goes a long way.
- Different Sprinkles: Not a fan of hearts? No problem! For a Valentine’s Day version, use pink or red sanding sugar. For a general winter cookie, use silver or white snowflake sprinkles. The green cookie base is so versatile.
- Lemon or Lime Zest: Add a teaspoon of finely grated lemon or lime zest to the dough for a bright, citrusy note. It cuts through the sweetness and adds a lovely freshness that’s perfect for spring or summer holidays.
Serving & Storage Suggestions
These cookies are best served at room temperature. The texture is at its peak—soft, tender, with that slight crunch from the powdered sugar coating. I love arranging them on a festive platter, with the red hearts facing up. They make a stunning centerpiece for a dessert table.
Storage: Store these cookies in an airtight container at room temperature. They will stay fresh for up to 5 days. I actually think they taste even better on day two—the flavors meld together beautifully. Do not refrigerate them. The fridge will dry them out and make the powdered sugar coating look dull.
Freezing: You have two options here. You can freeze the baked cookies for up to 3 months. Place them in a single layer in a freezer-safe container, with parchment paper between layers. Thaw at room temperature. Or, you can freeze the unbaked dough balls. Scoop and roll them, but don’t coat them in powdered sugar. Freeze them on a baking sheet until solid, then transfer to a freezer bag. When you’re ready to bake, let them thaw slightly, roll in powdered sugar, and bake as directed.
Nutritional Information & Benefits
Let’s be honest, these are a treat. But knowing what’s in them helps you enjoy them mindfully. Per cookie (based on 24 cookies), you’re looking at approximately:
- Calories: 140
- Fat: 7g
- Carbohydrates: 19g
- Protein: 1.5g
- Sugar: 11g
While they’re not a health food, there’s a small bright side. The butter provides a source of Vitamin A, and if you use a high-quality vanilla extract, you’re getting a touch of antioxidants. The main benefit here is purely emotional—these cookies bring joy, laughter, and a little bit of holiday magic to your table. And honestly, that counts for a lot.
Conclusion
These Festive Grinch Cookies with Red Heart Sprinkles are more than just a dessert. They are a little story on a plate. They remind us that even our biggest kitchen mess-ups can turn into something beautiful—and delicious. I love making them because they never fail to make people smile. The green color, the crackled top, that single red heart in the center… it’s pure nostalgia and fun.
I really hope you give these a try. Don’t be afraid to make them your own. Use a different sprinkle color, add a splash of almond extract, or double the batch because trust me, one batch won’t be enough. If you make them, I’d love to hear about it. Leave a comment below and tell me how they turned out, or share a photo on Pinterest. Happy baking, and may your heart grow three sizes this holiday season!
Frequently Asked Questions
Can I use all-purpose flour instead of cake flour?
You can, but the texture will be different. The cookies will be denser and less tender. For the best, softest, most crackly results, stick with cake flour or use the cornstarch substitute mentioned in the ingredients section.
Why did my cookies spread too much?
This usually happens for one of two reasons: the dough wasn’t chilled long enough, or the butter was too soft. Make sure your dough chills for at least 30 minutes. If your kitchen is very warm, chill it for a full hour.
Can I make the dough ahead of time?
Absolutely! You can refrigerate the dough for up to 3 days. Just wrap it tightly in plastic wrap. When you’re ready to bake, let it sit at room temperature for about 10 minutes to soften slightly before scooping and rolling in powdered sugar.
My cookies came out too green. What did I do wrong?
You probably just used a bit too much food coloring. Start with 3-4 drops of gel color and mix it in. You can always add more, but you can’t take it out. Remember, the color will lighten a bit during baking.
Where can I find red heart sprinkles?
Most craft stores (like Michaels or Joann) carry them, especially around Valentine’s Day and Christmas. You can also find them easily on Amazon. Look for “red heart sprinkles” or “Valentine’s Day sprinkles.” Wilton is a reliable brand.
Pin This Recipe!


Festive Grinch Cookies with Red Heart Sprinkles
- Total Time: 27 minutes
- Yield: 24 cookies 1x
Description
These soft, pillowy sugar cookies are tinted Grinch-green and topped with a single red heart sprinkle, making them a fun and festive holiday treat. Born from a happy accident, they feature a crackled powdered sugar coating and a tender, cake-like crumb.
Ingredients
- 1 cup (2 sticks) unsalted butter, softened
- 1 cup (200g) granulated sugar
- 1 large egg, room temperature
- 1 teaspoon vanilla extract
- 2 cups (240g) cake flour
- 1 teaspoon baking powder
- 1/2 teaspoon fine sea salt
- Green gel food coloring (e.g., Americolor Leaf Green or Electric Green)
- 1/2 cup (60g) powdered sugar, for rolling
- About 50 red heart sprinkles (e.g., Wilton brand)
Instructions
- Preheat your oven to 350°F (175°C). Line two baking sheets with parchment paper.
- In a large mixing bowl, beat the softened butter and granulated sugar together on medium speed until light, pale, and fluffy, about 2-3 minutes. Scrape down the sides of the bowl once or twice.
- Add the room-temperature egg and vanilla extract. Beat on low until just combined. Scrape the bowl again.
- Add a few drops of green gel food coloring. Beat on low until the color is evenly distributed. Start with 4-5 drops and add more for a deeper green; the color will lighten slightly during baking.
- In a separate medium bowl, whisk together the cake flour, baking powder, and salt.
- Gradually add the dry ingredients to the wet ingredients, mixing on low speed just until the flour disappears. Do not overmix. The dough will be very soft and slightly sticky.
- Cover the bowl with plastic wrap and refrigerate the dough for at least 30 minutes (up to 2 hours). This is crucial for the crackled look.
- Place the 1/2 cup of powdered sugar in a small, shallow bowl. Using a cookie scoop or spoon, scoop out rounded tablespoons of dough (about 1.5 tablespoons each). Roll each portion into a smooth ball, then roll it in the powdered sugar until completely coated.
- Place the sugar-coated dough balls on the prepared baking sheets, spacing them about 2 inches apart. Bake for 10-12 minutes, until puffed and cracked, with lightly golden bottoms. The centers will look soft and slightly underdone.
- Immediately after removing from the oven, gently press one red heart sprinkle into the center of each cookie.
- Let the cookies cool on the baking sheet for 5 minutes, then transfer to a wire cooling rack to cool completely.
Notes
Do not skip chilling the dough; it prevents spreading and creates the crackled top. Use gel food coloring instead of liquid to avoid thinning the dough. For a gluten-free version, use a high-quality 1-to-1 gluten-free baking flour blend. Store in an airtight container at room temperature for up to 5 days. Freeze baked cookies for up to 3 months or unbaked dough balls (without powdered sugar) for up to 3 months.
- Prep Time: 15 minutes
- Cook Time: 12 minutes
- Category: Dessert
- Cuisine: American
Nutrition
- Serving Size: 1 cookie
- Calories: 140
- Sugar: 11
- Sodium: 75
- Fat: 7
- Saturated Fat: 4
- Carbohydrates: 19
- Protein: 1.5
Keywords: Grinch cookies, Christmas cookies, sugar cookies, green cookies, heart sprinkles, holiday baking, easy cookies