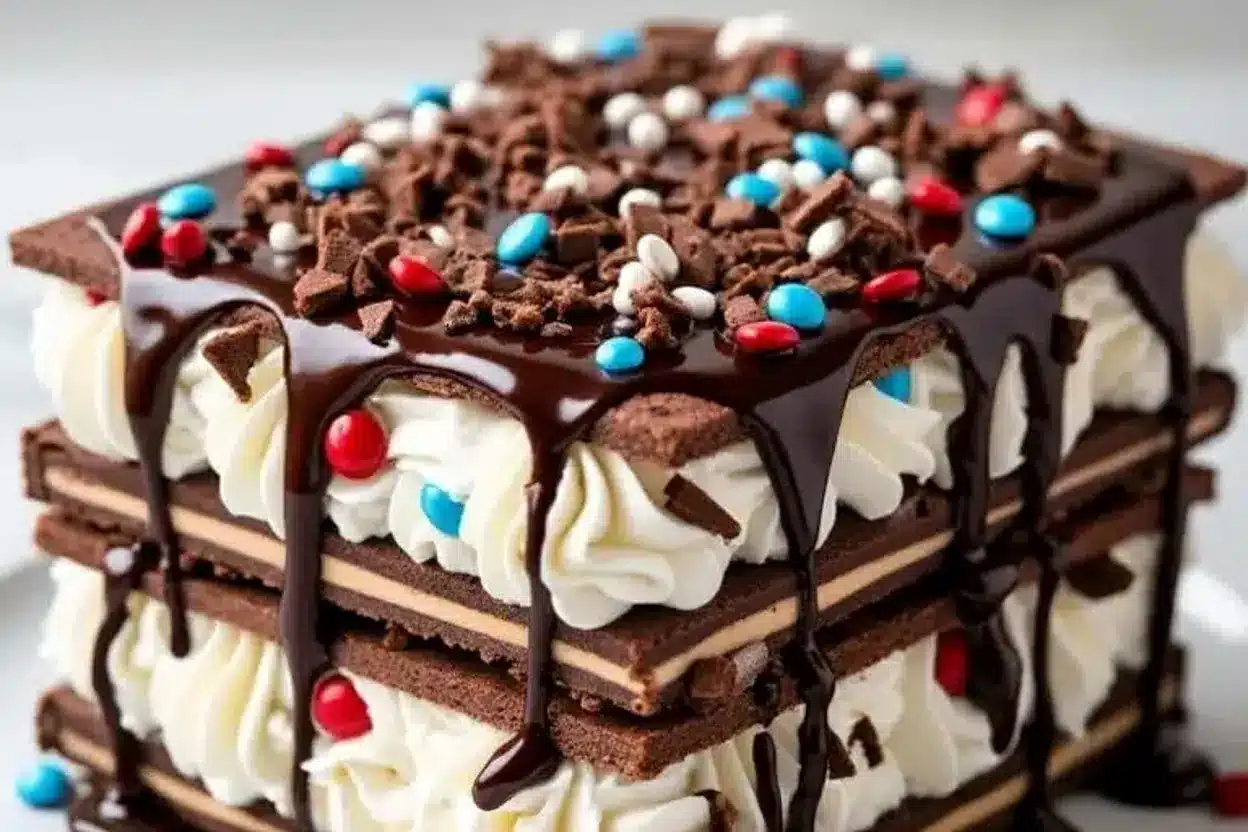
If you’re looking for the ultimate summer dessert, let me introduce you to the Ultimate Ice Cream Sandwich Cake. This no-bake recipe is everything you want on a hot day—cool, creamy, and ridiculously easy to throw together. Imagine layers of ice cream sandwiches, whipped cream, and all your favorite toppings melding into one glorious cake. It’s the kind of dessert that makes you the hero of every BBQ, pool party, or lazy summer afternoon. Trust me, this one’s a crowd-pleaser!
What I love most about this recipe is how customizable it is. Whether you’re a chocolate lover, a sprinkle fanatic, or someone who can’t resist caramel drizzle, you can make this cake your own. Plus, it’s no-bake, which means no sweating over a hot oven. Keep reading for the full recipe and all my tips to make your Ultimate Ice Cream Sandwich Cake a smashing success!
The Story Behind the Ultimate Ice Cream Sandwich Cake
Every summer, I find myself gravitating toward recipes that don’t require turning on the oven. Let’s face it—when it’s 90 degrees outside, the last thing you want is extra heat in the kitchen. That’s how this ice cream sandwich cake became a staple in my summer dessert rotation.
The idea came to me years ago during a family cookout. I had a box of ice cream sandwiches and a tub of whipped topping sitting in the freezer, and the kids were asking for something sweet. With a little improvisation, I layered the sandwiches with whipped cream and crushed cookies, then popped it in the freezer. It was an instant hit! Everyone thought I’d spent hours on it (little did they know it came together in about 15 minutes).
Over the years, I’ve refined the recipe, adding different toppings and flavors depending on the occasion. It’s become a go-to dessert for birthdays, 4th of July parties, and even casual weeknight dinners when we’re craving something special. It’s a testament to how simple ingredients can create something truly magical.
Ingredients for the Ultimate Ice Cream Sandwich Cake
The beauty of this cake is its simplicity. Here’s what you’ll need:
- Ice Cream Sandwiches: The star of the show! You’ll need about 12-16, depending on the size of your pan. Regular, mini, or even flavored varieties work.
- Whipped Topping (like Cool Whip): You’ll need about 16 oz. This acts as the “frosting” and binds everything together.
- Chocolate Syrup: For drizzling between layers and on top. You could also use caramel or strawberry syrup.
- Crushed Cookies or Candy: Think Oreos, graham crackers, or chopped candy bars. These add texture and flavor.
- Sprinkles: Because every cake deserves a little sparkle.
- Optional Toppings: Chopped nuts, mini chocolate chips, or fresh fruit like strawberries or bananas.
Feel free to mix and match based on your preferences. I’ve even swapped out traditional ice cream sandwiches for ones with cookie dough or mint flavors for a fun twist.
Equipment Needed
One of the best parts of this recipe is that you don’t need any fancy equipment. Here’s what you’ll want to have on hand:
- 9×13 Baking Dish: This size works perfectly, but you can scale up or down as needed.
- Offset Spatula or Spoon: For spreading the whipped topping evenly.
- Plastic Wrap or Aluminum Foil: To cover the cake while it freezes.
- Sharp Knife: For slicing through the frozen layers cleanly.
If you don’t have a 9×13 pan, a smaller dish or even a square pan will work. Just adjust the number of ice cream sandwiches accordingly!
How to Make the Ultimate Ice Cream Sandwich Cake
- Prepare Your Ingredients: Unwrap all your ice cream sandwiches and have your toppings ready to go. Speed is key so the sandwiches don’t melt too much.
- Layer the Ice Cream Sandwiches: Place a single layer of ice cream sandwiches on the bottom of your baking dish. You might need to cut a few sandwiches to fit snugly.
- Add Whipped Topping: Spread a generous layer of whipped topping over the sandwiches, ensuring it’s even.
- Drizzle and Sprinkle: Drizzle chocolate syrup (or your syrup of choice) over the whipped topping and sprinkle crushed cookies or candy.
- Repeat the Layers: Add another layer of ice cream sandwiches, followed by whipped topping, syrup, and toppings. Repeat until you’ve used all your ingredients, ending with a decorative layer of whipped topping and toppings.
- Freeze: Cover the cake tightly with plastic wrap or foil and freeze for at least 4 hours, or until firm.
- Slice and Serve: Once frozen, remove the cake from the freezer and let it sit for 5 minutes to soften slightly. Slice with a sharp knife and serve immediately!
Tips for the Perfect Ice Cream Sandwich Cake
- Work Quickly: Ice cream sandwiches melt fast, so have everything prepped and ready to go before you start assembling.
- Customize Your Layers: Add thin slices of fruit, like bananas or strawberries, for a refreshing twist.
- Use a Hot Knife: Run your knife under hot water and dry it before slicing for clean cuts.
- Make It Ahead: This cake freezes beautifully, so you can make it a day or two in advance. Just add final toppings before serving.
Variations & Adaptations
This recipe is endlessly adaptable! Here are a few ideas:
- Mint Chocolate: Use mint ice cream sandwiches and drizzle with hot fudge.
- Peanut Butter Lover’s: Add a layer of peanut butter between the sandwiches and top with chopped Reese’s Cups.
- Fruit Explosion: Add layers of fresh fruit like raspberries, strawberries, or blueberries for a refreshing twist.
- Gluten-Free: Use gluten-free ice cream sandwiches and cookies.
- Healthier Version: Opt for low-sugar or dairy-free ice cream sandwiches and toppings.
Serving & Storage Suggestions
This cake is best served straight from the freezer. Let it sit for 5 minutes to soften slightly, then slice and serve. It pairs beautifully with iced coffee, lemonade, or even a glass of bubbly for a festive touch.
If you have leftovers (unlikely!), cover the dish tightly with plastic wrap and store in the freezer for up to a week. Individual slices can also be wrapped in wax paper and stored in a freezer-safe bag for easy grab-and-go treats.
Nutritional Information & Benefits
While this dessert isn’t exactly health food, it’s all about balance, right? Each slice is estimated to have around 250-300 calories, depending on the toppings. You’ll get a dose of calcium from the ice cream and some feel-good endorphins from that chocolate drizzle!
For those with dietary restrictions, there are plenty of ways to adapt this recipe to suit your needs. Opt for dairy-free ice cream sandwiches or plant-based whipped topping, and you’re good to go.
Conclusion
The Ultimate Ice Cream Sandwich Cake is the perfect no-bake dessert for summer. It’s effortless, delicious, and endlessly customizable. Whether you’re hosting a party or just treating yourself, this cake is guaranteed to impress.
I’d love to hear about your creations! What toppings did you use? Did you try any fun variations? Let me know in the comments or tag me on social media with your photos. Happy summer, and happy dessert-making!
FAQs
Can I make this cake ahead of time?
Yes! This cake can be made 1-2 days in advance. Just keep it tightly covered in the freezer until you’re ready to serve.
What if I don’t have whipped topping?
You can use homemade whipped cream as a substitute. Just whip heavy cream with a bit of sugar until stiff peaks form.
How do I cut the cake neatly?
Run a sharp knife under hot water and dry it before slicing. This prevents the layers from sticking to the knife.
Can I use different flavors of ice cream sandwiches?
Absolutely! Try using flavored sandwiches like mint, cookies and cream, or even chocolate chip for a fun twist.
How long does the cake last in the freezer?
Stored properly, the cake will last up to a week in the freezer. Just make sure it’s tightly wrapped to prevent freezer burn.
Print
Ultimate Ice Cream Sandwich Cake
- Total Time: 4 hours 15 minutes
- Yield: 12 servings 1x
Description
This no-bake dessert is perfect for summer, featuring layers of ice cream sandwiches, whipped cream, and customizable toppings. It’s quick, easy, and a guaranteed crowd-pleaser.
Ingredients
- 12–16 ice cream sandwiches
- 16 oz whipped topping (like Cool Whip)
- Chocolate syrup (or caramel/strawberry syrup)
- Crushed cookies or candy (e.g., Oreos, graham crackers, chopped candy bars)
- Sprinkles
- Optional toppings: chopped nuts, mini chocolate chips, fresh fruit (e.g., strawberries, bananas)
Instructions
- Unwrap all your ice cream sandwiches and prepare your toppings.
- Place a single layer of ice cream sandwiches in a 9×13 baking dish, cutting sandwiches as needed to fit.
- Spread a generous layer of whipped topping over the sandwiches evenly.
- Drizzle chocolate syrup (or your syrup of choice) over the whipped topping and sprinkle crushed cookies or candy.
- Repeat the layers: ice cream sandwiches, whipped topping, syrup, and toppings. End with a decorative layer of whipped topping and toppings.
- Cover the cake tightly with plastic wrap or foil and freeze for at least 4 hours, or until firm.
- Remove the cake from the freezer and let it sit for 5 minutes to soften slightly. Slice with a sharp knife and serve immediately.
Notes
Work quickly to prevent the ice cream sandwiches from melting. Customize the layers with fruit, nuts, or different syrups. Use a hot knife for clean slices. This cake can be made 1-2 days in advance and stored in the freezer.
- Prep Time: 15 minutes
- Cook Time: 0 minutes
- Category: Dessert
- Cuisine: American
Nutrition
- Serving Size: 1 slice
- Calories: 250300
- Sugar: 25
- Sodium: 150
- Fat: 12
- Saturated Fat: 7
- Carbohydrates: 35
- Fiber: 1
- Protein: 3
Keywords: Ice Cream Sandwich Cake, No-Bake Dessert, Summer Dessert, Easy Cake Recipe