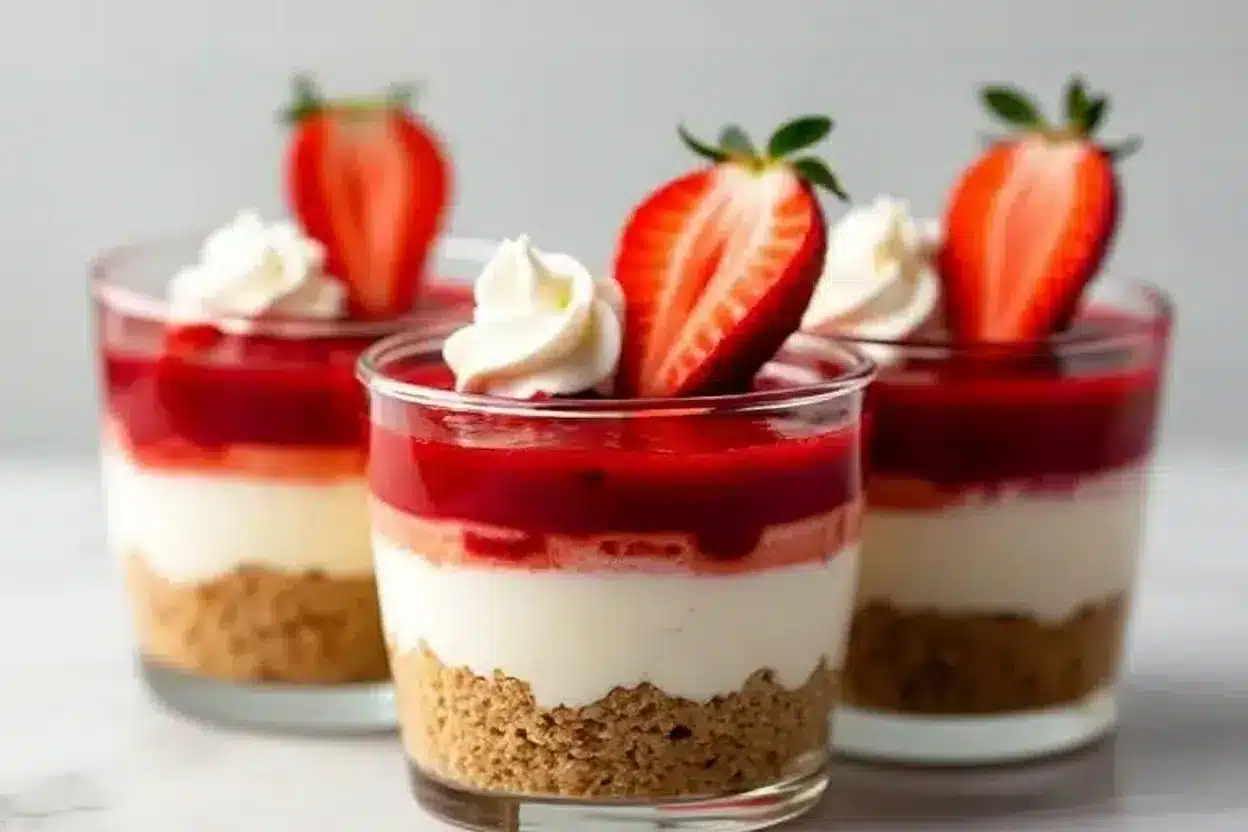
There’s something magical about strawberry cheesecake cups. The creamy tanginess of cheesecake paired with the sweet, fruity punch of strawberries—it’s a match made in dessert heaven. If you’ve ever felt intimidated by the idea of making cheesecake, let me tell you, this recipe is here to change your mind. These individual servings are as easy to make as they are impressive to serve. Whether you’re hosting a dinner party or simply want a treat to indulge in, these strawberry cheesecake cups are the perfect solution.
In this recipe, you’ll enjoy the classic flavors of cheesecake without the hassle of baking a full-sized one. Plus, the layered presentation in individual cups is perfect for Instagram-worthy photos or Pinterest inspiration—cute, colorful, and downright delicious!
The Story Behind Strawberry Cheesecake Cups
Cheesecake has been a part of culinary history for centuries, dating back to Ancient Greece. While traditional cheesecake recipes call for baking and a lot of patience, these strawberry cheesecake cups take a modern twist—no baking required! This version embraces the simplicity and ease of preparation, perfect for busy schedules and impromptu cravings.
Growing up, cheesecake was always a special occasion dessert in my family. I remember my mom carefully preparing the crust and whipping up the filling, only to wait hours for it to set. Fast forward to now, and I’ve discovered a way to get all those nostalgic flavors without the wait. These no-bake cups are a lifesaver, especially during summer when you don’t want your oven heating up the kitchen.
And let’s talk about strawberries! They’re the ultimate summer fruit—juicy, refreshing, and vibrant. Pairing them with cheesecake is a classic combo that never goes out of style. Whether it’s a backyard barbecue or a cozy night in, these strawberry cheesecake cups are bound to steal the show.
Ingredients You’ll Need
Let’s break down the ingredients to make sure you’re set up for success. Each component plays a key role in building the layers of flavor and texture in these strawberry cheesecake cups. Here’s what you’ll need:
- Cream Cheese: The star of the show! Use full-fat cream cheese for the creamiest texture. Let it soften at room temperature for easier mixing.
- Heavy Cream: This adds lightness and helps create a whipped, silky texture. Make sure it’s cold before whipping.
- Powdered Sugar: Perfect for sweetening without the grittiness of granulated sugar.
- Vanilla Extract: A small splash goes a long way in enhancing the flavor.
- Fresh Strawberries: Choose ripe, vibrant strawberries. Slice them thinly for layering or dice them for a more rustic presentation.
- Graham Crackers: The classic cheesecake crust flavor—but in crumb form! Crush them finely or buy pre-crushed crumbs for convenience.
- Butter: Melted butter is used to bind the graham cracker crumbs together.
- Lemon Juice: Optional, but a small squeeze adds brightness to the filling.
If you’re looking to adapt the recipe, here are a few tips:
- Gluten-Free Option: Use gluten-free graham crackers or substitute with almond flour.
- Dairy-Free Version: Swap cream cheese for a dairy-free alternative and use coconut cream instead of heavy cream.
- Fruit Substitution: Not a fan of strawberries? Try blueberries, raspberries, or even tropical fruits like mango.
Equipment Needed
Don’t worry—you won’t need any fancy tools for this recipe. Here’s what you’ll need:
- Mixing Bowls: One for the crust and one for the filling.
- Electric Mixer: A hand mixer or stand mixer works best for whipping the filling to creamy perfection.
- Food Processor: Optional, but great for crushing graham crackers evenly.
- Serving Cups: Glass cups or dessert jars work beautifully for presentation.
- Spatula: For scraping every last bit of filling from the bowl.
If you don’t have a food processor, a zip-top bag and rolling pin will do the trick for crushing crackers. And if you’re on a budget, mason jars double as adorable serving cups!
How to Make Strawberry Cheesecake Cups
- Prepare the Crust: In a mixing bowl, combine 1 ½ cups (150 g) of graham cracker crumbs with 4 tablespoons (60 g) of melted butter. Mix until the crumbs are evenly coated and have a sandy texture. Divide the mixture evenly among your cups, pressing it down firmly to create a crust layer.
- Make the Filling: In a large bowl, beat 8 oz (225 g) of softened cream cheese, ½ cup (60 g) of powdered sugar, and 1 teaspoon (5 ml) of vanilla extract until smooth. In a separate bowl, whip ¾ cup (180 ml) of cold heavy cream until stiff peaks form. Gently fold the whipped cream into the cream cheese mixture until fully incorporated.
- Layer the Cups: Add a dollop of cheesecake filling on top of the crust layer. Smooth it out with a spoon or spatula. Add a layer of sliced strawberries, then repeat with another layer of filling and strawberries until the cups are filled.
- Chill: Cover the cups with plastic wrap and refrigerate for at least 2 hours to allow the flavors to meld and the filling to set.
- Serve and Enjoy: Garnish with additional strawberries or a sprig of mint before serving. Grab a spoon and dive in!
Pro Tip: Make sure the cream cheese is fully softened to avoid lumps in the filling. If the filling seems too thick, add a splash of heavy cream to loosen it up.
Cooking Tips & Techniques
Here are a few tips to ensure your strawberry cheesecake cups turn out perfectly:
- Don’t Overmix: When folding the whipped cream into the cream cheese filling, be gentle to maintain the light, airy texture.
- Layer Neatly: For picture-perfect cups, use a piping bag for the filling instead of a spoon.
- Fresh is Best: Use fresh strawberries for the best flavor and texture. Frozen strawberries can work but may release extra liquid.
- Chill Time Matters: Don’t skip the refrigeration step—it helps the layers set and enhances the flavor.
Mistakes happen—I’ve accidentally overmixed my filling before, and while it still tasted great, the texture wasn’t as smooth. Take your time and enjoy the process!
Variations & Adaptations
Here are some fun ways to adapt your strawberry cheesecake cups:
- Chocolate Lovers: Add a layer of melted chocolate or chocolate chips between the crust and filling.
- Seasonal Twist: Swap strawberries for peaches or blackberries during their peak seasons.
- Nutty Addition: Sprinkle crushed nuts like almonds or pecans on top for extra crunch.
- Low-Sugar Option: Use a sugar substitute like stevia or monk fruit in the filling.
One time, I added a hint of cinnamon to the graham cracker crust, and it added such a cozy warmth to the cups. Feel free to experiment to suit your taste!
Serving & Storage Suggestions
Serve these cheesecake cups chilled for the best flavor and texture. They’re perfect on their own, but if you want to get fancy, pair them with a glass of sparkling rosé or a cup of coffee.
For storage, cover the cups tightly with plastic wrap and keep them in the fridge for up to three days. If you want to make them ahead, assemble the crust and filling layers and add the strawberries just before serving to avoid sogginess.
Reheating isn’t necessary, but if you freeze the cups, thaw them in the fridge before enjoying—they’ll still taste amazing!
Nutritional Information & Benefits
Here’s a rough estimate of the nutritional values per serving (based on one cup):
- Calories: 320
- Fat: 20 g
- Carbohydrates: 25 g
- Protein: 4 g
Strawberries are packed with vitamin C and antioxidants, making them a healthful addition to this dessert. While cheesecake is definitely indulgent, it’s all about balance—enjoying a treat every now and then is good for the soul!
Conclusion
Strawberry cheesecake cups are a dessert that checks all the boxes—easy to make, visually stunning, and undeniably delicious. Whether you’re a seasoned baker or a beginner in the kitchen, this recipe is approachable and rewarding.
I hope you love these cheesecake cups as much as I do. They’ve become a staple in my home for celebrations and casual treats alike. Don’t forget to make them your own—whether it’s swapping the fruit or adding a surprise layer, the possibilities are endless!
If you try this recipe, I’d love to hear how it turned out! Leave a comment below or share your photos on social media—tag me so I can see your creations. Happy cooking!
FAQs
Can I make these ahead of time?
Yes! You can prepare the cups a day in advance. Just add the strawberries right before serving to keep them fresh.
Can I use frozen strawberries?
While fresh strawberries are ideal, frozen ones can work if thawed and drained properly to avoid excess liquid.
How do I prevent lumps in the filling?
Make sure your cream cheese is fully softened before mixing. Be patient and scrape down the sides of the bowl as you mix.
Can I use a different type of cookie for the crust?
Absolutely! Digestive biscuits, Oreos, or shortbread cookies work wonderfully as substitutes.
How can I make this recipe vegan?
Use a plant-based cream cheese and coconut cream for the filling. Swap butter with vegan margarine for the crust.
Print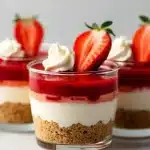
Strawberry Cheesecake Cups
- Total Time: 2 hours 20 minutes
- Yield: 6 servings 1x
Description
These no-bake strawberry cheesecake cups are an easy, classic dessert that combines creamy cheesecake with fresh strawberries in individual servings. Perfect for any occasion, they’re simple to make and visually stunning.
Ingredients
- 8 oz (225 g) cream cheese, softened
- 3/4 cup (180 ml) heavy cream, cold
- 1/2 cup (60 g) powdered sugar
- 1 teaspoon (5 ml) vanilla extract
- 1 1/2 cups (150 g) graham cracker crumbs
- 4 tablespoons (60 g) butter, melted
- 1 cup fresh strawberries, sliced
- 1 teaspoon lemon juice (optional)
Instructions
- In a mixing bowl, combine graham cracker crumbs with melted butter. Mix until the crumbs are evenly coated and have a sandy texture. Divide the mixture evenly among serving cups, pressing it down firmly to create a crust layer.
- In a large bowl, beat softened cream cheese, powdered sugar, and vanilla extract until smooth. In a separate bowl, whip cold heavy cream until stiff peaks form. Gently fold the whipped cream into the cream cheese mixture until fully incorporated.
- Add a dollop of cheesecake filling on top of the crust layer. Smooth it out with a spoon or spatula. Add a layer of sliced strawberries, then repeat with another layer of filling and strawberries until the cups are filled.
- Cover the cups with plastic wrap and refrigerate for at least 2 hours to allow the flavors to meld and the filling to set.
- Garnish with additional strawberries or a sprig of mint before serving. Enjoy!
Notes
Make sure the cream cheese is fully softened to avoid lumps in the filling. For a neater presentation, use a piping bag for the filling. Chill the cups for at least 2 hours to allow the flavors to meld and the filling to set.
- Prep Time: 20 minutes
- Cook Time: 0 minutes
- Category: Dessert
- Cuisine: American
Nutrition
- Serving Size: 1 cup
- Calories: 320
- Sugar: 15
- Sodium: 180
- Fat: 20
- Saturated Fat: 12
- Carbohydrates: 25
- Fiber: 1
- Protein: 4
Keywords: strawberry cheesecake cups, no-bake dessert, easy cheesecake recipe, summer dessert, individual cheesecake cups