
The back door slams at 3:47 PM, and I know exactly what’s about to happen. A backpack hits the floor, a moody sigh echoes through the hallway, and within sixty seconds, the refrigerator door is being opened with a dramatic groan. It’s the same scene five days a week, and honestly, I used to dread it. Not the kids coming home—I love that part—but the inevitable hunger that follows. That post-school hunger is a special kind of beast. It’s not polite. It doesn’t wait. And it definitely doesn’t want an apple. So a few years ago, I stopped fighting it. I started making these No-Bake Protein Energy Bites for After School, and I haven’t looked back since.
These little bites have become our kitchen’s unofficial welcome-home committee. They’re the first thing my kids reach for, and I don’t even have to nag them about eating something good for them. The best part? They’re made with simple, real ingredients that I always have on hand, and they come together in about ten minutes flat. No oven, no fuss, no messing around. Just a bowl, a spoon, and a little bit of patience while they chill in the fridge. Honestly, that’s my kind of snack.
I still remember the first time I made them. It was a chaotic Tuesday, and I was out of ideas. I had a half-empty jar of peanut butter, some sad-looking oats, and a desperate need for something that would keep the hangry monster at bay until dinner. I threw everything together, rolled it into balls, and prayed. The kids devoured them before I could even put the peanut butter away. That was the moment I knew I’d stumbled onto something special. These No-Bake Protein Energy Bites for After School aren’t just a recipe—they’re a survival tool, a peace offering, and a little bit of love rolled into one perfect, bite-sized package.
Why You’ll Love This Recipe
Let’s be real for a second. We’re all busy. Life is loud, and the last thing you need is a complicated recipe standing between you and a happy kid. That’s where these energy bites come in. They’re the snack that actually works with your schedule, not against it.
- Quick & Easy: You can have these ready and chilling in the fridge in under 15 minutes. No joke. No baking, no waiting for the oven to preheat. Just mix, roll, and go.
- Simple Ingredients: You probably have most of these in your pantry right now. Oats, peanut butter, honey, chocolate chips. No weird health food store finds required.
- Perfect for After School: This is the snack that stops the hangry spiral before it starts. It’s filling, it’s satisfying, and it actually keeps them full until dinner.
- Crowd-Pleaser: I’ve brought these to playdates, soccer games, and even school bake sales (shh, don’t tell anyone they’re healthy). They disappear every single time.
- Unbelievably Delicious: Let’s be honest—some healthy snacks taste like cardboard. These taste like dessert. The texture is soft and chewy, and the chocolate chips melt just a little in your mouth. It’s dangerous, honestly.
What makes these different from every other energy bite recipe out there? It’s the texture. I’ve tested this dozens of times, and the secret is in the ratio. Not too sticky, not too dry. Just perfectly rollable, with a little bit of crunch from the oats and a creamy richness from the peanut butter. It’s the kind of snack that makes you close your eyes after the first bite. And when your kid asks for a second one? That’s the win.
What Ingredients You Will Need
These No-Bake Protein Energy Bites for After School use simple, wholesome ingredients that come together to deliver a snack that’s both satisfying and good for you. No fancy stuff, just real food that works.
- Old-Fashioned Rolled Oats (1 cup / 90g): These are the backbone of the recipe. They provide the chewy texture and slow-burning energy that keeps kids full. I prefer old-fashioned oats over quick oats because they hold their shape better. If you’re gluten-sensitive, make sure to grab certified gluten-free oats.
- Peanut Butter (½ cup / 130g): Creamy or crunchy, it’s your call. I usually go with creamy for a smoother texture, but crunchy adds a nice little bite. Use a natural peanut butter that’s just peanuts and salt for the best flavor. (I’m partial to Smucker’s Natural or Trader Joe’s brand.)
- Honey (¼ cup / 85g): This is the sticky glue that holds everything together. It adds sweetness, but not too much. You can sub in maple syrup if you want a vegan version, but honey gives the best flavor here, in my opinion.
- Mini Chocolate Chips (⅓ cup / 60g): The little pockets of joy. Mini chips distribute more evenly than regular-sized ones, so you get chocolate in every single bite. I like Enjoy Life brand for allergy-friendly options, or just grab a bag of Toll House.
- Ground Flaxseed (2 tablespoons / 14g): This is my secret weapon. It adds a boost of fiber and omega-3s without changing the flavor at all. You can skip it if you don’t have it, but it really does make them a little more filling.
- Vanilla Extract (1 teaspoon): Just a splash to round out the flavors. It makes everything taste a little bit more like a treat.
- Pinch of Salt (¼ teaspoon): Don’t skip this. Even if your peanut butter is salted, a tiny extra pinch balances the sweetness and makes the chocolate pop.
Optional add-ins: You can toss in a tablespoon of chia seeds for extra fiber, or swap the chocolate chips for dried cranberries or chopped nuts. I’ve also added a scoop of vanilla protein powder before (about 2 tablespoons) for an extra protein punch, but you’ll need to add a little more honey to keep the texture right.
Equipment Needed
The beauty of this recipe is that you barely need any equipment. It’s practically a one-bowl situation, which means less cleanup and more time for you.
- Large Mixing Bowl: Any bowl will do, but a medium-to-large one makes mixing easier without ingredients flying everywhere.
- Measuring Cups & Spoons: You’ll need a ½ cup, ¼ cup, ⅓ cup, a tablespoon, and a teaspoon. Nothing fancy, just the basics.
- Rubber Spatula or Wooden Spoon: For mixing everything together. A spatula is great for scraping the sides of the bowl, but a wooden spoon works just fine.
- Baking Sheet or Plate: To hold the rolled bites while they chill. Line it with parchment paper if you want zero stickage, but it’s not strictly necessary.
- Refrigerator: The most important piece of equipment! These need at least 30 minutes to firm up. Patience is a virtue, I know.
If you don’t have a spatula, you can use your hands. Honestly, I often just use my hands to mix the last bits together—it’s faster and you can feel when the texture is right. Budget-friendly tip: a $2 spatula from the grocery store works exactly the same as a fancy one.
Preparation Method
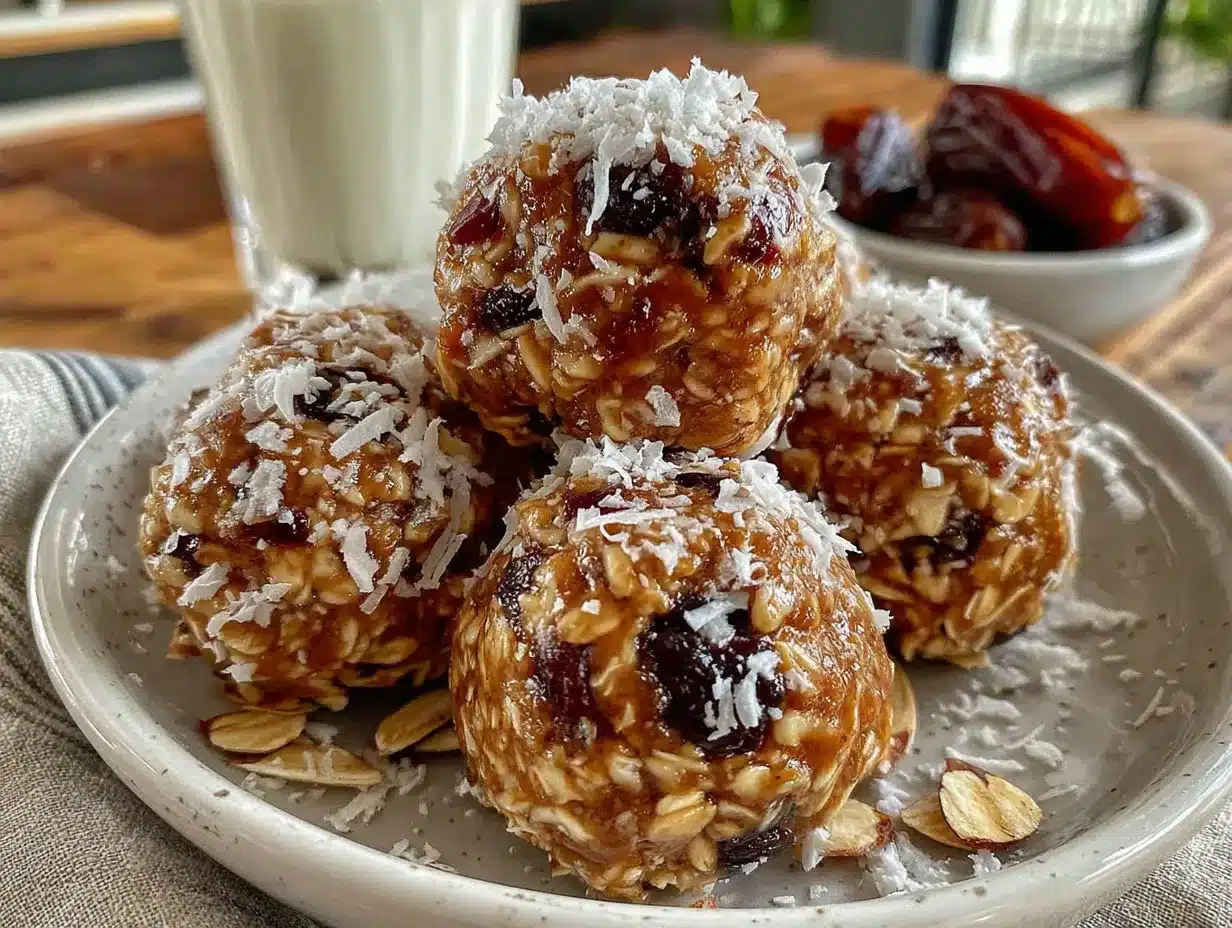
Alright, let’s get rolling. This is the easy part. Follow these steps, and you’ll have a batch of No-Bake Protein Energy Bites for After School ready in no time.
- Combine the dry ingredients. In your large mixing bowl, add 1 cup of rolled oats, 2 tablespoons of ground flaxseed, ⅓ cup of mini chocolate chips, and ¼ teaspoon of salt. Give it a quick stir with your spatula to distribute everything evenly. This step is quick, but it helps make sure the chocolate chips don’t all clump together later.
- Add the wet ingredients. Pour in ½ cup of peanut butter, ¼ cup of honey, and 1 teaspoon of vanilla extract. Don’t worry if it looks messy at first—that’s totally normal. The peanut butter will be stubborn, but keep mixing.
- Mix until fully combined. Use your spatula to fold everything together. Start by pressing the peanut butter into the oats, then stir in a circular motion. It’ll feel a little stiff at first, but keep going. You want every oat to be coated and the mixture to hold together when you squeeze it in your hand. This usually takes about 2 to 3 minutes of solid mixing. If it looks too dry, add a teaspoon more honey. If it’s too sticky, add a tablespoon more oats.
- Chill the mixture (optional but recommended). Pop the bowl in the fridge for 10 to 15 minutes. This makes the mixture a little firmer and easier to roll. If you’re in a hurry, you can skip this step, but your hands will get a bit sticky.
- Roll into balls. Scoop out about 1 to 1.5 tablespoons of the mixture. I use a small cookie scoop for consistency, but a regular spoon works too. Roll it between your palms gently to form a smooth ball. You should get about 14 to 16 bites, depending on the size.
- Place on a lined baking sheet. As you roll each ball, place it on your parchment-lined baking sheet or plate. Make sure they aren’t touching so they firm up evenly.
- Chill for at least 30 minutes. This is the hardest part. Pop the sheet into the fridge and let them set. After 30 minutes, they’ll be firm, chewy, and perfectly snackable.
- Store and enjoy. Transfer them to an airtight container and keep them in the fridge. They’ll last up to two weeks—if you can keep them around that long!
Pro tip: If your hands get too sticky while rolling, lightly wet them with a little cold water. It makes the process so much smoother.
Cooking Tips & Techniques
I’ve made these No-Bake Protein Energy Bites for After School more times than I can count, and I’ve learned a few things along the way. Here are my best tips to make sure yours turn out perfect every time.
- Use room temperature peanut butter. If your peanut butter is straight out of the fridge, it’ll be too stiff to mix properly. Let it sit on the counter for 15 minutes, or give it a quick stir before adding it to the bowl.
- Don’t overmix. Once everything is combined, stop. Overmixing can break down the oats and make the texture mushy instead of chewy.
- Test the consistency. Before you roll all the balls, take a small amount and squeeze it in your hand. If it holds together without crumbling, you’re good. If it falls apart, add a little more honey or peanut butter.
- Make them ahead. These are perfect for meal prep. I double the batch on Sunday, and we have snacks ready for the whole week. It’s a lifesaver on busy afternoons.
- Keep them cold. These bites are best straight from the fridge. If you leave them out too long, they’ll get soft and sticky. That’s still delicious, but they’re messier to eat.
Honestly, I’ve had my share of fails with energy bites. My first batch was way too dry and crumbly. I learned the hard way that measuring honey is tricky—it sticks to the cup! A quick spray of non-stick cooking spray in your measuring cup before adding honey makes it slide right out. That little trick changed my life, no joke.
Variations & Adaptations
One of the best things about this recipe is how flexible it is. You can adapt it to fit almost any diet or craving. Here are a few of my favorite variations.
- Vegan Version: Swap the honey for maple syrup or agave nectar. Use dairy-free chocolate chips (like Enjoy Life brand). Everything else is already plant-based!
- Nut-Free Version: Replace the peanut butter with sunflower seed butter (like SunButter) or tahini. They both work beautifully and give a slightly different flavor profile. Just make sure to use certified nut-free oats if allergies are a concern.
- Protein-Packed Version: Add 2 tablespoons of your favorite vanilla or chocolate protein powder. You’ll need to add an extra tablespoon of honey or a splash of milk to keep the texture right. I’ve done this for my teenage son who’s always hungry after practice, and it works great.
- Seasonal Twist: In the fall, swap the chocolate chips for dried cranberries and add a pinch of cinnamon and nutmeg. In the summer, try white chocolate chips and dried apricots. It’s a fun way to keep things fresh.
- Crunchy Version: Add ¼ cup of chopped almonds or pecans. The extra crunch is so satisfying, and it makes them feel even more like a treat.
I once made a batch with coconut flakes and dark chocolate chunks for a playdate, and the moms asked for the recipe before the kids did. That’s how you know it’s a winner.
Serving & Storage Suggestions
These No-Bake Protein Energy Bites for After School are best served cold, straight from the fridge. That’s when they have the perfect chewy texture and the chocolate chips are nice and firm. I usually set out a small bowl of them right when the kids walk in the door. It’s like a little welcome-home ritual.
They pair beautifully with a glass of cold milk or a fruit smoothie. If you’re packing them for lunch, pop one in a lunch box alongside some fresh fruit and veggies. They also make a great pre-sport snack for the soccer field or basketball court.
Storage: Keep them in an airtight container in the refrigerator. They’ll stay fresh for up to 2 weeks. You can also freeze them for up to 3 months. Just place them in a single layer on a baking sheet, freeze until solid, then transfer to a freezer bag. Thaw them in the fridge overnight, or let them sit on the counter for 10 minutes before eating.
One thing I love about these bites is that the flavors actually meld together after a day or two. They taste even better on day two than they do on day one. So don’t worry if you make them ahead—they’ll only get better.
Nutritional Information & Benefits
These No-Bake Protein Energy Bites for After School are more than just a tasty snack—they’re actually good for you. Here’s the estimated nutritional breakdown for one bite (based on 16 bites per batch):
- Calories: ~130
- Protein: 4g
- Fat: 7g
- Carbohydrates: 15g
- Fiber: 2g
- Sugar: 8g
The oats provide slow-releasing energy that keeps kids full and focused. The peanut butter adds healthy fats and protein for muscle repair and brain function. And the flaxseed? That’s a little dose of omega-3s and fiber, which is great for digestion. Honestly, this is a snack you can feel good about serving every single day.
These bites are naturally vegetarian and can easily be made vegan, gluten-free, or nut-free. The only potential allergen to watch out for is peanuts and gluten (if using standard oats). Always check your labels if you’re cooking for someone with food allergies.
Conclusion
These No-Bake Protein Energy Bites for After School have become a staple in our house for a reason. They’re quick, they’re easy, and they actually make the after-school chaos a little calmer. No more fighting about snacks. No more hangry meltdowns. Just a happy kid, a clean kitchen, and a little bit of peace.
I’d love for you to try them and make them your own. Swap in your favorite nut butter, toss in some dried fruit, or let the kids help you roll the balls (it’s a great sensory activity for little hands). However you make them, I promise they’ll be a hit.
Have you made these? What variations did you try? I’d love to hear about it in the comments below. And if you’re looking for more easy, no-fuss snacks, don’t miss my overnight peanut butter banana oat bars or these no-bake chocolate peanut butter protein balls—they’re just as simple and just as delicious. Happy snacking!
Frequently Asked Questions
Can I use quick oats instead of rolled oats?
You can, but the texture will be different. Quick oats are more finely ground, so they’ll absorb moisture faster and make the bites softer and less chewy. If that’s what you have, go ahead and use them—they’ll still taste great.
How long do these energy bites last?
Stored in an airtight container in the fridge, they’ll stay fresh for up to 2 weeks. You can also freeze them for up to 3 months. Just thaw them in the fridge overnight before eating.
Can I make these without peanut butter?
Absolutely. Swap the peanut butter for any other nut or seed butter, like almond butter, cashew butter, or sunflower seed butter. Each one will give a slightly different flavor, but they all work beautifully.
Why are my energy bites too dry?
This usually happens if the peanut butter is too thick or if you measured the oats generously. Try adding an extra tablespoon of honey or a splash of milk to bring the mixture together. Next time, make sure your peanut butter is well-stirred and at room temperature.
Can kids help make these?
Yes! This is one of the easiest recipes for little helpers. They can measure ingredients, stir the mixture, and roll the balls. It’s a fun, no-bake activity that teaches basic kitchen skills. Just make sure an adult handles the measuring of sticky ingredients to keep things less messy.
Pin This Recipe!


No-Bake Protein Energy Bites: Best After School Snack
- Total Time: 40 minutes (includes 30 minutes chilling)
- Yield: 14-16 bites 1x
Description
These No-Bake Protein Energy Bites are the perfect after-school snack, made with simple, real ingredients in about ten minutes. They’re filling, satisfying, and taste like dessert, keeping kids happy and full until dinner.
Ingredients
- 1 cup (90g) old-fashioned rolled oats
- ½ cup (130g) peanut butter (creamy or crunchy)
- ¼ cup (85g) honey
- ⅓ cup (60g) mini chocolate chips
- 2 tablespoons (14g) ground flaxseed
- 1 teaspoon vanilla extract
- ¼ teaspoon salt
Instructions
- Combine the dry ingredients: In a large mixing bowl, add rolled oats, ground flaxseed, mini chocolate chips, and salt. Stir to distribute evenly.
- Add the wet ingredients: Pour in peanut butter, honey, and vanilla extract. Mix until fully combined, pressing the peanut butter into the oats and stirring for 2-3 minutes until the mixture holds together when squeezed.
- Chill the mixture (optional but recommended): Refrigerate the bowl for 10-15 minutes to make rolling easier.
- Roll into balls: Scoop about 1 to 1.5 tablespoons of the mixture and roll between your palms to form smooth balls. You should get 14-16 bites.
- Place on a lined baking sheet: Arrange the balls on a parchment-lined baking sheet or plate, ensuring they aren’t touching.
- Chill for at least 30 minutes: Refrigerate until firm and chewy.
- Store and enjoy: Transfer to an airtight container and keep in the refrigerator for up to 2 weeks.
Notes
Use room temperature peanut butter for easier mixing. If mixture is too dry, add a teaspoon more honey; if too sticky, add a tablespoon more oats. Lightly wet hands with cold water if they get sticky while rolling. These bites are best served cold from the fridge. They can be frozen for up to 3 months.
- Prep Time: 10 minutes
- Cook Time: 0 minutes
- Category: Snack
- Cuisine: American
Nutrition
- Serving Size: 1 bite
- Calories: 130
- Sugar: 8
- Sodium: 50
- Fat: 7
- Saturated Fat: 2
- Carbohydrates: 15
- Fiber: 2
- Protein: 4
Keywords: no-bake protein energy bites, after school snack, healthy snack, peanut butter energy bites, easy snack recipe


