
The wedges are exactly the same width, each one a perfect little triangle with a faint, buttery sheen on the tortilla and a single, stubborn string of cheese clinging to the edge of the pan. That’s the whole point. I stood there staring at them, thinking about how my son would probably pick the strings off first, eat them like tiny cheese noodles, and then, only then, would he actually bite into the wedge. I wasn’t thinking about nutrition or Pinterest-perfect lunchboxes or even saving time. I was thinking about the cheese. The way it melts into that specific, gooey, slightly elastic state that kids (let’s be honest, adults too) can’t resist. Everything else in the lunch—the apple slices, the yogurt pouch, the sad little carrot sticks—is just a supporting actor.
This wasn’t some grand recipe development project. It was a Tuesday night, 8:15 PM, and I had completely forgotten to meal prep anything for the next day’s lunch. I had a block of cheddar, a stack of flour tortillas, and a vague sense of panic. I threw one together in the skillet, cut it into wedges, and tossed it in a container. The next day, the lunchbox came back empty. Not a crumb. That’s when I knew I had stumbled onto something real. Not fancy, not complicated, just… right. The Easy Kindergarten Lunch Box Cheese Quesadilla Wedges were born out of necessity, but they stuck around because they actually work. They’re the kind of lunch that makes you feel like you’ve got it together, even when you’re just barely hanging on.
Why You’ll Love This Recipe
Let’s be real—mornings are chaos. You’re trying to find matching socks, sign permission slips, and somehow get a nutritious lunch into a bag without losing your mind. These quesadilla wedges are the answer to that chaos. I’ve tested this method about a dozen times (my family has been very willing taste-testers), and I can say with confidence that this is the best version. It’s not just a quesadilla; it’s a lunchbox strategy.
- Ready in Under 10 Minutes: From fridge to lunchbox in less time than it takes to pour a bowl of cereal. Seriously. The skillet heats up while you’re grabbing the cheese.
- Uses Pantry Staples: You probably have everything already. Tortillas, cheese, butter. That’s it. No special trips to the store for fancy ingredients.
- Perfect for Lunchboxes: They hold up surprisingly well. The wedges don’t get soggy, and they taste good at room temperature. No reheating required.
- Kid-Approved (and Parent-Approved): My son devours these. So do I, honestly. They’re just simple, cheesy, and satisfying.
- So Easy, You Can Make Them in Your Sleep: The method is foolproof. Even on your most exhausted day, you can pull this off.
What makes this different from every other quesadilla recipe out there? It’s the technique. I don’t just slap cheese between tortillas and hope for the best. I use a specific heat level and a quick press with the spatula to get that even melt and a perfectly crisp outside. No burnt spots, no cold cheese in the middle. Just consistent, golden-brown perfection every single time. This is the recipe I turn to when I need a win, and it never lets me down. It’s the kind of food that makes you feel like a good parent, even on the hard days.
What Ingredients You Will Need
This recipe uses such simple ingredients, it almost feels like cheating. But trust me, the magic is in how they come together. Each component plays a specific role in creating that perfect lunchbox wedge.
- Flour Tortillas (8-inch): I prefer medium-sized flour tortillas for lunchbox wedges. They’re the perfect size for little hands. I’ve tried corn tortillas, but they tend to crack when you fold them, and the flavor is a bit too strong for a simple cheese quesadilla. Look for tortillas that are soft and pliable. If they’re a little stiff, you can microwave them for 10 seconds to make them more flexible. My go-to brand is Mission, but any brand works fine.
- Shredded Cheddar Cheese (1/2 cup per quesadilla): This is the star of the show. I use sharp cheddar for the most flavor, but mild cheddar works too. The key is to shred it yourself from a block. Pre-shredded cheese has a coating that prevents it from melting as smoothly. Trust me on this one—the difference is night and day. You’ll get a much gooier, more cohesive melt. For a fun twist, you can use a Mexican blend or Monterey Jack.
- Unsalted Butter (1 teaspoon per quesadilla): Butter gives the tortilla that beautiful golden-brown color and a rich, savory flavor. You don’t need much—just a thin smear on the outside of the tortilla. I’ve tried using oil, but butter just tastes better. It creates a crispier, more flavorful exterior. If you’re dairy-free, you can use a plant-based butter, but the texture might be slightly different.
- Optional Pinch of Salt: A tiny sprinkle of flaky sea salt on the outside of the tortilla after cooking adds a nice little pop of flavor. It’s not necessary, but it’s a nice touch if you have it.
Equipment Needed
You don’t need any fancy gadgets for this recipe. Just a few basic kitchen tools that you probably already have. I’m all about keeping things simple.
- Non-Stick Skillet (8-inch or 10-inch): A good non-stick skillet is your best friend here. It prevents the cheese from sticking and makes cleanup a breeze. I use a 10-inch skillet, which gives me plenty of room to work. If you don’t have non-stick, a well-seasoned cast iron skillet will work, but you’ll need to be extra careful about the heat.
- Spatula: A thin, flexible spatula is perfect for flipping the quesadilla. I prefer a silicone spatula because it won’t scratch your non-stick pan. A metal spatula works too, just be gentle.
- Cutting Board and Knife: You’ll need a sharp knife (a pizza cutter works great too) to cut the quesadilla into wedges. A clean, sturdy cutting board is essential.
- Small Bowl (for shredded cheese): I like to have my cheese pre-measured and ready to go. It makes the process faster and less messy.
- Butter Knife or Pastry Brush: For spreading the butter on the tortilla. A butter knife is the easiest option, but a pastry brush gives you a more even coating.
Preparation Method
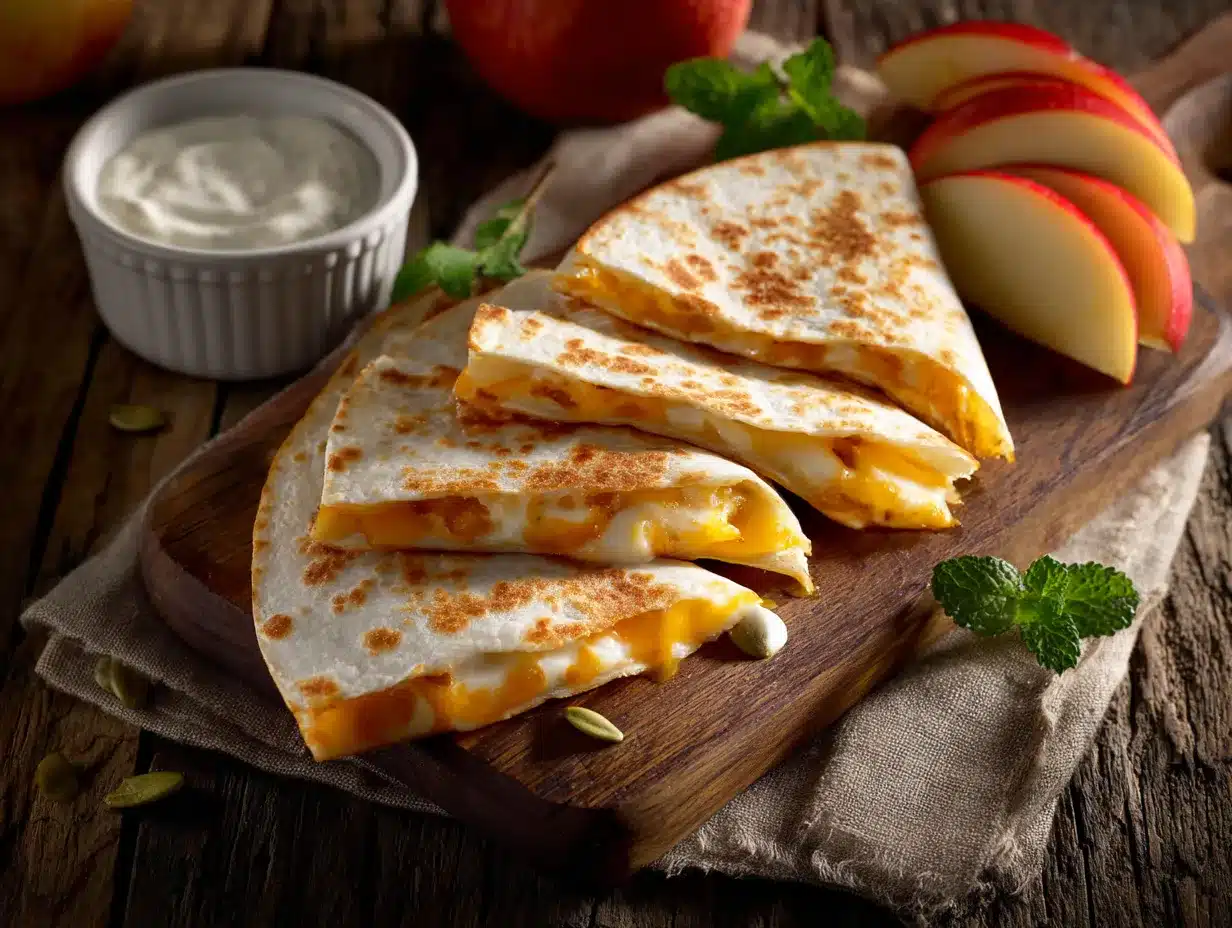
Alright, let’s get to the good part. This method is so simple, you’ll memorize it after one try. I’ve broken it down into easy, foolproof steps.
- Prep Your Station (2 minutes): Before you even turn on the stove, get everything ready. Shred your cheese (if you haven’t already) and have your tortillas and butter within reach. This makes the whole process seamless. I can’t stress this enough—mise en place is your friend, even for a simple quesadilla.
- Heat the Skillet (1 minute): Place your non-stick skillet over medium heat. Let it heat up for about a minute. You want it hot, but not smoking. A good test is to flick a drop of water onto the pan—if it sizzles and evaporates immediately, it’s ready. If it’s too hot, the tortilla will burn before the cheese melts.
- Butter the Tortilla (30 seconds): While the skillet is heating, take one tortilla and spread a thin, even layer of butter on one side. Don’t go overboard—you just want a light coating. I use about 1 teaspoon per tortilla. Place the tortilla, butter-side down, in the hot skillet.
- Add the Cheese (30 seconds): Sprinkle the shredded cheddar cheese evenly over the entire surface of the tortilla. Don’t pile it all in the center; spread it out to the edges. This ensures every bite has cheesy goodness. I use about 1/2 cup of cheese per quesadilla.
- Top with the Second Tortilla (10 seconds): Place the second tortilla on top of the cheese. Don’t butter this one yet. Gently press down with your spatula to help everything stick together.
- Cook the First Side (2-3 minutes): Let the quesadilla cook undisturbed for 2-3 minutes. You’ll know it’s ready to flip when the bottom is golden brown and the cheese starts to melt. Peek underneath with your spatula to check the color. It should be a beautiful, even golden brown.
- Flip and Cook the Second Side (2-3 minutes): Carefully flip the quesadilla using your spatula. It should slide right out of the pan. Cook for another 2-3 minutes, until the second side is also golden brown and the cheese is fully melted and gooey. You might see a little cheese oozing out the sides—that’s a good sign.
- Rest and Cut (1 minute): Transfer the cooked quesadilla to a cutting board and let it rest for about 30 seconds. This allows the cheese to set slightly, making it easier to cut. Use a sharp knife or pizza cutter to cut it into 6 wedges. For little hands, I find that 6 wedges is the perfect size. If you’re serving adults, you can cut it into 4 larger wedges.
- Cool Before Packing (5 minutes): Let the wedges cool completely on the cutting board before packing them in the lunchbox. If you pack them while they’re still warm, they’ll steam and get soggy. Patience is key here, I know it’s hard to wait.
Cooking Tips & Techniques
I’ve made these quesadillas more times than I can count, and I’ve learned a few things along the way. Here are my best tips for getting perfect results every time.
Don’t Overcrowd the Pan. If you’re making multiple quesadillas, cook them one at a time. If you try to cook two in the same skillet, the temperature drops, and they’ll steam instead of getting crispy. I learned this the hard way when I tried to rush through a batch. The first one was perfect, the second one was a sad, soggy mess.
Use Medium Heat. This is the most important tip. If the heat is too high, the tortilla will burn before the cheese melts. If it’s too low, the tortilla will dry out and become tough. Medium heat is the sweet spot. It gives the cheese time to melt slowly and evenly while the tortilla gets beautifully golden brown. I once tried to speed things up by cranking the heat to high, and I ended up with a blackened, inedible disc.
Press Down Gently. After you flip the quesadilla, press down gently with your spatula. This helps the cheese adhere to both tortillas and creates a more cohesive wedge. Don’t press too hard, or you’ll squeeze the cheese out. Just a gentle, firm press is all you need.
Let It Rest. I know it’s tempting to cut into the quesadilla immediately, but letting it rest for 30 seconds makes a huge difference. The cheese sets just enough that it doesn’t all ooze out when you cut it. You’ll get cleaner, more defined wedges.
Keep Them Warm in the Oven. If you’re making a big batch for a party or meal prep, you can keep the cooked quesadillas warm in a 200°F oven. Place them on a baking sheet in a single layer. They’ll stay warm and crispy for up to 30 minutes. I do this sometimes when I’m making lunch for the whole week on a Sunday afternoon.
Variations & Adaptations
This recipe is a blank canvas. Once you’ve mastered the basic method, you can customize it in so many ways. Here are a few of my favorite variations.
Protein-Packed Wedges: Add some finely chopped cooked chicken, turkey, or even crumbled bacon to the cheese before cooking. My son loves these with shredded rotisserie chicken. Just make sure the meat is cooked and finely chopped so it distributes evenly.
Veggie-Loaded Wedges: Sneak in some finely grated zucchini or carrots. Squeeze out the excess moisture with a paper towel before adding them to the quesadilla. You can also add some finely chopped spinach or bell peppers. My daughter won’t eat a salad, but she’ll eat these.
Different Cheese Blends: Don’t limit yourself to cheddar. Try a blend of Monterey Jack and pepper jack for a little kick. Or use mozzarella and parmesan for an Italian twist. Smoked gouda is also amazing. The possibilities are endless.
Gluten-Free Option: Use gluten-free tortillas. They can be a little more delicate, so be gentle when flipping. I’ve found that the ones made with cassava flour hold up the best. They’re not quite as pliable as regular flour tortillas, but they work well.
Dairy-Free Option: Use dairy-free cheese and plant-based butter. The texture will be slightly different—dairy-free cheese doesn’t melt as well—but it’s still delicious. I’ve had good luck with the brands that use coconut oil or cashew bases.
Air Fryer Method: You can also make these in an air fryer. Assemble the quesadilla as directed, then cook at 350°F for 5-6 minutes, flipping halfway through. The result is a super crispy exterior. I love this method when I’m making just one or two for a quick lunch.
Serving & Storage Suggestions
These wedges are incredibly versatile. They’re perfect for lunchboxes, but they also work as an after-school snack, a quick dinner, or even a party appetizer.
Serving Temperature: These are best served at room temperature or warm. If you’re packing them in a lunchbox, let them cool completely first. They hold up beautifully and taste great even after a few hours. For a party, you can serve them warm with a side of salsa, guacamole, or sour cream.
What to Serve With Them: In a lunchbox, I like to pair them with apple slices, baby carrots, and a yogurt pouch. For a snack, they’re great with a side of fresh cowboy caviar for dipping. For a more substantial meal, serve them alongside a simple salad or a bowl of creamy chicken and wild rice soup.
Storage Instructions: Store leftover wedges in an airtight container in the refrigerator for up to 3 days. They’re great for meal prep. I’ll make a big batch on Sunday and pack them in individual containers for the week.
Reheating Tips: To reheat, place the wedges in a dry skillet over medium heat for 1-2 minutes per side. This will restore their crispiness. You can also reheat them in an air fryer at 350°F for 2-3 minutes. Avoid the microwave—it will make them soggy. I learned that lesson the hard way.
How Flavors Develop: These are best eaten within a day or two, but they’re still good after a few days. The cheese might get a little firmer, but the flavor is still there. If you’re packing them for a later lunch, I recommend adding a small ice pack to the lunchbox to keep them cool.
Nutritional Information & Benefits
These quesadilla wedges are a great option for a balanced lunch. They provide a good source of protein and calcium from the cheese, and they’re easy to customize with added veggies or protein. Here’s a rough estimate for one serving (3 wedges, using 1/2 cup of cheddar cheese and one flour tortilla).
- Calories: Approximately 320-350
- Protein: 15-18 grams
- Fat: 18-22 grams
- Carbohydrates: 25-30 grams
- Fiber: 1-2 grams
- Calcium: 30-40% of the Daily Value
Health Benefits: Cheese is a great source of calcium, which is essential for growing bones and teeth. It also provides protein, which helps keep kids full and focused throughout the school day. If you use whole wheat tortillas, you’ll also get some fiber.
Dietary Considerations: This recipe can be made gluten-free and dairy-free with simple substitutions. It’s naturally vegetarian. If you’re watching your sodium intake, you can use low-sodium cheese and skip the optional salt.
Personal Wellness Perspective: For me, this recipe is about more than just nutrition. It’s about sanity. It’s about knowing that I’ve packed a lunch that my kid will actually eat, without any stress or fuss. That’s a win in my book.
Conclusion
Look, I’m not saying these Easy Kindergarten Lunch Box Cheese Quesadilla Wedges will change your life. But they might just make your mornings a little bit easier. And honestly, that’s a pretty big deal. They’re simple, they’re fast, and they’re something you can feel good about sending to school with your little one. No fancy ingredients, no complicated techniques, just good, honest food that kids actually want to eat.
I love this recipe because it reminds me that cooking doesn’t have to be complicated to be good. Sometimes the simplest things are the most satisfying. I encourage you to make this recipe your own. Swap in your kid’s favorite cheese, add some leftover chicken, or sneak in some grated veggies. The possibilities are endless. And when you do, I’d love to hear about it. Leave a comment below and let me know how it went. Did your kid love them? Did you make a fun variation? Share your stories! And if you’re looking for another easy lunch idea, check out these ham and cheese pinwheels—they’re another favorite in our house.
Happy cooking, and here’s to less stress and more cheese.
Frequently Asked Questions
Can I use corn tortillas instead of flour?
You can, but they’re a bit trickier to work with. Corn tortillas are smaller and more prone to cracking. If you use them, warm them up first to make them more pliable. The flavor will be different, but still good.
How do I keep the quesadillas from getting soggy in the lunchbox?
The key is to let them cool completely before packing. If you pack them while they’re still warm, the steam will make them soggy. I let them sit on a cutting board for at least 5-10 minutes before putting them in the container.
Can I freeze these quesadilla wedges?
Yes! They freeze really well. Let them cool completely, then place them in a single layer on a baking sheet and freeze for about an hour. Once they’re frozen solid, transfer them to a freezer-safe bag or container. They’ll keep for up to 2 months. To reheat, just pop them in a skillet or air fryer straight from the freezer.
What’s the best cheese for melting?
For the best melt, I recommend using a combination of cheddar and Monterey Jack. Cheddar has great flavor, and Monterey Jack is super creamy and melts beautifully. If you’re using just one cheese, sharp cheddar is my top pick.
My kid is a picky eater. How can I make these more appealing?
Try cutting them into fun shapes using cookie cutters! You can make stars, dinosaurs, or hearts. My son loves the star-shaped ones. You can also let them dip the wedges in their favorite sauce, like ketchup, ranch, or salsa. Sometimes it’s all about the presentation.
Pin This Recipe!
Easy Kindergarten Lunch Box Cheese Quesadilla Wedges
- Total Time: 11 minutes
- Yield: 1 quesadilla (6 wedges, serves 1-2) 1x
Description
Simple, cheesy quesadilla wedges perfect for lunchboxes. Ready in under 10 minutes using pantry staples, these golden-brown wedges are kid-approved and hold up well at room temperature.
Ingredients
- 2 (8-inch) flour tortillas
- 1/2 cup shredded sharp cheddar cheese (freshly shredded)
- 1 teaspoon unsalted butter
- Optional: pinch of flaky sea salt
Instructions
- Prep your station: Shred cheese if needed, and have tortillas and butter ready.
- Heat a non-stick skillet over medium heat for about 1 minute until hot but not smoking.
- Spread a thin layer of butter on one side of one tortilla. Place butter-side down in the hot skillet.
- Sprinkle shredded cheddar cheese evenly over the entire surface of the tortilla.
- Top with the second tortilla (unbuttered). Gently press down with a spatula.
- Cook for 2-3 minutes until the bottom is golden brown and cheese starts to melt.
- Carefully flip the quesadilla and cook for another 2-3 minutes until the second side is golden brown and cheese is fully melted.
- Transfer to a cutting board and let rest for 30 seconds. Cut into 6 wedges using a sharp knife or pizza cutter.
- Let wedges cool completely on the cutting board before packing in a lunchbox (about 5-10 minutes).
Notes
For best results, shred cheese from a block rather than using pre-shredded cheese. Let quesadillas cool completely before packing to prevent sogginess. Can be frozen for up to 2 months. Reheat in a dry skillet or air fryer for best texture.
- Prep Time: 5 minutes
- Cook Time: 6 minutes
- Category: Lunch
- Cuisine: Mexican-American
Nutrition
- Serving Size: 3 wedges
- Calories: 335
- Sugar: 2
- Sodium: 520
- Fat: 20
- Saturated Fat: 11
- Carbohydrates: 28
- Fiber: 1
- Protein: 16
Keywords: quesadilla, lunchbox, kid-friendly, cheese, easy, quick, kindergarten lunch, school lunch


