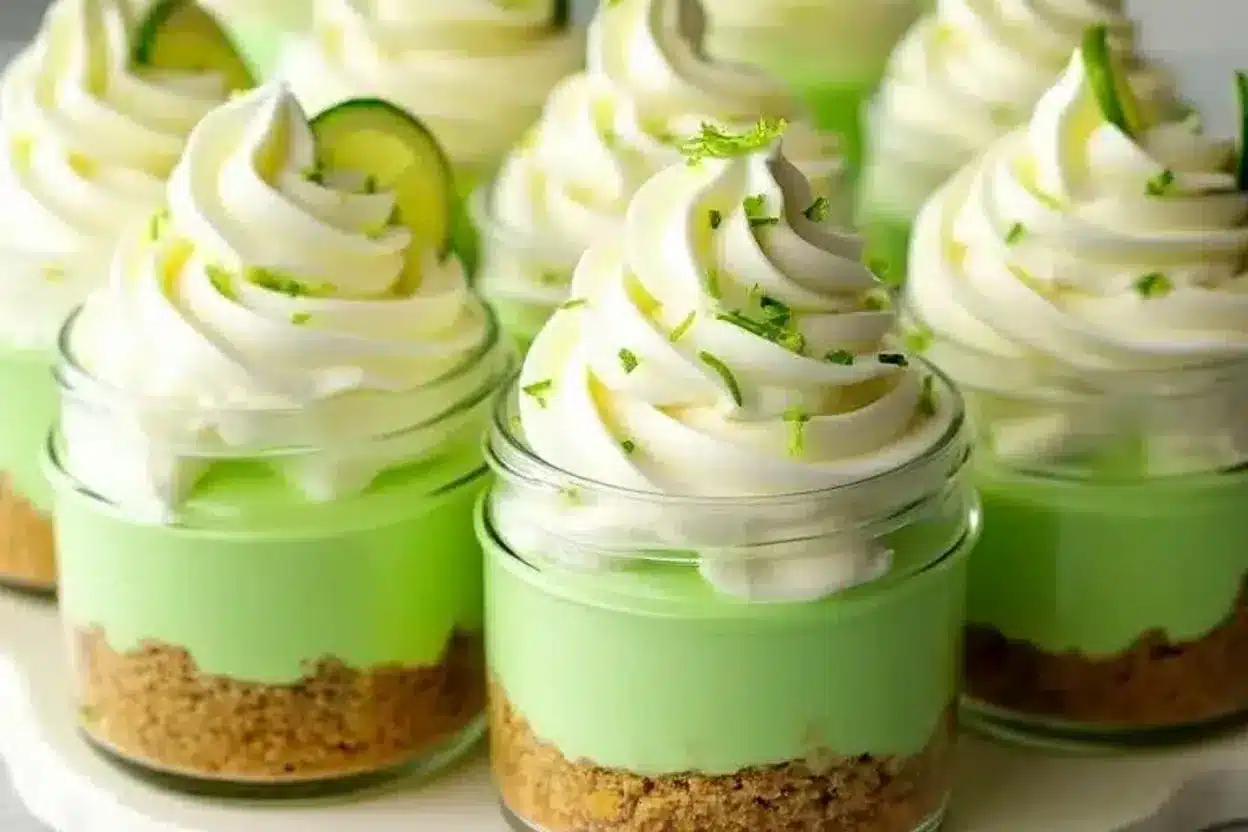
If you’re looking for a dessert that’s as adorable as it is delicious, these Key Lime Pie Jars are exactly what you need. Imagine a creamy, tangy key lime filling nestled between layers of buttery graham cracker crumbs, all served up in cute glass jars. They’re perfect for parties, picnics, or just treating yourself to something special! Honestly, once you try this recipe, you’ll understand why it’s a crowd favorite.
What makes this recipe truly irresistible is how easy it is to prepare and serve. No slicing or plating required—just grab a jar and dig in! Plus, with their vibrant lime flavor, these pies-in-a-jar are a refreshing treat for warm weather months or whenever you need a little tropical escape. Let’s dive into the story behind these mini desserts and how you can whip them up at home.
The Story Behind Key Lime Pie Jars
Key lime pie is a classic dessert with deep roots in Florida’s culinary history. It’s said to have originated in the Florida Keys, where key limes were abundant, and condensed milk was a pantry staple due to lack of refrigeration. The combination of tart key lime juice, creamy milk, and crunchy crust created a dessert that’s been beloved for generations.
While traditional key lime pie is often served as a slice, these individual Key Lime Pie Jars take the concept to the next level—perfect for modern gatherings! I first discovered this idea at a summer barbecue, where someone had served desserts in mason jars. It was love at first bite! Since then, I’ve adapted the recipe to include my favorite tweaks, like extra graham cracker crust layers and a dollop of whipped cream.
These jars are especially popular during spring and summer when citrus flavors really shine. But honestly, I’ve made them during winter as well—because who doesn’t love a little tropical vibe when it’s cold outside?
Ingredient Breakdown
Key Limes
The star of this recipe! Key limes are smaller and more aromatic than regular limes, with a distinctive tart flavor. If you can’t find fresh key limes, bottled key lime juice works just fine. Alternatively, Persian limes can substitute, though the flavor won’t be quite as authentic. For the best juice yield, roll the limes on your countertop before cutting them.
Sweetened Condensed Milk
This is what makes the filling creamy and sweet. Avoid substitutions here—condensed milk is essential for achieving the classic texture and flavor. I prefer using name-brand condensed milk like Eagle Brand for consistency.
Egg Yolks
Egg yolks give the filling its richness and body. Be sure to separate the whites carefully to avoid altering the recipe. If you’re worried about leftover whites, save them for an omelet or a meringue topping!
Graham Crackers
The buttery crunch of graham crackers is the perfect partner to the tangy lime filling. You can crush them yourself in a food processor or use pre-crushed crumbs for convenience. For a gluten-free version, substitute gluten-free graham crackers.
Butter
Melted butter binds the graham cracker crumbs into a crust. Use unsalted butter for better control of the flavor, though salted butter can work in a pinch.
Whipped Cream
Homemade whipped cream adds an airy finish to each jar. A touch of vanilla extract in the cream makes it even better. Store-bought whipped cream is a convenient alternative, but I swear by the homemade version!
Optional Garnishes
For an extra pop of color and texture, you can garnish the jars with lime zest, thin lime slices, or even a sprinkle of crushed graham crackers. It’s totally up to you!
Kitchen Tools You’ll Need
- Glass jars or ramekins (4-8 oz size)
- Food processor for crushing graham crackers
- Mixing bowls
- Hand mixer or stand mixer
- Whisk
- Measuring cups and spoons
- Zester or microplane for lime zest
If you don’t have glass jars, you can use clear plastic cups or any small dish with a similar capacity. Mason jars are my favorite because they’re sturdy and reusable!
How to Prepare Key Lime Pie Jars
- Prepare the crust: Crush 1 ½ cups (150g) of graham crackers into fine crumbs using a food processor or a rolling pin. Mix the crumbs with 6 tablespoons (85g) of melted unsalted butter and 2 tablespoons (25g) of sugar. Press about 2 tablespoons of the mixture into the bottom of each jar.
- Make the filling: In a bowl, whisk together 3 egg yolks and 1 can (14 oz or 396g) of sweetened condensed milk until smooth. Slowly add ½ cup (120ml) of key lime juice, whisking until fully incorporated. The mixture will thicken slightly.
- Layer the jars: Spoon a layer of lime filling over the crust in each jar, followed by another layer of graham cracker crumbs. Repeat until the jars are filled, finishing with a layer of filling on top.
- Bake: Place the jars on a baking tray and bake at 350°F (175°C) for 10 minutes. Let them cool completely, then refrigerate for at least 2 hours to set.
- Top with whipped cream: Whip 1 cup (240ml) of heavy cream with 2 tablespoons (25g) of powdered sugar and 1 teaspoon (5ml) of vanilla extract until soft peaks form. Pipe or spoon the whipped cream onto each jar.
- Garnish: Sprinkle lime zest or add a slice of lime for a finishing touch. Serve chilled!
Pro Tips for Perfect Key Lime Pie Jars
- Use freshly squeezed key lime juice for the best flavor.
- If the crust feels too dry, add a little more melted butter.
- Don’t over-bake the filling—it should only set slightly.
- Chill the jars thoroughly before serving for the best texture.
- To save time, prepare the jars the night before your event.
Trust me, once you’ve mastered this recipe, you’ll want to make it again and again!
Variations & Adaptations
- Gluten-Free: Use gluten-free graham crackers for the crust.
- Dairy-Free: Substitute coconut cream for the whipped cream topping.
- Chocolate Twist: Add a layer of chocolate ganache between the crust and filling.
- Tropical Flair: Mix shredded coconut into the crust for extra flavor.
- Berry Addition: Top the jars with fresh raspberries or strawberries for a fruity garnish.
I’ve tried the chocolate twist myself—it’s absolutely decadent!
Serving & Storage Suggestions
These jars are best served chilled, straight from the fridge. They make a beautiful presentation lined up on a tray, and the glass jars allow everyone to see the delicious layers inside. Pair them with iced tea or a tropical cocktail for a complete experience.
To store, cover each jar with plastic wrap or a lid and refrigerate for up to 3 days. If you want to freeze them, skip the whipped cream topping and store them for up to 2 months. Thaw in the fridge overnight and add whipped cream before serving.
When reheating isn’t an option, these jars are perfect for make-ahead desserts!
Nutritional Information & Benefits
One serving (1 jar) contains approximately:
- Calories: 350
- Fat: 15g
- Carbohydrates: 45g
- Protein: 5g
Key limes are a great source of vitamin C, supporting your immune system. While this dessert is indulgent, the individual portions help with portion control. It’s a sweet treat you can enjoy guilt-free!
Conclusion
There’s something magical about these Key Lime Pie Jars. Whether you’re hosting a party or just craving something sweet, they’re a joy to make and share. The layers of tart lime, creamy filling, and crunchy crust are downright addictive. Plus, the individual servings make them practical and fun.
I hope you love this recipe as much as I do! If you try it, let me know how it turned out in the comments below. Don’t forget to share this recipe with your friends and pin it for later. Happy baking!
FAQs About Key Lime Pie Jars
Can I use regular limes instead of key limes?
Yes, Persian limes will work as a substitute, but the flavor won’t be as authentic.
Do I have to bake the jars?
Baking helps set the filling, but you can skip it if you prefer a softer texture. Just refrigerate longer.
Can I prepare these jars ahead of time?
Absolutely! They can be made a day or two in advance and stored in the fridge.
What jars work best for this recipe?
Mason jars (4-8 oz) are ideal, but clear plastic cups or ramekins can also be used.
How do I make this recipe dairy-free?
Use coconut cream instead of whipped cream and ensure the condensed milk is dairy-free.