Picture this: the crackling of a campfire, the sweet scent of toasted marshmallows, and the irresistible crunch of graham crackers. Now imagine all of that cozy nostalgia packed into a decadent cheesecake. That’s exactly what this easy s’mores cheesecake recipe delivers—a dessert that’s perfect for any occasion, whether you’re hosting a backyard barbecue or simply craving something indulgent. Trust me, this recipe is going to earn a permanent spot in your dessert rotation!
S’mores are a beloved classic, and combining them with creamy cheesecake takes things to a whole new level. You don’t even need a campfire—just your oven and a little bit of patience. This recipe is simple enough for beginners yet impressive enough to wow your guests. Let’s dig into the story behind this irresistible creation!
The Story Behind S’mores Cheesecake
S’mores have been a campfire tradition for decades, with their origins tracing back to early 20th-century scouting events. The combination of graham crackers, marshmallows, and chocolate is the pinnacle of sweet simplicity, and it’s no surprise they’ve stood the test of time. But what happens when you transform this quintessential treat into a rich, creamy cheesecake? Pure magic, that’s what.
This recipe was inspired by my childhood camping trips, where roasting marshmallows over an open flame was always the highlight of the night. As I grew older, I started experimenting with ways to recreate that same feeling at home, leading to this s’mores cheesecake masterpiece. It’s become a family favorite, especially during the colder months when campfires aren’t an option. The layers of graham cracker crust, velvety chocolate cheesecake, and toasted marshmallow topping are a nostalgic nod to those simpler times.
While s’mores are often associated with summer, this cheesecake works beautifully year-round. Imagine serving it at a holiday gathering or as a cozy dessert after a winter meal—it’s versatile, indulgent, and guaranteed to bring smiles. Plus, it’s a great way to enjoy the flavors of s’mores without worrying about sticky fingers!
Breakdown of Ingredients
The Graham Cracker Crust
The foundation of this cheesecake is a classic graham cracker crust. For the best flavor, use fresh graham crackers and crush them finely. You’ll need about 1 ½ cups (150g) of crumbs, mixed with 5 tablespoons (70g) of melted butter and 2 tablespoons (25g) of sugar. If graham crackers aren’t available, digestive biscuits work well as a substitute.
The Chocolate Cheesecake Filling
Here’s where the magic happens. The filling is made with cream cheese, sugar, sour cream, eggs, and melted chocolate. I recommend using semi-sweet chocolate for a balanced flavor, but you can opt for milk or dark chocolate based on your preference. Add a splash of vanilla extract for extra depth.
The Marshmallow Topping
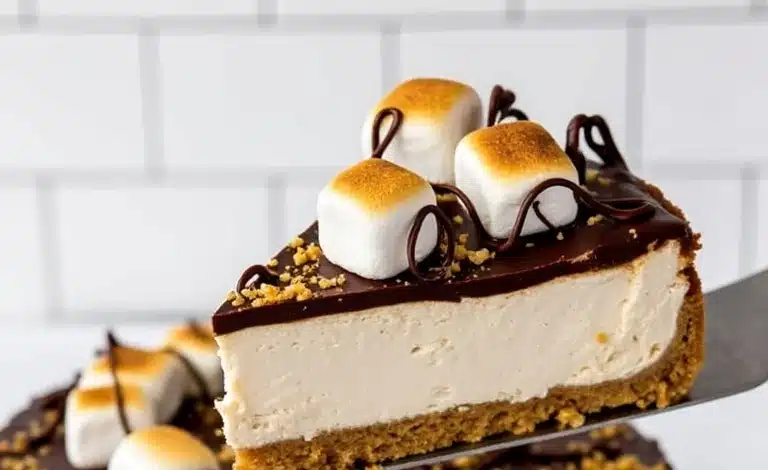
The pièce de résistance of this recipe is the marshmallow topping. Mini marshmallows are ideal, as they toast evenly under the broiler. If you’re feeling fancy, you can use a kitchen torch for that perfect golden finish. For a twist, try adding crushed graham crackers or drizzled chocolate on top.
Substitutions and Tips
- Graham crackers: Swap with digestive biscuits or even crushed Oreos for a chocolate crust.
- Semi-sweet chocolate: Use milk chocolate for a sweeter filling or dark chocolate for a richer taste.
- Sour cream: Greek yogurt works as a lighter alternative.
- Mini marshmallows: Large marshmallows can be cut into smaller pieces if needed.
Equipment Needed
- 9-inch (23cm) springform pan
- Food processor or rolling pin (for crushing graham crackers)
- Mixing bowls
- Electric mixer or hand mixer
- Spatula
- Oven and broiler
- Optional: kitchen torch for toasting marshmallows
If you don’t have a springform pan, a deep pie dish can work as an alternative. Just be careful when slicing to avoid breaking the crust!
Preparation Method
- Prepare the crust: Preheat your oven to 325°F (160°C). Mix the graham cracker crumbs, melted butter, and sugar together. Press the mixture firmly into the bottom of your springform pan. Bake for 10 minutes, then let it cool.
- Make the filling: Melt 8 ounces (225g) of chocolate and let it cool slightly. In a large mixing bowl, beat 24 ounces (680g) of cream cheese until smooth. Add 1 cup (200g) of sugar and continue to mix. Incorporate ¾ cup (180g) of sour cream, 2 teaspoons (10ml) of vanilla extract, and the melted chocolate. Add 4 eggs, one at a time, mixing gently after each addition.
- Bake the cheesecake: Pour the filling over the crust and smooth the top. Bake for 55-60 minutes, or until the center is slightly jiggly but set. Let it cool completely before refrigerating for at least 4 hours.
- Add the marshmallow topping: Preheat your broiler to high. Arrange mini marshmallows on top of the cheesecake and broil for 1-2 minutes, watching closely to prevent burning. Alternatively, use a kitchen torch for more control.
- Serve: Let the cheesecake sit for 15 minutes before slicing. Add crushed graham crackers or drizzled chocolate for extra flair.
Cooking Tips & Techniques
Baking a cheesecake can be tricky, but here are some tips to make it foolproof:
- Use room-temperature ingredients for a smoother filling.
- Wrap your springform pan in foil to prevent leaks if using a water bath.
- Don’t overmix the filling—it can lead to cracks.
- If cracks do appear, don’t worry! The marshmallow topping hides imperfections beautifully.
- Chill the cheesecake for at least 4 hours to ensure it sets properly.
Variations & Adaptations
Here are some fun ways to customize this recipe:
- Gluten-free: Use gluten-free graham crackers for the crust.
- Seasonal twist: Add pumpkin puree and spices to the filling for a fall-inspired version.
- Peanut butter lovers: Swirl peanut butter into the cheesecake filling before baking.
- Vegan adaptation: Use dairy-free cream cheese, coconut cream, and vegan marshmallows.
My personal favorite variation? Adding crushed peppermint candies to the marshmallow topping during the holidays—it’s like a winter wonderland in dessert form!
Serving & Storage Suggestions
This cheesecake is best served slightly chilled. Pair it with a cup of hot cocoa or coffee for the ultimate cozy experience. For presentation, garnish with extra marshmallows, chocolate curls, or graham cracker crumbs.
Leftovers can be stored in the refrigerator for up to 5 days in an airtight container. You can also freeze individual slices for up to 2 months—just make sure to wrap them tightly. To reheat, let frozen slices thaw in the fridge overnight.
Nutritional Information & Benefits
While this dessert is definitely indulgent, it’s worth every bite. Here’s a rough estimate per slice (based on 12 servings):
- Calories: 450
- Fat: 28g
- Carbohydrates: 42g
- Protein: 6g
The cream cheese provides calcium, while the dark chocolate adds antioxidants. Keep in mind, this recipe contains common allergens like dairy, eggs, and gluten, so always check the ingredient labels if serving to others.
Conclusion
This s’mores cheesecake is the perfect blend of childhood nostalgia and grown-up indulgence. Whether you’re making it for a special occasion or just because, it’s sure to become an instant favorite. I love how versatile and customizable it is—you can truly make it your own.
If you give this recipe a try, let me know in the comments! Share your variations, photos, or feedback. I’d love to hear how you made this campfire-inspired dessert your own. Happy baking, and may your kitchen be filled with delicious s’mores vibes!
FAQs
Can I make this cheesecake ahead of time?
Yes! It’s actually better to make it a day in advance so the flavors can fully develop.
Can I use a store-bought crust?
Absolutely! If you’re short on time, a pre-made graham cracker crust works just fine.
What if I don’t have a broiler?
No problem! Use a kitchen torch to toast the marshmallows instead.
Can I freeze the cheesecake?
Yes, wrap individual slices in plastic wrap and freeze for up to 2 months.
How do I prevent cracks in my cheesecake?
Don’t overmix the filling, and bake the cheesecake in a water bath for even cooking.