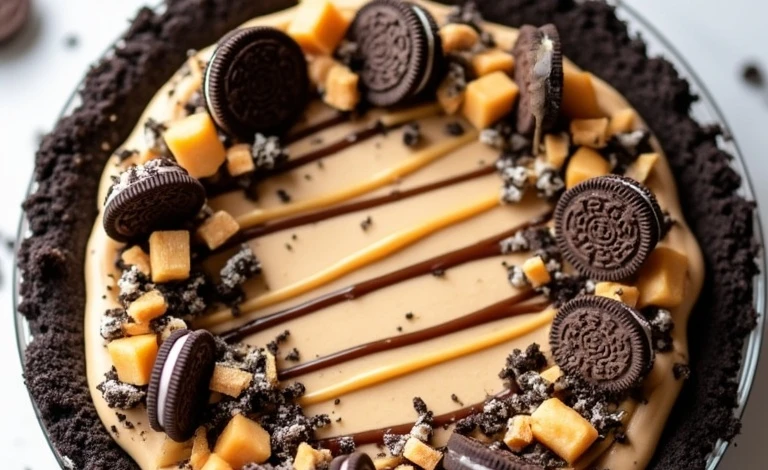
Picture this: creamy peanut butter filling nestled inside a crunchy Oreo crust, topped with dollops of whipped cream and a drizzle of chocolate. Doesn’t that sound like dessert heaven? This Oreo Peanut Butter Pie is the ultimate indulgence for peanut butter lovers, and honestly, anyone with a sweet tooth. It’s rich, luscious, and ridiculously easy to make – no oven required!
This recipe has a special place in my heart because it’s one of those magical desserts that comes together in no time but looks like you spent hours in the kitchen. Whether you’re hosting a dinner party or just craving something decadent, this pie will steal the show. Plus, who doesn’t love the combination of chocolate and peanut butter?
Recipe Story/Background
The Oreo Peanut Butter Pie has humble beginnings, inspired by classic American diner desserts. The peanut butter pie itself hails from the Southern United States, where creamy, no-bake pies reign supreme. Over time, someone genius thought to combine peanut butter filling with an Oreo crust, and the rest, as they say, is delicious history.
I first made this pie for a family gathering during the summer, and it instantly became a hit. It’s the kind of dessert that brings people together – everyone has a smile on their face after the first bite. It’s also a nostalgic treat that reminds me of childhood, sneaking spoonfuls of peanut butter out of the jar and munching on Oreos with friends.
While this pie is perfect year-round, I especially love making it in warmer months when turning on the oven feels like a chore. It’s cool, creamy, and refreshing, yet still indulgent enough to satisfy any dessert craving.
Ingredient Discussion
Here’s a breakdown of the key ingredients you’ll need to make this amazing Oreo Peanut Butter Pie:
- Oreo Cookies: The base of our crust! You’ll need about 24 Oreos (the regular kind, not Double Stuf). Crush them finely for a sturdy crust. If you’re gluten-free, you can use a GF chocolate cookie as a substitute.
- Unsalted Butter: This binds the crushed Oreos together to form the crust. Melted butter works best here. I recommend using unsalted butter to control the saltiness of the pie.
- Creamy Peanut Butter: The star ingredient! Choose your favorite brand, but make sure it’s smooth (not the natural kind that separates). If you prefer almond butter or sunflower seed butter, those work too!
- Cream Cheese: This adds richness and tang to the peanut butter filling. Make sure it’s softened for smooth mixing.
- Powdered Sugar: Essential for sweetening the filling without making it gritty. You can adjust the amount based on your sweetness preference.
- Whipped Topping or Heavy Cream: For that airy, creamy texture. Store-bought whipped topping works great, or you can whip your own heavy cream.
- Chocolate Sauce or Melted Chocolate: Optional but highly recommended for drizzling on top. It adds a touch of decadence and enhances that Oreo flavor.
For sourcing, most of these ingredients are pantry staples, but for the best peanut butter flavor, I recommend brands like Jif or Skippy. You can also experiment with flavored Oreos, like peanut butter Oreos, for a twist!
Equipment Needed
To make this Oreo Peanut Butter Pie, you don’t need any fancy equipment. Here’s what you’ll need:
- Food Processor: For crushing Oreos into fine crumbs. If you don’t have one, a zip-top bag and rolling pin work just as well.
- Mixing Bowls: One large bowl for the filling and a medium bowl for the crust mixture.
- Hand Mixer or Stand Mixer: Makes whipping up the filling a breeze, but you can use a whisk and some elbow grease if you prefer.
- 9-Inch Pie Dish: A classic glass or ceramic pie dish works beautifully. If you don’t have one, a springform pan can be a fun alternative.
- Rubber Spatula: For smoothing out the filling and spreading the crust evenly.
If you’re on a budget, most of these tools are likely already in your kitchen. And if you’re using a food processor, don’t forget to clean it right away to avoid Oreo crumbs sticking everywhere!
Preparation Method
Follow these steps to make your own show-stopping Oreo Peanut Butter Pie:
- Prepare the crust: Crush 24 Oreo cookies into fine crumbs using a food processor or a zip-top bag and rolling pin. Combine the crumbs with 6 tablespoons (85g) of melted unsalted butter and mix until evenly coated. Press the mixture firmly into a 9-inch pie dish to form the crust. Chill in the refrigerator for 10 minutes.
- Make the filling: In a large bowl, beat 1 cup (255g) of creamy peanut butter and 8 ounces (225g) of softened cream cheese until smooth and creamy. Add 1 cup (120g) of powdered sugar and mix until fully incorporated.
- Fold in whipped topping: Gently fold in 8 ounces (225g) of whipped topping until the mixture is light and fluffy. Be careful not to overmix.
- Assemble the pie: Spread the peanut butter filling evenly over the chilled Oreo crust. Smooth the top with a spatula for a polished look.
- Chill the pie: Cover the pie with plastic wrap and refrigerate for at least 4 hours, or until fully set. For best results, let it chill overnight.
- Decorate: Before serving, drizzle chocolate sauce or melted chocolate over the top. Add whipped cream swirls or crushed Oreos for extra flair.
Pro Tip: If the filling seems too thick, add a splash of heavy cream to loosen it up. And don’t skip the chilling step – it’s crucial for the pie to firm up properly!
Cooking Tips & Techniques
Here are some handy tips to ensure your Oreo Peanut Butter Pie turns out perfect:
- Chill your crust: This step helps the butter solidify and keeps the crust from crumbling when you slice the pie.
- Don’t overmix: When folding in the whipped topping, be gentle. Overmixing can deflate the airy texture of the filling.
- Use room-temperature cream cheese: Softened cream cheese is much easier to blend and prevents lumps in the filling.
- Refrigerate overnight: While 4 hours is enough to set the pie, letting it chill overnight ensures the flavors meld beautifully.
- Decorate just before serving: Whipped cream and chocolate topping are best added fresh to avoid melting or smudging.
If you’re in a rush, you can pop the pie in the freezer for an hour to speed up the chilling process. Just don’t forget to let it thaw a bit before serving!
Variations & Adaptations
The beauty of this Oreo Peanut Butter Pie is its versatility! Here are some ideas to make it uniquely yours:
- Gluten-Free Version: Use gluten-free chocolate cookies for the crust and make sure your whipped topping is GF-certified.
- Chocolate Lover’s Twist: Add 2 tablespoons of cocoa powder to the filling for a chocolate-peanut butter combo.
- Nut-Free Alternative: Replace peanut butter with sunflower seed butter or cookie butter for an allergy-friendly option.
- Seasonal Touch: Add crushed peppermint candies to the crust during the holiday season or fresh berries on top for summer flair.
Personally, I once swapped out peanut butter for Nutella, and let me tell you – it was a chocolate hazelnut dream!
Serving & Storage Suggestions
This Oreo Peanut Butter Pie is best served chilled but not frozen. Slice into generous pieces and serve with a drizzle of chocolate sauce or a dollop of whipped cream for extra pizzazz. Pair it with a hot cup of coffee or a frosty glass of milk for the ultimate treat.
For leftovers, cover the pie tightly with plastic wrap and store in the refrigerator for up to 5 days. The flavors actually deepen over time, making it even tastier the next day. If you need to freeze it, wrap the pie securely and store for up to 2 months. Thaw in the fridge overnight before serving.
When reheating (if frozen), avoid microwaving as it can ruin the texture. Instead, let it sit at room temperature for about 20 minutes before diving in.
Nutritional Information & Benefits
While this Oreo Peanut Butter Pie is definitely a treat, it does offer some nutritional perks:
- Estimated Calories: About 450 calories per slice (based on 8 slices).
- Protein Boost: Peanut butter is a great source of protein, offering about 7 grams per serving.
- Calcium: Cream cheese and whipped topping add a dose of calcium for bone health.
- Dietary Notes: This pie contains gluten, dairy, and peanuts, so it’s not suitable for individuals with those allergies.
While it’s not exactly a low-calorie dessert, it’s perfect for special occasions or when you need a little sweet indulgence in your life!
Conclusion
If you’re looking for a dessert that’s easy, delicious, and sure to impress, this Oreo Peanut Butter Pie is the answer. It’s one of those recipes that feels like a little slice of joy every time you make it. Customize it to suit your taste, and don’t forget to share a slice (or two) with loved ones.
I’d love to hear how your pie turns out! Drop a comment below and let me know your favorite variations or any tips you’ve discovered. And if you snapped a photo, share it on Instagram or Pinterest – I can’t wait to see your creations!
Happy baking, and remember: life is better with pie!
FAQs
Can I use natural peanut butter for this recipe?
Natural peanut butter isn’t recommended because it tends to separate and may affect the texture of the filling. Stick with creamy, processed peanut butter for best results.
Can I make this pie ahead of time?
Absolutely! This pie is best when made the day before serving. Just refrigerate overnight and decorate right before serving.
What can I use instead of Oreos for the crust?
Try graham crackers, chocolate wafer cookies, or even pretzels for a salty twist.
How do I make homemade whipped cream?
Whip 1 cup of heavy cream with 2 tablespoons of powdered sugar and 1 teaspoon of vanilla extract until stiff peaks form. It’s easy and tastes amazing!
Can I freeze the pie?
Yes, you can freeze the pie for up to 2 months. Wrap it tightly and thaw overnight in the fridge before serving.