Plus, who doesn’t love a dessert you can make ahead of time? Trust me, these Strawberry Shortcake Icebox Bars will quickly become one of your go-to recipes for summertime (or anytime, really!).
Recipe Story and Background
Strawberry shortcake has been a beloved dessert for generations, dating back to the mid-19th century in the United States. Traditionally, it’s made with layers of sweet biscuits, whipped cream, and fresh strawberries. While I adore the classic version, it does require baking, and let’s face it—baking in the summer heat isn’t always fun.
That’s where the idea for these icebox bars was born. Icebox desserts were all the rage in the 1920s, thanks to the introduction of refrigerators in homes. These no-bake creations rely on chilling to set the ingredients, making them perfect for warm weather. Combining the nostalgic charm of strawberry shortcake with the convenience of an icebox dessert just made sense!
I first made these bars for a family gathering where we had to transport the dessert in a cooler. They were an instant hit, and now they’ve become a summer staple for us. The best part? You can make them a day ahead, freeing up valuable time for the actual party.
Ingredient Discussion
Let’s break down the ingredients you’ll need for these Strawberry Shortcake Icebox Bars and why they’re so important.
- Fresh Strawberries: The star of the show! Look for bright red, firm strawberries with no soft spots. If strawberries aren’t in season, you can substitute frozen ones (just thaw and pat them dry).
- Graham Crackers: These create the sturdy, slightly crunchy base. You can swap them with digestive biscuits or vanilla cookies for a different flavor.
- Whipping Cream: This adds that fluffy, melt-in-your-mouth texture. Make sure it’s cold and use heavy cream for the best results.
- Powdered Sugar: It sweetens the cream without the grittiness of granulated sugar. Adjust the amount to suit your taste.
- Vanilla Extract: A little goes a long way in enhancing the overall flavor. If you’re feeling fancy, try using vanilla bean paste.
- Cream Cheese: This gives the filling a slight tang and extra creaminess. If you’re dairy-free, consider using a plant-based cream cheese alternative.
- Butter: Used to hold the crust together. Unsalted butter works best, but salted can be used in a pinch (just skip adding extra salt).
One thing I love about this recipe is how forgiving it is. Don’t have graham crackers? Use shortbread. Want to add a twist? Toss in some lemon zest or swap the strawberries for raspberries. The options are endless!
Equipment Needed
- 8×8-inch Baking Dish: This is the perfect size for these bars, but you can use a similar-sized dish if needed.
- Mixing Bowls: You’ll need one for the crust and another for the creamy filling.
- Electric Mixer: Whipping the cream is a breeze with a hand or stand mixer. If you don’t have one, you can use a whisk and some elbow grease.
- Spatula: A silicone spatula is ideal for spreading the layers evenly.
- Plastic Wrap or Foil: To cover the dish while it chills.
If you don’t have an electric mixer, I’ve whipped cream by hand before—it’s a workout, but it works! Just make sure to chill your bowl and whisk beforehand for the best results.
Preparation Method
- Prepare the Crust: In a mixing bowl, combine 2 cups (200g) of graham cracker crumbs with 1/2 cup (115g) melted butter. Press the mixture firmly into the bottom of an 8×8-inch dish. Chill in the fridge while you prepare the filling.
- Make the Filling: In a large bowl, beat 1 cup (240ml) of heavy whipping cream with 1/2 cup (60g) powdered sugar and 1 tsp (5ml) vanilla extract until stiff peaks form. In a separate bowl, beat 8 oz (225g) of cream cheese until smooth. Gently fold the whipped cream into the cream cheese until fully combined.
- Layer the Dessert: Spread half of the cream mixture over the crust. Arrange a layer of sliced strawberries on top. Add the remaining cream mixture and smooth the top with a spatula.
- Chill: Cover the dish with plastic wrap or foil and refrigerate for at least 4 hours (or overnight for best results).
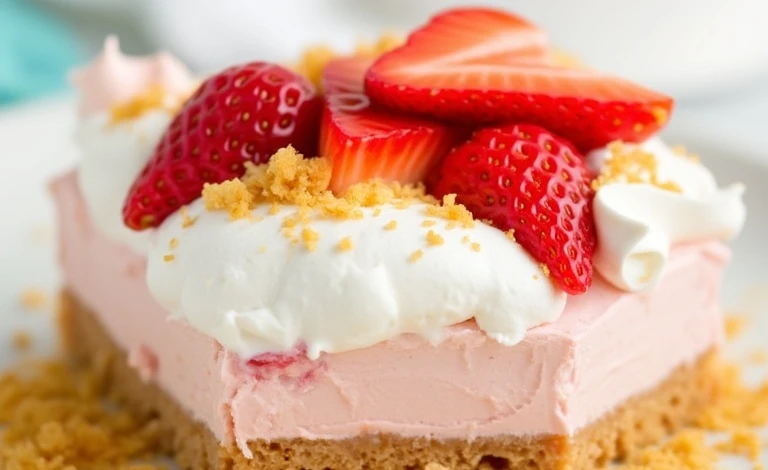
- Garnish and Serve: Just before serving, top with additional strawberries and crushed graham crackers for a decorative touch. Slice into bars and enjoy!
Pro Tip: To get clean slices, run your knife under warm water, wipe it dry, and cut through the bars. Repeat between each slice.
Cooking Tips & Techniques
Here are some tips to make your Strawberry Shortcake Icebox Bars foolproof:
- Chill your mixing bowl and beaters before whipping the cream—it whips faster and holds its shape better.
- Don’t skip pressing the crust firmly. Use the bottom of a glass or measuring cup to pack it down evenly.
- If your filling seems too soft, pop it in the fridge for 10-15 minutes before assembling the layers.
- Let the bars chill for at least 4 hours, but overnight is even better for the flavors to meld.
- Be gentle when folding the whipped cream into the cream cheese to keep the mixture light and airy.
These small tweaks can make a big difference, especially if you’re making this for a special occasion.
Variations & Adaptations
Looking to switch things up? Here are a few ideas:
- Berry Swap: Substitute strawberries with raspberries, blueberries, or a mix of your favorite berries.
- Gluten-Free: Use gluten-free graham crackers for a celiac-friendly dessert.
- Chocolate Twist: Add a layer of melted chocolate or chocolate chips on top of the crust for a rich variation.
- Lemon Zing: Mix in 1 tsp (5ml) of lemon zest into the cream filling for a citrusy kick.
- Vegan Option: Use plant-based whipped topping and cream cheese for a dairy-free version.
I once tried adding a thin layer of strawberry jam over the crust before the cream layer—absolute game changer!
Serving & Storage Suggestions
These bars are best served chilled, straight from the fridge. They make a stunning presentation when topped with fresh strawberry slices and a sprinkle of graham cracker crumbs.
Pair them with a refreshing glass of iced tea or a bubbly glass of sparkling wine for a summery vibe. If you’re serving them at a gathering, consider cutting the bars into smaller, bite-sized squares for a party-friendly option.
For storage, cover the dish tightly with plastic wrap or foil and keep it in the refrigerator for up to 3 days. If you have leftovers (though I doubt you will), you can freeze individual bars for up to a month. Just thaw them in the fridge for a few hours before serving.
Nutritional Information & Benefits
Here’s a rough breakdown of the nutritional content per serving (based on 12 servings):
- Calories: 250
- Fat: 15g
- Carbohydrates: 25g
- Protein: 3g
- Sugar: 15g
Strawberries are packed with vitamin C and antioxidants, making this dessert a slightly healthier indulgence. If you’re watching your sugar intake, you can reduce the powdered sugar or try a sugar substitute.
Conclusion
There you have it—easy, no-bake Strawberry Shortcake Icebox Bars that are perfect for any summer occasion. They’re simple to make, incredibly delicious, and guaranteed to impress your friends and family. Plus, they’re versatile enough to adapt to your taste preferences.
Give this recipe a try, and I’d love to hear how it turns out for you. Did you add your own twist? Let me know in the comments below or tag me on social media with your creations!
So, grab your strawberries and get ready to whip up a dessert that screams summer. Happy no-baking!
FAQs
-
Q: Can I make these bars ahead of time?
Yes, and it’s actually recommended! Preparing them a day in advance allows the flavors to meld beautifully for an even tastier treat.Q: Can I use frozen strawberries instead of fresh?
Absolutely. Just make sure to fully thaw and pat them dry to prevent excess moisture in the bars.Q: How should I store leftover bars?
Keep them in an airtight container in the refrigerator for up to 3 days. You can also freeze individual portions for up to 1 month.Q: What’s a good substitute for graham crackers?
Digestive biscuits, vanilla wafers, or shortbread cookies all make excellent alternatives.Q: Is there a dairy-free option for this recipe?
Yes! Simply swap in plant-based cream cheese and whipped topping to create a vegan-friendly version.