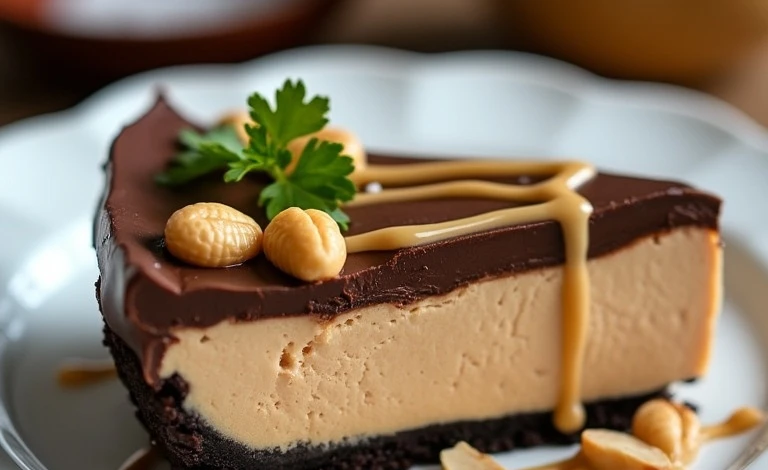
Imagine sinking your fork into a creamy, velvety slice of no bake chocolate peanut butter layered pie. The combination of rich chocolate and nutty peanut butter is truly unmatched. This recipe is perfect for those moments when you want a decadent dessert without turning on the oven. Whether you’re hosting a gathering, celebrating a special occasion, or simply craving something sweet, this pie is your answer.
Growing up, peanut butter desserts were always a family favorite. I distinctly remember my mom’s peanut butter fudge and the way we’d all huddle around the kitchen waiting for it to set. This no bake pie brings back all those nostalgic flavors but with the added bonus of indulgent chocolate layers. Trust me, this one’s a keeper!
Recipe Story/Background
No bake desserts have a fascinating history. They’re believed to have gained popularity during the 20th century when convenience became a priority for home cooks. The idea of creating a delicious dessert without an oven was revolutionary—and recipes like icebox cakes and layered pies took center stage.
This chocolate peanut butter pie has roots in those classic no bake traditions but with a modern twist. Chocolate and peanut butter are a flavor pairing that’s universally loved. It’s hard to resist the creamy texture of peanut butter combined with the smooth richness of chocolate. I’ve made this pie countless times for summer barbecues, holiday gatherings, and even as a birthday treat—it’s always a hit and never lasts long!
While this pie works year-round, it’s especially perfect for warmer months when you don’t want to heat up the kitchen. Plus, it’s so easy to customize—you’ll never get bored of making it!
Ingredient Discussion
The beauty of this recipe lies in its simplicity, but each ingredient plays a crucial role in delivering the perfect flavor and texture. Here’s a breakdown of the main components:
- Chocolate: Use semi-sweet or dark chocolate for a richer flavor. You can swap it for milk chocolate if you prefer something sweeter. I recommend using chocolate chips or a high-quality baking bar for the best results.
- Peanut Butter: Creamy peanut butter works best for a smooth texture, but crunchy peanut butter adds a fun twist with a bit of texture. If you’re avoiding peanuts, almond or cashew butter can be great alternatives.
- Cream Cheese: This helps create a luscious, creamy base for the peanut butter layer. Be sure to use full-fat cream cheese for the richest texture. Vegan cream cheese can be substituted if needed.
- Whipped Topping: Store-bought whipped topping makes this recipe super easy, but you can use freshly whipped cream if you prefer a homemade touch.
- Graham Cracker Crust: The classic choice for no bake pies, graham cracker crust provides a crunchy base. Oreo cookie crust works beautifully for chocolate lovers!
- Powdered Sugar: Adds just the right amount of sweetness without any grittiness. Make sure to sift it for a smoother mixture.
- Butter: Used to bind the crust together, melted butter adds a rich flavor. For a dairy-free option, swap it with coconut oil.
These ingredients are readily available at most grocery stores, but if you’re looking for specialty brands, I love Ghirardelli for chocolate and Jif for peanut butter. Oh, and pro tip—keep your peanut butter at room temperature for easier mixing!
Equipment Needed
You don’t need fancy tools to make this pie, which is part of its charm! Here’s what you’ll need:
- Mixing bowls (at least two)
- Hand mixer or stand mixer
- Spatula
- 9-inch pie pan
- Microwave-safe bowl
- Plastic wrap or aluminum foil (for covering)
If you don’t have a pie pan, a springform pan works well for easy slicing. And if you’re like me and love multitasking, opt for a silicone spatula—it makes scraping every last bit of filling a breeze!
Preparation Method
- Prepare the crust: Crush 1 ½ cups (about 150g) of graham crackers into fine crumbs. Mix with 6 tablespoons (85g) of melted butter and press evenly into a 9-inch pie pan. Chill in the fridge for 15 minutes.
- Make the peanut butter layer: Beat 8 ounces (225g) of softened cream cheese with 1 cup (240g) of peanut butter until smooth. Add 1 cup (120g) of powdered sugar and mix until combined. Fold in 2 cups (480ml) of whipped topping, then spread this mixture evenly over the chilled crust.
- Prepare the chocolate layer: Melt 1 cup (175g) of chocolate chips in a microwave-safe bowl, heating in 20-second intervals and stirring until smooth. Let it cool slightly. Fold the melted chocolate into another 2 cups (480ml) of whipped topping until creamy, then spread over the peanut butter layer.
- Chill the pie: Cover the pie with plastic wrap or foil and refrigerate for at least 4 hours—or overnight for best results.
- Decorate: Before serving, garnish with chocolate shavings, crushed peanuts, or a drizzle of melted peanut butter for extra flair.
Slice, serve, and watch it disappear in minutes!
Cooking Tips & Techniques
Here are some handy tips to make sure your pie turns out perfectly every time:
- Stabilize the whipped topping: If you’re using homemade whipped cream, add a little powdered gelatin to stabilize it and prevent it from deflating.
- Chill thoroughly: Don’t rush the chilling process—it helps the layers set and makes slicing much easier.
- Use parchment paper: If your crust tends to stick to the pan, line the bottom with parchment paper for easy removal.
- Test the chocolate temperature: Make sure the melted chocolate has cooled slightly before mixing with whipped topping to avoid curdling.
- Customize the garnish: Get creative! Crushed pretzels, mini chocolate chips, or even sea salt can add an interesting twist.
Variations & Adaptations
Want to mix things up? Here are some fun variations:
- Nut-free version: Swap peanut butter for sunflower seed butter and garnish with chocolate chips instead of peanuts.
- Seasonal twist: Add a layer of pumpkin puree mixed with spices in the fall, or fresh berries in the summer.
- Gluten-free option: Use gluten-free graham crackers for the crust.
- Dairy-free adaptation: Use vegan cream cheese, dairy-free whipped topping, and coconut oil in place of butter.
I once added a layer of caramel between the peanut butter and chocolate—let’s just say it didn’t last long!
Serving & Storage Suggestions
This pie is best served chilled straight from the fridge. Slice into wedges and plate it with extra whipped topping or a drizzle of chocolate syrup for a picture-perfect presentation. Pair it with a cup of coffee or a tall glass of milk for the ultimate dessert experience.
To store, cover tightly with plastic wrap and keep in the fridge for up to 4 days. For longer storage, freeze it for up to a month—just wrap it well to prevent freezer burn. To thaw, let it sit in the fridge overnight. Be aware that freezing may slightly alter the whipped topping’s texture, but it’s still delicious!
Nutritional Information & Benefits
Here’s a rough nutritional breakdown per slice (based on 8 slices):
- Calories: 410
- Fat: 25g
- Carbohydrates: 40g
- Protein: 6g
The peanut butter provides healthy fats and protein, while the chocolate delivers antioxidants. Keep in mind, this pie is a treat—enjoy it in moderation!
Conclusion
This irresistible no bake chocolate peanut butter layered pie is a must-try recipe for dessert lovers. With its creamy layers, rich flavors, and effortless preparation, it’s the perfect addition to your culinary repertoire. Customize it, share it, and make it your own—it’s the kind of recipe that brings people together.
If you give this recipe a try, I’d love to hear how it turned out! Leave a comment below, share a photo on social media, or tag me in your posts. Let’s keep the tradition of no bake desserts alive and thriving!
Happy baking—or should I say no baking!
FAQs
Can I use homemade whipped cream instead of store-bought?
Yes, absolutely! Just make sure to stabilize it with powdered gelatin or cream of tartar for best results.
What’s the best way to crush graham crackers?
Use a food processor for fine crumbs or place them in a zip-top bag and crush with a rolling pin for a more rustic texture.
Can I make this pie ahead of time?
Yes, this pie is perfect for making ahead. It actually tastes better after chilling overnight!
How do I prevent the layers from mixing?
Be sure to chill each layer thoroughly before adding the next to keep them distinct.
Can I freeze leftover pie?
Yes, wrap it tightly and freeze for up to a month. Thaw in the fridge before serving.