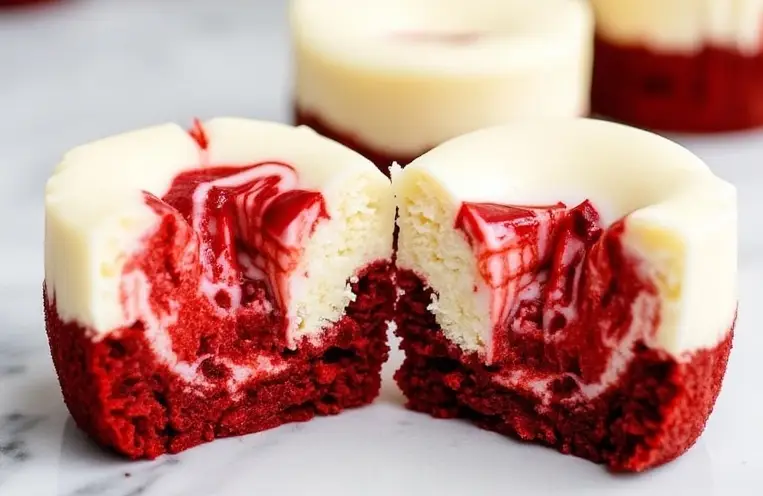
There’s something so irresistibly charming about bite-sized desserts. These Mini Red Velvet Cheesecakes are the perfect combination of creamy, tangy, and chocolatey goodness, all packed into a tiny, indulgent treat. Whether you’re hosting a party, celebrating a holiday, or just looking for a fun dessert to make, these cheesecakes will win hearts (and taste buds) every single time.
Not only are these mini cheesecakes adorable, but they’re also incredibly easy to make. With a smooth red velvet filling and a buttery cookie crust, every bite is a delightful explosion of flavor. Trust me, once you’ve tried these, you’ll want to make them for every special occasion!
The Story Behind Mini Red Velvet Cheesecakes
Red velvet cake has always been a classic dessert, known for its vibrant red hue and subtle cocoa flavor. While the origins of red velvet are debated, it’s often associated with Southern cooking and special occasions like Valentine’s Day and Christmas. But as much as I love a slice of red velvet cake, there’s something about mini desserts that feels extra special.
I first made these mini cheesecakes for a friend’s birthday party, and they were gone within minutes. People loved how easy they were to grab and eat—no forks or plates required! Over time, I’ve tweaked the recipe to perfect the balance of flavors and textures. Now, it’s one of my go-to desserts for any gathering.
These cheesecakes are also great for year-round celebrations because you can customize the toppings to match any theme. Add festive sprinkles for Christmas, heart-shaped candies for Valentine’s Day, or even edible flowers for spring events. They’re versatile, crowd-pleasing, and just plain fun to make!
Ingredients for Mini Red Velvet Cheesecakes
Let’s talk about the star ingredients that make these mini cheesecakes so delicious:
- Chocolate Sandwich Cookies: These form the base of the crust. You can use Oreos or any similar cookie. If you need a gluten-free option, there are plenty of gluten-free chocolate cookies available!
- Unsalted Butter: This helps bind the cookie crumbs together for the crust. Make sure it’s fully melted for easy mixing.
- Cream Cheese: The heart of any cheesecake. Use full-fat cream cheese for the creamiest texture, and let it soften at room temperature before mixing.
- Sugar: Just enough to sweeten the filling without overpowering the tanginess of the cream cheese.
- Egg: Acts as a binder and gives the cheesecake structure. A room-temperature egg will mix more evenly.
- Sour Cream: Adds a slight tang and creaminess to the filling. Greek yogurt can be used as a substitute.
- Vanilla Extract: Enhances the overall flavor. Always go for pure vanilla extract if possible.
- Cocoa Powder: Provides the subtle chocolatey flavor that makes red velvet so unique. Use unsweetened cocoa powder for the best results.
- Red Food Coloring: The signature red hue of red velvet! Gel food coloring works best for vibrant color without altering the texture.
Optional toppings like whipped cream, sprinkles, or chocolate shavings allow you to get creative and customize your cheesecakes!
Equipment Needed
Here’s what you’ll need to make these mini cheesecakes:
- Muffin Tin: A standard 12-cup muffin tin works perfectly for this recipe.
- Cupcake Liners: Use paper liners to make removing the cheesecakes a breeze.
- Mixing Bowls: You’ll need a couple of bowls for the crust and filling.
- Electric Mixer: A hand or stand mixer will make blending the cream cheese filling much easier.
- Measuring Cups and Spoons: For accurate measurements.
- Spatula: To scrape down the sides of the bowl and ensure everything is well mixed.
Step-by-Step Preparation Method
- Preheat your oven to 325°F (163°C) and line a standard muffin tin with 12 cupcake liners.
- In a small bowl, combine 1 cup (100g) of crushed chocolate sandwich cookies with 4 tablespoons (60g) of melted butter. Stir until the crumbs are evenly coated.
- Press about 1 tablespoon of the cookie mixture into the bottom of each cupcake liner to form the crust. Set aside.
- In a large mixing bowl, beat 16 oz (450g) of softened cream cheese and 1/2 cup (100g) of granulated sugar until smooth and creamy.
- Add 1 large egg, 1/4 cup (60g) of sour cream, and 1 teaspoon of vanilla extract. Mix until fully incorporated.
- Sift in 2 tablespoons (15g) of unsweetened cocoa powder and mix until no lumps remain. Add 1 teaspoon of red food coloring and adjust the color as needed.
- Divide the cheesecake batter evenly among the cupcake liners, filling each about 3/4 full.
- Bake in the preheated oven for 18-20 minutes, or until the centers are set and slightly jiggly.
- Let the cheesecakes cool in the pan for 10 minutes before transferring them to a wire rack to cool completely.
- Refrigerate for at least 2 hours before serving. Top with whipped cream, sprinkles, or chocolate shavings as desired.
Cooking Tips & Techniques
Here are some tips to ensure your mini red velvet cheesecakes turn out perfectly:
- Room Temperature Ingredients: Make sure your cream cheese and egg are at room temperature for a smoother batter.
- Don’t Overmix: Overmixing can introduce air bubbles, which may cause cracks during baking.
- Bake Gently: Avoid opening the oven door too often to prevent sudden temperature drops.
- Cool Gradually: Let the cheesecakes cool slowly to prevent them from sinking in the middle.
Variations & Adaptations
Here are a few ways to customize these mini cheesecakes:
- Gluten-Free: Use gluten-free chocolate sandwich cookies for the crust.
- No Food Coloring: Skip the red food coloring for a natural cocoa-colored cheesecake.
- Different Toppings: Try caramel drizzle, fresh berries, or even a dusting of powdered sugar for a unique twist.
Serving & Storage Suggestions
These mini cheesecakes are best served chilled. Top them with whipped cream or sprinkles right before serving to keep the decorations fresh. They pair wonderfully with a cup of coffee or a glass of milk. Store leftover cheesecakes in an airtight container in the refrigerator for up to 5 days or freeze them for up to 2 months. To thaw, simply place them in the fridge overnight.
Nutritional Information & Benefits
Each mini cheesecake contains approximately 240 calories, 17g of fat, 18g of carbohydrates, and 3g of protein. While they’re not exactly a health food, these cheesecakes are a perfect treat in moderation. Cream cheese provides a good source of calcium, and you can reduce the sugar slightly if desired.
Conclusion
If you’re looking for a show-stopping dessert that’s as fun to make as it is to eat, these Mini Red Velvet Cheesecakes are the answer. Their rich, creamy filling and buttery chocolate crust make them irresistible. Plus, their bite-sized nature means you can enjoy one (or two) guilt-free!
I’d love to hear how this recipe turns out for you. Share your creations in the comments below or tag me on social media. Don’t forget to save this recipe for your next party or special occasion. Happy baking!
FAQs About Mini Red Velvet Cheesecakes
Can I make these cheesecakes ahead of time?
Yes! These cheesecakes can be made up to 2 days in advance and stored in the refrigerator until ready to serve.
Can I use a different type of crust?
Absolutely! Graham cracker crumbs, vanilla wafers, or even crushed pretzels would work well as alternatives.
What if I don’t have red food coloring?
No problem! You can skip the coloring for a natural cocoa-colored filling. The flavor will still be delicious.
How do I prevent cracks in the cheesecakes?
Make sure not to overmix the batter and avoid overbaking. Cooling them gradually also helps.
Can I double the recipe?
Yes, you can easily double the ingredients to make 24 mini cheesecakes. Just bake them in two muffin tins.