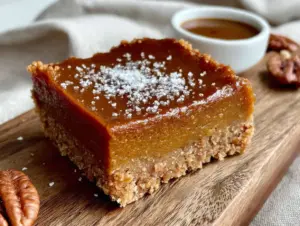
The potluck was in four hours and I’d completely forgotten. My phone buzzed with a text from my sister-in-law, Maria, asking if I was still bringing dessert for the neighborhood fall gathering. My heart dropped. Everyone else would be bringing their A-game—I knew Karen was making her famous bourbon pecan pie that takes two days, and my neighbor Dave always shows up with a bakery-quality apple tart. I had a half-empty can of pumpkin puree, a bag of almond flour I’d bought on a whim, and honestly? About forty-five minutes before I had to leave. I stood there staring into my pantry like it might magically produce a solution. Maybe you’ve been there—that moment where you have to either show up empty-handed or get creative, fast. I grabbed the pumpkin, crossed my fingers, and decided to wing it. What came out of the oven was so good I actually hid a piece for myself before walking out the door. These gluten-free pumpkin pie bars beat every single fancy dessert at that table—and I’m pretty sure Maria still asks me to bring them to every family event. That’s the thing about recipes born from panic: they tend to stick around.
Why You’ll Love This Recipe
Let me tell you, after testing this recipe about six times (the first batch was a crumbly disaster, honestly), I landed on something truly special. These bars aren’t just a compromise because you’re avoiding gluten—they’re genuinely the best pumpkin dessert I’ve ever made.
- Quick & Easy: From start to oven in about 20 minutes. No rolling dough, no fussy crusts, no stress.
- Simple Ingredients: You probably have most of this in your kitchen right now. No weird specialty flours that cost a fortune.
- Perfect for Fall Gatherings: Bring these to a potluck, Friendsgiving, or holiday brunch and watch them disappear.
- Crowd-Pleaser: I’ve served these to gluten-free folks and gluten-loving folks alike—everyone goes back for seconds.
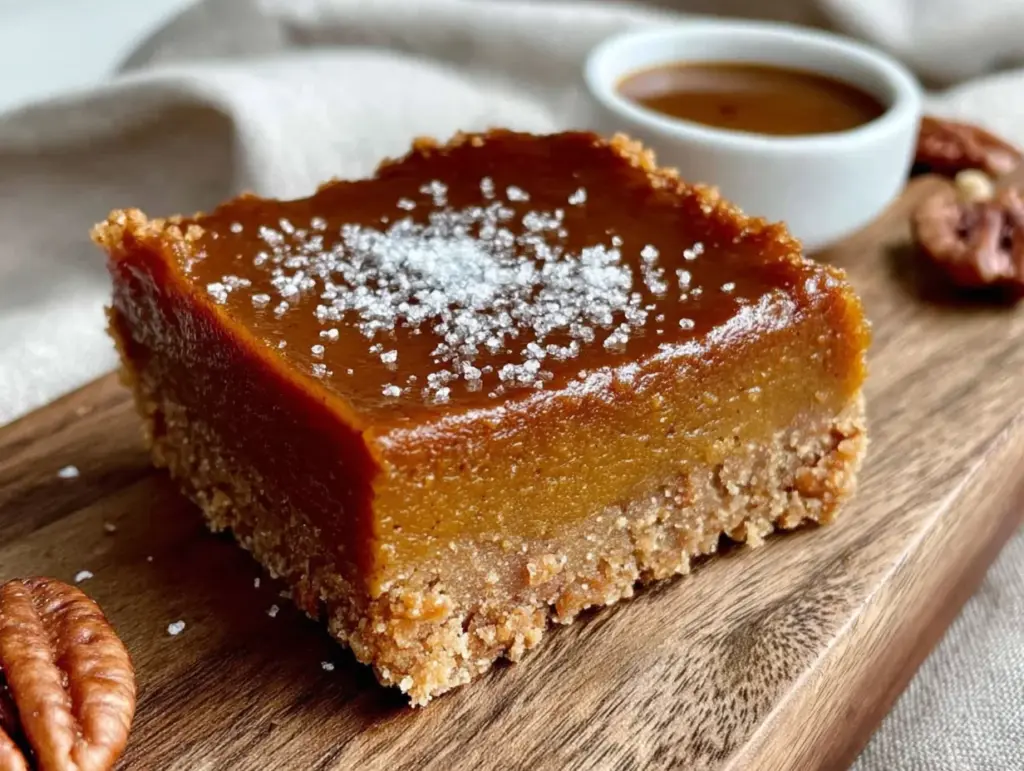
- Unbelievably Delicious: The crust is buttery and crisp, the filling is creamy and spiced just right. It’s comfort food that actually feels good to eat.
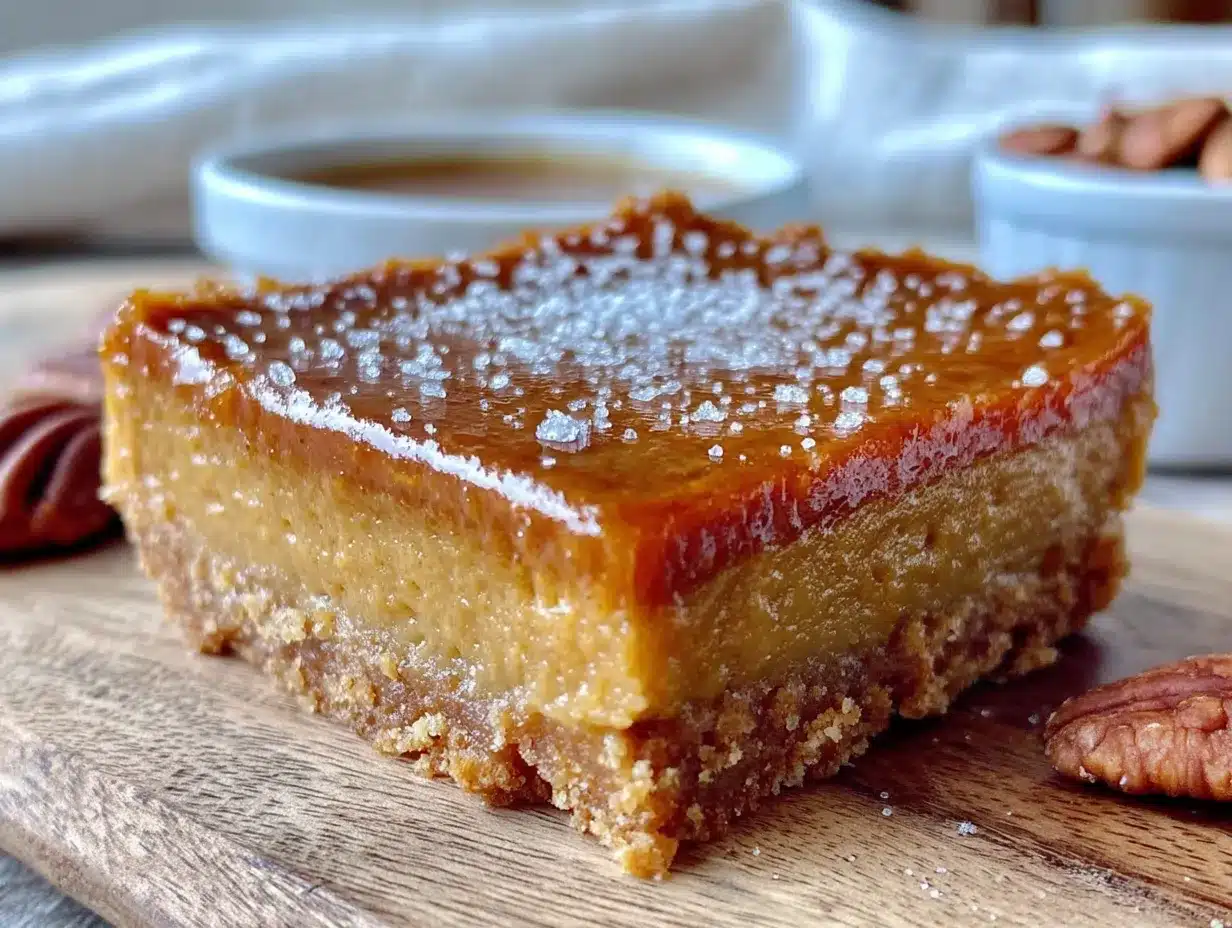
What makes these different from every other pumpkin bar recipe out there? It’s the crust, hands down. I spent weeks perfecting a gluten-free shortbread base that doesn’t crumble into a million pieces when you cut it. The trick is using a specific ratio of almond flour to oat flour with just enough cold butter to hold it together. And the filling? It’s got that silky, almost cheesecake-like texture because I blend the cottage cheese right in. I know that sounds weird, but trust me—it adds protein, creaminess, and zero weird flavor.
These bars are the kind of dessert that makes you close your eyes after the first bite. They’re wholesome enough for a Tuesday afternoon snack but impressive enough for a holiday table. No sacrifice required.
What Ingredients You Will Need
This recipe uses simple, wholesome ingredients to deliver that classic pumpkin pie flavor without the gluten or the fuss. Most of these are pantry staples, which is exactly what you want when a dessert craving hits mid-week.
For the Crust
- Almond flour – 1 ½ cups (finely ground, blanched works best for texture)
- Oat flour – ½ cup (use certified gluten-free if needed)
- Cold unsalted butter – 6 tablespoons, cut into small cubes
- Coconut sugar – 2 tablespoons (or brown sugar if that’s what you have)
- Pinch of salt
- Cinnamon – ½ teaspoon
For the Pumpkin Filling
- Pumpkin puree – 1 can (15 oz, not pumpkin pie filling)
- Cottage cheese – ½ cup (small curd, full-fat for best creaminess)
- Eggs – 2 large, room temperature
- Coconut sugar – ⅓ cup (or maple syrup for a different sweetness)
- Pumpkin pie spice – 2 teaspoons (store-bought or homemade)
- Vanilla extract – 1 teaspoon
- Salt – ¼ teaspoon
A quick note on the cottage cheese: I know it sounds strange in a dessert, but I promise you can’t taste it. It just makes the filling incredibly smooth and adds a little protein boost. If you’re dairy-free, you can swap in silken tofu or full-fat coconut cream instead. I’ve tested both, and they work well—just make sure to blend them until completely smooth.
For the pumpkin puree, I recommend Libby’s if you can find it. It’s consistently thick and not watery, which means your filling won’t turn out runny. Stay away from pumpkin pie filling—that stuff already has sugar and spices added, and it’ll throw off the whole balance.
Equipment Needed
You don’t need a fancy kitchen to make these bars, which is honestly my favorite thing about this recipe.
- 8×8 inch baking pan – Glass or metal both work, just adjust baking time slightly for metal (it cooks faster)
- Parchment paper – Please don’t skip this. It makes lifting the bars out so much easier
- Food processor or blender – For getting that cottage cheese perfectly smooth
- Mixing bowls – One medium, one large
- Whisk – A fork works in a pinch, but a whisk gives you a smoother filling
- Measuring cups and spoons
If you don’t have a food processor, you can mash the cottage cheese through a fine-mesh sieve with the back of a spoon. It takes a few extra minutes but gets the job done. I’ve also used an immersion blender straight in the mixing bowl—that works beautifully too.
Preparation Method
Alright, let’s get into it. I’ve made this recipe enough times to know exactly where things can go wrong, so I’ll walk you through every step with the little tricks I’ve learned.
-
Preheat your oven to 350°F (175°C). Line your 8×8 pan with parchment paper, leaving some overhang on two sides. This creates little handles so you can lift the whole thing out later. I learned this the hard way after trying to dig bars out of a pan with a spatula—total mess.
-
Make the crust. In a medium bowl, combine the almond flour, oat flour, coconut sugar, salt, and cinnamon. Add the cold butter cubes and use your fingers or a pastry cutter to work the butter into the flour mixture until it looks like coarse sand with some pea-sized butter bits remaining. Don’t overwork it—you want those little butter pockets for a flaky texture. Press the mixture firmly into the bottom of your prepared pan. I use the bottom of a measuring cup to really pack it down evenly. Bake for 12-14 minutes until lightly golden around the edges. Set aside to cool slightly while you make the filling.
-
Blend the cottage cheese. In a food processor or blender, blitz the cottage cheese until it’s completely smooth—no lumps at all. This takes about 30-45 seconds. Scrape down the sides once halfway through.
-
Make the filling. In a large bowl, whisk together the pumpkin puree, blended cottage cheese, eggs, coconut sugar, pumpkin pie spice, vanilla, and salt. Whisk until everything is well combined and silky smooth. The mixture should be thick but pourable. If it looks watery, your pumpkin puree might be too thin—try draining it through a cheesecloth for 10 minutes next time.
-
Pour and bake. Pour the pumpkin filling over the pre-baked crust. Gently tilt the pan to spread it evenly. Bake for 30-35 minutes, or until the edges are set and the center jiggles just slightly when you shake the pan. It will continue to set as it cools, so don’t overbake it. A toothpick inserted near the center should come out mostly clean with a few moist crumbs.
-
Cool completely. This is the hardest part, honestly. Let the bars cool in the pan on a wire rack for about 30 minutes, then transfer to the fridge for at least 2 hours (overnight is even better). They need to be fully chilled before you cut them, or they’ll fall apart. I’ve made that mistake when I was impatient—mushy bars are not a good look.
-
Cut and serve. Use the parchment handles to lift the whole block out of the pan. Place on a cutting board and use a sharp knife to cut into 9 or 16 squares, depending on how generous you’re feeling. Wipe the knife clean between cuts for neat edges.
Cooking Tips & Techniques
After making these bars approximately a dozen times (my family has been very patient), I’ve collected some real-world wisdom that’ll save you from my early mistakes.
Don’t skip the pre-bake on the crust. I tried skipping this once to save time, and the bottom came out soggy and sad. That short head start in the oven makes all the difference between a crust that holds up and one that disintegrates.
Room temperature eggs matter. Cold eggs can make the filling seize up and create a lumpy texture. Leave your eggs on the counter for 30 minutes before starting, or place them in a bowl of warm water for 5 minutes if you’re in a rush.
Watch your baking time closely. Every oven runs differently—mine runs hot, so I start checking at 25 minutes. The bars are done when the edges are set and the center has a slight wobble, like jello. If you wait until the center is completely firm, you’ve overbaked them and they’ll crack on top.
Let them chill overnight if you can. I know, I know—you want to eat them now. But the flavors really meld together after a full night in the fridge, and the texture becomes perfectly sliceable. I made a batch for a brunch and tasted one fresh out of the oven, then another the next morning, and the difference was honestly shocking.
Variations & Adaptations
One of the best things about this recipe is how flexible it is. Here are some variations I’ve tested and loved:
Dairy-Free Version: Swap the butter in the crust for coconut oil (use solid, not melted) and replace the cottage cheese with silken tofu or full-fat coconut cream. The texture will be slightly less rich but still delicious. I made this for a friend with dairy issues, and she asked for the recipe immediately.
Paleo-Friendly: Use coconut flour instead of oat flour (start with ¼ cup—coconut flour is super absorbent) and swap the coconut sugar for maple syrup. Reduce the maple syrup to ¼ cup since it’s sweeter than coconut sugar.
Extra Spiced: Add ¼ teaspoon each of ground ginger, nutmeg, and cloves to the filling for a more complex spice profile. My husband loves this version—he says it tastes like the holidays in bar form.
Chocolate Swirl: Melt ¼ cup of dark chocolate chips and drizzle it over the filling before baking. Use a knife to swirl it gently into the pumpkin mixture. I tried this on a whim one afternoon, and honestly? It might be my new favorite version.
Nut-Free Option: Replace the almond flour with an equal amount of sunflower seed flour or more oat flour. The texture will be slightly denser but still really good. Just note that sunflower seed flour can turn green when baked (it’s a chemical reaction, totally safe to eat).
Serving & Storage Suggestions
These bars are incredibly versatile when it comes to serving. Here’s how I like to enjoy them:
At room temperature – Let them sit out for about 15 minutes after coming out of the fridge. The texture softens slightly and the spices become more aromatic. Perfect for an afternoon snack with coffee.
Chilled – Straight from the fridge, these bars have a firmer, almost cheesecake-like texture. I actually prefer them this way, especially with a dollop of whipped cream on top.
Warm – Pop a bar in the microwave for 10-15 seconds if you want that fresh-from-the-oven experience. Add a scoop of vanilla ice cream for the ultimate fall dessert.
Storage: Keep leftover bars in an airtight container in the refrigerator for up to 5 days. They actually get better after day two as the flavors continue to develop. You can also freeze them for up to 3 months—just wrap each bar individually in plastic wrap, then place them in a freezer bag. Thaw overnight in the fridge before serving.
Pairing suggestions: A drizzle of salted caramel sauce takes these over the top. Or serve them alongside a warm chai latte or spiced apple cider for the ultimate cozy fall moment.
Nutritional Information & Benefits
Here’s the thing—I’m not a nutritionist, but I do care about what I put in my body. These bars are a solid choice when you want dessert without the sugar crash.
Per bar (based on 9 servings):
- Calories: ~220
- Protein: 7g
- Fat: 14g
- Carbohydrates: 18g
- Fiber: 4g
- Sugar: 9g
The almond flour provides healthy fats and vitamin E, while the pumpkin is packed with vitamin A and antioxidants. The cottage cheese adds protein without changing the flavor—sneaky, right? These bars are naturally gluten-free and can easily be made dairy-free or paleo-friendly with the substitutions I mentioned earlier.
If you’re watching your sugar intake, you can reduce the coconut sugar to ¼ cup without sacrificing too much sweetness. The pumpkin and spices do a lot of the heavy lifting flavor-wise.
Conclusion
Look, I’m not going to tell you these gluten-free pumpkin pie bars will change your life. But they might change how you think about gluten-free desserts. They’re not a compromise—they’re genuinely, unapologetically delicious. That potluck where I showed up panicked and left victorious? It taught me that sometimes the best recipes come from necessity, not planning.
I hope you make these bars and love them as much as I do. Maybe you’ll tweak the spices, add a swirl of chocolate, or serve them with a mountain of whipped cream. That’s the beauty of a good recipe—it gives you a foundation to make your own. If you try them, drop a comment below and let me know how they turned out. Did you make any changes? Did your family fight over the last piece? I want to hear it all.
Happy baking, friends. And remember—sometimes the best desserts are the ones you almost didn’t make.
Frequently Asked Questions
Can I use a different flour for the crust?
Absolutely. You can substitute the almond flour with more oat flour or even a gluten-free all-purpose blend. Just keep in mind that the texture will change slightly—almond flour gives a buttery, tender crumb that’s hard to replicate exactly.
Why did my filling crack on top?
This usually happens when the bars are overbaked or the oven temperature is too high. Make sure you pull them out while the center still has a slight jiggle. Also, letting them cool slowly in the pan helps prevent cracking.
Can I make these bars vegan?
Yes! Replace the eggs with flax eggs (1 tablespoon ground flaxseed + 3 tablespoons water per egg), use coconut oil instead of butter, and swap the cottage cheese for silken tofu. The texture will be a bit softer but still delicious.
How do I know when the bars are done baking?
The edges should be set and slightly pulling away from the pan, while the center should jiggle just a little when you gently shake the pan. A toothpick inserted near the center should come out with a few moist crumbs, not wet batter.
Can I double this recipe for a 9×13 pan?
Yes, just double all the ingredients and increase the baking time by about 10-15 minutes. Keep an eye on it toward the end—the center will take longer to set in a larger pan.
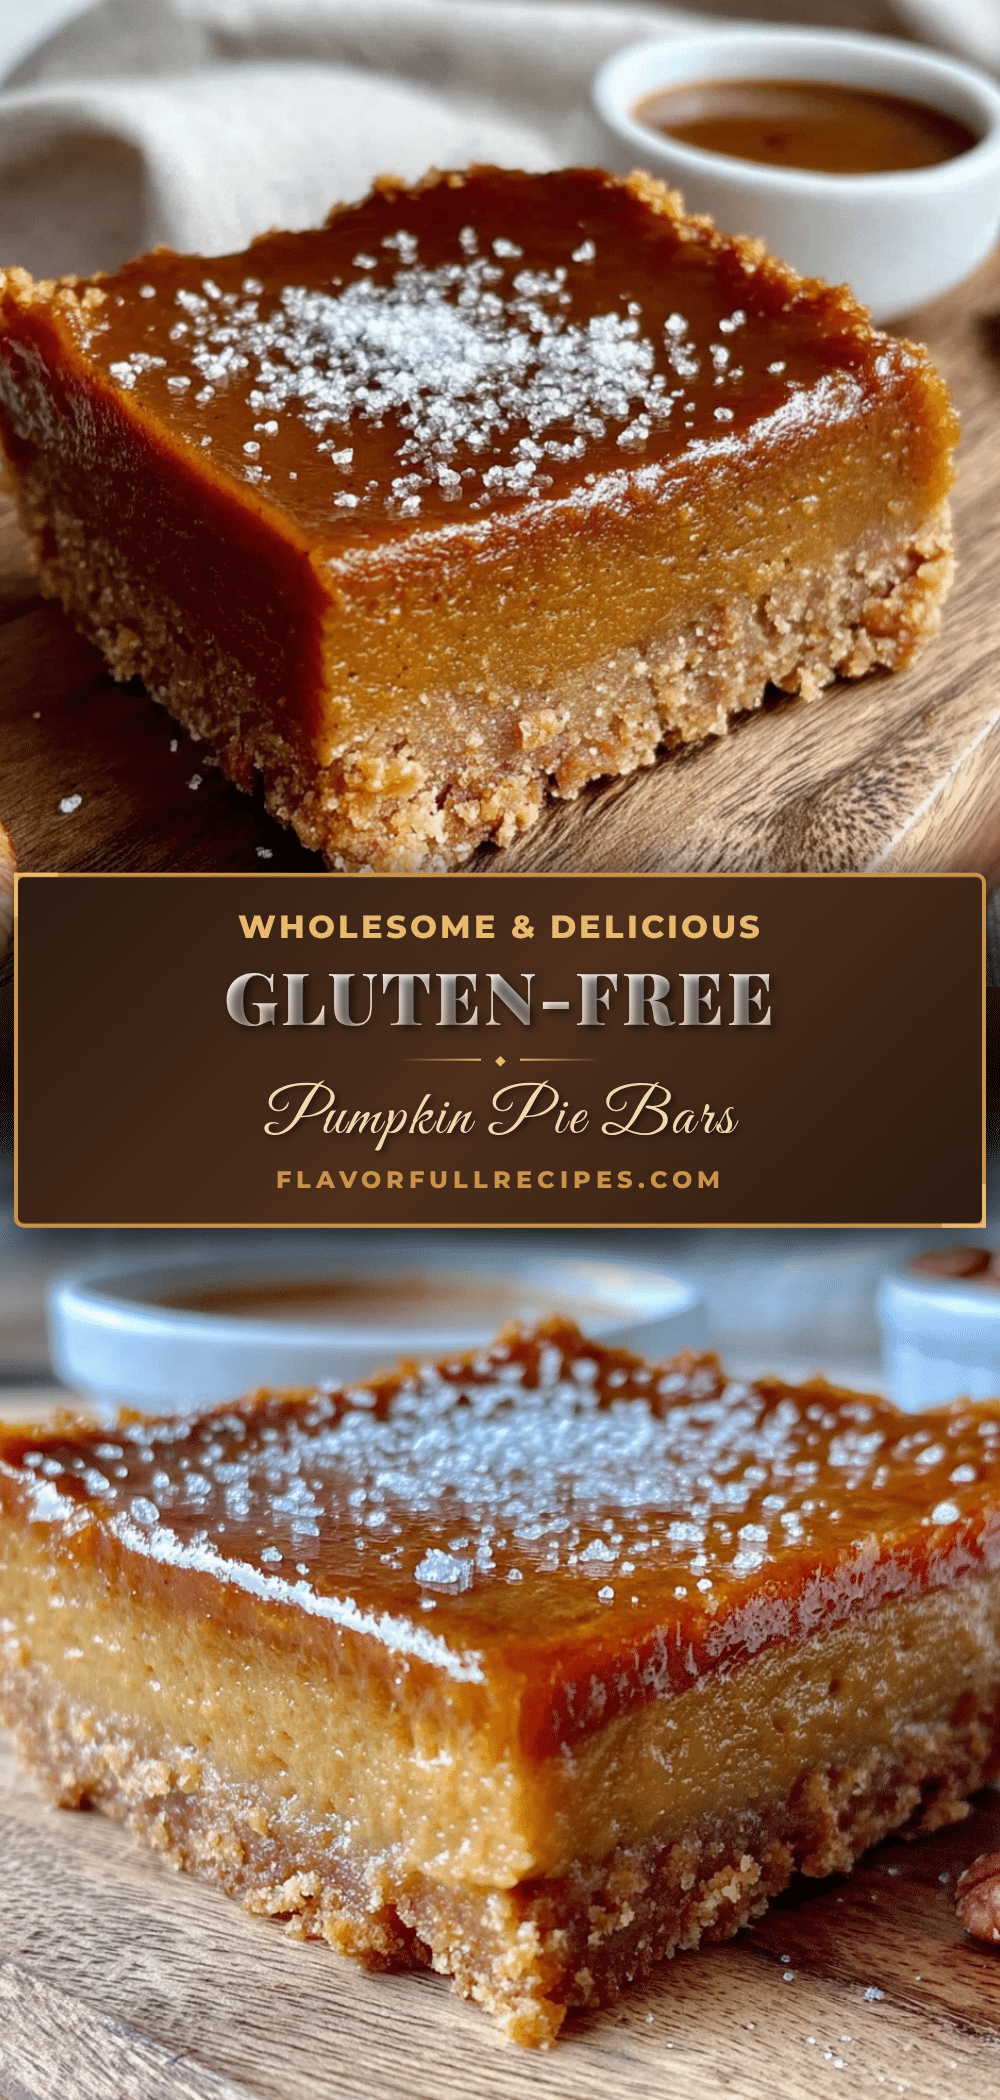
Pin This Recipe!
Best Gluten-Free Pumpkin Pie Bars – Easy & Perfect
- Total Time: 2 hours 50 minutes (includes chilling)
- Yield: 9 servings 1x
Description
These gluten-free pumpkin pie bars are quick, easy, and made with simple ingredients. A buttery almond-oat crust and silky pumpkin filling create a crowd-pleasing dessert perfect for fall gatherings.
Ingredients
- 1 ½ cups almond flour (finely ground, blanched)
- ½ cup oat flour (certified gluten-free if needed)
- 6 tablespoons cold unsalted butter, cut into small cubes
- 2 tablespoons coconut sugar (or brown sugar)
- Pinch of salt
- ½ teaspoon cinnamon
- 1 can (15 oz) pumpkin puree (not pumpkin pie filling)
- ½ cup cottage cheese (small curd, full-fat)
- 2 large eggs, room temperature
- ⅓ cup coconut sugar (or maple syrup)
- 2 teaspoons pumpkin pie spice
- 1 teaspoon vanilla extract
- ¼ teaspoon salt
Instructions
- Preheat your oven to 350°F (175°C). Line an 8×8 inch baking pan with parchment paper, leaving overhang on two sides.
- Make the crust: In a medium bowl, combine almond flour, oat flour, 2 tablespoons coconut sugar, salt, and cinnamon. Add cold butter cubes and work into the flour mixture using your fingers or a pastry cutter until it resembles coarse sand with some pea-sized butter bits. Press firmly into the bottom of the prepared pan. Bake for 12-14 minutes until lightly golden around the edges. Set aside to cool slightly.
- Blend the cottage cheese in a food processor or blender until completely smooth, about 30-45 seconds.
- Make the filling: In a large bowl, whisk together pumpkin puree, blended cottage cheese, eggs, ⅓ cup coconut sugar, pumpkin pie spice, vanilla, and ¼ teaspoon salt until well combined and silky smooth.
- Pour the pumpkin filling over the pre-baked crust. Gently tilt the pan to spread evenly. Bake for 30-35 minutes, or until edges are set and center jiggles slightly when shaken. A toothpick inserted near the center should come out mostly clean with a few moist crumbs.
- Cool in the pan on a wire rack for 30 minutes, then transfer to the refrigerator for at least 2 hours (overnight is best) until fully chilled.
- Use parchment handles to lift the block out of the pan. Place on a cutting board and cut into 9 or 16 squares with a sharp knife, wiping the knife clean between cuts.
Notes
Don’t skip pre-baking the crust to avoid sogginess. Use room temperature eggs for a smooth filling. Chill overnight for best flavor and texture. For dairy-free, substitute butter with coconut oil and cottage cheese with silken tofu or full-fat coconut cream. For paleo, use coconut flour instead of oat flour and maple syrup instead of coconut sugar.
- Prep Time: 20 minutes
- Cook Time: 30 minutes
- Category: Dessert
- Cuisine: American
Nutrition
- Serving Size: 1 bar (based on 9 se
- Calories: 220
- Sugar: 9
- Sodium: 180
- Fat: 14
- Saturated Fat: 6
- Carbohydrates: 18
- Fiber: 4
- Protein: 7
Keywords: gluten-free pumpkin bars, pumpkin pie bars, gluten-free dessert, fall dessert, pumpkin recipe, easy pumpkin bars