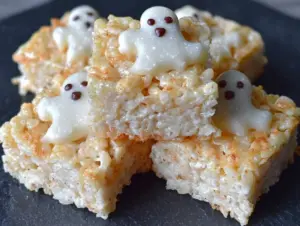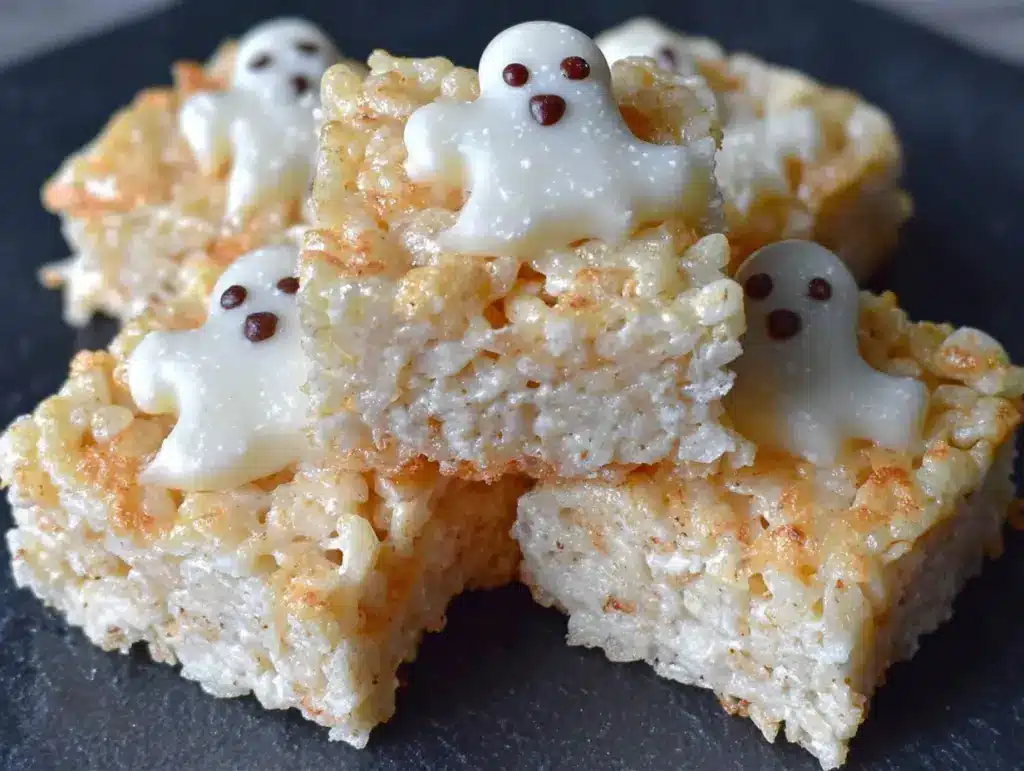
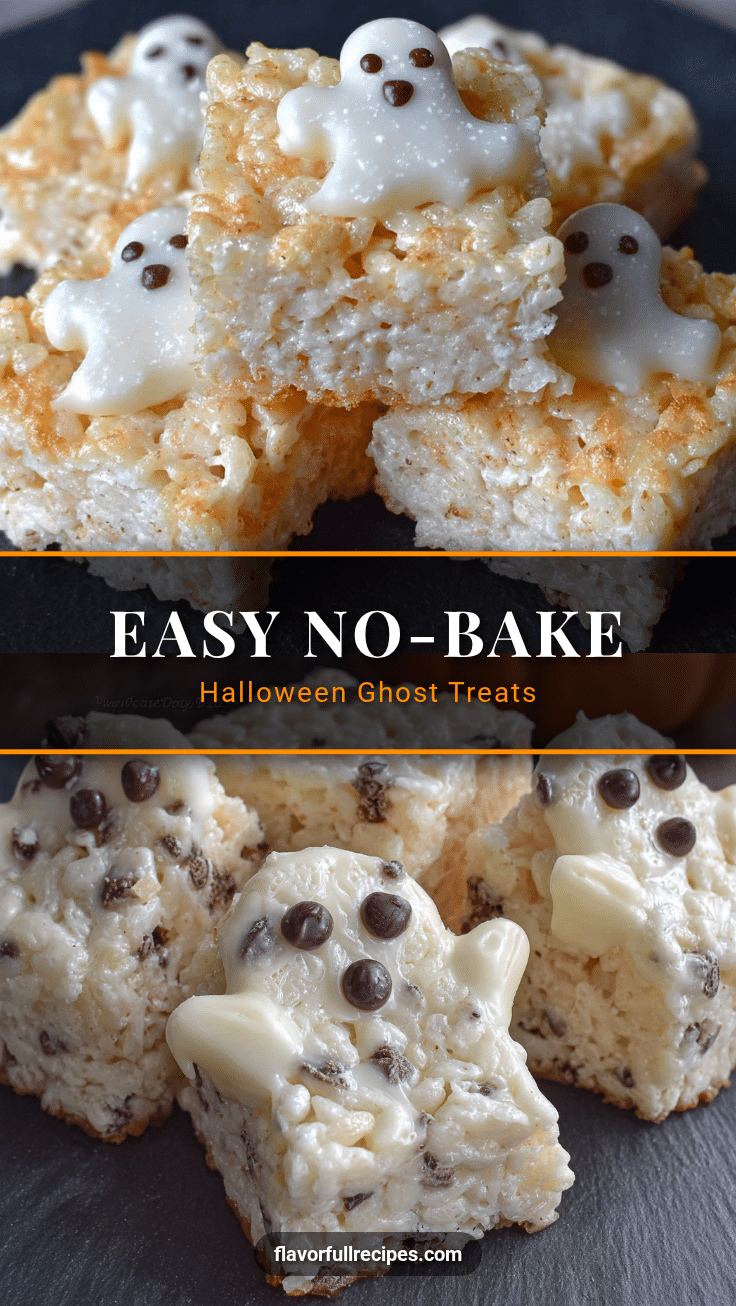
I didn’t plan to make Halloween Rice Krispie Ghost Treats last October. I was standing in the baking aisle at 6 PM on October 30th, holding a bag of marshmallows and staring at a display of candy eyeballs, wondering what exactly I had gotten myself into. My daughter had announced that morning that she needed “something spooky but not scary” for her class party the next day. I had already said yes before realizing I had zero ideas.
The thing is, I’ve never been a Pinterest-perfect mom. My previous attempts at themed treats usually ended with me covered in frosting and the kids eating raw ingredients off the counter. But there was something about those little marshmallow ghosts—simple, white, staring up with those googly eyes—that felt doable. No fondant. No food coloring. No three-hour decorating session that leaves you questioning your life choices.
So I grabbed the butter, the cereal, and a bag of candy eyeballs, and I went home to figure it out. And honestly? They turned out exactly right. Not perfect, but right. A little lopsided, a little goofy, but undeniably ghost-like. The kind of treat that makes kids giggle and adults sneak one when nobody’s looking. That first batch taught me something important: Halloween treats don’t need to be complicated to be memorable. They just need to be made with a little patience and a lot of butter.
Why You’ll Love This Recipe
These Easy Halloween Rice Krispie Ghost Treats are the kind of recipe that saves you on a busy weeknight or a last-minute party request. I’ve made them three Halloweens in a row now, and every time, I’m surprised by how simple they are. No oven required, no complicated decorating tools, and you probably already have most of the ingredients in your pantry.
Here’s what makes these ghost treats stand out from the crowd:
- 15 Minutes Total : From start to finish, including shaping and decorating. That’s less time than it takes to watch a single episode of your favorite show.
- No Special Equipment : You don’t need a stand mixer, a piping bag, or any fancy cookie cutters. Just your hands, a pot, and a baking sheet.
- Kid-Friendly : My daughter helps with the marshmallow shaping every year now. The sticky fingers are worth the memory.
- Perfect for Parties : Classroom celebrations, Halloween potlucks, or just a fun weekend project—these fit right in.
- Completely Customizable : Make them spooky, silly, or somewhere in between. The candy eyeballs do all the heavy lifting.
What really makes this recipe different is the texture. Most Rice Krispie treats turn out either too hard or too sticky. I’ve learned the exact temperature to melt the butter and marshmallows so the treats stay soft but hold their shape. That ghost silhouette? It stays put. No slumping, no melting, no sad little puddles of marshmallow on your serving tray.
These are the treats that make you look like you planned ahead, even when you didn’t. And honestly, isn’t that the whole point of Halloween?
What Ingredients You Will Need
This recipe uses basic pantry staples to create something that looks like it took hours. The ingredient list is short, but each one plays a specific role in getting that perfect ghost shape and texture.
- 6 cups Rice Krispies cereal (or any crispy rice cereal—store brand works fine here)
- 4 tablespoons unsalted butter (salted butter works too, just skip the extra salt)
- 1 package (10 oz) mini marshmallows (about 6 cups, but the whole bag is easier)
- 1/4 teaspoon vanilla extract (optional, but it rounds out the sweetness nicely)
- Pinch of salt (balances the sugar and keeps them from being cloying)
- 1 bag candy eyeballs (the flat ones work best for sticking to marshmallow)
- Non-stick cooking spray (for your hands and the pan—this is non-negotiable)
For the marshmallows, I’ve tried a few different brands over the years. Jet-Puffed seems to melt the smoothest, but any standard brand will do. Stay away from the flavored marshmallows, though—they don’t melt the same way and leave a weird aftertaste.
The butter is important here. I’ve used margarine in a pinch, and the treats came out greasy and flat. Real butter gives you that rich flavor and helps the treats set up properly. If you’re dairy-free, there are good plant-based butter sticks that work—just make sure they’re at least 80% fat content.
For the candy eyeballs, you want the kind that are flat on the back, not the domed ones. The flat ones stick right to the marshmallow without any extra glue. I’ve found them at most grocery stores in the baking aisle around Halloween, but Amazon has them year-round if you want to stock up.
One last thing—the vanilla. It’s technically optional, but I’ve made these without it and they taste flat. That little splash of vanilla makes them taste homemade instead of just sugary.
Equipment Needed
You don’t need much to pull these off. Here’s what you’ll want to have ready:
- Large pot (at least 4 quarts—marshmallows expand when they melt)
- Wooden spoon or silicone spatula (metal scratches the pot and gets too hot for marshmallow)
- 9×13 baking sheet or large cutting board (for shaping the ghosts)
- Parchment paper or wax paper (keeps everything from sticking)
- Small bowl of water (for wetting your hands—trust me on this)
- Measuring cups (for the cereal and marshmallows)
If you don’t have a 9×13 pan, a large baking sheet works just fine. I’ve even used a clean countertop covered in parchment paper. The key is having enough flat surface to spread the mixture out without it being too thin.
I use a silicone spatula for stirring because it doesn’t scratch the pot and the marshmallow slides right off. Wooden spoons work too, but they tend to absorb some of the butter. Not a dealbreaker, just something to keep in mind.
For shaping the ghosts, you really just need your hands. I know it sounds messy, but wet hands make all the difference. Keep that bowl of water nearby and re-wet your fingers between each ghost. It stops the marshmallow from sticking to you and gives you cleaner edges.
I bought a ghost-shaped cookie cutter one year thinking it would make things easier. It didn’t. The marshmallow mixture is too sticky for cutters, and you end up with more waste than actual ghosts. Hand-shaping is faster and gives each ghost its own personality anyway.
Preparation Method
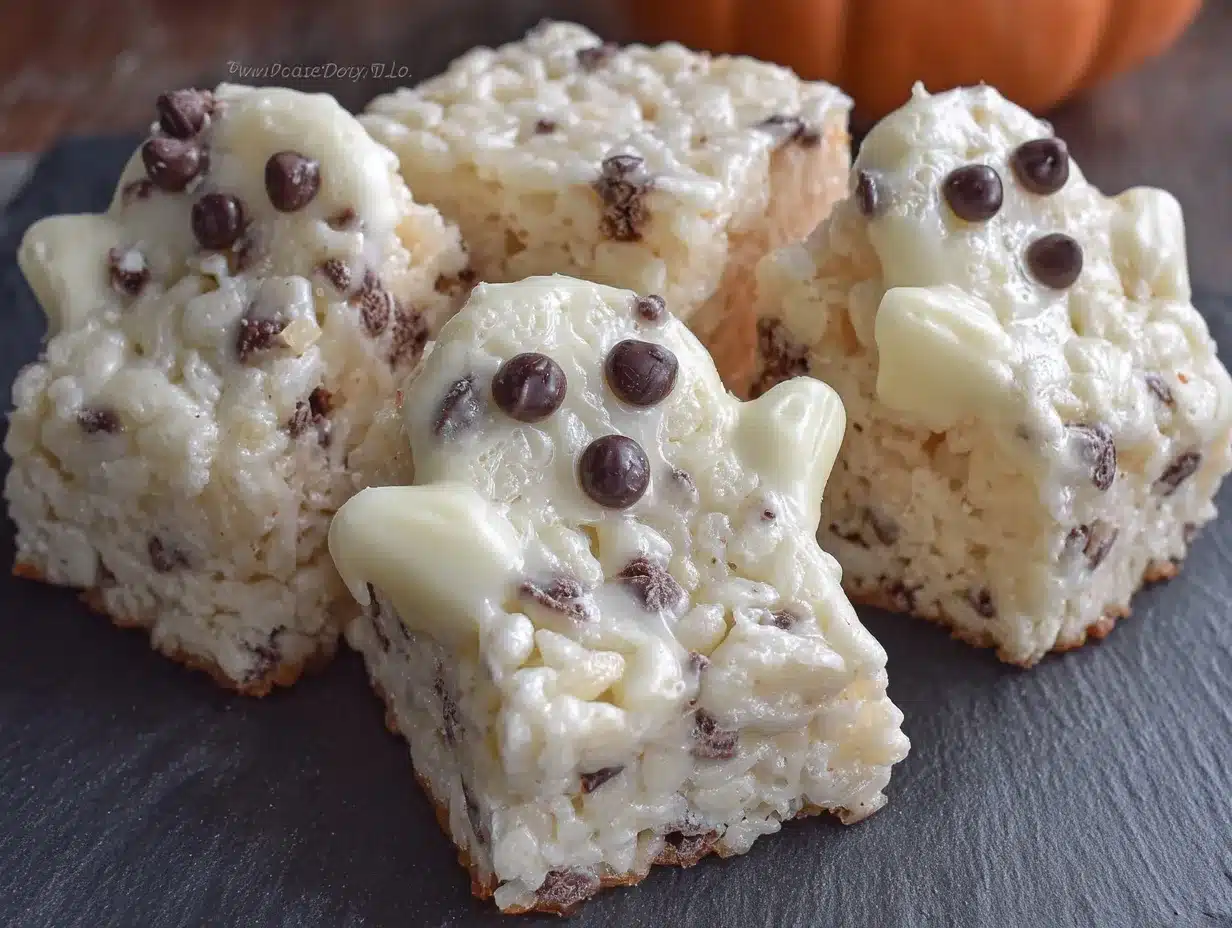
Let me walk you through this step by step. I’ve made these enough times to know exactly where things can go wrong, so I’ll flag those spots as we go.
- Prep your workspace. Line your baking sheet or cutting board with parchment paper. Spray it lightly with non-stick cooking spray. This is your ghost assembly station. Do this before you start melting anything—once the marshmallow is hot, you won’t have time to hunt for parchment.
- Melt the butter. Place your large pot on the stove over low heat. Add the 4 tablespoons of butter and let it melt slowly. Don’t rush this step. Medium heat might seem faster, but it can brown the butter, which changes the flavor and makes the treats taste toasty instead of sweet. Low heat, patience, and a little swirling now and then.
- Add the marshmallows. Once the butter is fully melted, dump in the entire bag of mini marshmallows. Stir constantly with your silicone spatula or wooden spoon. The marshmallows will start to puff up and then collapse into a smooth, gooey mass. This takes about 3-4 minutes on low heat.
- Watch for the right consistency. You want the marshmallows to be completely melted—no lumps or streaks. The mixture should be smooth and glossy, like thick glue. If you see any white bits, keep stirring. But don’t overheat it. Once it’s smooth, remove the pot from the heat immediately. Overcooked marshmallow turns into hard, chewy cement.
- Add vanilla and salt. Stir in the 1/4 teaspoon vanilla and the pinch of salt. The mixture will smell amazing at this point. Give it a few good stirs to incorporate everything evenly.
- Add the cereal. Pour in the 6 cups of Rice Krispies cereal. Fold it into the marshmallow mixture gently. I use a folding motion—scrape down the sides, lift from the bottom, turn it over. Don’t stir aggressively or you’ll crush the cereal. You want those little puffs to stay intact. It takes about 2 minutes to get everything evenly coated.
- Let it cool slightly. This is the part I learned the hard way. If you try to shape the ghosts right away, the mixture is too hot and sticky. Let it sit in the pot for 2-3 minutes. Not longer, or it starts to set up. You want it warm but not burn-your-fingers hot.
- Wet your hands. Fill a small bowl with cool water. Dip your hands in and shake off the excess. Your hands should be damp, not dripping. This is the secret to shaping without everything sticking to you.
- Shape the ghosts. Scoop up about 1/4 cup of the mixture. Roll it gently into a ball, then pinch one end to form a pointy head. Flatten the bottom slightly so it stands up. The shape should look like a teardrop standing on its wide end. Don’t worry about perfection—ghosts are supposed to look a little irregular. Place each shaped ghost on the parchment-lined sheet.
- Add the eyes. While the ghost is still warm and slightly tacky, press two candy eyeballs into the front. Don’t push too hard or they’ll sink in. Just a gentle press so they stick. If the marshmallow has cooled too much and the eyes won’t stick, dab a tiny bit of melted marshmallow on the back of the eyeball first.
- Repeat. Keep wetting your hands between each ghost. The mixture will start to set as it cools, so work fairly quickly. You should get about 12-14 ghosts from one batch, depending on how big you make them.
- Let them set. Leave the ghosts on the parchment paper for about 15-20 minutes. They’ll firm up as they cool. Don’t try to move them before they’re fully set or they’ll fall apart.
A few things I’ve learned the messy way: If your hands get too sticky mid-shaping, just re-wet them. It’s that simple. Also, if the mixture starts to harden before you’re done shaping, pop the pot back on low heat for 30 seconds to soften it up. Just be careful not to overheat it.
The first time I made these, I tried to shape them all at once without re-wetting my hands. By the third ghost, I had marshmallow glued to my fingers all the way up to my wrists. Learn from my mistake. Water is your friend here.
Cooking Tips & Techniques
I’ve made these ghosts at least a dozen times now, and I’ve collected a few tips that make the process smoother. Some of these came from trial and error. Others came from standing in my kitchen at 10 PM, covered in marshmallow, vowing to figure out a better way.
Low heat is your best friend. I cannot stress this enough. High heat makes marshmallows seize up and turn into a rubbery mess. Low heat gives you a smooth, workable mixture that stays pliable longer. If you’re in a hurry, you’re better off using a microwave instead of cranking up the stove. Microwave the butter and marshmallows in 30-second bursts, stirring between each, until smooth.
Don’t skip the salt. I know it seems weird to add salt to something this sweet, but it makes a real difference. It balances the sugar and keeps the treats from tasting one-dimensional. Just a pinch is all you need.
Work in batches if needed. If you’re making a double batch for a party, don’t try to melt everything at once. The mixture gets too thick to stir evenly. Make one batch, shape the ghosts, then start the next batch. It takes a little longer, but the texture is much better.
Storage matters. These ghosts are best within 24 hours of making them. After that, the cereal starts to absorb moisture from the marshmallow and they get chewy. If you need to make them ahead, store them in an airtight container at room temperature, but expect them to soften a bit.
My biggest failure. One year, I tried to add food coloring to make green ghosts. I stirred in about 10 drops of green gel coloring, and the mixture turned into a sticky, greasy mess. The color never distributed evenly, and the ghosts came out looking moldy instead of festive. Stick with white. Ghosts are supposed to be white.
If you’re looking for another easy treat that comes together quickly, these easy no-bake strawberry icebox cake follow the same low-effort, high-reward philosophy. Perfect for when you want dessert without turning on the oven.
Variations & Adaptations
Once you’ve got the basic ghost shape down, you can play around with different looks and flavors. Here are a few variations I’ve tried over the years:
- Chocolate Ghosts : Melt 1/2 cup of chocolate chips with the butter before adding the marshmallows. The chocolate flavor is subtle but gives the ghosts a brownish tint that looks kind of spooky. Use white candy eyes for contrast.
- Peanut Butter Ghosts : Stir in 1/4 cup of creamy peanut butter right after the marshmallows melt. It adds a savory note that balances the sweetness. These are my husband’s favorite.
- Spooky Shapes : If you’re not feeling ghosts, press the mixture into a greased 9×13 pan and cut it into squares. Add candy eyes to each square for a “monster” look. It’s faster than shaping individual ghosts and works better for younger kids.
- Gluten-Free Version : Rice Krispies are naturally gluten-free, but check the label—some store brands add malt flavoring that contains gluten. There are certified gluten-free crispy rice cereals available if needed.
- Vegan Adaptation : Use vegan butter and vegan marshmallows. Dandies brand works really well. The texture is slightly different—a bit chewier—but the ghosts still hold their shape.
For a fall-themed twist, try adding a sprinkle of cinnamon or pumpkin pie spice to the marshmallow mixture. It gives the ghosts a warm, cozy flavor that works for Halloween and Thanksgiving both. I tried this last November and ended up making a second batch for Friendsgiving.
If you enjoy recipes that feel festive without being fussy, you might also like these easy fluffy pumpkin chocolate chip muffins. They’re simple enough for a weekday morning but pretty enough for a holiday brunch.
Serving & Storage Suggestions
These ghosts are best served at room temperature, right after they’ve set. The marshmallow is soft but firm, and the cereal still has a little crunch. If you serve them straight from the fridge, the marshmallow gets too firm and the cereal loses its texture.
For presentation, I like to arrange them on a black platter or a dark-colored serving board. The white ghosts pop against a dark background, and it gives the whole thing a spooky vibe. Add a few fake spiderwebs or plastic spiders around the platter for extra Halloween flair.
These pair well with warm drinks. A mug of hot apple cider or a cozy slow cooker spiced cranberry apple cider balances the sweetness of the marshmallow perfectly. For a grown-up gathering, set out a pitcher of cold milk or a warm latte.
Storage is straightforward. Place leftover ghosts in an airtight container with parchment paper between layers. Keep them at room temperature for up to 3 days. Don’t refrigerate them—the cold air makes the marshmallow hard and the cereal stale. If you live in a humid climate, add a silica gel packet to the container to absorb excess moisture.
You can freeze these ghosts for up to a month. Wrap each one individually in plastic wrap, then place them in a freezer bag. Thaw at room temperature for about 30 minutes before serving. The texture won’t be quite as good as fresh, but they’re still tasty.
One thing I’ve noticed—these ghosts actually taste better the next day. The flavors meld together overnight, and the marshmallow softens just enough to make them extra chewy. If you can resist eating them all on Halloween night, save a few for the next day.
Nutritional Information & Benefits
Let’s be real—these are a treat, not a health food. But knowing what’s in them helps you make informed choices, especially if you’re serving them to kids.
| Nutrient | Per Ghost (approx.) |
|---|---|
| Calories | 120 |
| Total Fat | 4g |
| Saturated Fat | 2.5g |
| Carbohydrates | 21g |
| Sugar | 11g |
| Protein | 1g |
| Sodium | 95mg |
These numbers are estimates based on a batch of 12 ghosts. Your actual values will vary depending on the exact brands you use and how big you make each ghost.
On the plus side, Rice Krispies are fortified with iron and B vitamins, so there’s a tiny nutritional boost. The butter provides some vitamin A. But honestly, these are about fun, not fiber. They’re a once-a-year treat that brings joy to a Halloween party, and that counts for something too.
If you’re watching sugar intake, you can reduce the marshmallows by 1 cup and add an extra 1/2 cup of cereal. The ghosts won’t hold together as well, but they’ll be less sweet. I’ve tried this and they’re a bit crumbly, so handle them gently.
For allergen considerations: These contain dairy (butter) and may contain gluten depending on the cereal brand. The candy eyeballs often contain wheat starch, so check the label if you’re serving someone with celiac disease.
Conclusion
These Easy Halloween Rice Krispie Ghost Treats have become a tradition in my house, and I think they deserve a spot in yours too. They’re simple enough for a last-minute school party, fun enough for a Halloween gathering, and forgiving enough for even the most kitchen-clueless parent.
What I love most about this recipe is how it brings people together. My daughter and I make them every year now, standing side by side at the counter, her little hands covered in marshmallow, both of us giggling at the lopsided ghosts we create. That’s the real magic of Halloween—not perfect treats, but the messy, sticky, joyful process of making them.
I’d love to hear how your ghosts turn out. Did you add a twist? Did your kids come up with their own designs? Drop a comment below and let me know. And if you share them on social media, tag me so I can see your spooky creations.
Now go make some ghosts. They’re waiting for you.
Frequently Asked Questions
Can I use marshmallow creme instead of mini marshmallows?
I wouldn’t recommend it. Marshmallow creme has a different consistency—it’s thinner and doesn’t set up the same way. The ghosts won’t hold their shape, and you’ll end up with a sticky mess. Stick with mini marshmallows for the best texture.
Why did my ghosts turn out hard and chewy?
You probably overheated the marshmallows. When marshmallows get too hot, the sugar crystallizes and the mixture turns hard. Keep the heat low and remove the pot from the stove as soon as the marshmallows are smooth. Also, make sure you’re using fresh marshmallows—old ones don’t melt as evenly.
How far in advance can I make these?
I recommend making them the day before you plan to serve them. They’re best within 24 hours. If you need to make them further in advance, freeze them and thaw at room temperature. They won’t be quite as good, but they’ll still be enjoyable.
Can I use a different cereal?
You can, but the texture will change. Cocoa Pebbles make chocolate ghosts that look kind of spooky. Fruity Pebbles give you colorful ghosts that are more fun than frightening. Just keep in mind that different cereals absorb moisture differently, so you may need to adjust the marshmallow ratio.
How do I get the candy eyes to stick?
Press them into the ghost while the marshmallow is still warm and tacky. If the ghost has cooled too much, dip the back of the eyeball into the leftover melted marshmallow in the pot, then press it onto the ghost. That little dab acts like glue.
If you’re looking for more easy Halloween treats, these easy game day peanut butter brownie bites are another quick option that travels well and disappears fast at parties.
Pin This Recipe!
Easy Halloween Rice Krispie Ghost Treats: Best 15-Min Recipe
- Total Time: 15 minutes
- Yield: 12-14 ghosts 1x
Description
These Easy Halloween Rice Krispie Ghost Treats are the perfect last-minute Halloween party snack. Made in just 15 minutes with simple ingredients, these adorable ghost-shaped treats are kid-friendly, customizable, and require no special equipment.
Ingredients
- 6 cups Rice Krispies cereal (or any crispy rice cereal)
- 4 tablespoons unsalted butter (salted butter works too, just skip the extra salt)
- 1 package (10 oz) mini marshmallows (about 6 cups)
- 1/4 teaspoon vanilla extract (optional)
- Pinch of salt
- 1 bag candy eyeballs (flat ones work best)
- Non-stick cooking spray
Instructions
- Prep your workspace. Line your baking sheet or cutting board with parchment paper. Spray it lightly with non-stick cooking spray.
- Melt the butter. Place your large pot on the stove over low heat. Add the 4 tablespoons of butter and let it melt slowly.
- Add the marshmallows. Once the butter is fully melted, dump in the entire bag of mini marshmallows. Stir constantly with your silicone spatula or wooden spoon until smooth and glossy, about 3-4 minutes.
- Watch for the right consistency. The marshmallows should be completely melted—no lumps or streaks. Remove from heat immediately once smooth.
- Add vanilla and salt. Stir in the 1/4 teaspoon vanilla and the pinch of salt.
- Add the cereal. Pour in the 6 cups of Rice Krispies cereal. Fold it into the marshmallow mixture gently until evenly coated, about 2 minutes.
- Let it cool slightly. Let the mixture sit in the pot for 2-3 minutes until warm but not burn-your-fingers hot.
- Wet your hands. Fill a small bowl with cool water. Dip your hands in and shake off the excess.
- Shape the ghosts. Scoop up about 1/4 cup of the mixture. Roll it gently into a ball, then pinch one end to form a pointy head. Flatten the bottom slightly so it stands up. Place each shaped ghost on the parchment-lined sheet.
- Add the eyes. While the ghost is still warm and slightly tacky, press two candy eyeballs into the front. Don’t push too hard.
- Repeat. Keep wetting your hands between each ghost. You should get about 12-14 ghosts.
- Let them set. Leave the ghosts on the parchment paper for about 15-20 minutes until firm.
Notes
Keep heat low to avoid hard, chewy treats. Wet hands between shaping to prevent sticking. If mixture hardens, reheat on low for 30 seconds. Best within 24 hours. Store in airtight container at room temperature for up to 3 days. Can be frozen for up to a month.
- Prep Time: 5 minutes
- Cook Time: 10 minutes
- Category: Dessert
- Cuisine: American
Nutrition
- Serving Size: 1 ghost
- Calories: 120
- Sugar: 11
- Sodium: 95
- Fat: 4
- Saturated Fat: 2.5
- Carbohydrates: 21
- Protein: 1
Keywords: Halloween treats, Rice Krispie treats, ghost treats, easy Halloween recipe, no-bake dessert, kid-friendly Halloween, 15-minute recipe