I need a Halloween dessert that’s actually cute. Not creepy, not gory, not trying to scare anyone. Just adorable. Because let’s be honest, I love Halloween treats that make people smile instead of flinch. So I’m staring at my kitchen counter, mentally running through what I have. Cocoa powder? Check. Butter? Check. Halloween is in two days, and I need something that looks impressive but doesn’t require fondant or food coloring or any of that fancy decorating stuff I’m terrible at.
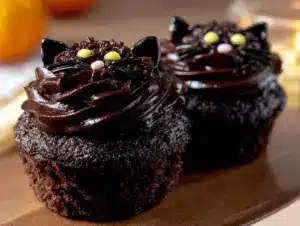
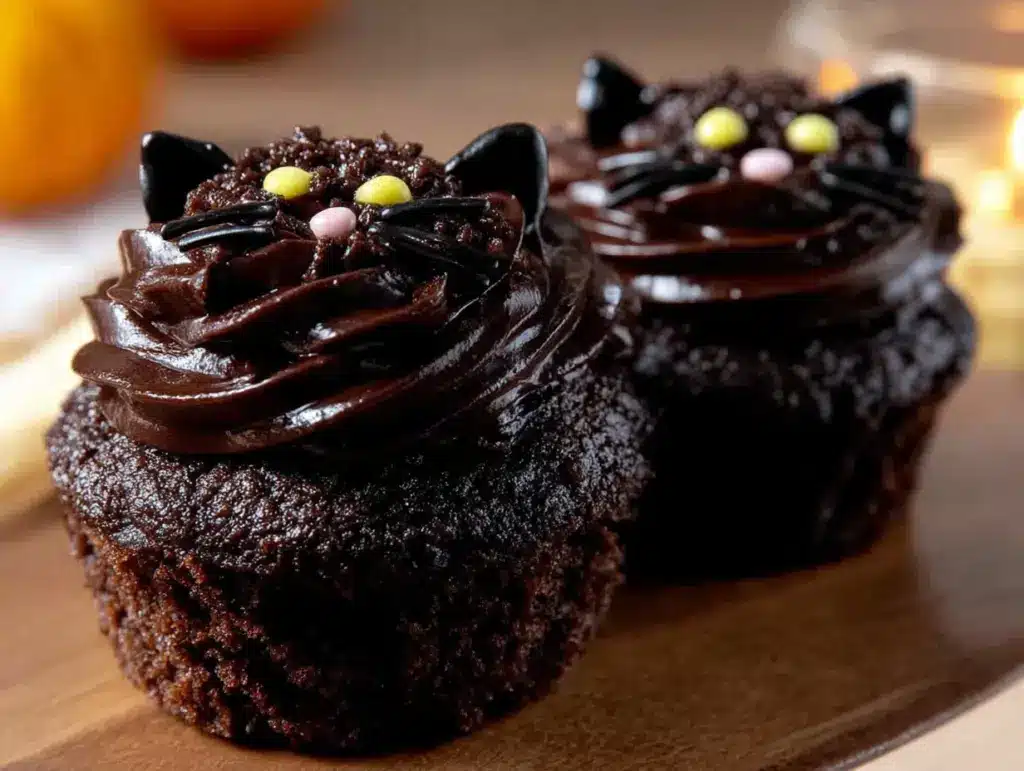
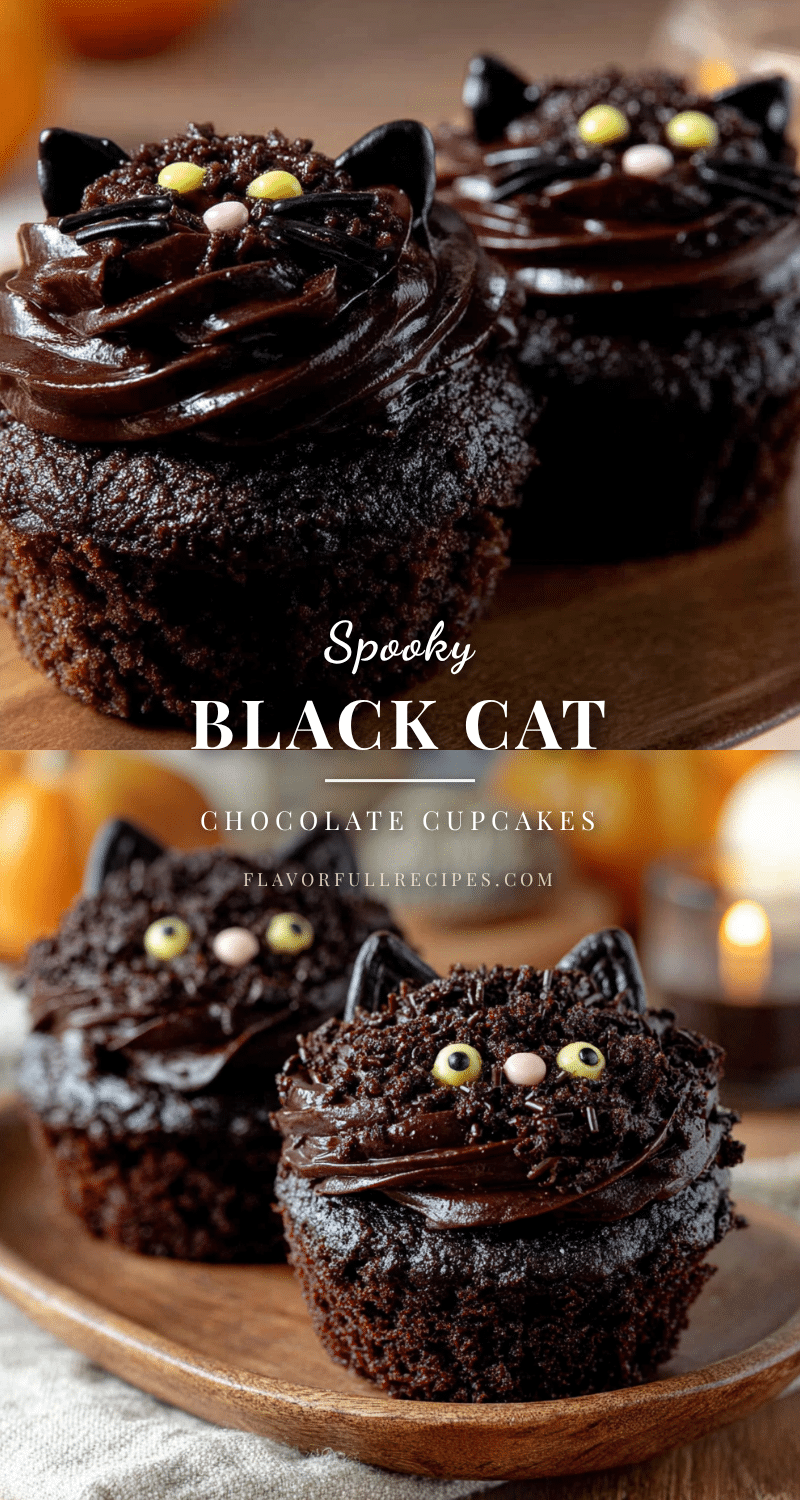
That’s when it hits me. Black cat cupcakes. Chocolate cupcakes (obviously black from the cocoa), topped with dark frosting, and the simplest little cat face made from candy eyes and chocolate chips. No piping skills required. No special equipment. Just a few ingredients and a little creativity. I’ve been making chocolate cupcakes for years, so I knew the base recipe would be solid. The real question was whether I could pull off the cat face without it looking like a melted mess.
Spoiler alert: I did. And honestly, they turned out even better than I imagined. The kids went absolutely nuts. My neighbor texted me a photo of her daughter holding one with the biggest grin. That’s the thing about these Adorable Black Cat Chocolate Cupcakes for Halloween — they’re not just desserts. They’re little moments of joy. You take one bite of that rich, fudgy chocolate cake with the creamy frosting, and suddenly Halloween feels a lot more sweet than spooky. This is the recipe I wish I had years ago.
Why You’ll Love This Recipe
Let me tell you straight up — these aren’t your average chocolate cupcakes. I’ve tested this recipe six times to get the texture just right. The cake is moist but not dense, fluffy but not crumbly, and deeply chocolatey without being overly sweet. That’s the sweet spot, and it took some trial and error to get there.
Here’s what makes these black cat cupcakes stand out:
- Adorably Simple Decorating — You don’t need a piping bag or any fancy tools. Just some candy eyes, chocolate chips, and a little frosting. Even kids can help with this part.
- Rich Chocolate Flavor — We’re using real cocoa powder and a secret ingredient (hot coffee) that makes the chocolate taste deeper and more complex. Trust me on this one.
- Perfect for Halloween Parties — Whether it’s a school celebration, a neighborhood gathering, or just a fun family activity, these cupcakes are always the star of the show. They pair beautifully with something savory like our Easy Loaded Bacon Ranch Football Dip if you’re hosting a Halloween game day party.
- Made with Pantry Staples — No weird ingredients. No special trips to a fancy baking supply store. You probably have everything you need right now.
- Kid-Approved and Adult-Loved — I’ve served these to everyone from picky five-year-olds to my dad who “doesn’t do cute desserts.” They disappeared within minutes. Every single time.
What makes this recipe different from every other Halloween cupcake out there? It’s the balance. The cake is moist enough that you don’t need a glass of milk with every bite. The frosting is creamy but not greasy. And the decoration is simple enough that anyone can do it, but charming enough that people will ask where you bought them. That’s the kind of recipe I want in my back pocket.
These cupcakes make me feel like a kitchen rockstar without actually having to work that hard. And honestly? That’s exactly the kind of Halloween energy I’m here for.
What Ingredients You Will Need
This recipe uses simple, everyday ingredients to create something truly special. I’ve tested substitutions and variations, so I’ll walk you through what works and what doesn’t.
For the Chocolate Cupcakes
- All-purpose flour — 1 ½ cups (190g). Standard AP flour works perfectly here. Spoon and level it into your measuring cup for accuracy.
- Granulated sugar — 1 cup (200g). Regular white sugar gives the cupcakes structure and sweetness.
- Unsweetened cocoa powder — ½ cup (50g). I prefer Dutch-process cocoa for its darker color and smoother flavor, but natural cocoa works fine too. The darker the cocoa, the blacker your cupcakes will look.
- Baking soda — 1 teaspoon. This helps the cupcakes rise properly.
- Salt — ½ teaspoon. Balances the sweetness and enhances the chocolate flavor.
- Egg — 1 large, room temperature. Let it sit out for 30 minutes before baking for better incorporation.
- Buttermilk — ½ cup (120ml), room temperature. This is the secret to tender cupcakes. If you don’t have buttermilk, add 1 ½ teaspoons of lemon juice or vinegar to regular milk and let it sit for 5 minutes.
- Vegetable oil — ½ cup (120ml). Oil keeps the cupcakes moist longer than butter. I use a neutral oil like canola or avocado.
- Vanilla extract — 2 teaspoons. Pure vanilla makes a difference here. Skip the imitation stuff.
- Hot coffee — ½ cup (120ml), freshly brewed. Don’t skip this. The coffee doesn’t make the cupcakes taste like coffee — it deepens the chocolate flavor and makes the cake incredibly moist. I use leftover morning coffee or instant espresso powder dissolved in hot water.
For the Black Cat Frosting
- Unsalted butter — 1 cup (226g), softened to room temperature. Let it sit out for at least an hour. You want it soft but not melty.
- Powdered sugar — 3 ½ cups (440g), sifted. Sifting prevents lumps and gives you a silky smooth frosting.
- Unsweetened cocoa powder — ½ cup (50g), sifted. I use dark cocoa here for that deep black color.
- Heavy cream — 3-4 tablespoons (45-60ml). Start with 3 and add more if needed for consistency.
- Vanilla extract — 1 teaspoon.
- Salt — ¼ teaspoon. Just a pinch to balance the sweetness.
- Black gel food coloring — Optional, but recommended if you want that true black color. Liquid food coloring won’t work as well.
For the Cat Faces
- Candy eyes — The edible kind with black pupils. You can find these at craft stores or online. I use the small size (about 6mm).
- Semi-sweet chocolate chips — For the noses. I use mini chocolate chips for smaller cats or regular ones for bigger faces.
- Black licorice strings — Cut into small pieces for whiskers. You can also use black decorating gel or thin pretzel sticks broken into pieces.
- Optional additions — Orange or purple sprinkles for a Halloween touch, or small candy corn pieces for little pumpkin decorations next to the cats.
Equipment Needed
You don’t need a professional bakery setup for these. Here’s what I use:
- Standard 12-cup muffin pan — I prefer a light-colored metal pan for even baking. Dark pans can cause the bottoms to brown too quickly.
- Cupcake liners — Black or orange liners make the presentation extra festive. I found some with little bats on them at the grocery store. Regular white works too.
- Mixing bowls — One large bowl for dry ingredients, one medium for wet ingredients.
- Whisk — For combining dry ingredients. A fork works in a pinch.
- Hand mixer or stand mixer — For the frosting. You can whisk it by hand, but your arm will definitely feel it the next day.
- Cooling rack — Essential for even cooling. If you don’t have one, let the cupcakes cool in the pan for 10 minutes, then transfer them to a plate.
- Small offset spatula or butter knife — For spreading the frosting. I actually use a regular dinner knife most of the time.
- Piping bags or zip-top bags — For the frosting. I use disposable piping bags, but a sturdy zip-top bag with the corner snipped off works perfectly.
I’ve made these cupcakes with both a $10 hand mixer and a fancy stand mixer. The results were identical. Don’t overthink the equipment. If you have a muffin pan and a bowl, you’re good to go.
Preparation Method
Let me walk you through this step by step. I’ve made these cupcakes so many times that I’ve got the process down to a science. Follow along, and you’ll have perfect black cat cupcakes every time.
Step 1: Preheat and Prep
Preheat your oven to 350°F (175°C). Line your muffin pan with 12 cupcake liners. I like to spray the inside of the liners lightly with non-stick spray, but that’s optional. Set the pan aside.
Step 2: Mix the Dry Ingredients
In a large bowl, whisk together the flour, sugar, cocoa powder, baking soda, and salt. Make sure there are no lumps in the cocoa powder. Whisk for about 20 seconds to aerate everything. This step takes less than a minute, but it’s important for even distribution.
Step 3: Combine the Wet Ingredients
In a separate medium bowl, whisk together the egg, buttermilk, vegetable oil, and vanilla extract until smooth. The mixture should look pale and slightly thickened. If your buttermilk is cold, the mixture might look a little separated — that’s okay. Just keep whisking.
Step 4: Bring It All Together
Pour the wet ingredients into the dry ingredients. Stir with a spatula or wooden spoon until just combined. A few streaks of flour are fine at this point. Now pour in the hot coffee and stir gently until the batter is smooth. The batter will be very thin — that’s exactly what you want. Don’t panic. This thin batter is what gives you that incredibly moist, tender crumb.
Step 5: Fill the Liners
Fill each cupcake liner about ⅔ full. I use a ¼-cup measuring cup or a cookie scoop for even portions. You should get exactly 12 cupcakes. If you overfill, they’ll dome too much and won’t look as neat for decorating. Trust me, I learned this the hard way.
Step 6: Bake the Cupcakes
Bake for 18-22 minutes. Start checking at 18 minutes by inserting a toothpick into the center of a cupcake. If it comes out clean or with just a few moist crumbs, they’re done. The tops should spring back when lightly touched. Let them cool in the pan for exactly 5 minutes, then transfer to a wire rack to cool completely. Do not frost them while they’re warm. The frosting will melt into a sad puddle. I’ve done that too.
Step 7: Make the Frosting
While the cupcakes cool, make the frosting. In a large bowl, beat the softened butter with a hand mixer on medium speed until smooth and creamy, about 2 minutes. Add the sifted powdered sugar and cocoa powder, one cup at a time, beating on low speed until incorporated. Add the heavy cream, vanilla extract, and salt. Increase the speed to medium-high and beat for 3-4 minutes until light and fluffy. If you want a true black color, add black gel food coloring a tiny drop at a time until you reach the desired shade. Be patient — it takes more than you think.
Step 8: Frost the Cupcakes
Once the cupcakes are completely cool, it’s time to frost. I use a piping bag fitted with a large round tip, but you can also just spread the frosting with a knife. Pipe a generous swirl on each cupcake, starting from the outside and working inward. Leave a little space around the edges so the cat face has a clear area to sit on. Smooth the top slightly with the back of a spoon if needed.
Step 9: Decorate the Cat Faces
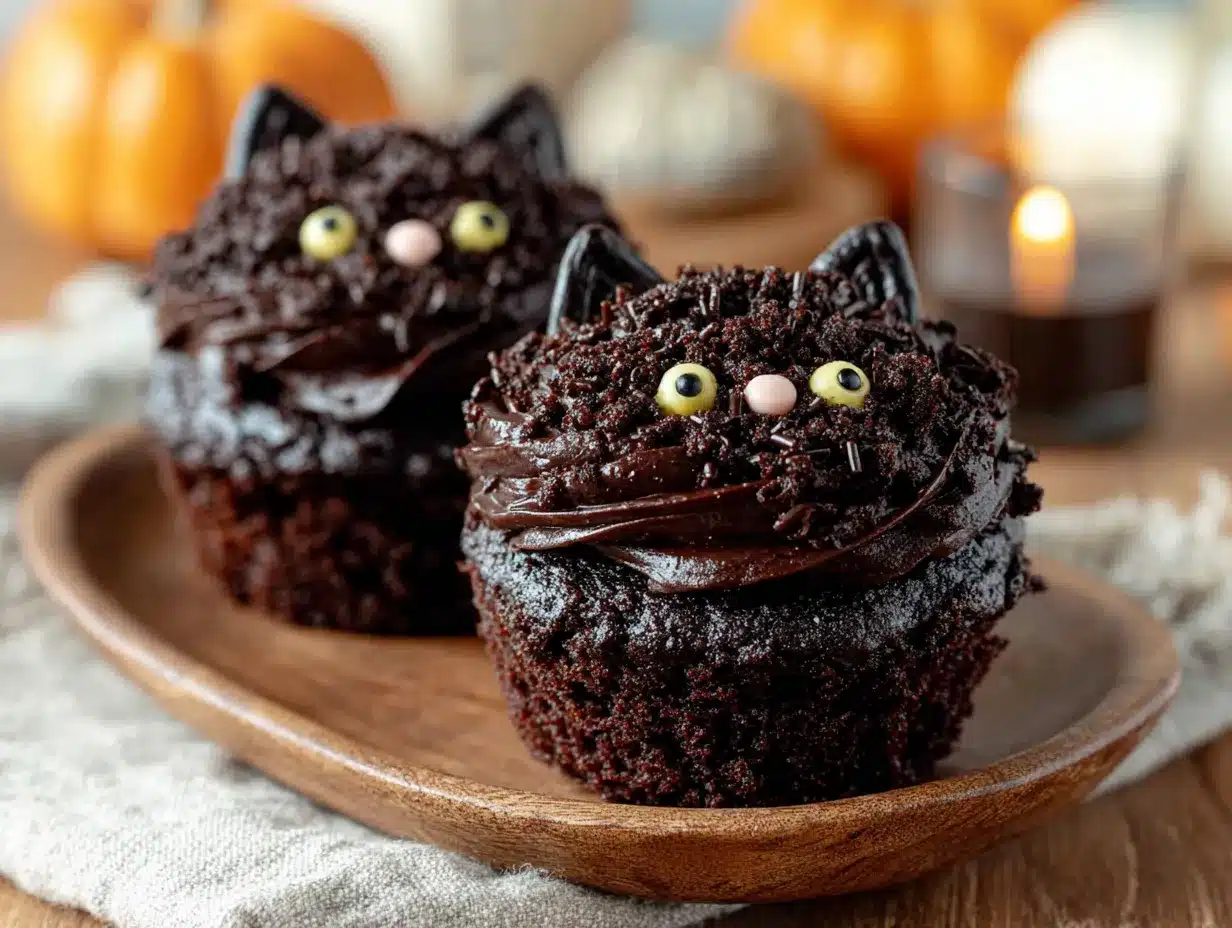
Here’s the fun part. For each cupcake, place two candy eyes in the upper half of the frosting. Press them in gently so they stick. Place one chocolate chip pointy-side-down in the center for the nose. For whiskers, use three small pieces of black licorice string on each side of the nose, angled slightly outward. Press them in gently. If you’re using pretzel sticks, break them into thin pieces and position them the same way. The cats should look like they’re staring back at you with those big round eyes. It’s impossible not to smile.
Step 10: Add Final Touches
For extra cuteness, I sometimes add little ears made from chocolate chips placed diagonally above the eyes. Just press two chocolate chips pointy-side-up into the frosting at the top. You can also add a tiny dot of orange frosting for a little pumpkin next to the cat, or sprinkle orange and purple sprinkles around the edges. These touches make them even more Halloween-ready.
Cooking Tips & Techniques
I’ve made plenty of mistakes with these cupcakes so you don’t have to. Here’s what I’ve learned:
Don’t overmix the batter. When you add the hot coffee, stir gently until just combined. Overmixing develops gluten and makes the cupcakes tough. A few small lumps are fine. The batter is thin, so it’s tempting to keep stirring, but resist the urge.
Use room temperature ingredients. Cold eggs and buttermilk won’t emulsify properly with the oil and butter. The result is a denser, less tender cupcake. Set everything out on the counter 30-45 minutes before you start baking. I set a timer on my phone so I don’t forget.
Check your oven temperature. Ovens run hot or cold. I learned this after my first batch came out dry and over-baked. Use an oven thermometer if you have one. If your cupcakes are browning too quickly on the edges but still raw in the center, your oven is too hot. Reduce the temperature by 25°F and try again.
Let the cupcakes cool completely. I cannot stress this enough. Warm frosting on warm cupcakes is a disaster. The frosting slides off, melts into the cake, and your beautiful cat faces turn into abstract art. Wait at least an hour. I sometimes make the cupcakes a day ahead and frost them the next morning.
Use a light hand with the food coloring. Black gel food coloring is potent. Start with a tiny dot on a toothpick, mix it in, and assess. You can always add more, but you can’t take it out. I’ve accidentally stained my countertops (and my fingers) more times than I care to admit.
Practice the cat face on a piece of wax paper first. If you’re nervous about the decorating, do a test run on a piece of wax paper or parchment. Arrange the eyes, nose, and whiskers until you like the look, then transfer the design to the cupcake. This saved me from ruining a whole batch the first time.
Variations & Adaptations
One of the best things about this recipe is how flexible it is. Here are some ways to make it your own:
Gluten-Free Version
Substitute the all-purpose flour with a 1:1 gluten-free baking flour blend. I’ve used Bob’s Red Mill and King Arthur brands with great results. Add ¼ teaspoon of xanthan gum if your blend doesn’t already include it. The texture will be slightly more delicate, but still delicious. Just don’t overmix the batter.
Dairy-Free Version
Replace the buttermilk with unsweetened almond milk mixed with 1 ½ teaspoons of lemon juice. Use a dairy-free butter substitute like Miyoko’s or Earth Balance for the frosting. Coconut cream works well instead of heavy cream, though the frosting will be slightly less stable. Let it chill in the fridge for 10 minutes before piping.
Spider Web Cupcakes
Instead of cat faces, turn these into spider web cupcakes. Pipe white frosting in a spiral on top of the black frosting, then drag a toothpick from the center outward to create web lines. Place a small candy spider on top. This is a fun alternative if you want variety at your Halloween party.
Pumpkin Spice Twist
Add 1 teaspoon of pumpkin pie spice to the dry ingredients and replace the buttermilk with pumpkin puree. The cupcakes will be slightly denser but incredibly flavorful. Decorate with orange frosting and candy corn for a pumpkin patch theme. This version pairs wonderfully with our Easy Fluffy Pumpkin Chocolate Chip Muffins for a full fall dessert spread.
Mini Cupcakes
Use a mini muffin pan and reduce the baking time to 10-12 minutes. You’ll get about 36 mini cupcakes. These are perfect for classroom parties or potlucks where people want a bite-sized treat. The cat faces will be tiny and extra cute. Use mini chocolate chips for the noses and smaller candy eyes.
Serving & Storage Suggestions
These cupcakes are best served at room temperature. The cake is moist and tender, and the frosting is perfectly creamy. If you’ve refrigerated them, let them sit out for 30 minutes before serving. The flavor really shines when it’s not cold.
For presentation, I arrange them on a black or orange platter with some fake spider webs or plastic spiders scattered around. A few mini pumpkins or fall leaves add a nice touch. Kids love seeing the cat faces staring up at them from the platter. It’s almost too cute to eat. Almost.
These cupcakes pair beautifully with a glass of cold milk, hot apple cider, or a pumpkin spice latte. If you’re serving them at a Halloween party, set them next to a bowl of popcorn or some savory snacks like our Crispy Air Fryer Parmesan Garlic Chicken Wings for a sweet and salty balance.
Storage is simple. Place the decorated cupcakes in an airtight container at room temperature for up to 3 days. If your kitchen is warm, refrigerate them — but bring them back to room temperature before serving. The frosting will harden slightly in the fridge, so let them sit out for 20 minutes to soften.
You can freeze the unfrosted cupcakes for up to 3 months. Wrap each one individually in plastic wrap, then place them in a freezer bag. Thaw at room temperature, then frost and decorate. The cake freezes beautifully. I often make a double batch and freeze half for last-minute Halloween emergencies.
Here’s a pro tip: the flavors actually get better after a day. The coffee and chocolate meld together overnight, and the cupcakes become even more moist. I sometimes make them a day ahead on purpose. Just don’t frost them until you’re ready to serve, or the frosting will absorb moisture from the cake and lose its shape.
Nutritional Information & Benefits
Let’s be real — these are cupcakes, not health food. But they’re made with real ingredients, and that counts for something. Here’s the approximate nutritional breakdown per cupcake (with frosting and decoration):
- Calories: 380
- Total Fat: 18g
- Saturated Fat: 9g
- Carbohydrates: 54g
- Sugar: 38g
- Protein: 4g
- Fiber: 2g
- Sodium: 220mg
These values are estimates and will vary based on your specific ingredients and portion sizes. If you use low-fat buttermilk or reduce the sugar slightly, you can lower the numbers a bit.
On the plus side, cocoa powder is rich in antioxidants called flavonoids, which can support heart health and reduce inflammation. Dark chocolate has more of these beneficial compounds than milk chocolate. And hey, there’s a whole egg in there for protein. Every little bit helps, right?
If you’re watching your sugar intake, you can reduce the sugar in the cupcake batter to ¾ cup without affecting the texture too much. The frosting is harder to adjust, but you can use a sugar-free powdered sugar alternative. Just know that the texture will be slightly different.
These cupcakes are vegetarian and can be made dairy-free with the substitutions I mentioned earlier. They contain wheat, dairy, and eggs, so they’re not suitable for those with allergies to those ingredients. Always check your candy decorations for potential allergens too.
Conclusion
These Adorable Black Cat Chocolate Cupcakes for Halloween are exactly what a holiday dessert should be — fun, delicious, and surprisingly easy to make. They bring people together. They make kids light up. They turn a regular October evening into something special.
I love that this recipe doesn’t require any special skills. You don’t need to be a pastry chef or a cake decorator. You just need a little patience, a few basic ingredients, and the willingness to have fun with it. The cat faces might not be perfect, and that’s okay. Actually, that’s the best part. Each one has its own personality. Some look grumpy. Some look surprised. Some look like they’re plotting world domination. They’re all adorable.
I’d love to see your versions. Tag me in your photos, leave a comment below, or send me a message. Tell me if your kids helped decorate. Tell me if your cat watched you make them. Tell me if you ate three before anyone else got home. No judgment here.
If you’re looking for more Halloween baking inspiration, check out our Perfect Brown Butter Pumpkin Chocolate Chip Cookies or Easy Game Day Peanut Butter Brownie Bites for more seasonal treats. Happy Halloween, and happy baking!
Frequently Asked Questions
Can I make these cupcakes ahead of time?
Absolutely. Bake the cupcakes up to 2 days in advance and store them in an airtight container at room temperature. Make the frosting up to 3 days ahead and keep it refrigerated in an airtight container. When you’re ready to serve, let the frosting come to room temperature, give it a quick whip with the mixer to restore its fluffiness, then frost and decorate.
Why did my cupcakes turn out dry?
Overbaking is the most common culprit. Check your cupcakes at 18 minutes. Every oven is different, and even one extra minute can make a difference. Also, make sure you’re measuring your flour correctly — scooping directly from the bag packs it down and adds too much flour. Spoon it into your measuring cup and level it off with a knife.
Can I use a boxed cake mix instead?
You can, but the texture won’t be as good. Boxed mixes are designed for shelf stability, not for the tender, moist crumb we’re going for here. If you’re short on time, use a high-quality chocolate cake mix and add ½ cup of sour cream to the batter for extra moisture. The flavor won’t be as deep, but the cat faces will still be cute.
How do I get the frosting to be truly black?
Start with dark cocoa powder for the base color. Then use gel food coloring, not liquid. Liquid food coloring adds too much moisture and won’t give you a true black. Add the gel a tiny drop at a time, mixing thoroughly between additions. You’ll need more than you think. Let the frosting sit for 10 minutes after coloring — the color deepens as it rests.
My cat faces keep falling off. What am I doing wrong?
The decorations need something to stick to. Make sure your frosting is thick enough to hold them — if it’s too soft, the candy eyes will slide right off. Chill the frosted cupcakes in the fridge for 15 minutes before adding the decorations. Press each piece in gently but firmly. If you’re still having trouble, use a tiny dab of melted chocolate as “glue” to attach the eyes and nose.
Pin This Recipe!
Adorable Black Cat Cupcakes: Easy Halloween Recipe
- Total Time: 1 hour 40 minutes (includes cooling)
- Yield: 12 cupcakes 1x
Description
These Adorable Black Cat Cupcakes are a fun and easy Halloween dessert that’s cute, not creepy. Rich chocolate cupcakes with dark frosting and simple cat faces made from candy eyes and chocolate chips.
Ingredients
- 1 ½ cups (190g) all-purpose flour
- 1 cup (200g) granulated sugar
- ½ cup (50g) unsweetened cocoa powder (Dutch-process preferred)
- 1 teaspoon baking soda
- ½ teaspoon salt
- 1 large egg, room temperature
- ½ cup (120ml) buttermilk, room temperature
- ½ cup (120ml) vegetable oil
- 2 teaspoons vanilla extract
- ½ cup (120ml) hot coffee, freshly brewed
- 1 cup (226g) unsalted butter, softened
- 3 ½ cups (440g) powdered sugar, sifted
- ½ cup (50g) unsweetened cocoa powder, sifted (dark cocoa preferred)
- 3–4 tablespoons (45-60ml) heavy cream
- 1 teaspoon vanilla extract
- ¼ teaspoon salt
- Black gel food coloring (optional)
- Candy eyes (edible, about 6mm)
- Semi-sweet chocolate chips (mini or regular)
- Black licorice strings (or black decorating gel, or thin pretzel sticks)
Instructions
- Preheat oven to 350°F (175°C). Line a 12-cup muffin pan with cupcake liners. Lightly spray liners with non-stick spray (optional).
- In a large bowl, whisk together flour, sugar, cocoa powder, baking soda, and salt until well combined and aerated.
- In a separate medium bowl, whisk together egg, buttermilk, vegetable oil, and vanilla extract until smooth and slightly thickened.
- Pour wet ingredients into dry ingredients and stir with a spatula until just combined. Add hot coffee and stir gently until batter is smooth (batter will be thin).
- Fill each cupcake liner about ⅔ full (about ¼ cup batter each).
- Bake for 18-22 minutes, until a toothpick inserted in center comes out clean or with a few moist crumbs. Cool in pan for 5 minutes, then transfer to a wire rack to cool completely.
- For frosting: In a large bowl, beat softened butter with a hand mixer on medium speed until smooth and creamy, about 2 minutes. Add sifted powdered sugar and cocoa powder one cup at a time, beating on low. Add heavy cream, vanilla extract, and salt. Beat on medium-high for 3-4 minutes until light and fluffy. Add black gel food coloring a tiny drop at a time until desired shade is reached.
- Once cupcakes are completely cool, pipe or spread frosting onto each cupcake, leaving a little space around the edges.
- Decorate cat faces: Place two candy eyes in the upper half of the frosting. Place one chocolate chip pointy-side-down in the center for the nose. Add three small pieces of black licorice string on each side of the nose for whiskers. Optionally, add two chocolate chips pointy-side-up above the eyes for ears.
- Serve at room temperature. Store in an airtight container at room temperature for up to 3 days, or refrigerate if warm.
Notes
Don’t overmix the batter. Use room temperature ingredients for best results. Let cupcakes cool completely before frosting. For true black frosting, use dark cocoa powder and black gel food coloring. The flavors improve after a day. Unfrosted cupcakes can be frozen for up to 3 months.
- Prep Time: 20 minutes
- Cook Time: 20 minutes
- Category: Dessert
- Cuisine: American
Nutrition
- Serving Size: 1 cupcake
- Calories: 380
- Sugar: 38
- Sodium: 220
- Fat: 18
- Saturated Fat: 9
- Carbohydrates: 54
- Fiber: 2
- Protein: 4
Keywords: Halloween cupcakes, black cat cupcakes, chocolate cupcakes, easy Halloween dessert, cute Halloween treats, kid-friendly Halloween