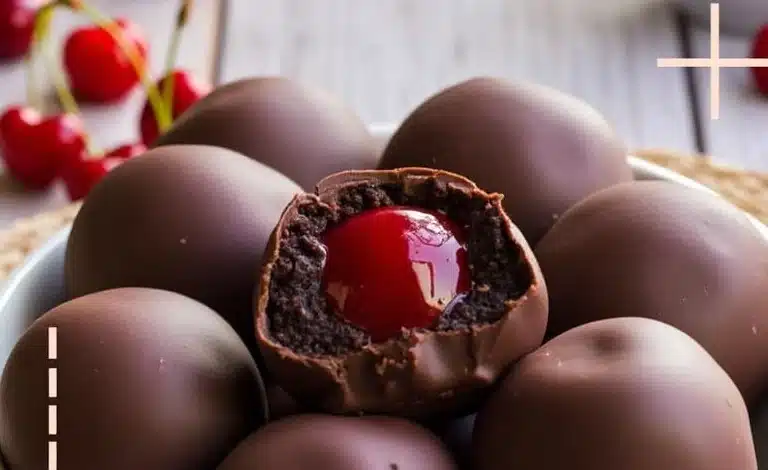
Imagine biting into a soft, fudgy brownie that’s been wrapped around a sweet cherry and then dipped in a luscious layer of chocolate. These Chocolate Covered Cherry Brownie Bombs are more than just a dessert—they’re a holiday experience in every bite! Perfect for gifting, parties, or just indulging at home, these brownie bombs are as fun to make as they are to eat. Let’s dive into why this recipe deserves a spot in your holiday baking lineup!
The Story Behind Chocolate Covered Cherry Brownie Bombs
There’s something magical about the pairing of chocolate and cherries, isn’t there? It’s a combination that’s been loved for centuries, dating back to the 1800s when chocolate-covered cherries first became a holiday staple in Europe. My love for this flavor pairing started during childhood when my grandmother would keep a box of cherry cordials hidden away for “special occasions.” Naturally, I’d sneak a few (or more) when no one was looking!
Fast forward to today, and I’ve taken that nostalgic flavor and turned it into something even more decadent. The idea for these brownie bombs came to me when I was brainstorming ways to make brownies feel a little fancier for a holiday party. I wanted something bite-sized, festive, and irresistibly indulgent. That’s how these brownie bombs were born!
While the classic chocolate-covered cherry is delightful, wrapping it in a fudgy brownie layer makes it even more indulgent. Plus, the versatility of this recipe means you can dress up these little treats with sprinkles, crushed nuts, or even a drizzle of white chocolate to match any holiday theme. They’re everything you love about the holidays wrapped into one perfect bite.
Ingredients for Chocolate Covered Cherry Brownie Bombs
Let’s talk ingredients, because every element in this recipe plays a key role in making these brownie bombs unforgettable:
- Brownie Mix or Homemade Brownie Batter: You can use your favorite boxed brownie mix for convenience or make a rich, fudgy brownie batter from scratch. The key is to pick a recipe or mix that produces dense, chewy brownies.
- Maraschino Cherries: These vibrant red cherries are the heart of the recipe. Look for ones with stems for easier dipping, but stemless works too! Drain them well to avoid excess moisture.
- Chocolate Chips or Melting Wafers: Choose good-quality semi-sweet or dark chocolate for dipping. Melting wafers are especially easy to work with if you’re new to candy-making.
- Heavy Cream (optional): If your chocolate needs a little thinning out, a splash of cream can make it silky smooth.
- Sprinkles or Toppings: Get creative here! Holiday-themed sprinkles, crushed candy canes, or even shredded coconut can take these brownie bombs to the next level.
Substitution Tip: If you want to make these a bit healthier or cater to dietary needs, you can swap out regular brownie mix for a gluten-free version and use dried cherries instead of maraschino cherries.
Equipment Needed
Don’t worry—you won’t need any fancy gadgets to make these brownie bombs. Here’s what you’ll need:
- Mixing Bowls: For preparing your brownie batter and melting chocolate.
- Baking Sheet: Line it with parchment paper or a silicone mat to prevent sticking.
- Cookie Scoop or Spoon: For portioning out the brownie mixture.
- Double Boiler or Microwave-Safe Bowl: To melt the chocolate.
- Toothpicks or Fork: For dipping the brownie bombs into the melted chocolate.
If you don’t have a double boiler, a heatproof bowl set over a pot of simmering water works just as well. And for a budget-friendly option, use zip-top bags for piping chocolate decorations!
How to Make Chocolate Covered Cherry Brownie Bombs
- Prepare the Brownie Batter: If using boxed brownie mix, follow the package instructions. For homemade batter, whip up your favorite recipe. Allow the batter to chill for 20-30 minutes to make it easier to handle.
- Wrap the Cherries: Drain the maraschino cherries and pat them dry with paper towels. Take a tablespoon of chilled brownie batter and flatten it in your hands. Wrap it around a cherry, ensuring it’s fully encased. Repeat with all the cherries.
- Chill the Brownie Balls: Place your brownie-covered cherries onto a parchment-lined baking sheet and freeze for 20 minutes. This step makes dipping them in chocolate much easier!
- Melt the Chocolate: Using a double boiler or microwave, melt your chocolate chips or wafers until smooth. Stir frequently to prevent burning.
- Dip and Decorate: Using a toothpick or fork, dip each brownie bomb into the melted chocolate, ensuring it’s fully coated. Shake off excess chocolate and place it back on the baking sheet. While the chocolate is still wet, add sprinkles or other decorations.
- Set and Serve: Let the chocolate harden completely at room temperature or in the fridge. Once set, your brownie bombs are ready to enjoy!
Cooking Tips & Techniques
Here are a few tips to ensure your chocolate-covered cherry brownie bombs turn out perfectly:
- Chill Your Batter: Chilling the brownie batter makes it much easier to work with. If it’s too sticky, lightly grease your hands with cooking spray.
- Dry the Cherries Thoroughly: Excess moisture can make the batter slippery and cause the chocolate to seize up.
- Use Quality Chocolate: The better the chocolate, the better the flavor. Don’t skimp here!
- Work Quickly: Frozen brownie balls can make the chocolate set too fast. Dip a few at a time to maintain a smooth coating.
Variations & Adaptations
Want to mix things up? Here are some fun variations:
- Alcohol-Infused: Soak the cherries in rum or bourbon for an adult twist.
- White Chocolate Version: Swap dark chocolate for white chocolate and add a drizzle of red food coloring for a festive look.
- Nutty Delight: Roll the brownie bombs in crushed pistachios or almonds before the chocolate sets.
- Vegan-Friendly: Use a vegan brownie mix and dairy-free chocolate for a plant-based treat.
Have fun experimenting with different flavors and textures to make these brownie bombs uniquely yours!
Serving & Storage Suggestions
These brownie bombs are best served at room temperature for that perfect balance of fudgy brownie and crisp chocolate coating. Arrange them on a festive platter and pair with a glass of milk, hot cocoa, or even a holiday cocktail.
To store, place the brownie bombs in an airtight container. They’ll keep in the fridge for up to a week or in the freezer for up to a month. Just be sure to let them thaw a bit before serving so the brownie layer softens.
Nutritional Information & Benefits
While these treats are definitely indulgent, they do offer some perks:
- Each brownie bomb is about 150 calories, making them a reasonable treat.
- Cherries are rich in antioxidants and vitamin C.
- Dark chocolate contains flavonoids, which are great for heart health.
Be mindful of portion sizes, and don’t hesitate to enjoy these as part of your holiday celebrations!
Conclusion
There you have it—Chocolate Covered Cherry Brownie Bombs that are sure to steal the show this holiday season. Whether you’re making them for a party, as gifts, or just for yourself, this recipe is a guaranteed crowd-pleaser. I love how easy it is to customize, and honestly, every bite takes me back to those childhood memories of sneaking cherry cordials from my grandma’s candy dish.
If you make these, I’d love to see how they turn out! Share your photos on social media or drop a comment below with your favorite variations. Happy holidays and happy baking!
FAQs
Can I use fresh cherries instead of maraschino cherries?
Fresh cherries can work, but they’re harder to wrap due to their softer texture. Be sure to pit them first!
What’s the best way to melt chocolate for dipping?
Using a double boiler ensures smooth, evenly melted chocolate. If microwaving, heat in 15-second bursts and stir often.
Can I make these ahead of time?
Absolutely! These brownie bombs can be made up to a week in advance and stored in the fridge.
What if my chocolate coating cracks?
This can happen if the brownie balls are too cold. Let them sit at room temperature for a few minutes before dipping.
Are there other fruits I can use?
Yes! Try dried apricots or strawberries for a fun twist on the classic recipe.