This recipe is not only delicious but also ridiculously easy to make. Whether you’re hosting a dinner party or just craving something sweet on a chilly evening, this apple crisp comes together in no time. Plus, it’s way easier than baking a pie, and let’s be honest, who doesn’t love shortcut desserts that taste like they took hours?
Recipe Story and Background
Apple crisp has been a staple in many homes for generations, and for good reason. It’s a humble dessert that lets fall’s star ingredient – apples – shine. My version takes this classic up a notch with the addition of caramel. Sticky, sweet, and just a little indulgent, caramel pairs beautifully with the tartness of the apples and the crunch of the topping.
I first fell in love with apple crisp as a kid during apple-picking season. My mom would bake huge pans of it, and we’d devour it straight out of the oven with scoops of vanilla ice cream. Over the years, I started experimenting, and adding caramel was a game-changer. It adds an extra layer of coziness that makes this dessert unforgettable.
Fall is the perfect time to make this recipe, especially when apples are at their peak. It’s also a great way to use up any apples that are starting to get a little soft. Plus, it’s versatile – you can make it for Thanksgiving, a casual weekend treat, or even as a comforting dessert for a rainy day.
Ingredient Discussion
Let’s talk ingredients! Each one plays a key role in making this Caramel Apple Crisp irresistible.
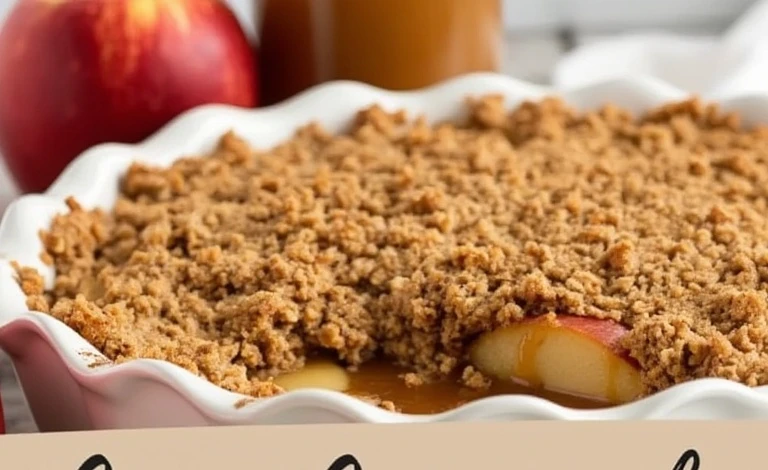
- Apples: Use a mix of tart and sweet apples for the best flavor. Granny Smith apples provide that tangy bite, while Honeycrisp or Fuji add sweetness. If you’re in a pinch, just use what you have – this recipe is forgiving!
- Caramel Sauce: Store-bought or homemade both work here. If you’re feeling fancy, make your own caramel for that extra homemade touch. Just make sure it’s thick and rich.
- Flour: All-purpose flour is used in the topping to create that perfect crumbly texture.
- Brown Sugar: Adds deep, molasses-like sweetness to the topping. You can substitute coconut sugar if you prefer a slightly healthier option.
- Oats: Old-fashioned rolled oats create a heartier, crunchier topping. Avoid quick oats as they can get mushy.
- Butter: Use unsalted butter for more control over the saltiness. Cold butter is key to getting that crumbly texture in the topping.
- Spices: Cinnamon and nutmeg are essential for that warm, fall flavor. Feel free to experiment with cloves or allspice if you’re feeling adventurous.
Pro tip: If you’re making this for a gluten-free crowd, swap out the flour for almond flour and make sure your oats are certified gluten-free. It’s just as delicious!
Equipment Needed
- Baking Dish: A 9×13-inch dish works perfectly, but you can also use smaller ramekins for individual servings.
- Mixing Bowls: You’ll need at least two – one for the apple filling and one for the topping.
- Pastry Cutter or Fork: To blend the butter into the topping mixture. If you don’t have one, clean hands work just fine!
- Peeler and Knife: To peel and slice the apples. A mandoline slicer can speed things up if you’re making a large batch.
If you don’t have a pastry cutter, don’t stress – just use two knives to cut the butter into the dry ingredients. It takes a little longer but gets the job done.
Preparation Method
- Preheat your oven to 350°F (175°C). Grease a 9×13-inch baking dish.
- Peel, core, and slice 6-7 medium apples. Place them in a mixing bowl.
- Add 1/4 cup (50g) granulated sugar, 1/4 cup (50g) brown sugar, 1 tsp cinnamon, and 1/4 tsp nutmeg to the apples. Toss until the apples are evenly coated.
- Spread the apple mixture evenly into the prepared baking dish. Drizzle with 1/4 cup (60ml) caramel sauce.
- In another mixing bowl, combine 1 cup (120g) all-purpose flour, 1 cup (100g) rolled oats, 3/4 cup (150g) brown sugar, and 1 tsp cinnamon. Mix well.
- Add 1/2 cup (115g) cold unsalted butter (cubed) into the dry ingredients. Use a pastry cutter or your hands to mix until it forms a crumbly texture.
- Sprinkle the topping evenly over the apples. Don’t press it down – you want it to stay light and crumbly.
- Bake for 40-45 minutes or until the topping is golden brown and the apple filling is bubbling.
- Let it cool for 10-15 minutes before serving. Drizzle more caramel sauce on top and serve with a scoop of vanilla ice cream if desired.
Cooking Tips & Techniques
Here are some insider tips to make your Caramel Apple Crisp absolutely foolproof:
- Don’t skimp on the butter: Cold butter is essential for that perfect crumbly topping. If it starts melting, pop it in the fridge for a few minutes.
- Layer the caramel sauce: Drizzling some caramel over the apples before adding the topping ensures every bite has that gooey goodness.
- Watch the bake time: Ovens can vary, so keep an eye on the crisp in the last 5 minutes. The topping should be golden, not burnt.
- Let it rest: As tempting as it is to dig right in, let the crisp cool slightly. This helps the filling set and prevents burns!
Variations & Adaptations
This recipe is incredibly versatile! Here are a few ways to switch it up:
- Gluten-Free Option: Use almond flour in place of all-purpose flour and certified gluten-free oats.
- Nutty Crunch: Add chopped pecans or walnuts to the topping for extra texture.
- Salted Caramel: Use salted caramel sauce or sprinkle a pinch of flaky sea salt over the topping before baking.
- Berry Twist: Mix in a handful of fresh cranberries or raspberries with the apples for a tart contrast.
- Vegan-Friendly: Replace the butter with coconut oil or a vegan butter alternative and use a dairy-free caramel sauce.
Serving & Storage Suggestions
This dessert is best served warm, straight out of the oven. Top it with a scoop of vanilla ice cream or a dollop of whipped cream for the ultimate cozy treat. If you’re feeling indulgent, drizzle even more caramel sauce on top!
Leftovers can be stored in an airtight container in the refrigerator for up to 4 days. To reheat, just pop a portion in the microwave for 30-40 seconds or warm it in the oven at 350°F (175°C) for about 10 minutes. While it’s freezer-friendly, the topping may lose some of its crispness after defrosting.
Nutritional Information & Benefits
Here’s a rough breakdown for one serving (based on 8 servings):
- Calories: 320
- Fat: 12g
- Carbs: 52g
- Protein: 3g
- Fiber: 4g
Apples are rich in fiber and vitamin C, making this dessert a somewhat wholesome treat. Oats add an extra boost of fiber, and you can reduce the sugar slightly if desired.
Conclusion
If you’re looking for a dessert that screams fall, this Cozy Caramel Apple Crisp is it. It’s warm, comforting, and full of nostalgic flavors that’ll make you feel right at home. Plus, it’s so easy to customize and adapt to your preferences.
What are you waiting for? Grab some apples, preheat your oven, and let the magic happen! I’d love to hear how it turns out for you. Drop a comment below or tag me on social media with your creations. Happy fall baking!
FAQs
Q: Can I make this recipe ahead of time?
A: Yes! You can prep the apple filling and the crumb topping in advance. Store them separately in the fridge and assemble just before baking for the freshest results.
Q: What kind of apples are best for apple crisp?
A: A blend of tart and sweet apples works beautifully—try Granny Smith for tang and Honeycrisp for natural sweetness. The contrast gives the dessert depth and balance.
Q: Can I use quick oats instead of rolled oats?
A: It’s not recommended. Quick oats tend to break down during baking and can lead to a mushy topping. Rolled oats provide that perfect crispy-crunchy texture.
Q: Is this recipe gluten-free?
A: Not by default—but it’s easy to adapt! Simply use almond flour instead of all-purpose flour and make sure your oats are certified gluten-free.
Q: How should I store leftovers?
A: Keep any leftover apple crisp in an airtight container in the fridge for up to 4 days. Reheat in the microwave for convenience or in the oven to restore that crisp topping.