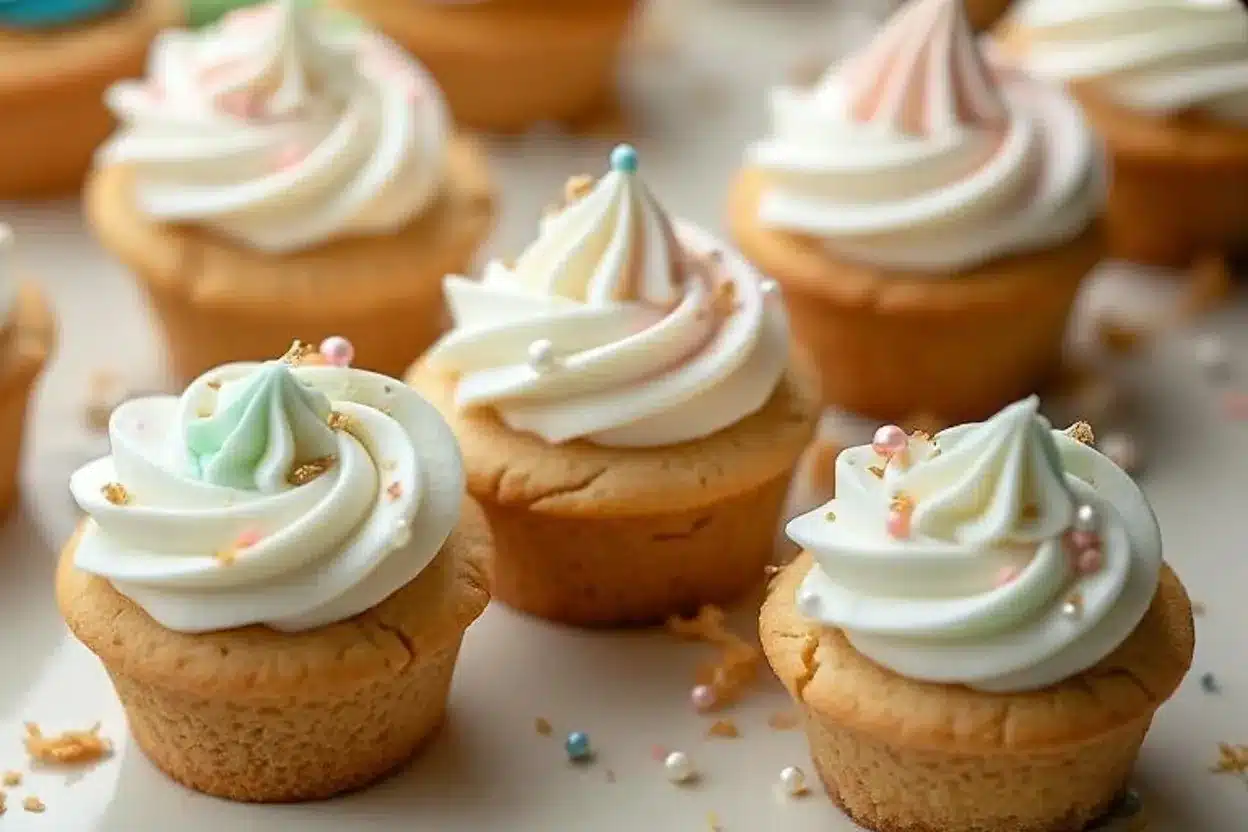
Picture this: sweet, buttery sugar cookie cups filled with luscious cream cheese buttercream frosting. Sounds heavenly, right? These adorable treats are perfect for parties, holidays, or just satisfying that sweet tooth. The combination of crispy edges and creamy filling makes every bite unforgettable. Trust me, once you make these sugar cookie cups, they’ll be your go-to dessert for any occasion!
Not only are they fun to make, but they look like little works of art—Pinterest-worthy, if I do say so myself. Plus, they’re super versatile. You can customize the frosting colors and decorations to match any theme or celebration. Let’s dive into the magic of creating this delightful recipe!
The Story Behind Sugar Cookie Cups
There’s something nostalgic about sugar cookies—they remind me of childhood baking sessions with my grandmother. She would let me roll out the dough and use cookie cutters to create all sorts of shapes. But over time, I wanted to try something new, something that added a modern twist to the classic sugar cookie. That’s when I stumbled upon the idea of cookie cups.
Cookie cups are like the perfect marriage of cookies and cupcakes. They originated as a creative way to serve bite-sized desserts at parties, and now they’ve become a staple treat for birthdays, weddings, and holidays. For this recipe, I’ve paired them with a cream cheese buttercream frosting that’s slightly tangy, perfectly sweet, and oh-so-creamy.
These sugar cookie cups are especially great during the winter holiday season. You can add festive sprinkles or create frosty designs with the frosting. But honestly, they’re a hit any time of year. Imagine pastel designs for Easter, spooky decorations for Halloween, or red hearts for Valentine’s Day. The possibilities are endless!
Discussing the Ingredients
For the Sugar Cookie Cups:
- Unsalted Butter: Go for high-quality butter; the flavor really shines in this recipe. If you’re in a pinch, salted butter works too—just omit the added salt.
- Granulated Sugar: This gives the cookie cups their signature sweetness. If you prefer a less sweet option, try reducing the sugar slightly.
- Egg: Adds structure and moisture to the dough. Ensure it’s at room temperature for the best results.
- Vanilla Extract: Pure vanilla extract is ideal, but almond extract can be a fun alternative for a nuttier flavor.
- All-Purpose Flour: Stick to all-purpose for the classic texture. If you’re gluten-free, use a 1:1 gluten-free baking flour.
- Baking Powder: Gives the cookie cups a slight lift. Make sure it’s fresh for optimal results.
- Salt: Balances the sweetness and enhances flavor.
For the Cream Cheese Buttercream Frosting:
- Cream Cheese: Use full-fat cream cheese for that rich, creamy texture. Avoid whipped or low-fat options, as they can make the frosting runny.
- Unsalted Butter: Softened butter blends smoothly with the cream cheese. If you’re dairy-free, vegan butter works well too.
- Powdered Sugar: Provides sweetness and structure to the frosting. Sift it beforehand to avoid lumps.
- Vanilla Extract: Adds depth to the frosting flavor. You can experiment with lemon or orange extract for a citrusy twist.
Want to add extra flair? Grab some food coloring, sprinkles, or edible glitter to decorate your sugar cookie cups. Seasonal decorations always make them stand out!
Equipment You’ll Need
- Muffin Tin: Essential for shaping the cookie cups. You can also use a mini muffin tin for bite-sized treats.
- Mixing Bowls: At least two—one for the cookie dough and one for the frosting.
- Electric Mixer: Speeds up the process of creaming butter and sugar. A hand mixer works too.
- Measuring Cups and Spoons: Precision is key to nailing this recipe.
- Rolling Pin: If your dough feels sticky, a rolling pin can help smooth it out before shaping.
- Pastry Bag and Tips: For frosting designs, though a zip-top bag with the corner cut works in a pinch.
If you don’t have a muffin tin, try using small ramekins or silicone molds. They’re just as effective and can create unique shapes!
How to Make Sugar Cookie Cups with Cream Cheese Frosting
- Preheat the oven: Set your oven to 350°F (175°C) and lightly grease your muffin tin.
- Prepare the dough: In a mixing bowl, cream together 1 cup (230g) unsalted butter and 1 cup (200g) granulated sugar until light and fluffy.
- Add wet ingredients: Beat in 1 egg and 2 teaspoons vanilla extract until combined.
- Mix dry ingredients: In a separate bowl, whisk together 2 ¾ cups (345g) all-purpose flour, 1 teaspoon baking powder, and ½ teaspoon salt. Gradually add this to the wet mixture until a soft dough forms.
- Shape the cups: Roll 1 ½-inch balls of dough and press them into the muffin tin, creating a small well in the center.
- Bake: Bake for 10-12 minutes, or until the edges are lightly golden. Remove from the oven and use the back of a spoon to deepen the wells while the cookies are still warm.
- Cool: Let the cookie cups cool completely before removing them from the tin.
- Make the frosting: Beat together 8 oz (225g) cream cheese and ½ cup (115g) unsalted butter until smooth. Gradually add 3 cups (375g) powdered sugar and 1 teaspoon vanilla extract. Beat until fluffy.
- Decorate: Fill a pastry bag with the frosting and pipe it into the cookie cups. Add sprinkles or decorations as desired.
The cookie cups should be firm but tender, and the frosting smooth and creamy. If your dough feels too crumbly, add a teaspoon of milk to bring it together.
Cooking Tips & Techniques
Here are some tips to make your sugar cookie cups picture-perfect:
- Chill the Dough: If your dough feels too soft, refrigerate it for 30 minutes. This helps with shaping and prevents spreading.
- Don’t Overbake: Sugar cookies can go from golden to burnt quickly. Keep a close eye during the last few minutes.
- Room Temperature Ingredients: Softened butter and cream cheese ensure smooth mixing.
- Frosting Consistency: If the frosting is too thick, add a tablespoon of milk. Too runny? Add more powdered sugar.
- Clean Edges: Use a sharp knife or offset spatula to carefully remove cookie cups from the tin without breaking them.
And remember, don’t stress too much about perfection. Homemade always tastes better!
Variations & Adaptations
- Chocolate Lovers: Add 2 tablespoons of cocoa powder to the cookie dough for a chocolaty twist.
- Fruit-Filled: Replace the frosting with lemon curd or raspberry jam for a refreshing option.
- Dietary Adjustments: Use gluten-free flour and dairy-free cream cheese and butter for a gluten-free, vegan version.
- Seasonal Themes: Add food coloring to the frosting to match holidays or celebrations.
Last Christmas, I made green and red swirled frosting—it was a hit with everyone!
Serving & Storage Suggestions
Sugar cookie cups are best served at room temperature. Arrange them on a platter for a stunning presentation and pair them with coffee, tea, or milk. For storage:
- Refrigerator: Store in an airtight container for up to 3 days. Bring to room temperature before serving.
- Freezer: Freeze undecorated cookie cups for up to 2 months. Frost them after thawing.
- Reheating: If refrigerated, let them sit out for 10 minutes to soften.
The flavors develop beautifully overnight, so don’t hesitate to make them a day ahead!
Nutritional Information & Benefits
While these sugar cookie cups are a treat, let’s look at the approximate nutritional info per serving (1 cookie cup):
- Calories: 250
- Fat: 12g
- Sugar: 20g
- Protein: 2g
The cream cheese provides calcium, while the butter adds a bit of vitamin A. If you’re counting calories, consider smaller portions or alternative ingredients like low-fat cream cheese.
Conclusion
There you have it—a recipe that’s as fun to make as it is to eat! Sugar cookie cups with cream cheese frosting are the ultimate crowd-pleaser. Whether you’re hosting a party or baking for your family, these treats are sure to impress.
I love how customizable they are, and honestly, decorating them is half the fun. So grab your apron, whip up a batch, and let your creativity shine!
If you try this recipe, let me know how it went in the comments. Don’t forget to share your photos—I can’t wait to see your creations!
FAQs
Can I make the cookie cups ahead of time?
Yes! You can bake the cookie cups a day or two in advance and store them in an airtight container. Frost them just before serving for the freshest taste.
What can I use instead of cream cheese frosting?
Try whipped cream, chocolate ganache, or even a simple glaze if you’re looking for alternatives.
Why did my cookie cups stick to the pan?
Make sure to grease your muffin tin properly, or use non-stick baking spray. Silicone muffin molds can also help prevent sticking.
Can I add sprinkles to the dough?
Absolutely! Fold sprinkles into the dough for a fun confetti effect.
How long do these cookie cups stay fresh?
Stored in the fridge, they stay fresh for up to 3 days. If frozen, they can last up to 2 months.