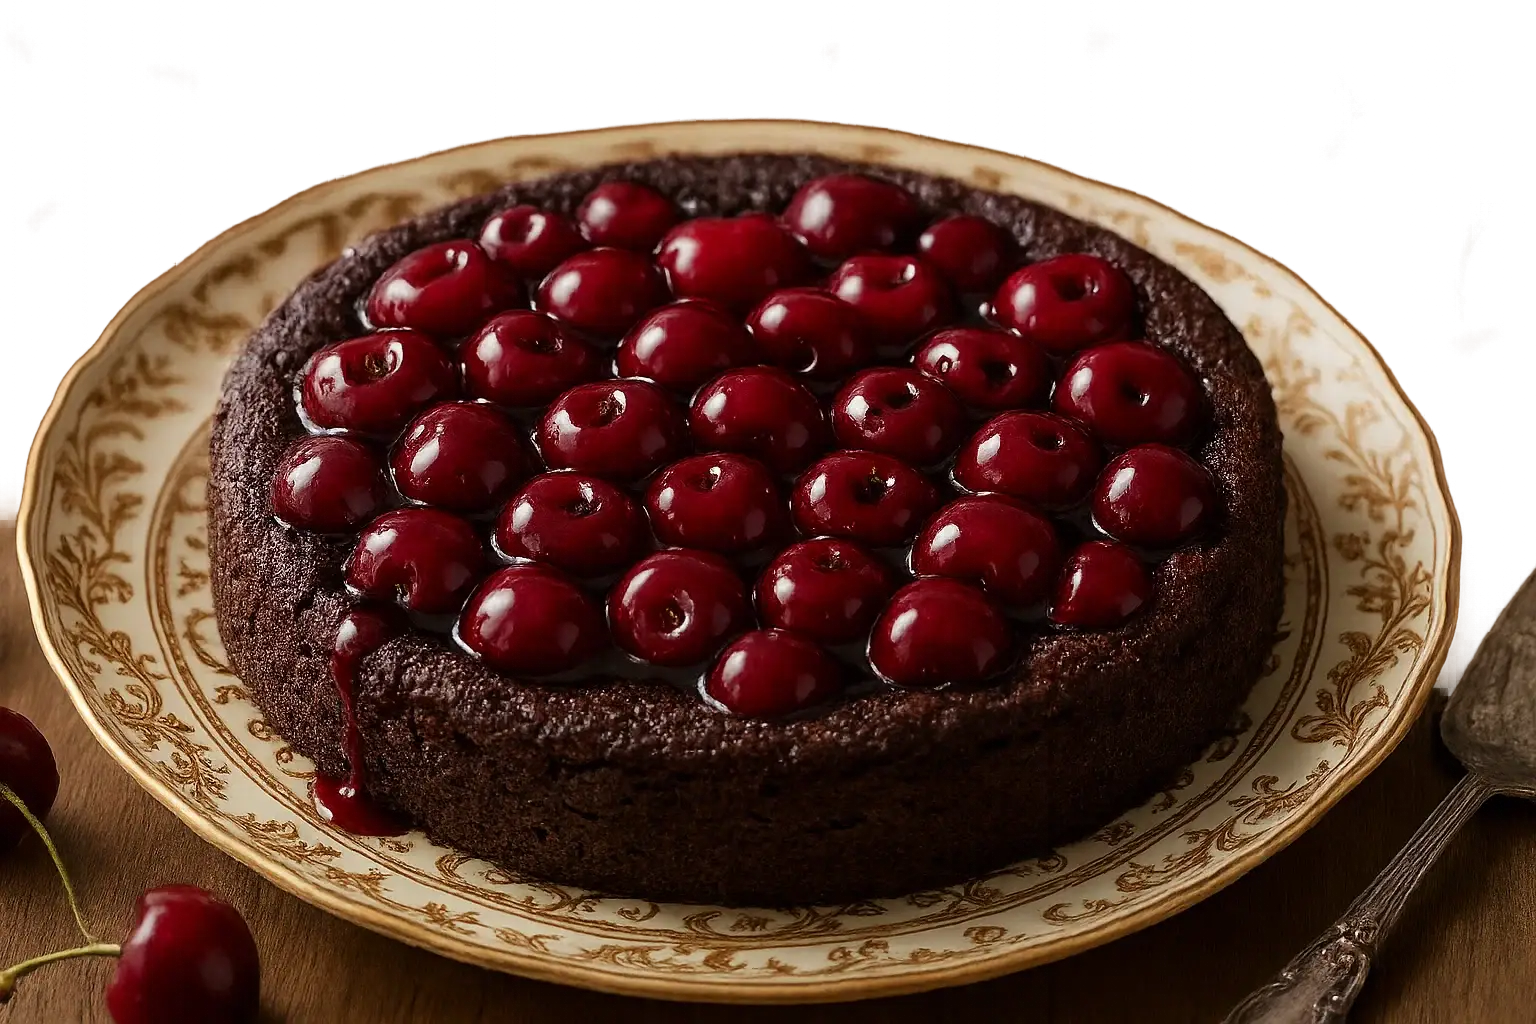
There’s something magical about the combination of rich chocolate and sweet, tangy cherries, isn’t there? This decadent chocolate cherry upside down cake is a showstopper dessert that’s perfect for holidays or any special occasion. Imagine slicing into a moist, fudgy chocolate cake topped with caramelized cherries glistening like jewels—irresistible, right? Whether you’re planning a festive gathering or just treating yourself, this recipe is bound to impress your taste buds and your guests.
Growing up, I always loved cherry desserts, but this cake takes it to the next level. Inspired by the classic pineapple upside-down cake, this chocolate cherry version is a modern twist that’s equally nostalgic. Plus, it’s surprisingly easy to make! So, grab your apron and let me walk you through this indulgent treat.
The Story Behind Chocolate Cherry Upside Down Cake
This cake has roots in the beloved tradition of upside-down cakes, which have been around since the early 1900s. Back then, they were made in cast iron skillets and featured fruits like apples and pineapples. But cherries? They add an elegant, ruby-red touch that feels festive and luxurious.
My love for this recipe started during a holiday baking marathon. I had leftover cherries from a pie and thought, “Why not try an upside-down cake with chocolate?” The result was unforgettable. The contrast of rich cocoa with the tart cherries felt like a match made in dessert heaven. Plus, the caramelized cherry topping creates a stunning visual effect—like edible art!
This cake is especially wonderful during the winter holidays when cherries remind us of summer’s sweetness. However, it’s easily adaptable for year-round enjoyment. Whether you’re making it for Christmas, Valentine’s Day, or a summer barbecue, this recipe will always be a star on the dessert table.
Ingredients: What Makes This Cake Shine
Let’s talk ingredients! Each element plays a crucial role in creating this decadent masterpiece. Here’s what you’ll need:
- Fresh or Frozen Cherries: Fresh cherries are ideal when in season, but frozen cherries work beautifully too. If using frozen, thaw them and drain excess liquid. Look for bright, plump cherries for maximum flavor.
- Brown Sugar: This caramelizes beautifully with the cherries, creating a rich and buttery topping. Light brown sugar works best, but dark brown sugar adds a deeper molasses flavor.
- Unsalted Butter: Butter is the foundation of both the topping and the cake. Make sure it’s softened for the batter and melted for the topping.
- Cocoa Powder: Use high-quality unsweetened cocoa powder for that deep, chocolatey flavor. Dutch-processed cocoa will give you a darker, richer color.
- All-Purpose Flour: The backbone of the cake. You can substitute with gluten-free flour if needed.
- Eggs: Eggs provide structure and richness. Make sure they’re at room temperature for better mixing.
- Milk: Whole milk works best, but you can use almond or oat milk for a dairy-free version.
- Vanilla Extract: A little vanilla enhances the overall flavor of the cake.
- Baking Powder & Baking Soda: These ensure the cake rises beautifully and stays fluffy.
- Salt: A pinch of salt balances the sweetness and enhances the chocolate flavor.
If you’re feeling fancy, you can add a splash of almond extract to complement the cherries—a little goes a long way!
Equipment Needed
You don’t need a professional kitchen to whip up this cake. Here’s what you’ll need:
- 9-inch Round Cake Pan: This size is perfect for upside-down cakes. If you don’t have one, a cast iron skillet works too.
- Mixing Bowls: At least two—one for the topping and one for the batter.
- Hand Mixer or Stand Mixer: While you can mix by hand, a mixer speeds things up and ensures a smooth batter.
- Spatula: For spreading the batter evenly and scraping every last bit from the bowl.
- Cooling Rack: Essential for cooling the cake properly without a soggy bottom.
If you’re using a cast iron skillet, make sure it’s well-seasoned to prevent sticking. Also, keep parchment paper handy for easy cleanup!
Preparation Method
- Preheat the oven: Set your oven to 350°F (175°C). Grease your cake pan or skillet thoroughly with butter.
- Prepare the cherry topping: Melt 4 tablespoons (60g) of butter and mix it with 3/4 cup (150g) of brown sugar. Spread this mixture evenly in the bottom of your pan. Arrange cherries on top in a single layer—try to cover the entire base for a stunning look.
- Make the batter: In a mixing bowl, cream 1/2 cup (115g) of softened butter with 1 cup (200g) of granulated sugar until light and fluffy. Add 2 eggs, one at a time, beating well after each addition.
- Add dry ingredients: Sift together 1 cup (125g) of all-purpose flour, 1/2 cup (50g) of cocoa powder, 1 teaspoon of baking powder, 1/2 teaspoon of baking soda, and a pinch of salt. Gradually add this mixture to the wet ingredients, alternating with 1/2 cup (120ml) of milk.
- Mix in vanilla: Stir in 1 teaspoon of vanilla extract for added flavor.
- Combine batter and topping: Pour the batter over the cherries in the pan. Smooth the top with a spatula.
- Bake: Place the pan in the oven and bake for 40-45 minutes, or until a toothpick inserted into the center comes out clean.
- Cool and flip: Allow the cake to cool for 10 minutes. Run a knife around the edges, then carefully invert onto a serving plate. Ta-da—your gorgeous upside-down cake is ready!
Pro tip: If the cherries stick to the pan, just scoop them out and gently press them back onto the cake. No one will know!
Cooking Tips & Techniques
Want to bake this cake like a pro? Here are some tips:
- Don’t overmix the batter—it can make the cake dense. Mix just until combined.
- Use room-temperature ingredients for a smoother batter and better rise.
- If your cake pan leaks, place it on a baking sheet to catch any drips.
- For extra cherry flavor, toss the cherries in a bit of kirsch (cherry brandy) before layering them.
- Let the cake cool slightly before flipping—it helps the topping set.
Trust me, these little tricks make a big difference!
Variations & Adaptations
This recipe is wonderfully versatile! Here are some ideas:
- Gluten-Free: Substitute the all-purpose flour with a gluten-free baking blend.
- Dairy-Free: Use plant-based butter and milk alternatives like almond or soy milk.
- Holiday Twist: Add a sprinkle of cinnamon or nutmeg to the batter for a warm, festive flavor.
- Berry Swap: Try raspberries or blackberries instead of cherries for a different fruit profile.
- Personal Spin: I once added chocolate chips to the batter—it was a hit!
Serving & Storage Suggestions
This cake is best served warm, with a scoop of vanilla ice cream or a dollop of whipped cream. For extra flair, drizzle with chocolate sauce or dust with powdered sugar.
Leftovers? Store the cake in an airtight container at room temperature for up to 2 days, or refrigerate for up to 5 days. To freeze, wrap slices individually in plastic wrap and store them in a freezer-safe bag for up to 3 months. Reheat in the microwave or oven for that fresh-baked taste.
Fun fact: The flavors deepen with time, making the cake even better the next day!
Nutritional Information & Benefits
Here’s a rough estimate per serving (1 slice, based on 12 slices):
- Calories: 280
- Fat: 12g
- Carbohydrates: 40g
- Protein: 4g
Cherries are rich in antioxidants and vitamin C, while cocoa powder provides flavonoids that are great for heart health. While this cake isn’t exactly a health food, it’s a delicious way to enjoy real, wholesome ingredients!
Conclusion
If you’re searching for a dessert that’s both visually stunning and irresistibly delicious, this decadent chocolate cherry upside down cake is the one. It’s easy to make, customizable, and perfect for impressing holiday guests—or simply treating yourself!
I’d love to hear how you make this recipe your own. Leave me a comment below to share your spin on the cake, and don’t forget to tag me on social media with your creations. Happy baking!
So what are you waiting for? Grab those cherries and your favorite cocoa powder, and let’s get baking!
FAQs
Can I use canned cherries for this recipe?
Yes, but make sure to drain them thoroughly to avoid excess liquid. Fresh or frozen cherries are ideal for better flavor.
What’s the best way to flip the cake?
Place a serving plate over the pan, hold both firmly, and flip in one quick motion. Be careful—it’s hot!
Can I make this cake ahead of time?
Absolutely! The flavors deepen overnight, making it even tastier the next day.
What can I serve with this cake?
Vanilla ice cream, whipped cream, or even a dollop of Greek yogurt work beautifully.
How do I prevent the cake from sticking?
Grease the pan generously with butter, and don’t skip the cooling step before flipping.