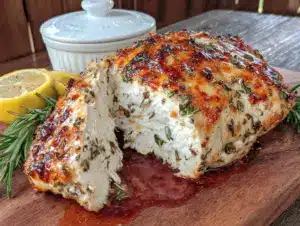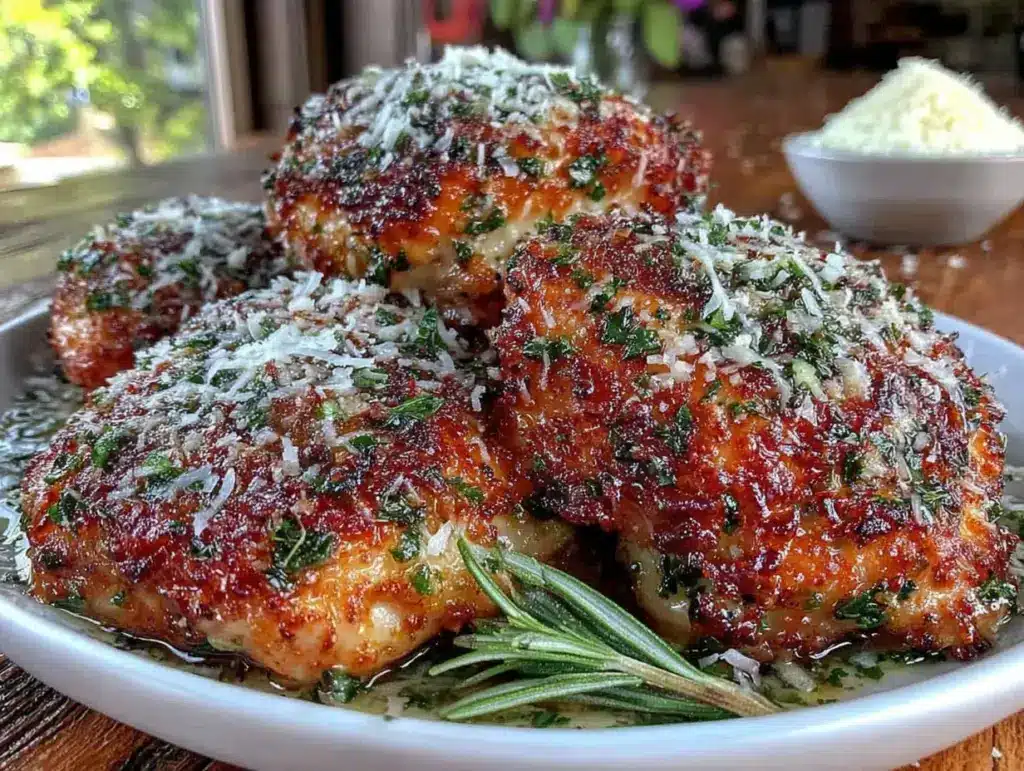
Right, I need a dinner that actually delivers tonight. Not one of those recipes that promises the world and leaves you with a soggy pan and a sink full of dishes. I have chicken thighs in the fridge, a block of Parmesan that’s been staring at me, and exactly thirty minutes before the hangry monster in my house emerges. The craving is specific: something crunchy, deeply savory, with that golden crust that shatters when you bite into it. And I want it fast. No marinating, no complicated sauces, just pure, unapologetic crispy chicken. That’s the only thought I have time for as I preheat the oven and start grating that cheese. Honestly, this is the kind of cooking I love most—no fuss, just flavor, and a promise of a quiet, happy table.
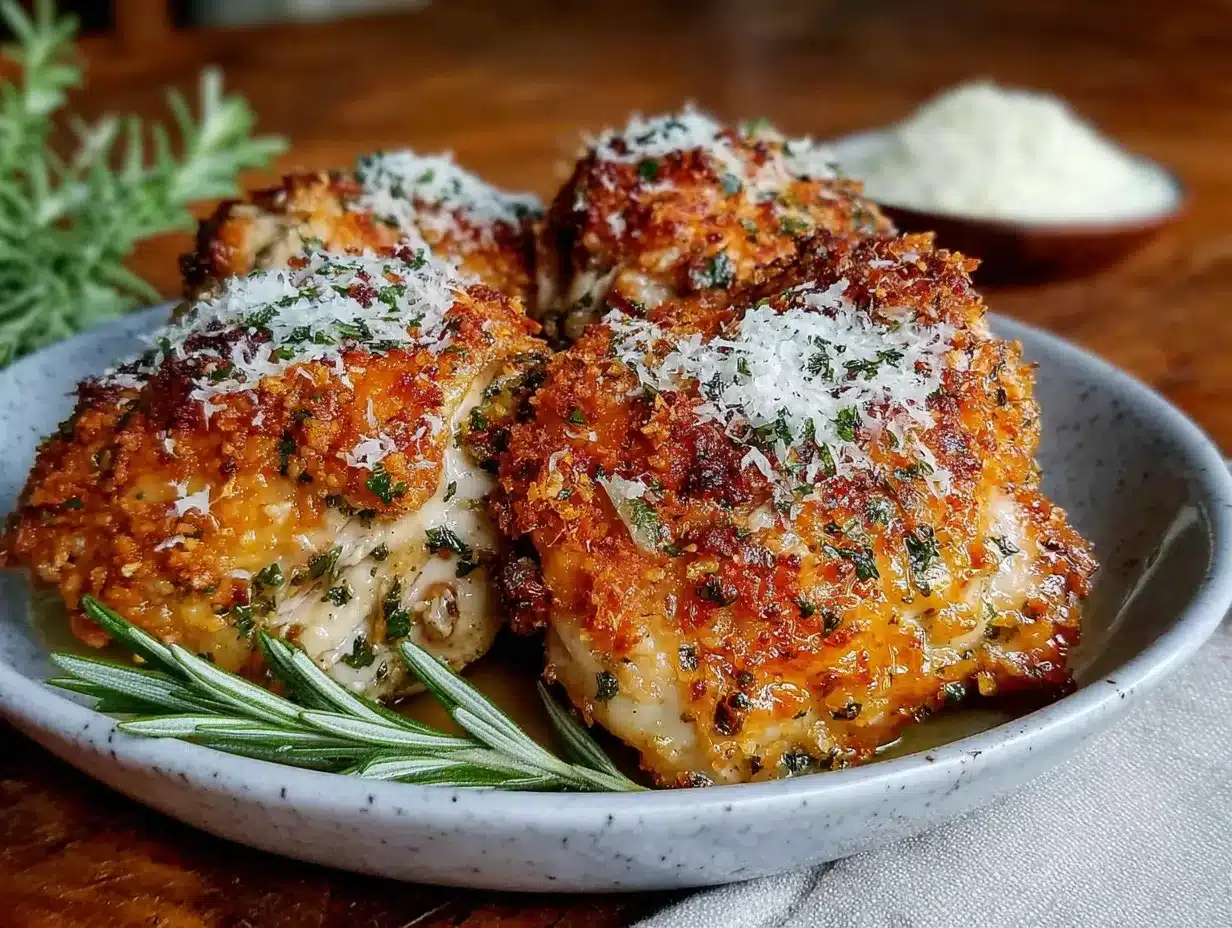
These Crispy Garlic Parmesan Chicken Thighs are the answer to that exact craving. They’re weeknight gold. The chicken comes out with a crunchy, cheesy, garlicky crust that’s baked, not fried, so you get all the satisfaction without the mess. The meat stays juicy and tender underneath, and the whole thing takes about 30 minutes from start to finish. It’s one of those recipes that feels like a cheat code for dinner—impressive enough for guests, but simple enough for a Tuesday when you just can’t even. Let me show you how it’s done.
Why You’ll Love This Recipe
I’ve tested this recipe about six times now (tough job, I know) to get that perfect balance of crunch and flavor. Here’s why it works so well, and why I think you’ll make it on repeat.
- Quick & Easy: From fridge to table in 30 minutes flat. No marinating, no complicated steps, just simple prep and oven time. Perfect for those nights when you need dinner on the table yesterday.
- Simple Ingredients: You probably have most of these in your kitchen right now. Chicken thighs, Parmesan, garlic, breadcrumbs, and a few pantry staples. No special trips to the store required.
- Perfect for Busy Weeknights: This is the kind of dinner that saves your sanity on a Wednesday. It’s fast, it’s filling, and it makes everyone happy without a lot of effort on your part.
- Crowd-Pleaser: I’ve served these to picky kids, skeptical in-laws, and hungry friends, and they disappear every single time. The crispy coating is universally loved, and the garlic Parmesan flavor is just irresistible.
- Unbelievably Delicious: The texture is what gets me every time. That crunchy, cheesy crust gives way to tender, juicy chicken, and the garlic flavor is perfectly balanced. It’s comfort food that feels a little bit fancy, but it’s actually super simple.
What makes this recipe different from all the other crispy chicken recipes out there? It’s the technique. Instead of just coating the chicken and baking it, I use a two-step method that ensures the coating stays crunchy and doesn’t get soggy. The Parmesan gets mixed right into the breadcrumb coating, so every bite has that salty, nutty flavor. And the garlic? We’re not messing around with garlic powder here. Fresh minced garlic gets mixed into the coating for a punch of flavor that’s unmistakable. This isn’t just another version of crispy chicken—it’s the best version I’ve ever made.
This recipe is the kind that makes you close your eyes after the first bite. It’s that good. It’s comfort food reimagined—faster, easier, but with the same soul-soothing satisfaction. Perfect for impressing guests without stress, or turning a simple Tuesday into something memorable.
What Ingredients You Will Need
This recipe uses simple, wholesome ingredients to deliver bold flavor and satisfying texture without the fuss. Most of these are pantry staples, so you can probably make this tonight without a trip to the store.
For the Chicken Coating
- 4 boneless, skinless chicken thighs (about 1.5 lbs) – You can also use bone-in thighs, just adjust the cooking time. I prefer boneless for faster cooking and easier eating.
- 1/2 cup panko breadcrumbs – Panko gives the best crunch. Regular breadcrumbs work too, but the texture won’t be as crispy. I recommend Kikkoman or Ian’s brand for best results.
- 1/2 cup freshly grated Parmesan cheese – Please, please grate it yourself. The pre-shredded stuff has anti-caking agents that prevent it from melting properly and sticking to the chicken. A microplane or box grater works great.
- 3 cloves garlic, minced – Fresh garlic is non-negotiable here. Garlic powder won’t give you the same punch of flavor. Use a garlic press or mince it finely.
- 1/2 teaspoon salt – I use fine sea salt. Kosher salt works too, but you might need a bit more.
- 1/4 teaspoon black pepper – Freshly ground is always better.
- 1/2 teaspoon paprika – Adds a subtle smoky flavor and helps with browning. Smoked paprika is amazing here if you have it.
- 1/4 teaspoon garlic powder – Just a little extra garlic boost. Don’t skip it, it works with the fresh garlic beautifully.
- 2 tablespoons olive oil – Helps the coating get golden and crispy. You can also use melted butter for a richer flavor.
For the Topping
- 2 tablespoons melted butter – Drizzled over the chicken before baking for extra richness and golden color.
- 2 tablespoons fresh parsley, chopped – For garnish and a pop of freshness. Optional but highly recommended.
- Extra grated Parmesan for serving – Because you can never have too much cheese.
Ingredient Tips: Look for chicken thighs that are similar in size so they cook evenly. If your thighs are very thick, you can pound them to an even thickness with a rolling pin or meat mallet. For the Parmesan, I recommend buying a block of real Parmigiano-Reggiano if you can—the flavor is incomparable. But a good domestic Parmesan works well too. Just make sure it’s freshly grated.
Substitution Guidance: If you’re gluten-free, use gluten-free panko breadcrumbs—they work perfectly. You can also swap the Parmesan for Pecorino Romano for a saltier, more pungent flavor. For a dairy-free version, use nutritional yeast instead of Parmesan and a dairy-free butter alternative. The texture will be slightly different, but still delicious.
Equipment Needed
You don’t need a lot of fancy equipment for this recipe, which is part of why I love it. Here’s what you’ll need:
- Baking sheet – A rimmed baking sheet works best. Line it with parchment paper or aluminum foil for easy cleanup. I use a Nordic Ware sheet pan and it’s been going strong for years.
- Wire rack – This is the secret to crispy chicken. Placing the chicken on a wire rack set inside the baking sheet allows air to circulate all around the chicken, so the bottom stays crispy too. If you don’t have one, you can still make this, but you’ll need to flip the chicken halfway through.
- Mixing bowls – One medium bowl for the coating mixture, and one small bowl for the melted butter.
- Microplane or box grater – For grating the Parmesan cheese. A microplane gives you that fine, fluffy texture that sticks to the chicken beautifully.
- Garlic press or knife – For mincing the garlic. I use a garlic press because it’s faster and I don’t have to worry about garlic bits being too big.
- Tongs – For handling the chicken without getting your hands messy. Silicone-tipped tongs are great because they won’t scratch your baking sheet.
- Meat thermometer – Optional but highly recommended for perfectly cooked chicken. Chicken thighs are done at 165°F, but I pull them at 160°F and let them rest—they’ll come up to temperature while resting.
Budget-Friendly Options: If you don’t have a wire rack, you can use a cooling rack that’s oven-safe, or just place the chicken directly on the parchment-lined baking sheet. Just be sure to flip the chicken halfway through cooking so both sides get crispy. A $5 cooling rack from the grocery store works perfectly for this.
Preparation Method
Let’s get cooking. This is straightforward, but I’ll walk you through every step so you get perfect results every time.
- Preheat your oven to 400°F (200°C). Place a wire rack on a rimmed baking sheet and spray it lightly with cooking spray or brush with a little oil. This prevents the chicken from sticking and helps the bottom get crispy.
- Pat the chicken thighs dry with paper towels. This is a crucial step. Excess moisture will steam the coating instead of letting it get crispy. Really take your time here—press firmly and use a few paper towels if needed. Season both sides of the chicken with a pinch of salt and pepper.
- In a medium bowl, combine the panko breadcrumbs, grated Parmesan, minced garlic, salt, pepper, paprika, and garlic powder. Mix well with a fork to distribute everything evenly. The mixture should look like coarse, golden crumbs with little flecks of garlic throughout. Take a moment to smell it—that garlic and Parmesan combo is intoxicating.
- Drizzle the olive oil over the breadcrumb mixture and toss with a fork until the crumbs are evenly moistened. The oil helps the coating get golden and crispy in the oven. You want the crumbs to look slightly damp and clump together a bit when pressed. If they look dry, add another teaspoon of oil.
- Working with one chicken thigh at a time, press the chicken into the breadcrumb mixture, coating both sides evenly. Use your hands to really press the coating on—don’t just sprinkle it on. You want a nice, thick layer that will form that beautiful crust. Shake off any excess and place the chicken on the prepared wire rack.
- Drizzle the melted butter over the tops of the chicken thighs. This step is optional but highly recommended. The butter adds richness and helps the coating brown beautifully. Use a spoon or a small brush to distribute it evenly.
- Bake for 20-25 minutes, until the chicken is golden brown and crispy on the outside, and cooked through. The coating should be deep golden brown and feel firm to the touch. If you’re using a meat thermometer, the internal temperature should reach 165°F (74°C). I usually check at 20 minutes and add more time if needed.
- Remove from the oven and let the chicken rest on the wire rack for 5 minutes. This is important! The coating needs a few minutes to set, and the juices need to redistribute. If you cut into it immediately, you’ll lose all those delicious juices and the coating might fall off.
- Garnish with fresh parsley and extra grated Parmesan before serving. The parsley adds a fresh, bright note that cuts through the richness of the cheese and butter. Serve immediately while the coating is still super crispy.
Pro Tip: If you want extra crispy chicken, you can broil it for the last 1-2 minutes of cooking. Just keep a close eye on it so it doesn’t burn. The Parmesan can go from golden to black very quickly under the broiler.
Sensory Cues: When the chicken is done, the coating should be deep golden brown and sound crunchy when you tap it with a fork. The kitchen should smell like garlic, cheese, and toasted breadcrumbs—basically heaven. If you see any dark spots on the coating, that’s just the Parmesan getting nicely browned, and it’s delicious.
Cooking Tips & Techniques
I’ve made this recipe more times than I can count, and I’ve learned a few things along the way. Here are my best tips for perfect crispy chicken every time.
The Dry Chicken Rule: This is the most important tip I can give you. Wet chicken = soggy coating. I cannot stress this enough. Pat those chicken thighs bone-dry with paper towels before you even think about adding the coating. Let them sit on a paper towel-lined plate for a few minutes if you have time—the extra drying time makes a real difference.
Don’t Skip the Wire Rack: I know it’s one more thing to wash, but the wire rack is the secret to crispy chicken. When you place the chicken directly on the baking sheet, the bottom steams and gets soggy. The wire rack allows hot air to circulate all around the chicken, so every single bite is crunchy. If you don’t have one, flip the chicken halfway through cooking and bake it on a preheated baking sheet.
Fresh Garlic is Key: I tried this recipe with garlic powder once (because I was out of fresh garlic and thought I could get away with it), and it was a disaster. The flavor was flat and one-dimensional. Fresh garlic gives that sharp, pungent kick that makes this recipe so addictive. Don’t substitute it. If you’re worried about garlic bits burning, mince it very finely or use a garlic press.
The Parmesan Problem: Pre-shredded Parmesan is the enemy of crispy chicken. It has anti-caking agents that prevent it from melting and sticking properly. Grate your own Parmesan from a block—it takes two minutes and the difference is huge. The freshly grated cheese melts into the breadcrumbs and creates that incredible, crispy crust.
Timing is Everything: This recipe comes together fast, so I like to have everything prepped before I start. Measure out your ingredients, grate the cheese, mince the garlic, and line your baking sheet. Once you start coating the chicken, you want to work quickly and get it in the oven as soon as possible.
My Biggest Failure: The first time I made this, I used way too much coating and ended up with a thick, doughy crust that wasn’t cooked through. Less is more here. You want a thin, even layer that crisps up beautifully. Press the coating on firmly, but shake off any excess.
Variations & Adaptations
One of the best things about this recipe is how versatile it is. Here are some of my favorite variations.
Spicy Garlic Parmesan Chicken: Add 1/2 teaspoon of cayenne pepper or red pepper flakes to the breadcrumb mixture. The heat cuts through the richness of the cheese and butter beautifully. I make this version when I’m craving something with a little kick, and it’s always a hit.
Lemon Herb Version: Add the zest of one lemon and 1 tablespoon of fresh thyme or rosemary to the breadcrumb mixture. The lemon brightens up the dish and pairs perfectly with the garlic. This is my go-to version in the spring and summer, especially when served with a light salad.
Air Fryer Adaptation: This recipe works beautifully in the air fryer. Preheat the air fryer to 375°F (190°C). Cook the chicken in a single layer (you may need to work in batches) for 12-15 minutes, flipping halfway through. The coating gets even crispier in the air fryer, and it’s perfect for smaller batches. I love this method when I’m cooking for just one or two people.
Gluten-Free Option: Use gluten-free panko breadcrumbs instead of regular panko. Everything else in the recipe is naturally gluten-free. I’ve tested this with several brands, and Ian’s gluten-free panko works best. The texture is almost identical to regular panko.
Dairy-Free Adaptation: For a dairy-free version, use nutritional yeast instead of Parmesan (about 1/4 cup) and a dairy-free butter alternative. The flavor will be different—more savory and nutty—but still delicious. I’ve made this for friends with dairy allergies, and they always ask for the recipe.
Personal Variation: My favorite way to make this is with a tablespoon of Dijon mustard mixed into the melted butter before drizzling it over the chicken. The mustard adds a tangy depth that complements the garlic and Parmesan beautifully. It’s a small change that makes a big difference.
Serving & Storage Suggestions
These crispy chicken thighs are best served immediately, but here’s how to make the most of them.
Serving Temperature: Serve the chicken hot out of the oven while the coating is still super crispy. Let it rest for 5 minutes after baking, then serve immediately. If you let it sit too long, the coating will start to soften from the steam.
What to Serve With It: These chicken thighs are incredibly versatile. I love serving them with a simple side salad dressed with lemon vinaigrette—the acidity cuts through the richness of the chicken. For a heartier meal, try them with roasted vegetables like asparagus or broccoli, or a side of creamy mashed potatoes. They’re also delicious sliced and served over a Caesar salad or tucked into a sandwich with some arugula and tomato.
Complementary Dishes: If you’re looking for a complete meal, this chicken pairs beautifully with creamy mashed potatoes for a comfort food feast. Or, for a lighter option, serve it alongside a fresh Mediterranean chickpea salad for a colorful, satisfying dinner. And if you’re in the mood for soup, a bowl of creamy chicken tortellini soup makes a perfect starter.
Storage Instructions: Store leftover chicken in an airtight container in the refrigerator for up to 3 days. The coating will soften as it sits, but it’s still delicious. I don’t recommend freezing this recipe, as the coating becomes soggy when thawed.
Reheating Methods: The best way to reheat this chicken is in the oven or air fryer. Preheat your oven to 350°F (175°C) and place the chicken on a wire rack set over a baking sheet. Bake for 5-7 minutes until heated through and crispy. In the air fryer, reheat at 350°F for 3-4 minutes. The microwave will make the coating soggy, so avoid it if you can.
How Flavors Develop: The garlic flavor actually mellows and becomes sweeter as the chicken sits. Some people prefer the leftovers because the flavors have had time to meld together. The coating won’t be as crispy, but the flavor is even better the next day.
Nutritional Information & Benefits
Here’s the nutritional breakdown for one serving (one chicken thigh) based on the recipe as written. Please note that these are estimates and will vary based on specific ingredients and portion sizes.
| Nutrient | Amount per Serving |
|---|---|
| Calories | 385 |
| Total Fat | 24g |
| Saturated Fat | 9g |
| Cholesterol | 165mg |
| Sodium | 580mg |
| Total Carbohydrates | 8g |
| Dietary Fiber | 1g |
| Sugars | 1g |
| Protein | 35g |
Health Benefits: Chicken thighs are a great source of protein, which is essential for muscle repair and growth. They also contain B vitamins, particularly B6 and B12, which support energy metabolism and brain function. The garlic in this recipe is known for its anti-inflammatory and immune-boosting properties. And while Parmesan is high in sodium, it’s also a good source of calcium and protein.
Dietary Considerations: This recipe is naturally low-carb and keto-friendly, with only 8g of carbohydrates per serving. For a gluten-free version, use gluten-free panko. For a lower-fat option, you can skip the melted butter drizzle and use cooking spray instead—the chicken will still be crispy, just not quite as rich.
Potential Allergens: This recipe contains dairy (Parmesan, butter) and gluten (panko breadcrumbs). For dairy-free and gluten-free adaptations, see the Variations section above.
My Wellness Perspective: I believe in balance. This recipe is indulgent enough to feel like a treat, but it’s made with real, whole ingredients and baked instead of fried. It’s the kind of meal that nourishes your body and your soul, and that’s exactly what I want from my dinner.
Frequently Asked Questions
Can I use chicken breasts instead of thighs?
Absolutely! Chicken breasts work great in this recipe. Just keep in mind that breasts are leaner and can dry out more easily. Pound them to an even thickness (about 1/2 inch) and reduce the cooking time to 15-18 minutes. Check the internal temperature—165°F is your target.
Why is my coating not crispy?
The most common reason is excess moisture. Make sure you pat the chicken very dry before coating it. Also, don’t overcrowd the baking sheet—the chicken needs space for air to circulate. Using a wire rack instead of placing the chicken directly on the baking sheet makes a huge difference. And finally, make sure your oven is fully preheated before you put the chicken in.
Can I make this recipe ahead of time?
This recipe is best made fresh, but you can prep the coating mixture up to 3 days ahead and store it in an airtight container in the refrigerator. You can also coat the chicken up to 4 hours ahead and keep it in the refrigerator on the wire rack, uncovered. Just add a few minutes to the baking time if the chicken is cold from the fridge.
How do I prevent the garlic from burning?
Fresh garlic can burn if it’s minced too coarsely or if the oven temperature is too high. Mince the garlic very finely or use a garlic press. Also, make sure it’s well incorporated into the breadcrumb mixture so it’s not sitting directly on the chicken. If you’re worried, you can use garlic powder instead, but the flavor won’t be as vibrant.
Can I double this recipe?
Yes! This recipe doubles beautifully. Just make sure you use a large enough baking sheet or work in batches—you don’t want the chicken to be crowded. If you’re making a big batch, you might need to add a few minutes to the cooking time. Use a meat thermometer to check for doneness.
Conclusion
These Crispy Garlic Parmesan Chicken Thighs are everything I want in a weeknight dinner—fast, delicious, and guaranteed to make everyone at the table happy. The crunchy, cheesy coating gives way to tender, juicy chicken, and the garlic flavor is perfectly balanced. It’s comfort food that comes together in 30 minutes, and that’s a win in my book.
I hope you give this recipe a try and make it your own. Maybe you’ll add a little extra garlic like I do, or throw in some red pepper flakes for heat. That’s the beauty of a simple recipe—it’s a starting point for your own creativity. Let me know how it turns out in the comments below! I’d love to hear about your variations and how this recipe works for your family.
Happy cooking, and remember—the best meals are the ones shared with the people you love.
Pin This Recipe!
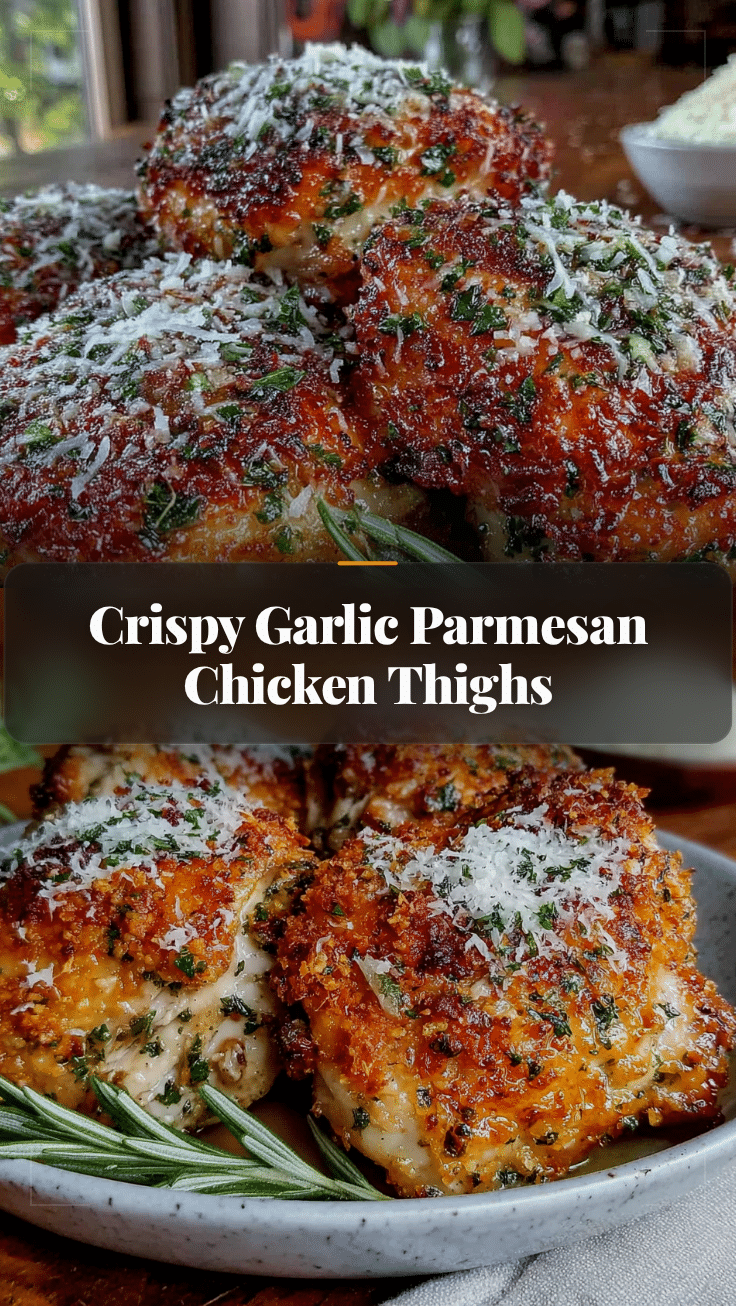

Crispy Garlic Parmesan Chicken Thighs – Easy 30-Minute Dinner
- Total Time: 30 minutes
- Yield: 4 servings 1x
Description
These Crispy Garlic Parmesan Chicken Thighs are weeknight gold—crunchy, cheesy, and garlicky with a baked crust that’s ready in 30 minutes. Juicy, tender, and perfect for busy nights.
Ingredients
- 4 boneless, skinless chicken thighs (about 1.5 lbs)
- 1/2 cup panko breadcrumbs
- 1/2 cup freshly grated Parmesan cheese
- 3 cloves garlic, minced
- 1/2 teaspoon salt
- 1/4 teaspoon black pepper
- 1/2 teaspoon paprika
- 1/4 teaspoon garlic powder
- 2 tablespoons olive oil
- 2 tablespoons melted butter
- 2 tablespoons fresh parsley, chopped
- Extra grated Parmesan for serving
Instructions
- Preheat your oven to 400°F (200°C). Place a wire rack on a rimmed baking sheet and spray it lightly with cooking spray or brush with a little oil.
- Pat the chicken thighs dry with paper towels. Season both sides with a pinch of salt and pepper.
- In a medium bowl, combine the panko breadcrumbs, grated Parmesan, minced garlic, salt, pepper, paprika, and garlic powder. Mix well.
- Drizzle the olive oil over the breadcrumb mixture and toss with a fork until the crumbs are evenly moistened.
- Working with one chicken thigh at a time, press the chicken into the breadcrumb mixture, coating both sides evenly. Shake off any excess and place on the prepared wire rack.
- Drizzle the melted butter over the tops of the chicken thighs.
- Bake for 20-25 minutes, until the chicken is golden brown and crispy on the outside, and cooked through (internal temperature of 165°F).
- Remove from the oven and let the chicken rest on the wire rack for 5 minutes.
- Garnish with fresh parsley and extra grated Parmesan before serving.
Notes
Pat chicken very dry for crispiest coating. Use a wire rack to allow air circulation. Fresh garlic is key—do not substitute with garlic powder. Grate Parmesan from a block for best results. For extra crispiness, broil for the last 1-2 minutes.
- Prep Time: 10 minutes
- Cook Time: 20 minutes
- Category: Main Course
- Cuisine: American
Nutrition
- Serving Size: 1 chicken thigh
- Calories: 385
- Sugar: 1
- Sodium: 580
- Fat: 24
- Saturated Fat: 9
- Carbohydrates: 8
- Fiber: 1
- Protein: 35
Keywords: crispy chicken thighs, garlic parmesan chicken, easy weeknight dinner, baked chicken, 30-minute meal