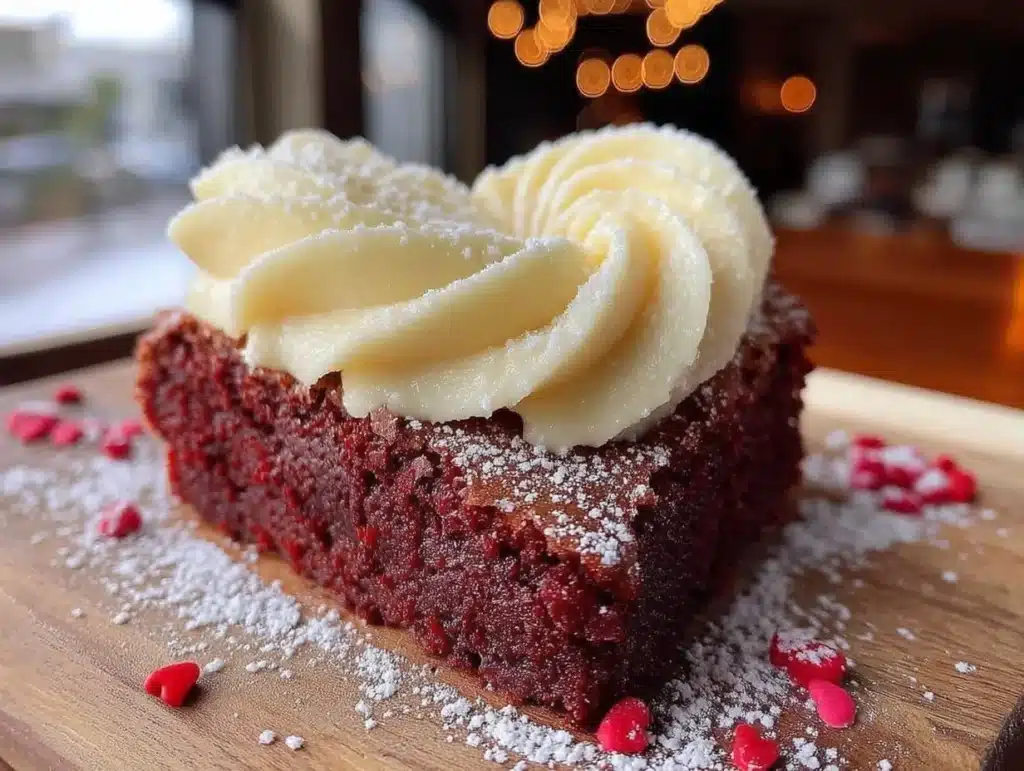
It was 10:47 PM on a rainy Tuesday in February, and I had a very specific craving for something chocolatey, something red, and something that would make my kids lose their minds the next morning. I didn’t have a boxed red velvet mix (the shame), but I had cocoa powder, a bottle of red food coloring that had been hiding in the back of the pantry since last Easter, and this wild idea that heart-shaped brownies could fix everything wrong with a regular weeknight. Let me tell you, I was standing there in my pajamas, flour on my cheek, and the dog staring at me like I’d finally lost it.
The thing is, I’d been promising my daughter we’d make something special for her class Valentine’s party, but between work and homework and the general chaos of life, I’d completely forgotten. So there I was, whisking melted butter and sugar together at nearly midnight, hoping the neighbors couldn’t see into my brightly lit kitchen. I used a heart-shaped silicone mold I’d bought on a whim at the dollar store two years ago, and honestly, I had zero expectations. I just needed these brownies to turn out edible and red.
They came out perfect. Like, dangerously perfect. The next morning, my kids ate them for breakfast (don’t judge, it was a special occasion), and my daughter declared them “the best thing I’ve ever made, ever.” Maybe you’ve been there — that moment when a last-minute kitchen experiment turns into a new family favorite. These heart-shaped red velvet brownies have that effect on people. They’re fudgy, they’re festive, and they make you look like you planned ahead, even when you absolutely did not.
Why You’ll Love This Recipe
These aren’t just any brownies. They’re the kind of brownies that make people ask for the recipe before they’ve even finished the first bite. Here’s what makes them special:
- Kid-Approved Magic : My own kids have tested these at three separate school events, and they’ve come back with empty containers every single time. Even the pickiest eaters at the party couldn’t resist the red velvet charm.
- Simple Ingredients : No fancy grocery store runs needed. You probably have most of this stuff in your kitchen right now — flour, sugar, cocoa powder, butter, eggs. The only “special” thing is red food coloring, and you can find that anywhere.
- Perfect for Valentine’s Day : Whether it’s for a classroom party, a romantic treat, or just a random Tuesday that needs some color, these heart-shaped beauties deliver the festive vibes without the stress.
- Quick & Easy : From start to finish, you’re looking at about 35 minutes. That’s less time than it takes to argue with kids about homework.
- Crowd-Pleaser : Adults love the classic red velvet flavor, and kids adore the fun shape and vibrant color. It’s a win-win situation for everyone at the table.
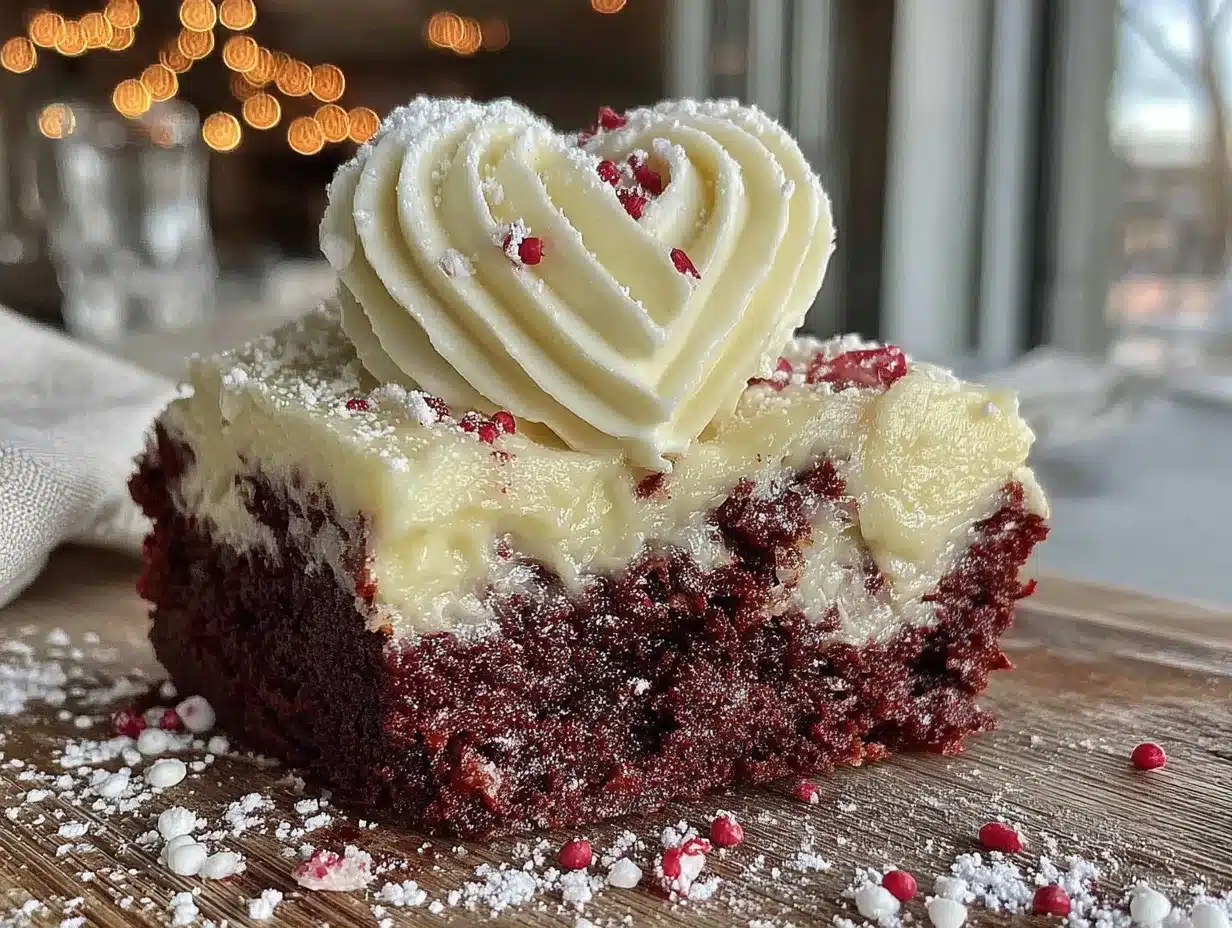
What makes this recipe different from all the other red velvet brownies out there? It’s the texture. I spent three batches getting it just right — the first one was too cakey, the second was a greasy mess, and the third? Pure gold. These brownies have that perfect fudgy center with a slightly crackly top, just like a good brownie should. The cream cheese swirl on top adds this tangy richness that cuts through the sweetness, making every bite feel balanced and intentional.
Honestly, this is the kind of recipe that makes you close your eyes after the first bite. It’s comfort food with a festive twist — faster than a full cake, more impressive than regular brownies, and absolutely soul-soothing when you need a little sweetness in your life.
What Ingredients You Will Need
This recipe uses simple, pantry-friendly ingredients that come together to create something truly special. Most of these items you probably already have, which makes these brownies perfect for those last-minute baking emergencies.
For the Brownies
- 1/2 cup (113g) unsalted butter, melted (I use Land O’Lakes for consistent results, but any good butter works)
- 1 cup (200g) granulated sugar (adds just the right sweetness without being overwhelming)
- 2 large eggs, room temperature (cold eggs can make the batter seize up)
- 1 teaspoon vanilla extract (pure vanilla makes a difference, but imitation works in a pinch)
- 1 1/2 tablespoons red food coloring (gel food coloring gives the most vibrant red, but liquid works too — just use a bit more)
- 1 teaspoon white vinegar (this is the secret to that classic red velvet tang)
- 3/4 cup (95g) all-purpose flour (spoon and level it — don’t scoop directly from the bag)
- 2 tablespoons unsweetened cocoa powder (I prefer Hershey’s Special Dark for a richer color)
- 1/4 teaspoon salt (balances the sweetness and enhances the chocolate flavor)
For the Cream Cheese Swirl
- 4 oz (113g) cream cheese, softened (Philadelphia is my go-to — it’s consistently creamy)
- 1/4 cup (50g) granulated sugar
- 1 large egg yolk (save the white for an omelet tomorrow)
- 1/2 teaspoon vanilla extract
Substitution Tips: If you need a dairy-free version, use vegan butter and dairy-free cream cheese alternative. For a gluten-free option, swap the all-purpose flour with a 1:1 gluten-free baking blend. And if you’re out of red food coloring, you can use beet powder mixed with a little water — it gives a more natural red that’s less vibrant but still pretty.
Equipment Needed
You don’t need a fancy kitchen to make these heart-shaped beauties. Here’s what you’ll need:
- Heart-shaped silicone mold (6-cavity or 12-cavity, depending on size preference — I found mine at the dollar store and it’s held up for three years)
- Large mixing bowl (glass or stainless steel works best)
- Medium mixing bowl (for the cream cheese swirl)
- Whisk (a sturdy one — cheap whisks bend easily with thick brownie batter)
- Rubber spatula (for scraping every last bit of batter into the mold)
- Small offset spatula (optional, but makes spreading the cream cheese swirl much easier)
- Measuring cups and spoons (accuracy matters in baking)
- Cookie sheet (to place the silicone mold on — it makes transferring in and out of the oven much safer)
If you don’t have a heart-shaped mold, don’t worry. You can use a regular 8×8 inch baking pan lined with parchment paper, then cut the brownies into squares after they cool. They won’t be heart-shaped, but they’ll still taste amazing. I’ve also used a mini muffin tin in a pinch — just grease it well and reduce the baking time by about 5 minutes.
Preparation Method
Let’s get baking! Follow these steps carefully, and you’ll have perfect heart-shaped red velvet brownies every time.
- Preheat your oven to 350°F (175°C). Place your heart-shaped silicone mold on a cookie sheet. This makes it stable and easy to move. No need to grease the silicone mold — that’s the beauty of silicone, nothing sticks to it.
- Melt the butter in a microwave-safe bowl or on the stovetop. If using the microwave, heat in 30-second intervals until just melted. Let it cool for about 2 minutes — you don’t want it hot enough to cook the eggs when you add them later.
- Mix the wet ingredients. In a large bowl, whisk together the melted butter and granulated sugar until well combined. It should look like wet sand. Add the eggs one at a time, whisking after each addition until smooth. Stir in the vanilla extract, red food coloring, and white vinegar. The batter will be a beautiful bright red at this point — take a moment to appreciate it.
- Combine the dry ingredients. In a separate small bowl, whisk together the flour, cocoa powder, and salt. This ensures the cocoa powder is evenly distributed and you don’t get pockets of bitter chocolate in your brownies.
- Fold the dry ingredients into the wet. Add the flour mixture to the wet ingredients and fold gently with a rubber spatula. Mix just until you no longer see streaks of flour — overmixing will make your brownies tough and cakey. The batter should be thick and glossy, like a thick milkshake.
- Make the cream cheese swirl. In a medium bowl, beat the softened cream cheese with an electric mixer or a sturdy whisk until smooth. Add the sugar, egg yolk, and vanilla extract, and mix until everything is combined and creamy. Don’t overbeat — you want it smooth, not whipped.
- Fill the molds. Using a spoon or a small cookie scoop, fill each heart-shaped cavity about 2/3 full with the red velvet batter. This leaves room for the cream cheese swirl and prevents overflowing. You should have enough batter for about 6 large hearts or 12 smaller ones, depending on your mold size.
- Add the cream cheese swirl. Drop small spoonfuls of the cream cheese mixture on top of each brownie — about 1 teaspoon per large heart, less for smaller ones. Use a toothpick or a small knife to gently swirl the cream cheese into the batter. Don’t over-swirl; you want distinct pockets of cream cheese, not a fully mixed batter.
- Bake. Place the cookie sheet with the filled mold into the preheated oven. Bake for 15-18 minutes for large hearts, or 10-12 minutes for smaller ones. The edges should look set and slightly cracked, and a toothpick inserted into the center should come out with a few moist crumbs attached — not wet batter. If the toothpick comes out clean, you’ve overbaked them.
- Cool completely. Remove from the oven and let the brownies cool in the mold for 10 minutes. Then gently pop them out of the silicone mold and transfer to a wire rack to cool completely. This is the hardest part — waiting. But trust me, they need to cool to set properly. Warm brownies are delicious, but they’ll fall apart if you try to move them too soon.
Cooking Tips & Techniques
After making these brownies more times than I care to count, I’ve picked up a few tricks that make a real difference. Here’s what I’ve learned the hard way so you don’t have to.
Don’t overmix the batter. I know I said this already, but it’s worth repeating. The first time I made red velvet brownies, I whisked the batter like I was trying to win a competition, and they came out dense and tough. Mix until the flour just disappears, then stop. Your brownies will be fudgy and tender instead of bready.
Room temperature eggs matter. Cold eggs can make the melted butter seize up, creating a lumpy batter that doesn’t bake evenly. If you forgot to take the eggs out of the fridge, place them in a bowl of warm water for 5 minutes before using. It’s a simple trick that saves a lot of frustration.
Use gel food coloring for the best color. Liquid food coloring works, but you’ll need to use more of it to get that vibrant red, and extra liquid can throw off the batter consistency. Gel food coloring gives you a more intense color with less product. I buy a small bottle at the craft store, and it lasts for months.
Watch the baking time closely. Every oven runs differently. My old oven would bake these in exactly 16 minutes, but my new one takes 18. Start checking at the minimum time and add a minute or two if needed. The brownies will continue to cook slightly as they cool in the mold, so it’s better to underbake slightly than overbake.
Let them cool completely before removing from the mold. I learned this lesson the messy way. I got impatient once, tried to pop a warm brownie out of the mold, and ended up with a red velvet disaster on my hands. Silicone molds need the brownies to cool and set before they release easily. Ten minutes in the mold, then transfer to a wire rack.
Variations & Adaptations
One of the best things about this recipe is how adaptable it is. Here are some variations I’ve tried and loved:
- Chocolate Chip Red Velvet Brownies : Fold in 1/2 cup of white chocolate chips or semi-sweet chocolate chips before pouring the batter into the mold. The little pockets of melted chocolate add an extra layer of indulgence.
- Peppermint Red Velvet Brownies : Add 1/2 teaspoon of peppermint extract to the batter along with the vanilla. Top with crushed candy canes after baking for a festive holiday twist. My kids went crazy for these at Christmas.
- Vegan Version : Substitute the butter with vegan butter, use flax eggs (1 tablespoon ground flaxseed mixed with 3 tablespoons water per egg), and use a dairy-free cream cheese alternative. The texture is slightly denser, but the flavor is still fantastic.
- Mini Heart Bites : Use a mini heart-shaped silicone mold and reduce the baking time to 8-10 minutes. These are perfect for lunchboxes or party platters where you need lots of small treats.
- Gluten-Free Option : Replace the all-purpose flour with a 1:1 gluten-free baking blend that contains xanthan gum. I’ve used Bob’s Red Mill with great results — just make sure to spoon and level the flour carefully.
Serving & Storage Suggestions
These heart-shaped red velvet brownies are beautiful on their own, but a little extra effort makes them truly special. Here’s how to serve and store them.
Serving: Arrange the brownies on a pretty plate or a tiered stand for maximum visual impact. For Valentine’s Day, I like to dust them lightly with powdered sugar right before serving — it adds a snowy contrast to the red and white swirls. You can also drizzle a little melted white chocolate on top for an extra touch of elegance. Serve them at room temperature for the best texture; refrigerated brownies are firmer and less fudgy.
Pairing Suggestions: These brownies pair beautifully with a cold glass of milk (obviously), a hot cup of coffee, or a scoop of vanilla ice cream for an indulgent dessert. For a Valentine’s Day brunch, serve them alongside fresh strawberries and a fruit salad for a colorful spread.
Storage: Store leftover brownies in an airtight container at room temperature for up to 3 days. If you stack them, place a sheet of parchment paper between layers to prevent sticking. For longer storage, you can refrigerate them for up to a week — just let them come to room temperature before serving for the best texture.
Freezing: These brownies freeze beautifully. Place them in a single layer on a baking sheet and freeze for 1 hour, then transfer to a freezer-safe bag or container. They’ll keep for up to 3 months. To thaw, simply leave them at room temperature for about 30 minutes. The cream cheese swirl might lose a tiny bit of its texture, but honestly, no one will notice.
Flavor Development: The flavors actually get better after a day or two. The red velvet tang deepens, and the cream cheese swirl melds with the chocolate in a way that’s hard to resist. If you can manage it, make these a day ahead of when you need them — your future self will thank you.
Nutritional Information & Benefits
Let’s be real — these are brownies, not a health food. But knowing what’s in them helps you enjoy them mindfully. Here’s the estimated nutritional breakdown per serving (based on 6 large brownies):
| Nutrient | Amount per Serving |
|---|---|
| Calories | 380 |
| Total Fat | 22g |
| Saturated Fat | 13g |
| Cholesterol | 115mg |
| Sodium | 220mg |
| Total Carbohydrates | 42g |
| Dietary Fiber | 1g |
| Sugars | 32g |
| Protein | 5g |
Health Highlights: The cocoa powder contains antioxidants called flavonoids, which are good for heart health. The cream cheese adds a small amount of calcium and protein. And honestly, the biggest benefit here is the joy these brownies bring — food is about more than just nutrients, and sometimes a treat like this is exactly what the soul needs.
Dietary Considerations: This recipe contains dairy, eggs, and gluten. For allergen-free versions, see the variations section above. If you’re watching your sugar intake, you can reduce the sugar to 3/4 cup, though the texture will be slightly less tender.
Conclusion
These heart-shaped red velvet brownies have become a staple in my kitchen for good reason. They’re easy enough for a weeknight baking project, impressive enough for a Valentine’s Day party, and delicious enough to make everyone ask for seconds. The combination of fudgy red velvet and tangy cream cheese swirl is just irresistible, and the heart shape adds that extra touch of love that makes homemade treats so special.
I encourage you to make these your own. Add chocolate chips if that’s your thing, swap the cream cheese for a peanut butter swirl, or double the batch because one pan is never enough. Baking is about experimenting and having fun, and this recipe is the perfect canvas for your creativity.
I’d love to hear how these turn out for you! Drop a comment below and let me know if your kids gave them the seal of approval, or tag me in your photos on Pinterest — I’m always looking for inspiration. Until next time, happy baking, and remember: the best recipes are the ones made with love (and a little bit of red food coloring).
Frequently Asked Questions
Can I make these brownies without a heart-shaped mold?
Absolutely! Use an 8×8 inch baking pan lined with parchment paper. Pour the batter in, add the cream cheese swirl, and bake for 20-25 minutes. Once cool, cut into squares or use a heart-shaped cookie cutter to stamp out shapes from the cooled brownies.
Why did my brownies turn out too cakey?
This usually happens from overmixing the batter or overbaking. Mix just until the flour disappears, and start checking for doneness at the minimum baking time. You want a toothpick to come out with a few moist crumbs, not clean.
Can I use natural red food coloring alternatives?
Yes! Beet powder mixed with a little water works well, though the color will be more of a deep pinkish-red than bright red. You’ll need about 2 tablespoons of beet powder for this recipe. Pomegranate juice concentrate is another option, but it will add more liquid, so reduce the butter slightly.
How do I prevent the cream cheese swirl from sinking to the bottom?
Make sure your cream cheese mixture is thick enough — if it’s too runny, it will sink. Also, don’t over-swirl. Drop spoonfuls on top of the batter and use a toothpick to make just 2-3 gentle swirls. Too much mixing pushes the cream cheese down.
Can I double this recipe?
Definitely! Double all the ingredients and bake in a 9×13 inch pan for 25-30 minutes. If using heart-shaped molds, you’ll need two molds or you can bake in batches. Just make sure not to overcrowd your oven — bake one batch at a time for even results.
Pin This Recipe!
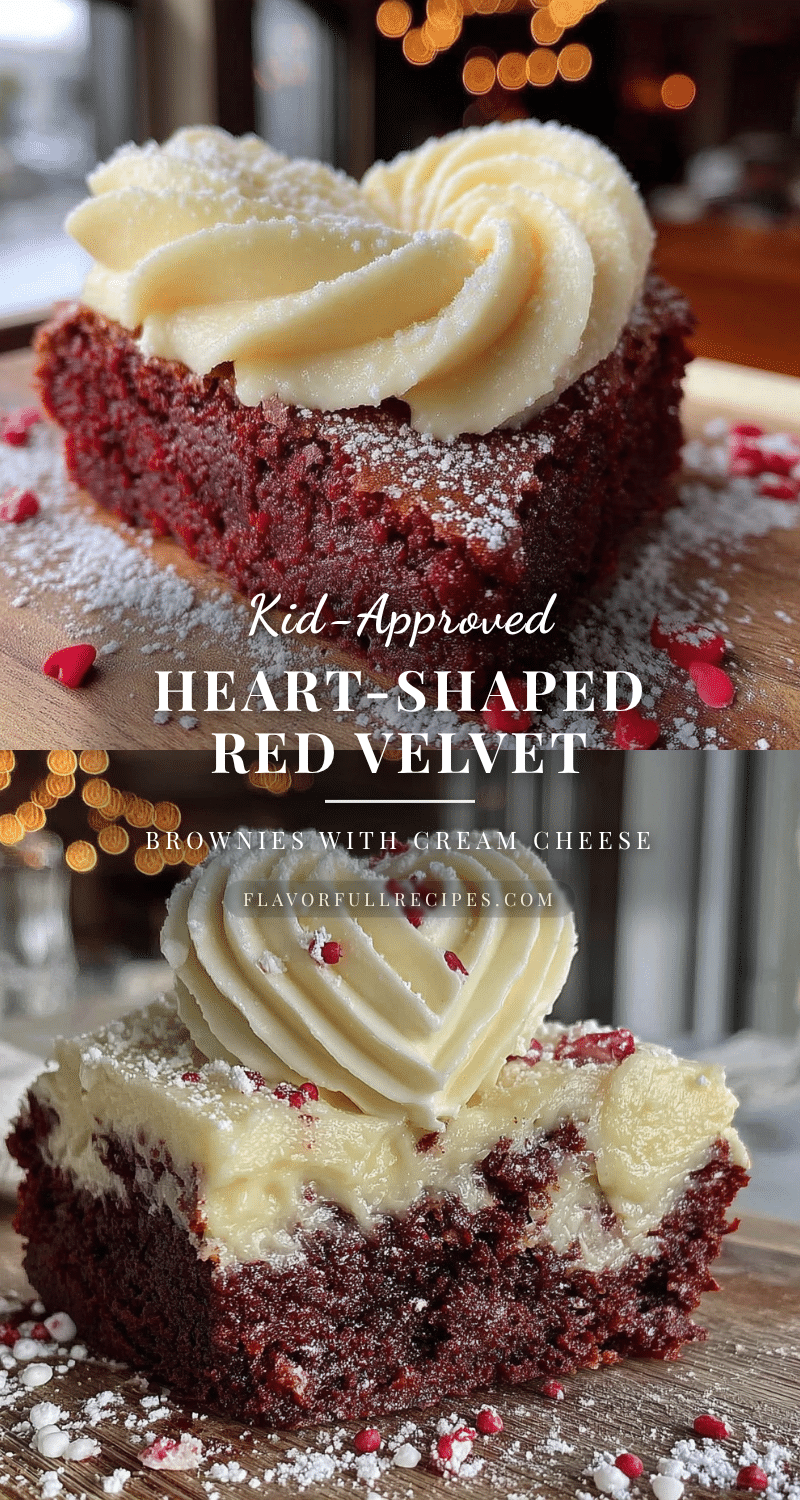
The Best Heart-Shaped Red Velvet Brownies (Kid-Approved!)
- Total Time: 35 minutes
- Yield: 6 servings 1x
Description
These fudgy, festive heart-shaped red velvet brownies with a tangy cream cheese swirl are a kid-approved, last-minute Valentine’s Day treat that comes together in just 35 minutes using simple pantry ingredients.
Ingredients
- 1/2 cup (113g) unsalted butter, melted
- 1 cup (200g) granulated sugar
- 2 large eggs, room temperature
- 1 teaspoon vanilla extract
- 1 1/2 tablespoons red food coloring (gel preferred)
- 1 teaspoon white vinegar
- 3/4 cup (95g) all-purpose flour
- 2 tablespoons unsweetened cocoa powder
- 1/4 teaspoon salt
- 4 oz (113g) cream cheese, softened
- 1/4 cup (50g) granulated sugar
- 1 large egg yolk
- 1/2 teaspoon vanilla extract
Instructions
- Preheat oven to 350°F (175°C). Place heart-shaped silicone mold on a cookie sheet.
- Melt butter and let cool for 2 minutes.
- In a large bowl, whisk melted butter and sugar until combined. Add eggs one at a time, whisking after each. Stir in vanilla, red food coloring, and vinegar.
- In a small bowl, whisk flour, cocoa powder, and salt.
- Fold dry ingredients into wet ingredients until just combined (do not overmix).
- In a medium bowl, beat cream cheese until smooth. Add sugar, egg yolk, and vanilla; mix until creamy.
- Fill each heart cavity 2/3 full with red velvet batter.
- Drop small spoonfuls of cream cheese mixture on top and gently swirl with a toothpick.
- Bake large hearts for 15-18 minutes, small hearts for 10-12 minutes, until edges are set and a toothpick comes out with moist crumbs.
- Cool in mold for 10 minutes, then transfer to a wire rack to cool completely.
Notes
For best results, use room temperature eggs and gel food coloring. Do not overmix the batter. Let brownies cool completely before removing from mold. Store in an airtight container at room temperature for up to 3 days, or freeze for up to 3 months.
- Prep Time: 15 minutes
- Cook Time: 18 minutes
- Category: Dessert
- Cuisine: American
Nutrition
- Serving Size: 1 large heart-shaped
- Calories: 380
- Sugar: 32
- Sodium: 220
- Fat: 22
- Saturated Fat: 13
- Carbohydrates: 42
- Fiber: 1
- Protein: 5
Keywords: red velvet brownies, heart-shaped brownies, Valentine's Day dessert, kid-friendly brownies, fudgy brownies, cream cheese swirl brownies