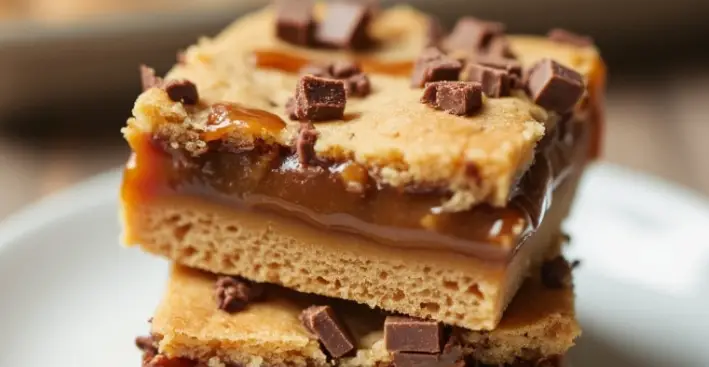
Imagine a dessert so rich, gooey, and indulgent that it makes you close your eyes with every bite – that’s exactly what these Better Than Anything Bars promise! Layers of caramel, chocolate, and whipped topping come together to create a treat that’s sweet, salty, and absolutely irresistible. Whether you’re prepping for a potluck, a family gathering, or just a cozy night in, this recipe will become your new go-to dessert. Trust me, one bite and you’ll see why these bars have earned their bold name!
The Story Behind Better Than Anything Bars
Let’s talk about these legendary bars! Their name alone sparks curiosity, doesn’t it? This recipe is a modern twist on the classic “Better Than Sex Cake,” which gained popularity in the 1980s. The original version featured boxed cake mix, caramel, and whipped topping, but over the years, variations have popped up, including these easy-to-make bars. They’re less messy, more portable, and pack all the same decadent flavors into a handheld treat.
I remember the first time I tried these at a holiday party when I was a kid. I was mesmerized by the gooey caramel oozing from the layers and the crunch of crushed toffee sprinkled on top. They were love at first bite! Since then, I’ve tweaked the recipe to make it even more indulgent (and honestly, easier to assemble). These bars are perfect year-round, but I especially love making them during the holidays when caramel and chocolate seem to be the stars of every dessert table.
What You’ll Need: The Ingredients
The beauty of this recipe is that it uses simple, store-bought ingredients that come together like magic. Here’s what you’ll need:
- Graham cracker crumbs: The base of these bars. You can substitute with crushed digestive biscuits or gluten-free graham crackers.
- Butter: Melted butter binds the graham cracker crust. Use unsalted butter for better control over the sweetness.
- Sweetened condensed milk: This is the secret to creating the gooey caramel layer without the hassle of making caramel from scratch.
- Chocolate chips: A luscious chocolate layer that melts beautifully. Semi-sweet or milk chocolate works best, but dark chocolate is an option for those who love a richer flavor.
- Whipped topping: Light and fluffy, this balances the richness of the other layers. You can swap it with homemade whipped cream if you prefer.
- Toffee bits: These add a delightful crunch and tie all the flavors together. You can find pre-crushed toffee bits in most baking aisles.
Pro tip: For a nutty twist, sprinkle chopped pecans or walnuts with the toffee bits. It adds another layer of texture that’s simply divine!
Equipment Needed
No fancy tools are required for this recipe. Here’s what you’ll need:
- 9×13-inch baking dish: This size is perfect for spreading the layers evenly.
- Parchment paper: Makes removing the bars a breeze and keeps cleanup easy.
- Mixing bowls: For combining the crust and melted chocolate.
- Spatula: To spread the layers evenly – trust me, this is key for presentation!
- Microwave-safe bowl: If you’re melting the chocolate in the microwave.
Budget-friendly tip: If you don’t have a 9×13-inch dish, you can use two smaller pans and adjust the layers accordingly.
How to Make Better Than Anything Bars
- Prepare the crust: Preheat your oven to 350°F (175°C). Line your baking dish with parchment paper. In a bowl, mix 2 cups (200g) of graham cracker crumbs with 1/2 cup (115g) of melted butter. Press the mixture firmly into the bottom of the dish to form the crust. Bake for 8-10 minutes until lightly golden. Let it cool completely.
- Add the caramel layer: Pour 1 can (14 oz or 396g) of sweetened condensed milk over the cooled crust. Spread it evenly using a spatula and bake for another 12-15 minutes until it starts to bubble and turn golden. Remove from the oven and let it cool.
- Create the chocolate layer: Melt 1 1/2 cups (270g) of chocolate chips in the microwave or using a double boiler. Spread the melted chocolate over the caramel layer while it’s still slightly warm.
- Add the toppings: Once the chocolate has slightly set, spread 1 1/2 cups (360g) of whipped topping evenly over the chocolate. Sprinkle 1/2 cup (50g) of toffee bits on top.
- Chill and serve: Refrigerate the bars for at least 2 hours (or overnight for best results) to allow the layers to set. Once firm, slice into squares and enjoy!
Cooking Tips for Perfect Bars
- Don’t rush the chilling process: Letting the bars chill fully ensures clean slices and preserves the layers.
- Use a hot knife to slice: Heat the knife under warm water, dry it, and then cut for neat edges.
- Keep the layers even: Take your time spreading each layer for a visually appealing dessert.
I’ve had my share of uneven layers (and chocolate that hardened too quickly), but patience is key here. Also, don’t skip the parchment paper – it’s a lifesaver when you’re ready to lift the bars out of the dish!
Variations to Try
- Peanut butter twist: Swirl peanut butter into the caramel layer for a nutty flavor.
- Salted caramel version: Sprinkle a pinch of sea salt over the caramel for a sweet-salty combo.
- Seasonal toppings: Swap toffee bits for crushed candy canes during the holidays or colorful sprinkles for birthdays.
I once experimented with a s’mores theme by adding mini marshmallows on top, and it was a hit with the kids!
Serving & Storage
These bars are best served chilled, straight from the refrigerator. Pair them with a hot cup of coffee or a glass of milk for the ultimate indulgence. If you have leftovers (unlikely!), store them in an airtight container in the fridge for up to 5 days. For longer storage, freeze the bars for up to a month. Just thaw them in the fridge overnight before serving.
Nutritional Information
While these bars are definitely a treat, here’s an approximate breakdown per serving (based on 12 bars):
- Calories: 320
- Fat: 18g
- Carbohydrates: 38g
- Protein: 4g
They’re not exactly a health food, but hey, dessert is all about balance, right?
Conclusion
If you’re looking for a dessert that’s easy to make, absolutely delicious, and guaranteed to impress, these Better Than Anything Bars are it. They’re rich, gooey, and layered with love. Give them a try and make them your own with fun variations. I’d love to hear how they turn out for you – leave a comment below or tag me on social media with your creations! Happy baking!
FAQs
Can I use homemade caramel instead of sweetened condensed milk?
Yes, you can! Just make sure the caramel is thick enough to hold its shape when layered.
Can I make these bars gluten-free?
Absolutely! Use gluten-free graham crackers, and you’re good to go.
How do I prevent the chocolate from hardening too quickly?
Spread the melted chocolate immediately after removing it from the heat for smoother application.
Can I make these bars ahead of time?
Yes, these bars are perfect for making ahead. Prepare them a day in advance and store them in the fridge.
What’s the best way to cut these bars?
Use a warm knife and clean it between cuts for neat slices.