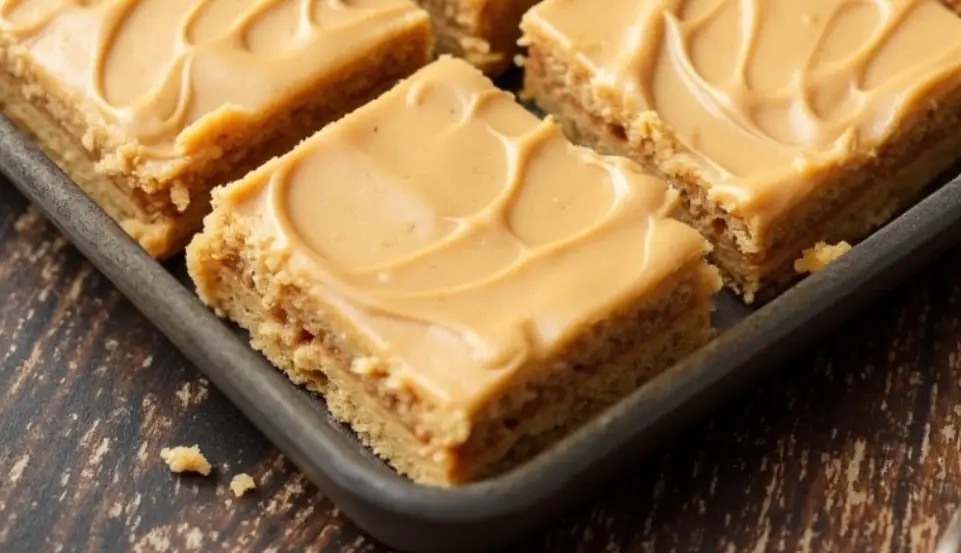
Who doesn’t love peanut butter desserts? These Classic Peanut Butter Cookie Bars are the ultimate treat for anyone with a sweet tooth. Imagine the rich, nutty flavor of peanut butter baked into a soft, chewy cookie bar—sounds dreamy, right? And the best part? You can whip these up in just 30 minutes! Whether you’re hosting friends, looking for a quick dessert, or just craving something indulgent, this recipe is sure to become a favorite in your kitchen.
Years ago, I stumbled upon a similar recipe in my grandmother’s handwritten cookbook (you know, the kind with butter stains and flour dust). It was one of her go-to desserts for family gatherings, and I’ve put my own twist on it over time. These cookie bars are timeless, comforting, and oh-so-easy to make. Grab your apron and let’s dive into this delicious dessert adventure!
Recipe Story/Background
Peanut butter cookies have been a staple in American kitchens for decades. Their origins trace back to the 1910s when peanut butter started gaining popularity as a versatile ingredient. By the 1930s, peanut butter cookies became a household favorite, with recipes appearing in cookbooks nationwide. Adding a nostalgic twist, these peanut butter cookie bars offer the same classic flavor in a convenient bar form—perfect for slicing and sharing!
For me, this recipe is like a warm hug on a chilly day. I remember making these with my mom during the holidays. We’d argue over who got to lick the spoon (spoiler: I usually won). Over time, I’ve tweaked the recipe to match my style—adding a pinch of salt here, a drizzle of chocolate there. It’s my go-to dessert when I need something fast and foolproof, and it always disappears in minutes at parties. Plus, it’s great for any season—summer picnics, cozy winter nights, or just a random Tuesday when you need a pick-me-up!
Ingredient Discussion
Let’s talk ingredients! The magic of these Classic Peanut Butter Cookie Bars lies in their simplicity. Here’s the breakdown:
- Peanut Butter: Use creamy peanut butter for that smooth, melt-in-your-mouth texture. If you prefer a bit of crunch, chunky peanut butter works too. Natural peanut butter is fine, but make sure it’s stirred well to avoid dryness.
- Brown Sugar: This adds a rich, caramel-like sweetness that pairs beautifully with peanut butter. If you’re out of brown sugar, white sugar with a touch of molasses works as a substitute.
- Butter: Stick with unsalted butter so you can control the saltiness. For a dairy-free option, coconut oil is a great alternative.
- Eggs: Eggs provide structure, making these bars chewy and soft. If you’re vegan, a flaxseed egg or applesauce can replace the eggs.
- All-Purpose Flour: Regular flour works best, but you can swap it with gluten-free flour blends if needed.
- Baking Soda: This helps the bars rise just enough. Double-check that your baking soda is fresh!
- Vanilla Extract: A splash of vanilla ties all the flavors together beautifully. Pure vanilla extract is ideal, but imitation vanilla works in a pinch.
- Optional Add-Ins: Chocolate chips, chopped peanuts, or even a sprinkle of flaky sea salt on top can add extra flair.
Pro tip: Always measure ingredients accurately, especially your flour. Too much flour can make these bars dry, so use a spoon to scoop and level your measurements.
Equipment Needed
To make these Classic Peanut Butter Cookie Bars, you don’t need fancy gadgets—just the basics:
- Mixing Bowls: One large and one medium bowl will do the trick.
- Whisk or Electric Mixer: Whisk works fine, but an electric mixer makes the process faster (and saves your arms!).
- 9×13 Baking Pan: This size ensures even baking. If you don’t have one, two smaller pans will work, but keep an eye on the baking time.
- Silicone Spatula: Perfect for scraping down the bowl—no batter left behind!
- Parchment Paper: Makes cleanup a breeze and prevents sticking.
If you’re a baking newbie, don’t worry—these tools are budget-friendly and easy to find at most stores.
Preparation Method
Ready to bake? Follow these simple steps to create your Classic Peanut Butter Cookie Bars:
- Preheat your oven to 350°F (175°C). Line your 9×13 baking pan with parchment paper, leaving some overhang for easy removal.
- In a large mixing bowl, cream together 1 cup (240g) peanut butter, 1/2 cup (115g) unsalted butter, and 1 cup (200g) brown sugar until smooth and fluffy. This should take about 2-3 minutes using an electric mixer.
- Add 2 large eggs and 2 teaspoons (10ml) vanilla extract to the bowl. Mix until fully combined.
- In a separate bowl, whisk together 2 cups (240g) all-purpose flour and 1 teaspoon (5g) baking soda. Gradually add the dry mixture to the wet ingredients, mixing just until combined. Avoid overmixing!
- Pour the batter into the prepared baking pan and smooth it out evenly with a spatula.
- If desired, sprinkle chocolate chips, chopped peanuts, or flaky sea salt on top.
- Bake for 20-25 minutes, or until the edges are golden and a toothpick inserted in the center comes out clean. Remember, the bars will continue to set as they cool.
- Let the bars cool in the pan for at least 15 minutes before lifting them out using the parchment paper. Slice into squares and enjoy!
Tip: If your batter feels too thick, add a tablespoon of milk to loosen it up.
Cooking Tips & Techniques
Here are some tips to make sure your Classic Peanut Butter Cookie Bars turn out perfectly every single time:
- Don’t Overbake: These bars are meant to be soft and chewy, so keep an eye on them. If the edges are golden, they’re ready!
- Room Temperature Ingredients: Let your butter and eggs come to room temperature for easier mixing and better texture.
- Grease the Pan Well: If you’re skipping parchment paper, be generous with greasing to avoid sticking.
- Customize for Texture: Add crunchy peanuts or swirl in some jam for a PB&J vibe.
Trust me, once you nail these tips, this recipe will feel like second nature!
Variations & Adaptations
This recipe is super versatile. Here are some fun ways to switch things up:
- Chocolate Lovers: Add 1/2 cup (85g) of chocolate chips to the batter for gooey, chocolatey goodness.
- Gluten-Free Option: Replace the all-purpose flour with a 1:1 gluten-free baking flour blend.
- Vegan Adaptation: Use coconut oil instead of butter, flax eggs instead of regular eggs, and ensure your chocolate chips are dairy-free.
- Seasonal Twist: During the holidays, sprinkle crushed candy canes or drizzle melted chocolate on top for a festive flair.
Experiment and make these bars your own—it’s hard to go wrong!
Serving & Storage Suggestions
These Classic Peanut Butter Cookie Bars are best served at room temperature, but they’re delicious warm too!
- Serving Ideas: Pair with a cold glass of milk, scoop of vanilla ice cream, or drizzle with caramel sauce for an extra indulgent treat.
- Storage: Store leftovers in an airtight container at room temperature for up to 3 days. For longer storage, refrigerate for up to a week or freeze for up to 3 months.
- Reheating: Warm in the microwave for 10-15 seconds to bring back the softness.
Bonus tip: The flavors deepen after a day or two, making them even better!
Nutritional Information & Benefits
Here’s a rough breakdown of the nutrition per serving (assuming 16 bars):
- Calories: ~210
- Protein: ~4g
- Carbohydrates: ~22g
- Fat: ~12g
- Fiber: ~1g
Peanut butter is a great source of protein and healthy fats, making these bars a slightly more balanced dessert. Just keep in mind they’re still a treat, so enjoy in moderation!
Conclusion
If you’re looking for a dessert that’s quick, easy, and undeniably delicious, these Classic Peanut Butter Cookie Bars are the answer. They’re perfect for busy weeknights, parties, or even just a cozy night in. I love how simple they are to customize, and honestly, they never fail to impress!
Give them a try, and don’t forget to share your creations! What’s your favorite way to enjoy peanut butter desserts? Let me know in the comments below. And if you loved this recipe, pin it to your Pinterest board or share it with friends—it’s too good to keep to yourself!
Happy baking!
FAQs
Can I use crunchy peanut butter instead of creamy?
Absolutely! Crunchy peanut butter adds texture and works beautifully in this recipe.
What’s the best way to store these bars?
Keep them in an airtight container at room temperature for up to 3 days, or refrigerate for up to a week.
Can I make these without a mixer?
Yes, you can mix by hand using a whisk and spatula. It just takes a bit more elbow grease!
Are these bars gluten-free?
Not as written, but you can easily make them gluten-free by using a 1:1 gluten-free flour blend.
Can I freeze these cookie bars?
Definitely! Wrap them tightly and freeze for up to 3 months. Let them thaw at room temperature before serving.