
Creamy Hatch Green Chili Chicken Enchiladas
I was elbow-deep in a pile of roasted Hatch chiles, their smoky scent sticking to my fingers and the kitchen air thick with that unmistakable earthy heat, when I realized I had a problem. The freezer was full of them—bags and bags from our annual trip down to New Mexico—and I had promised my neighbor I’d bring dinner for her family after she had her second baby. I needed something fast, comforting, and absolutely crowd-pleasing. Something that would transport her to a cozy kitchen far away from the chaos of newborn life, even if just for one meal.
That’s when these creamy Hatch green chili chicken enchiladas were born. Right there, standing over a sink full of blackened pepper skins, with a hungry toddler tugging at my apron and a half-eaten bag of tortilla chips staring at me from the counter. I wasn’t trying to be fancy. I was trying to survive—and feed another family in the process.
Honestly, I didn’t even measure anything that first time. I just shredded some rotisserie chicken, mixed it with cream cheese and sour cream (because that’s what I had), threw in a handful of those gorgeous roasted chiles, and rolled everything up in flour tortillas. I poured a simple green enchilada sauce over the top, covered it with cheese, and crossed my fingers.
The next morning, my neighbor texted me a photo of an empty baking dish with the caption: “My husband ate half of this before I could even sit down. Please tell me you’ll make this again.” And I have. Over and over again, tweaking and perfecting until the filling was just the right amount of creamy, the sauce had enough kick without being overwhelming, and the whole thing came together in a way that felt both special and totally doable on a Tuesday night.
These creamy Hatch green chili chicken enchiladas aren’t just a recipe anymore. They’re my go-to for bringing comfort to people who need it—whether that’s a new mom, a friend going through a rough week, or just my own family on a chilly evening when we all need something warm to gather around.
Why You’ll Love This Recipe
I’ve tested this recipe more times than I can count, and here’s why it keeps earning a permanent spot in my dinner rotation:
- Quick & Easy: From start to finish, these enchiladas come together in about 45 minutes. That’s fast enough for a weeknight but feels special enough for company.
- Simple Ingredients: You don’t need to hunt down anything exotic. Most of these ingredients are probably already in your fridge or pantry—especially if you’re a fellow Hatch chile enthusiast who stocks up every season.
- Perfect for Busy Nights: This is the kind of meal you can assemble ahead of time, pop in the fridge, and bake when you’re ready. It’s also freezer-friendly, which makes it a lifesaver for meal prep or those “I need to bring someone dinner” moments.
- Crowd-Pleaser: I’ve served these to spice lovers and spice skeptics alike, and somehow they win everyone over. The creaminess balances the heat beautifully, so nobody’s reaching for a glass of milk.
- Unbelievably Delicious: The combination of tender chicken, smoky roasted chiles, and that luscious creamy sauce wrapped in a warm tortilla with melted cheese on top? It’s the kind of comfort food that makes you close your eyes after the first bite. Every single time.
What sets this version apart from other enchilada recipes is the double-creaminess factor. We’re not just using cheese and sauce—we’re incorporating cream cheese and sour cream directly into the filling, which creates this velvety texture that soaks into the tortillas as they bake. It’s richer than traditional enchiladas but somehow still feels light and fresh, thanks to the bright, smoky flavor of the Hatch chiles. I’ve tried making these with canned green chiles in a pinch, and while those work okay, nothing compares to the depth of flavor you get from freshly roasted Hatch chiles. Trust me on this one.
What Ingredients You Will Need
This recipe relies on simple, wholesome ingredients that come together to create something truly special. Here’s what you’ll need:
For the Filling
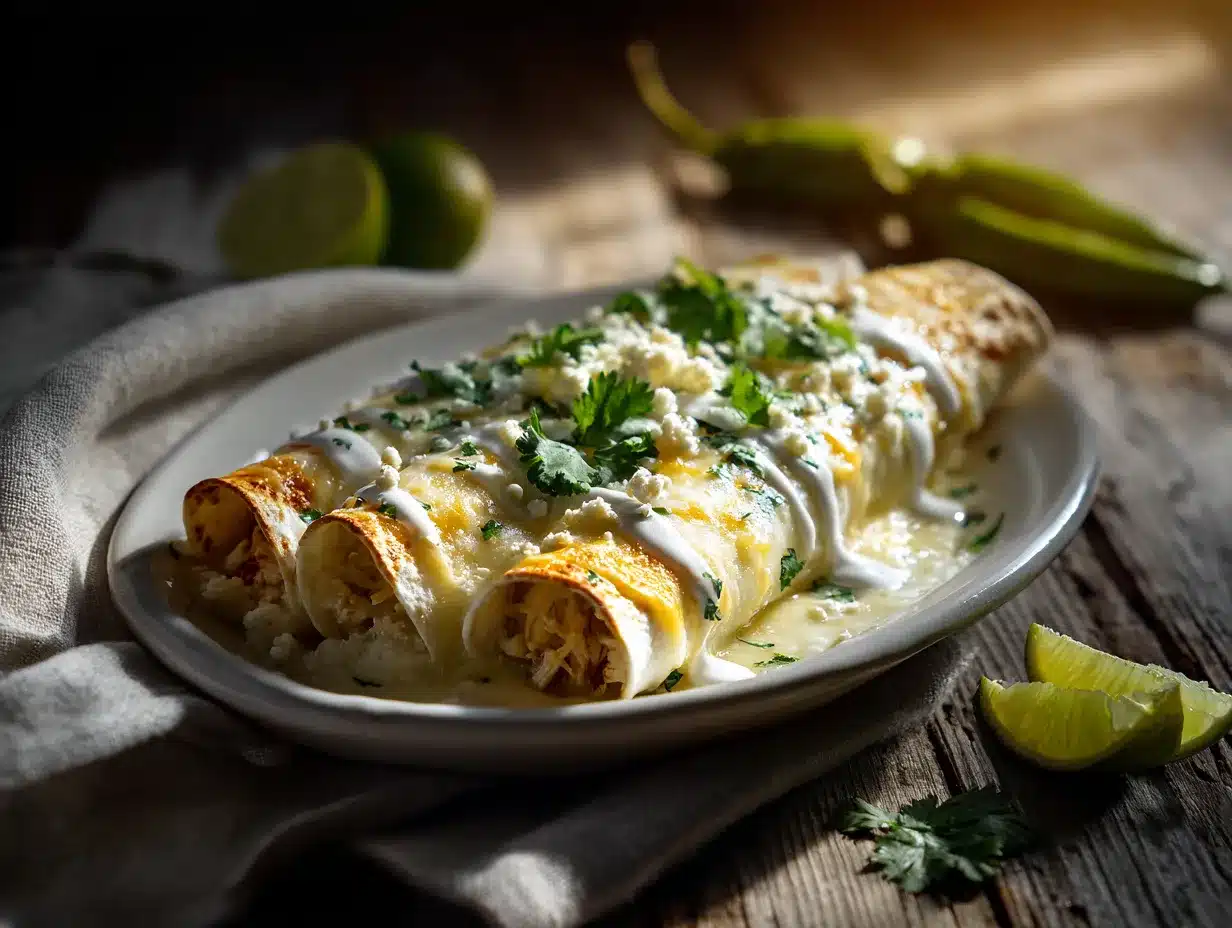
- 3 cups cooked, shredded chicken (I use rotisserie chicken for convenience, but leftover grilled or poached chicken works beautifully too)
- 8 oz cream cheese, softened (full-fat gives the best creamy texture, but reduced-fat works in a pinch)
- 1/2 cup sour cream (adds tanginess and helps bind the filling)
- 1 cup roasted Hatch green chiles, chopped (medium heat is my sweet spot, but use mild if you’re serving kids or spice-averse guests)
- 1 cup shredded Monterey Jack cheese (melts like a dream and has a mild flavor that lets the chiles shine)
- 1/2 cup shredded sharp cheddar cheese (adds a little sharpness and color)
- 1/2 teaspoon garlic powder
- 1/2 teaspoon onion powder
- 1/4 teaspoon cumin (just enough to complement the chiles without overpowering them)
- Salt and black pepper to taste
For the Sauce
- 1 can (10 oz) green enchilada sauce (I prefer Las Palmas or Hatch brand for authentic flavor)
- 1/2 cup heavy cream (this is the secret to the creamy sauce—don’t skip it!)
- 1/4 cup sour cream
For Assembly
- 8-10 flour tortillas (8-inch size works best; corn tortillas can be substituted for gluten-free option)
- 2 cups shredded Mexican blend cheese (or a mix of Monterey Jack and cheddar)
- Fresh cilantro, chopped, for garnish
- Diced white onion, for garnish (optional)
- Lime wedges, for serving
When it comes to the Hatch chiles, I cannot stress enough how much the roasting process matters. If you’re lucky enough to live near a store that does the annual Hatch chile roasting event, grab a bushel and freeze them for the year. If not, you can roast your own under the broiler or on a gas stove—just blacken the skins, steam them in a bowl covered with plastic wrap, and peel them off. The smoky, slightly sweet flavor you get from roasting is absolutely irreplaceable. For a shortcut, look for jarred roasted Hatch chiles in the international aisle of most grocery stores. They’re not quite as good as fresh-roasted, but they’ll do in a pinch.
I’ve also made these with leftover smoky roasted hatch chicken enchiladas filling before, and honestly, it’s a fantastic way to repurpose leftovers into a whole new meal. The smoky flavor from that recipe pairs beautifully with the creamy sauce here.
Equipment Needed
You don’t need a lot of fancy equipment to make these enchiladas, which is part of what makes them so approachable:
- 9×13-inch baking dish (glass or ceramic works best for even heating)
- Large mixing bowl (for combining the filling)
- Medium saucepan (for warming the sauce)
- Cutting board and sharp knife
- Measuring cups and spoons
- Rubber spatula (for scraping every last bit of that creamy filling into the tortillas)
- Aluminum foil (for covering the dish while baking)
If you don’t have a 9×13 dish, you can use two smaller baking dishes or even a cast-iron skillet. Just adjust the baking time slightly—smaller dishes will cook a bit faster. And if you’re planning to freeze these, go ahead and assemble them in a disposable aluminum pan. That way you can give the whole dish away and not worry about getting your pan back!
Preparation Method
- Preheat your oven to 375°F (190°C). While it’s heating up, lightly grease your 9×13 baking dish with cooking spray or a little butter. This prevents sticking and makes cleanup a breeze.
- Make the filling. In a large mixing bowl, combine the softened cream cheese and sour cream. Use a rubber spatula or wooden spoon to mix them until smooth and well combined. Add the shredded chicken, chopped Hatch chiles, Monterey Jack cheese, cheddar cheese, garlic powder, onion powder, cumin, and a pinch of salt and pepper. Stir everything together until it’s evenly distributed. Take a moment to taste the filling—it should be creamy, slightly tangy from the sour cream, and have a gentle warmth from the chiles. Adjust seasoning if needed.
- Prepare the sauce. In a medium saucepan over low heat, combine the green enchilada sauce, heavy cream, and sour cream. Whisk gently until everything is smooth and warmed through. You don’t want it to boil—just get it warm enough to meld the flavors together. Remove from heat and set aside.
- Assemble the enchiladas. Spread about 1/2 cup of the sauce evenly across the bottom of your prepared baking dish. This creates a little moisture barrier so the tortillas don’t dry out. Take a tortilla and place about 1/3 to 1/2 cup of filling down the center. Roll it up tightly and place it seam-side down in the dish. Repeat with the remaining tortillas, nestling them snugly together. Depending on the size of your tortillas and dish, you should fit 8 to 10 enchiladas.
- Top with sauce and cheese. Pour the remaining sauce evenly over the rolled enchiladas, making sure to cover the edges of the tortillas so they don’t crisp up too much. Sprinkle the shredded Mexican blend cheese generously over the top. Don’t be shy—the cheese is what creates that gorgeous golden crust.
- Bake. Cover the dish with aluminum foil and bake for 20 minutes. Then remove the foil and bake for another 10-15 minutes, until the cheese is bubbly and starting to brown in spots. The edges of the tortillas should be slightly crispy, and the sauce should be bubbling up around the sides.
- Rest and serve. Let the enchiladas rest for about 5 minutes after you pull them out of the oven. This helps the filling set up a little so they don’t fall apart when you serve them. Garnish with fresh cilantro, diced onion if you like, and a squeeze of lime juice. Serve warm.
A few things I’ve learned the hard way: don’t overfill your tortillas. I know it’s tempting to stuff them to the brim, but if you do, they’ll burst open during baking and you’ll end up with more of a casserole situation. Also, if you’re using corn tortillas, warm them briefly in the microwave or on a dry skillet before rolling—they’re much less likely to crack that way. And if you’re in a rush, you can skip the foil step and just bake uncovered for 20-25 minutes, but the tortillas will be a bit crisper on top. I like them soft and tender, so I always do the foil trick.
If you’re looking for another cozy meal that comes together just as easily, you should try my cozy creamy chicken and wild rice soup—it has that same comforting, creamy vibe but in soup form, perfect for chilly evenings.
Cooking Tips & Techniques
After making these enchiladas more times than I can count, here are the tips that make the biggest difference:
Room temperature ingredients matter. I know, I know—nobody plans ahead perfectly. But if you can remember to pull your cream cheese and sour cream out of the fridge about 30 minutes before you start, your filling will come together much more smoothly. Cold cream cheese creates lumps that are hard to get rid of, and nobody wants a lumpy enchilada filling.
Don’t skip the cream in the sauce. The first time I made these, I thought I could get away with just using the canned enchilada sauce alone. It was fine, but it wasn’t great. The heavy cream transforms a standard sauce into something velvety and luxurious. If you’re dairy-free, you can use full-fat coconut cream instead—it adds a different flavor but still gives you that luscious texture.
Toast your tortillas slightly. This is a trick I learned from my grandmother, and it makes a surprising difference. If you have a gas stove, you can char each tortilla briefly over the flame (just a few seconds per side). If not, warm them in a dry skillet for about 30 seconds per side. This adds a subtle smoky flavor and also makes them more pliable, so they’re less likely to tear when you roll them.
Let the filling cool slightly before assembling. If your filling is too warm when you start rolling, it can make the tortillas soggy. I usually let the filling sit for about 5-10 minutes after mixing. It’s still warm enough to be easy to work with, but not so hot that it steams the tortillas.
Make extra sauce. I always double the sauce recipe because I like my enchiladas swimming in it. The extra sauce also keeps the leftovers from drying out when you reheat them. If you have any leftover, it’s amazing drizzled over eggs the next morning.
Variations & Adaptations
One of the best things about this recipe is how flexible it is. Here are some variations I’ve tried and loved:
Vegetarian Version: Swap the chicken for two cans of drained and rinsed black beans, plus a cup of sautéed mushrooms and onions. The mushrooms add that meaty texture, and the beans give you plenty of protein. I’ve made this for my vegetarian sister-in-law, and she said it was the best enchilada she’s ever had.
Spicy Upgrade: If you’re like me and crave more heat, use a mix of medium and hot Hatch chiles, or add a diced jalapeño to the filling. You can also stir a teaspoon of chipotle in adobo sauce into the cream cheese mixture for a smoky, fiery kick. Just be careful—a little goes a long way!
Low-Carb Option: Use low-carb tortillas or large collard green leaves (blanched briefly to soften) instead of flour tortillas. The collard greens add a nice earthy flavor that actually complements the chiles really well. If you’re watching carbs, you can also skip the tortillas entirely and turn this into a creamy hatch chili mac and cheese-style casserole—just layer the filling with cooked pasta and bake.
Dairy-Free Adaptation: Use vegan cream cheese, dairy-free sour cream, and a plant-based heavy cream alternative. Most dairy-free cheeses don’t melt as well, so I recommend using a combination of nutritional yeast and a good vegan mozzarella for the topping. It won’t be exactly the same, but it’s still delicious.
Breakfast Enchiladas: This is my favorite leftover hack. Chop up leftover enchiladas and scramble them into eggs with a little extra cheese. Serve with salsa and avocado for the best breakfast you’ll have all week. I’ve also made a breakfast version from scratch using scrambled eggs instead of chicken—it’s phenomenal.
Serving & Storage Suggestions
These enchiladas are best served hot, straight out of the oven, with all that cheese still stretchy and the sauce bubbling around the edges. I like to serve them with a simple side salad dressed with lime vinaigrette to cut through the richness, or with Mexican rice and refried beans for a more substantial meal. A dollop of sour cream and a generous sprinkle of fresh cilantro on top are non-negotiable in my house.
For drinks, a cold Mexican beer like Modelo or a tangy margarita pairs beautifully with the smoky heat of the chiles. If you’re keeping it non-alcoholic, a sparkling limeade or horchata works wonderfully.
Storage: Leftover enchiladas keep beautifully in the refrigerator for up to 4 days. Store them in an airtight container, and they’ll actually taste even better the next day as the flavors continue to meld together. To reheat, pop individual portions in the microwave for about 2 minutes, or reheat the whole dish in a 350°F oven for 15-20 minutes until warmed through.
Freezing: These enchiladas freeze like a dream. Assemble them completely but don’t bake. Cover the dish tightly with plastic wrap and then aluminum foil, and freeze for up to 3 months. When you’re ready to bake, thaw overnight in the refrigerator, then bake as directed. You may need to add 5-10 minutes to the baking time since everything will be cold. If you’re baking from frozen, add about 20 minutes and keep the foil on for the entire baking time.
I’ve also found that the flavors develop beautifully over time. If you can resist eating them right away, let the baked enchiladas sit for about 15 minutes before serving—the filling sets up perfectly, and every bite is even more flavorful.
Nutritional Information & Benefits
While these enchiladas are definitely a comfort food indulgence, they do offer some nutritional benefits worth noting:
Estimated per serving (2 enchiladas): Approximately 620 calories, 38g fat, 35g protein, 35g carbohydrates, 4g fiber. These values will vary based on the specific ingredients and brands you use.
The chicken provides high-quality lean protein, which helps keep you full and satisfied. The Hatch green chiles are packed with vitamin C—actually more than an orange gram for gram—and contain capsaicin, which has anti-inflammatory properties and can boost metabolism. The cream cheese and sour cream add calcium and vitamin A, though they’re best enjoyed in moderation.
If you’re watching your sodium intake, you can use low-sodium enchilada sauce and reduce the added salt in the filling. The chiles themselves are naturally low in sodium, so you’ll still get plenty of flavor without overdoing it on the salt.
These enchiladas are naturally gluten-free if you use corn tortillas, though be sure to check your enchilada sauce label as some brands contain wheat flour as a thickener. For a lighter version, you can substitute Greek yogurt for the sour cream and use reduced-fat cream cheese—the texture will be slightly less rich, but still very satisfying.
Conclusion
These creamy Hatch green chili chicken enchiladas have become a staple in my kitchen for good reason. They’re the kind of recipe that feels both familiar and exciting—comforting enough for a quiet Tuesday night, but impressive enough to bring to a potluck or serve to guests. The smoky heat of the roasted chiles, the velvety creaminess of the sauce, the way the cheese gets all bubbly and golden on top… it’s hard to beat.
What I love most about this recipe is how forgiving it is. You can swap ingredients, adjust the spice level, use whatever cheese you have on hand, and it still turns out delicious. It’s a recipe that invites you to make it your own, which is exactly how cooking should feel.
I’d love to hear how these turn out for you. Did you add extra spice? Try a vegetarian version? Serve them with something unexpected? Drop a comment below and let me know—I read every single one, and your variations often inspire my next kitchen experiment. And if you’re looking for another crowd-pleasing dish for your next gathering, don’t miss my ultimate sheet pan beef nachos with easy queso—they’re perfect for game day or any casual get-together.
Happy cooking, friends. May your kitchen be warm, your chiles be smoky, and your enchiladas always be extra creamy.
Frequently Asked Questions
Can I use canned green chiles instead of fresh Hatch chiles?
Absolutely! While fresh roasted Hatch chiles have a deeper, smokier flavor, canned green chiles work perfectly well in a pinch. Use about one 7-ounce can of diced green chiles for this recipe. Just drain them well before adding to the filling so you don’t end up with watery enchiladas.
How do I prevent my enchiladas from getting soggy?
The key is not to oversaturate the tortillas. Spread only a thin layer of sauce on the bottom of the dish, and don’t drown the rolled enchiladas in sauce either. Also, make sure your filling isn’t too wet—drain any excess liquid from the chicken and chiles before mixing. And don’t skip the foil step during baking; it traps steam and helps the tortillas cook through without drying out.
Can I make these enchiladas ahead of time?
Yes, and I actually recommend it! Assemble the enchiladas completely, but don’t bake them. Cover and refrigerate for up to 24 hours. When you’re ready to bake, add about 10 minutes to the baking time since everything will be cold from the fridge. The flavors actually meld together beautifully overnight.
What’s the best cheese for melting on top?
Monterey Jack is my top choice because it melts smoothly and has a mild flavor that doesn’t compete with the chiles. A Mexican blend cheese works great too. If you want a sharper flavor, mix in some cheddar or pepper jack. Avoid pre-shredded cheeses labeled “melting blend” that contain anti-caking agents—they don’t melt as smoothly. Grate your own cheese if you have time!
How do I roast Hatch chiles at home?
Place whole chiles directly on a gas stove burner over medium-high heat, or under the broiler on a baking sheet. Turn them occasionally with tongs until the skins are blackened and blistered all over. Transfer the charred chiles to a bowl, cover with plastic wrap, and let them steam for 10-15 minutes. Once cool enough to handle, rub off the blackened skins, remove the stems and seeds, and chop the flesh. Wear gloves if you have sensitive skin—the oils can burn!
Pin This Recipe!
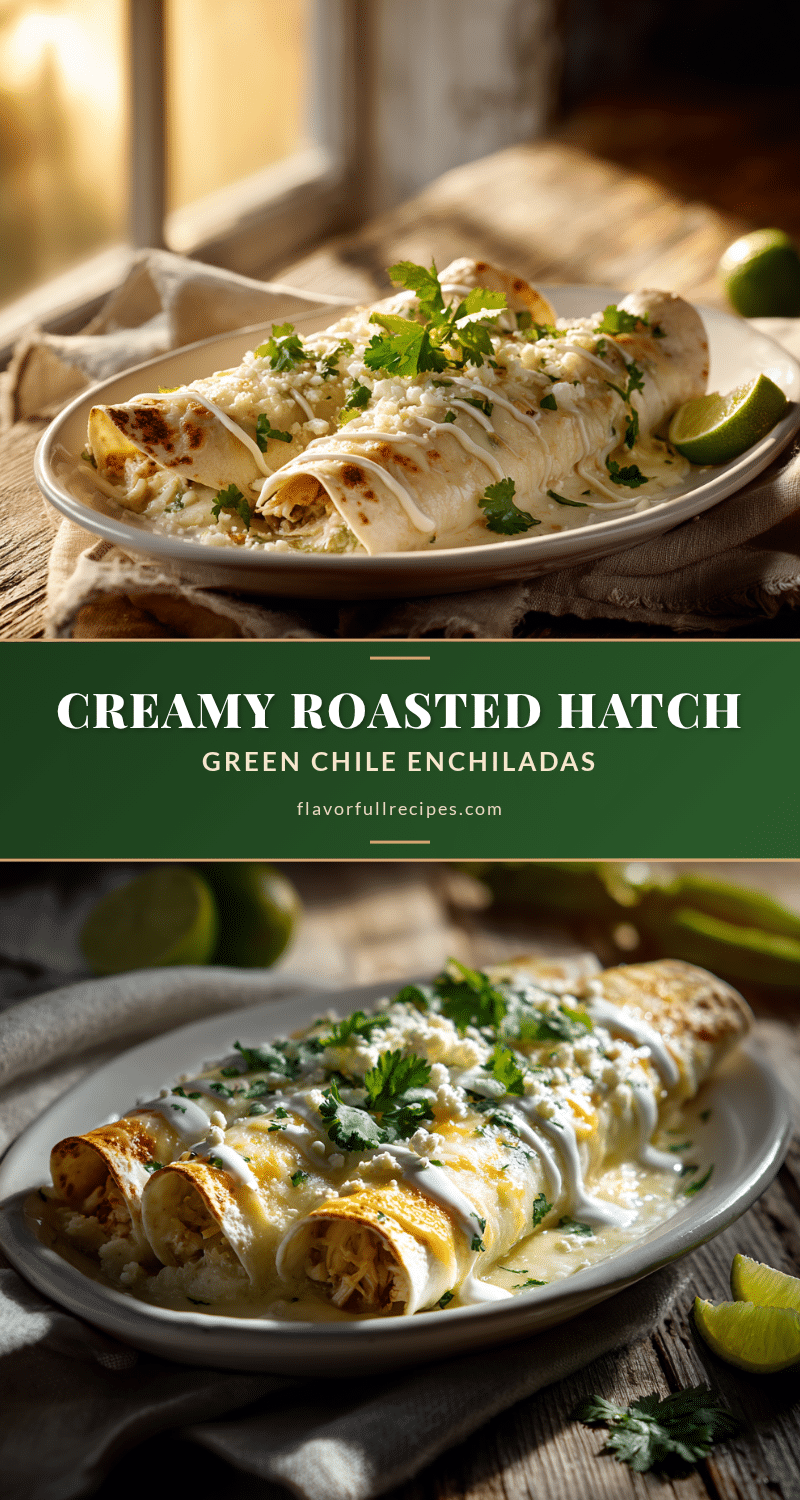
Creamy Hatch Green Chili Chicken Enchiladas
- Total Time: 45 minutes
- Yield: 4 servings (2 enchiladas per serving) 1x
Description
These creamy Hatch green chili chicken enchiladas are a comforting, crowd-pleasing meal featuring tender shredded chicken, smoky roasted Hatch chiles, and a velvety cream cheese filling, all wrapped in flour tortillas and baked with a rich green enchilada sauce and melted cheese. Perfect for busy weeknights or bringing comfort to someone in need.
Ingredients
- 3 cups cooked, shredded chicken (rotisserie or leftover)
- 8 oz cream cheese, softened
- 1/2 cup sour cream
- 1 cup roasted Hatch green chiles, chopped (medium heat)
- 1 cup shredded Monterey Jack cheese
- 1/2 cup shredded sharp cheddar cheese
- 1/2 teaspoon garlic powder
- 1/2 teaspoon onion powder
- 1/4 teaspoon cumin
- Salt and black pepper to taste
- 1 can (10 oz) green enchilada sauce
- 1/2 cup heavy cream
- 1/4 cup sour cream (for sauce)
- 8–10 flour tortillas (8-inch)
- 2 cups shredded Mexican blend cheese (or Monterey Jack and cheddar mix)
- Fresh cilantro, chopped, for garnish
- Diced white onion, for garnish (optional)
- Lime wedges, for serving
Instructions
- Preheat your oven to 375°F (190°C). Lightly grease a 9×13-inch baking dish with cooking spray or butter.
- Make the filling: In a large mixing bowl, combine softened cream cheese and 1/2 cup sour cream until smooth. Add shredded chicken, chopped Hatch chiles, Monterey Jack cheese, cheddar cheese, garlic powder, onion powder, cumin, and a pinch of salt and pepper. Stir until evenly distributed. Taste and adjust seasoning if needed.
- Prepare the sauce: In a medium saucepan over low heat, combine green enchilada sauce, heavy cream, and 1/4 cup sour cream. Whisk gently until smooth and warmed through (do not boil). Remove from heat and set aside.
- Assemble the enchiladas: Spread about 1/2 cup of the sauce evenly across the bottom of the prepared baking dish. Place about 1/3 to 1/2 cup of filling down the center of each tortilla, roll tightly, and place seam-side down in the dish. Repeat with remaining tortillas, nestling them snugly together.
- Top with sauce and cheese: Pour remaining sauce evenly over the rolled enchiladas, covering the edges. Sprinkle shredded Mexican blend cheese generously over the top.
- Bake: Cover the dish with aluminum foil and bake for 20 minutes. Remove foil and bake for another 10-15 minutes, until cheese is bubbly and starting to brown.
- Rest and serve: Let enchiladas rest for 5 minutes before serving. Garnish with fresh cilantro, diced onion (if using), and a squeeze of lime juice. Serve warm.
Notes
For best results, use room temperature cream cheese and sour cream to avoid lumps. Don’t overfill tortillas to prevent bursting. If using corn tortillas, warm them briefly before rolling to prevent cracking. For a spicier version, use hot Hatch chiles or add diced jalapeño. Leftovers keep in the refrigerator for up to 4 days and freeze well for up to 3 months.
- Prep Time: 15 minutes
- Cook Time: 30 minutes
- Category: Main Course
- Cuisine: Mexican
Nutrition
- Serving Size: 2 enchiladas
- Calories: 620
- Sugar: 5
- Sodium: 980
- Fat: 38
- Saturated Fat: 18
- Carbohydrates: 35
- Fiber: 4
- Protein: 35
Keywords: Hatch green chili chicken enchiladas, creamy enchiladas, chicken enchiladas, Hatch chile recipes, comfort food, easy dinner, freezer-friendly


